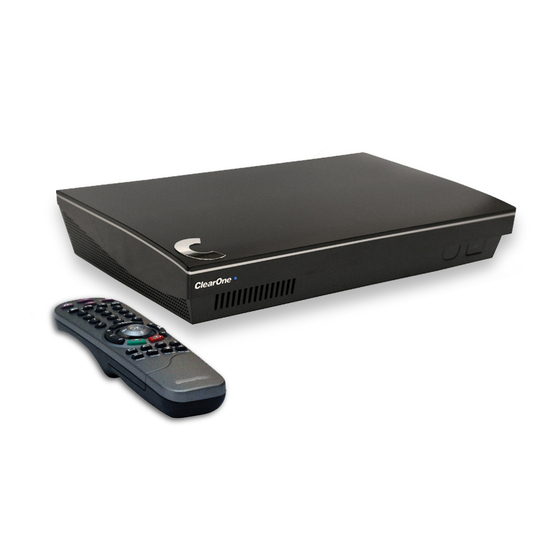
ClearOne COLLABORATE ROOM PRO User Manual
Hide thumbs
Also See for COLLABORATE ROOM PRO:
- Quick start manual (16 pages) ,
- Quick start manual (8 pages)
Table of Contents
Advertisement
Quick Links
Advertisement
Table of Contents

Related Manuals for ClearOne COLLABORATE ROOM PRO


Summary of Contents for ClearOne COLLABORATE ROOM PRO
- Page 1 COLLABORATE ® UIDE ...
- Page 2 DOC-0156-001 R 1.0 – Dec. 2014 © 2014 ClearOne Inc. - All rights reserved. No part of this document may be reproduced in any form or by any means without written permission from ClearOne. Printed in the United States of America. ClearOne reserves specific privileges.
-
Page 3: Table Of Contents
Muting the Video ..........................28 Switching Image Modes........................28 Display Mode ..........................28 Far End Mode..........................28 Switching Call View Modes ......................28 Single Mode ..........................28 Dual Mode .............................28 Presentation Mode ........................28 Using Picture-In-Picture (PIP) Modes....................29 Call State Indications........................30 COLLABORATE Room Pro: User Guide 3 ... - Page 4 In this Chapter ..........................37 Using the Contacts ...........................37 Using the Contacts via the Remote Control .................37 Using Contacts via the COLLABORATE Room Pro GUI ..............37 Using the Contacts via the New Call Bar..................38 Adding Entries to the Contacts......................38 Editing Entries in the Contacts ......................38 Deleting Entries from the Contacts ....................39...
- Page 5 Firewall Settings ..........................61 Chapter 7: Web Access and Management ............63 In this Chapter ..........................63 Accessing COLLABORATE Room Pro via Browser .................63 Viewing a Stream Session........................64 Viewing a Multicast Video Collaboration..................65 Importing/Exporting the License ......................65 Viewing the Recording Archive ......................66 Sending Running Text in a Call......................66...
- Page 6 6 COLLABORATE Room Pro: User Guide ...
-
Page 7: Chapter 1: Introduction
COLLABORATE Room Pro brings users face-to-face with other people and organizations. COLLABORATE Room Pro enables you to record and stream video calls to multiple locations with up to 8 additional participants. COLLABORATE Room Pro incorporates advanced data sharing capabilities, allowing you to turn any videoconference into a fully interactive meeting. - Page 8 NOTES: For more information about the COLLABORATE Room Pro physical installation, including the connection of cables and devices to COLLABORATE Room Pro, refer to the COLLABORATE Room Pro Installation and Setup Guide. For the complete technical specifications, refer to the COLLABORATE Room Pro datasheet.
-
Page 9: Main Features
MAIN FEATURES COLLABORATE Room Pro allows you to call a destination via LAN or ISDN, and to interact via video and data-sharing during calls. Some of the primary capabilities of the system include: Point-to-point or multipoint connections ... -
Page 10: Comparison Table
Note:The display resolution must be set to 1920x1080 when the received resolution is 1080. Otherwise you may encounter video issues. FEATURE HIGHLIGHTS New features incorporated in COLLABORATE Room Pro include: New sleek design ... -
Page 11: Chapter 2: Getting Started
Chapter 2: Getting Started IN THIS CHAPTER Once the COLLABORATE Room Pro unit is installed, connected and turned on, it is ready for use. This chapter describes the following basic operations: Using the Remote Control ... -
Page 12: Command Buttons
Recall a camera PTZ preset position Preset: Set Set a camera PTZ preset position Picture-In-Picture (PIP) Toggle the PIP position (5 positions + Side-by- Side) Speed Dial Recent Calls Display the current Recent Calls 12 COLLABORATE Room Pro: User Guide ... -
Page 13: Navigation Joystick And Additional Buttons
End Call – End the current call or close the GUI. NOTE: The red End Call button can also be used for turning off or restarting the unit. Press and hold the button until the shutdown confirmation prompt appears. COLLABORATE Room Pro: User Guide 13 ... -
Page 14: Using The On-Screen Menu
USING THE ON-SCREEN MENU The on-screen menu enables you to navigate COLLABORATE Room Pro options prior to and during a videoconference call. The main menu is accessed using the remote control (see Using the Remote Control). To display the COLLABORATE Room Pro main menu: ... - Page 15 Return to the previous window without saving changes Apply Apply changes or soft-start your system Restore Defaults Cancels all user-defined settings and returns the unit to its factory default settings Open Open the selected folder/file COLLABORATE Room Pro: User Guide 15 ...
-
Page 16: System Icons
Mute Microphone Far End Microphone Mute No Network Far End Camera Control (FECC) Central Registration Central Registration Failed Gatekeeper Registration Gatekeeper Registration Failed MCU Voice-Switch Layout Multicast Streaming Recording Far End Recording Encrypted Call 16 COLLABORATE Room Pro: User Guide ... -
Page 17: Displaying System Information
DISPLAYING SYSTEM INFORMATION Whenever the COLLABORATE Room Pro unit is turned on, you can view the system status details. Different details are displayed when the unit is in idle state, in recording mode, or in an ongoing videoconference session. - Page 18 MAC Address – MAC address of the COLLABORATE Room Pro unit IP Address – IP Address of the COLLABORATE Room Pro unit, as automatically assigned by the DHCP server or as manually configured via Settings>Advanced>IP (static IP). You can use this IP Address to access and manage the unit via a browser (see Accessing COLLABORATE Room Pro via Browser) ...
-
Page 19: Chapter 3: Configuration Basics
CONFIGURING THE CAMERA Before you begin videoconferencing, you need to make sure that the cameras connected to the COLLABORATE Room Pro are properly configured. Cameras are configured via the Camera Settings window. To access the camera settings: ... -
Page 20: Configuring Multiple Cameras
GUI) to save the changes and close the Camera Settings window. CONFIGURING MULTIPLE CAMERAS The COLLABORATE Room Pro system can work with two cameras connected. In order to use this functionality, configure it in the Camera Settings menu. •... -
Page 21: Configuring Camera Connected To Hdmi Video 1 And Laptop Sharing Thru Hdmi Video 2
CONTROLLING MULTIPLE CAMERAS To connect and control 2 cameras in a chain to the COLLABORATE Room Pro system: 1. Connect the camera control cable from COM 1 on the COLLABORATE Room Pro system to the Main camera RS232 In. - Page 22 Audio Output – Select a playback device from the list that corresponds with which audio output options is connected from the back of the COLLABORATE Room Pro. Acoustic Echo Cancellation – Select the check box to prevent echo when the Disable this feature when it is supported by an external device.
- Page 23 Volume After attaching the HDMI output to the monitor, set the COLLABORATE Room Pro Volume to 50%, then play the sample audio by pressing the Play button. Use the monitor audio adjustment to set the volume within the room to a comfortable level.
-
Page 24: Configuring The Display
Device and Resolution – Select an option from the lists. Keep Aspect Ratio – Select this option to keep the original aspect ratio on screens that have different aspect ratio. 2. Click OK. 24 COLLABORATE Room Pro: User Guide ... -
Page 25: Chapter 4: Video Collaboration
You can start a manual call to an ISDN line number or a network IP Address that you type in the New Call bar. To start a call using the manual dialer: 1. Select Conference > New Call. The New Call bar appears. COLLABORATE Room Pro: User Guide 25 ... - Page 26 4. Select the maximum bandwidth for the call or use the default. NOTE: The maximum bandwidth of a single ISDN line is 128 kbps. The maximum bandwidth of four concurrent lines is 512 kbps. 26 COLLABORATE Room Pro: User Guide ...
-
Page 27: Auto-Answering Calls
To end the current call: On the remote control, press the red End Call button, – or – Select Conference>Hang Up in the GUI and then press OK on the remote control. COLLABORATE Room Pro: User Guide 27 ... -
Page 28: Muting The Video
RESENTATION When recordings or files are displayed in data sharing mode, the remote video is shown in a PIP area, while the recordings/files are presented on the main screen area. 28 COLLABORATE Room Pro: User Guide ... -
Page 29: Using Picture-In-Picture (Pip) Modes
NOTE: When data is shared, the remote video and the data are displayed side by side on the screen. PIP 6 – The local caller sees only the remote person. COLLABORATE Room Pro: User Guide 29 ... -
Page 30: Call State Indications
The local speaker is muted Far End mode is on (You can control the remote side camera) Local network disconnection Unsuccessful COLLABORATE Central registration Successful COLLABORATE Central registration Unsuccessful gatekeeper registration Successful gatekeeper registration Currently multicasting 30 COLLABORATE Room Pro: User Guide ... -
Page 31: Using Call Tones
The Operator can request you to connect using a dial-tone to proceed with the call. To enter DTMF tone: Use the remote control, dial using the numeric pad. The screen shows DTMF message: "DTMF signal **** sent" representing the numbers pressed on the keypad. COLLABORATE Room Pro: User Guide 31 ... -
Page 32: Recording And Streaming
Through the COLLABORATE Room Pro Web access system, remote users can view all previously recorded sessions and download them for later viewing with a media player. Alternatively, using streaming, remote users can view a live broadcast of whatever the camera and microphone are currently transmitting. -
Page 33: View Recording
From the COLLABORATE Room Pro Web management application (see Web Access and Management) by clicking View Stream button on the left menu. This takes you to a page with the media player embedded in the webpage, displaying the ongoing session. -
Page 34: Data Sharing
1. Connect the laptop to HDMI Input 2 2. Connect the laptop using a DataPoint HD device The moment a device such as a laptop is connected to the COLLABORATE Room Pro via a DataPoint HD, the Laptop option is enabled. USB F... -
Page 35: Viewing Recordings
Multicasting a session from your COLLABORATE Room Pro allows numerous passive viewers to view the session. This is typically used at lectures, or any session that passive viewers can benefit from. Multicast sessions can be viewed by all ClearOne endpoints, the free ClearOne Broadcast Viewer, and the Apple QuickTime viewer. -
Page 36: Joining A Multicast Call As A Passive Participant
TARTING TOPPING A ULTICAST To stop or start a multicast: 1. Press OK on the remote control. The main menu appears. 2. Select Streaming> Start (or Stop) Multicast. 36 COLLABORATE Room Pro: User Guide ... -
Page 37: Chapter 5: Quick Dialing Methods
CONTACTS COLLABORATE R SING VIA THE You can display the Contacts using the COLLABORATE Room Pro GUI menus. To select the Contacts via the COLLABORATE Room Pro GUI: 1. Select Conference>Contacts. The Contacts window appears (use the joystick left button to skip to the left tabs). -
Page 38: Using The Contacts Via The New Call Bar
To edit a contact’s details in the Contacts list: 1. In the Contacts, select the entry you want to edit and then press OK on the remote control. 2. Select OK in the GUI. The Name/Address bar opens. 38 COLLABORATE Room Pro: User Guide ... -
Page 39: Deleting Entries From The Contacts
You can select Recent Calls via the Contacts. To display the Recent Calls via the Contacts: In the Contacts, select Recent Calls by pressing down with the joystick and scrolling down. COLLABORATE Room Pro: User Guide 39 ... -
Page 40: Adding A Recent Calls Entry To The Contacts
2. Select the Directory tab, and on the number to dial press Dial. NOTE: When the Contacts is open, typing a letter in the ABC field causes it to 'jump' to the first letter entered. 40 COLLABORATE Room Pro: User Guide ... -
Page 41: Accessing Directory Via The Contacts
You can access Directory via the Contacts. To access the Directory via the Contacts: 1. In the Contacts, select Directory by pressing left with the joystick and scrolling down. 2. Select the Directory tab, select the number to dial and press Dial. COLLABORATE Room Pro: User Guide 41 ... - Page 42 42 COLLABORATE Room Pro: User Guide ...
-
Page 43: Chapter 6: Advanced Settings
Chapter 6: Advanced Settings IN THIS CHAPTER This chapter covers the advanced settings for COLLABORATE Room Pro, and includes the following sections: Preference Settings Security Settings Call Settings Call Security ... -
Page 44: Preference Settings
Date – If not already set, enter the current date. Sleep Timeout – Duration of idle time (in minutes) before the system goes into sleep mode. 3. Select Apply. 44 COLLABORATE Room Pro: User Guide ... -
Page 45: Security Settings
Enable Password for Advanced Configuration – Selecting this option restricts the access to the advanced configuration options of the unit, which are: Admin (the current window), H.323, System, Calls and ISDN. COLLABORATE Room Pro: User Guide 45 ... -
Page 46: Call Settings
Sharpness mode - provides the highest possible resolution. Used when you want the highest quality of detailed images and graphics. 46 COLLABORATE Room Pro: User Guide ... -
Page 47: Admin Settings
Modulated Lapped Transform (MLT). Enable H.264 Profile – When selected, enables the system to operate in high profile mode. COLLABORATE Room Pro: User Guide 47 ... -
Page 48: Directory Properties
, the Directory Settings provide a way to register with a Directory. NOTE: Directory settings are available only in COLLABORATE Room Pro systems that are not managed by a ClearOne COLLABORATE Central. To configure the Directory settings: ... - Page 49 Administrators can manage a single user- repository for their organization that can be used by multiple applications to both authenticate and retrieve stored information for users such as access levels and user profiles. COLLABORATE Room Pro: User Guide 49 ...
-
Page 50: H.323 Protocol Settings
For point-to-point and multipoint videoconferences, the H.323 protocol standard is used for call signaling and control, video/audio transport and control, and bandwidth control. COLLABORATE Room Pro utilizes H.323 to transport video/audio via DNS and NAT addressing, and to communicate/interact with either a COLLABORATE Central server or... - Page 51 Password – Enter the password used to log into the COLLABORATE Central server. Gatekeeper – Select this option if you want COLLABORATE Room Pro to communicate/interact with a gatekeeper server. If selected, enter the required details in the following fields: ...
-
Page 52: Working In Collaborate Central Mode
SIP is a common communication signaling protocol for VoIP. To configure SIP settings: 1. Select Settings>Advanced>SIP. The SIP Settings window appears. 52 COLLABORATE Room Pro: User Guide ... -
Page 53: Isdn Settings (Optional)
You can skip this section if you did not purchase the ISDN option and if you do not use ISDN lines. COLLABORATE Room Pro can register to an ISDN point via the IP LAN. The ISDN wizard enables connection to ISDN based networks, using up to 4 ISDN BRI lines, reaching connection bandwidth of up to 512 kbps. -
Page 54: Isdn Lines Configuration
The ISDN Lines Configuration window enables you to set the phone numbers of up to 4 lines. To define the ISDN phone numbers: 1. Enter the appropriate number for each field, without the area or country code. 54 COLLABORATE Room Pro: User Guide ... -
Page 55: Ip Settings
To edit system settings: 1. Select Settings>Advanced>IP. The IP Settings window appears. COLLABORATE Room Pro: User Guide 55 ... - Page 56 DNS Suffix – Set the DNS domain suffix to be used by this system. Ethernet Speed – Displays the network interface speed. NOTE: Modify these settings only if they are required in your network. 3. Select Apply. 56 COLLABORATE Room Pro: User Guide ...
-
Page 57: Multicast And Streaming Settings
Multicasting a session from your COLLABORATE Room Pro allows numerous passive viewers to view the session. This is typically used at lectures, or any session that passive viewers can benefit from. -
Page 58: Recording Settings
Recording Path – Select to set the path of the recording directory. This option is useful when changing the recording location to a USB flash drive or any external storage location. 58 COLLABORATE Room Pro: User Guide ... -
Page 59: Mcu Settings
To configure the MCU settings: 1. Select Settings>General>MCU. The MCU Settings window appears. COLLABORATE Room Pro: User Guide 59 ... - Page 60 5+1 layout. Names Overlay – Display the remote station name overlaid on each participant image. 3. Select Apply. Incoming calls will be answered using the settings you configured. 60 COLLABORATE Room Pro: User Guide ...
-
Page 61: Firewall Settings
LAN. NAT Address – If your organization uses NAT when communicating with parties in another LAN or WAN, type the external address for your videoconferencing device. COLLABORATE Room Pro: User Guide 61 ... - Page 62 Use HTTP Proxy – If your organization uses Proxy server, configure in the Proxy Address and Proxy Port. Send Media As HTTP – Disguising tunneling traffic as HTTP. 62 COLLABORATE Room Pro: User Guide ...
-
Page 63: Chapter 7: Web Access And Management
Web Access and Management IN THIS CHAPTER This chapter explains how to access COLLABORATE Room Pro via a browser and use the Web-based GUI for viewing sessions/files, and configuring the unit from a remote location or via the LAN. ... -
Page 64: Viewing A Stream Session
VIEWING A STREAM SESSION You can view in your browser any stream that has started on COLLABORATE Room Pro. The stream may be of whatever is currently being captured by the video camera and microphone that are connected to COLLABORATE Room Pro. -
Page 65: Viewing A Multicast Video Collaboration
1. Open your browser. 2. In the browser’s address bar, type the direct IP Address of the COLLABORATE Room Pro unit. The COLLABORATE Room Pro Web login page appears. 3. Click View Multicast; a new browser window opens and displays the video collaboration on a page with Windows Media Player or QuickTime embedded to it. -
Page 66: Viewing The Recording Archive
VIEWING THE RECORDING ARCHIVE You can view the list of recordings that are stored in the COLLABORATE Room Pro recording directory, and you can also delete recordings that are no longer needed. To view the list of recordings: ... -
Page 67: Sending Running Text In A Call
All – Click to display the entire archive of recordings that are saved in the COLLABORATE Room Pro recording directory. The directory path is shown in the title line above the list. Name – If you want to search for a specific recording name, enter the name in this ... - Page 68 NOTE: To stop the display of the running text message on the far end, click Stop. 68 COLLABORATE Room Pro: User Guide ...
-
Page 69: Viewing Call Status
Audio Bandwidth – Bandwidth used by the audio in this call Encryption Mode – Type of encryption used in this call (if encryption is used). NOTE: To return to the Call View box, click Back. COLLABORATE Room Pro: User Guide 69 ... -
Page 70: Performing System Upgrade
2. Click Browse and then select the ClearOne-provided file that contains the newer software version. 3. Click Upgrade. The system upgrade is performed and then the system reboots. PERFORMING SYSTEM BACKUP ... - Page 71 9. Once it is done, press the Exit button and reboot the system. Shutdown the system by pressing few seconds on the power button; then press the power button again in order to turn on the system. COLLABORATE Room Pro: User Guide 71 ...
-
Page 72: Performing System Restore From Backup File
NOTE: Before restoring the system, you must save the system License Key. This is accessed by using the menu: Maintenance> System License Reset the COLLABORATE Room Pro unit to a backup snapshot file using a browser: 1. Open your browser. - Page 73 9. Copy the stored License Key to the system (Configuration>Option>License) COLLABORATE Room Pro: User Guide 73 ...
-
Page 74: Performing System Restore From Ftp
NOTE: before restoring the system to its factory defaults, you must save system License Key. This is accessed by using the menu: Maintenance>System License To set the COLLABORATE Room Pro unit to settings delivered via FTP: 1. After logging in, click Maintenance>System Recovery ... -
Page 75: Access To System Recovery With Usb Device
3. During restart, press F10 on your keyboard. 4. In the boot manager, Choose Recovery USB device. NOTE: System recovery management via USB device is with the keyboard, while recovery management via Web Server is with the remote control. COLLABORATE Room Pro: User Guide 75 ... - Page 76 76 COLLABORATE Room Pro: User Guide ...
-
Page 77: Chapter 8: Telnet Commands
– left r – right ul – up+left ur – up+right dl – down+left dr – down+right zi – zoom in zo – zoom out COLLABORATE Room Pro User Guide: 77 ... - Page 78 volume get autoanswer speaker license autoanswer Set parameter value Parameter: set mic on set volume 5 volume set autoanswer speaker autoanswer 78 COLLABORATE Room Pro: User Guide ...
-
Page 79: Chapter 9: Specifications
Chapter 9: Specifications The following are the COLLABORATE Room Pro specifications. Video Specifications Transmission Speed SIP / H.323: 96 Kbps - 6Mbps ISDN 64 Kbps -512 Kbps (4xBRI) Not supported in current version Video Standards H.261, H.263, H.263+/++, H.264... - Page 80 AES is NIST validation Firewall traversal using NetPoint H.460 protocol and ClearOne Tunneling proprietary protocol NAT – Network Address Translation Supports restricted access to users via admin 80 COLLABORATE Room Pro: User Guide ...
- Page 81 COLLABORATE Room Pro: User Guide 81 ...
Need help?
Do you have a question about the COLLABORATE ROOM PRO and is the answer not in the manual?
Questions and answers