Table of Contents
Advertisement
Quick Links
Advertisement
Table of Contents

Related Manuals for ClearOne COLLABORATE Room


Summary of Contents for ClearOne COLLABORATE Room
- Page 1 COLLABORATE ® NSTALLATION AND ETUP ANUAL...
- Page 3 . 1.2 – M 2013 ARCH © 2013 ClearOne and NetStreams - All rights reserved. No part of this document may be reproduced in any form or by any means without written permission from ClearOne and NetStreams. Printed in the United States of America.
- Page 5 Please refer servicing to ClearOne-trained service personnel. When you use a COLLABORATE Room system, observe the following safety guidelines: DANGER! The internal areas of the unit and auxiliary equipment are sources of voltage that, if not handled properly, constitute danger of bodily harm.
- Page 6 Do not disassemble or open the appliance. Failure to comply will void the warranty. Do not use any accessories other than those approved by ClearOne. Failure to do so may result in loss of performance, damage to the product, fire, electric shock or injury, and will void the warranty.
- Page 7 Lors de l'utilisation d'un système COLLABORATE Room, veuillez respecter les consignes de sécurité suivantes : DANGER! Les parties internes de l'unité et l'équipement auxiliaire sont sous tension et s'ils ne sont pas manipulés correctement peuvent représentant un danger de dommage corporel. Ne pas faire fonctionner l'unité...
- Page 8 Ne pas démonter ou ouvrir l'appareil. Faute de quoi la garantie deviendrait caduque. Ne pas utiliser d'autres accessoires que ceux agréés par ClearOne. Dans le cas contraire, les performances de l'appareil sont susceptibles d'être affectées, et un pareil usage pourrait occasionner un dommage au produit, provoquer un incendie, un choc électrique ou une blessure et rendrait la garantie caduque.
- Page 9 We hereby declare entirely on our own responsibility that the products: Product Name: COLLABORATE Room SYSTEM and all its associated peripherals manufactured by ClearOne, to which this declaration relates is in conformity with: COLLABORATE Room: Installation and Setup Guide 9...
- Page 10 The products are compliant with the following standards and other normative documents: EMC: FCC Part 15, Class A Safety / Low Voltage: CS 22.2 950 UL 60950 Telecom (ISDN Point only): FCC Part 68 CS-03 Issue 9 10 COLLABORATE Room: Installation and Setup Guide...
- Page 11 Federal Communications Commission Radio Frequency Interference Statement all products - COLLABORATE Room - comply with the limits for a Class A digital device, pursuant to Part 15 of the FCC Rules. These limits are designed to provide reasonable protection against harmful interference when the equipment is operated in a commercial environment.
- Page 12 Si un nombre excessif d'IES est connecté sur une ligne de téléphone les appareils pourraient ne pas sonner lors d'un appel entrant. Dans la plupart des zones, mais pas dans toutes, la somme des IES de tous les appareils pouvant être connectés sur une 12 COLLABORATE Room: Installation and Setup Guide...
- Page 13 No warranty as to accuracy or completeness is expressed or implied. The information in this document may change without notice. Environmental Data – Product's Materials Information Restricted Substances ClearOne's products does NOT contain any of the following substances (in concentrations exceeding legal threshold limits): ...
- Page 14 Certificate For China Compulsory Product Certification The standards and technical requirement for the product: gb9254-1998 This is to certify that the above mentioned products have qualified for the requirements of implementation rules for compulsory certification 14 COLLABORATE Room: Installation and Setup Guide...
-
Page 15: Table Of Contents
In this Chapter ..........................35 Initiating Calls ...........................35 Manual Dialer..........................35 Address Book..........................36 Accepting a Call ..........................37 Chapter 6: Backup and Recovery..............38 In this Chapter ..........................38 Performing System Backup ......................38 Performing System Restore From Backup File................40 COLLABORATE Room: Installation and Setup Guide 15... - Page 16 Performing System Restore from FTP .....................42 Chapter 7: Specifications................45 In this Chapter ..........................45 System Specification........................45 16 COLLABORATE Room: Installation and Setup Guide...
-
Page 17: Chapter 1: Introduction
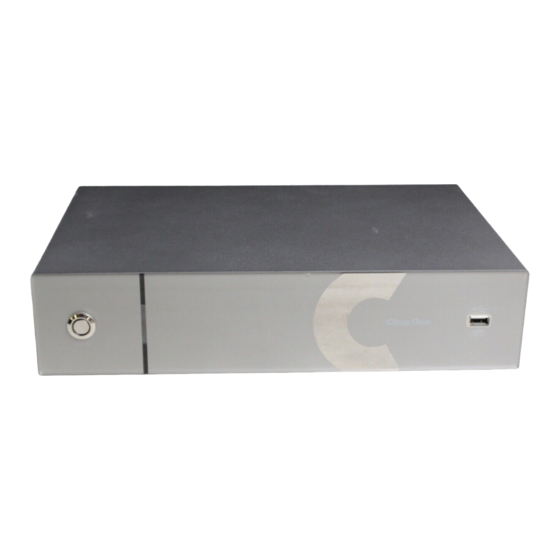
COLLABORATE Room Model Configurations COLLABORATE ROOM OVERVIEW ClearOne’s COLLABORATE Room is a room system conferencing system that offers high- quality videoconferencing capabilities. Utilizing the newest H.264 video standard and clear, crisp audio, the COLLABORATE Room brings users face-to-face with other people and organizations. -
Page 19: Chapter 2: Unpacking And Connecting The System
Connecting (FHD example) UNPACKING When you open the COLLABORATE Room system shipping package(s) for the first time, please check that all items purchased according to the model (see specification above), are included in accordance with the supplied product. If any of the items (according to your customer order) are missing or damaged, contact your ClearOne distributor immediately. -
Page 20: Connecting (Fhd Example)
Connecting the cables and peripherals is done as shown in the following graphic which visually presents all required connections. In order to connect the COLLABORATE Room to its peripherals, follow the schematic diagram (located on the back side of the guide) going from the left side. -
Page 21: Chapter 3: Remote Control
Using the Remote Control USING THE REMOTE CONTROL You can navigate the COLLABORATE Room on-screen graphic user interface (GUI) using the infrared remote control, bundled with the unit. Pressing any button on the remote control activates the on-screen GUI, which appears on top of the camera/videoconference picture. -
Page 22: Alphanumeric Keypad
Toggle the PIP position (5 positions + Side-by- Side) Speed Dial Display the speed dial options Call Log Display the current call log Mute Mic Mute the local microphone Display Toggle the local and remote displays 22 COLLABORATE Room: Installation and Setup Guide... -
Page 23: Navigation Joystick And Additional Buttons
NOTE: The red End Call button can also be used for turning off the unit. Press and hold the button until the shutdown confirmation prompt appears. Selecting “Yes” immediately shuts down the system. COLLABORATE Room: Installation and Setup Guide 23... -
Page 25: Chapter 4: System Configuration
When system fully loads, you will see the view from the camera on the entire screen. The COLLABORATE Room system is capable of using one or two displays. According to the devices you physically connected to the system, configure the appropriate settings using the system configuration options. -
Page 26: Display Settings
Display Remote on Main – When using multiple monitors, display the remote side on the main display. Uncheck to display the remote on the secondary monitor 3. Click OK. 26 COLLABORATE Room: Installation and Setup Guide... -
Page 27: Network
NETWORK The COLLABORATE Room system is a communication device that relies on various networks and protocols. Before you can use the system, you must configure its network settings according to the network you intend to use. (IP) YSTEM ETTINGS 1. Select Settings>Network>System from the program main menu. -
Page 28: Settings
None – Keep this option selected (selected by default) if you do not want to use a COLLABORATE Central server or a gatekeeper. COLLABORATE Central – Select this option if you want COLLABORATE Room to communicate/interact with a COLLABORATE Central server and utilize its advanced features. - Page 29 Password – Enter the password used to log into the COLLABORATE Central server. Gatekeeper – Select this option if you want COLLABORATE Room to communicate/interact with a gatekeeper server. If selected, enter the required details in the following fields: Server Address –...
-
Page 30: Sip Protocol Settings
ISDN option and if you do not use ISDN lines. COLLABORATE Room can register to an ISDN point via the IP LAN. The ISDN wizard enables connection to ISDN based networks, using up to 4 ISDN BRI lines, reaching connection bandwidth of up to 512 kbps. - Page 31 Line 3: ISDN line status for line number 3 Line 4: ISDN line status for line number 4 3. Select Next to continue to the ISDN Lines Configuration step (see ISDN Lines Configuration). COLLABORATE Room: Installation and Setup Guide 31...
-
Page 32: Isdn Lines Configuration
NOTE: Depending on the switch type you selected, an additional step may be required. If you are not sure what numbers to enter, consult your system administrator. 2. Select Finish to save the ISDN lines configuration and complete the configuration wizard. 32 COLLABORATE Room: Installation and Setup Guide... -
Page 33: Camera
1. In the Camera Settings window, select the correct options from the Camera, Input Device, and Capability drop-down lists. NOTE: COLLABORATE Room supports PTZ cameras only. 2. Optional: set the percentage (%) of Color, Contrast, Brightness, and Hue. You can leave the default settings of these parameters unchanged. -
Page 34: Audio
Playback Device – Select a playback device from the list. Recording Device – Select a recording device from the list. Audio Input – ClearOne Chat Mic connected to USB Port. Microphone Level – Adjust the microphone sensitivity level in percentage (%). ... -
Page 35: Chapter 5: Basic Operation
beforehand via the ISDN Settings pages. 5. Select the maximum bandwidth for the call. If you are not sure, use the default on the screen. 6. Press Dial to initiate the call. COLLABORATE Room: Installation and Setup Guide 35... -
Page 36: Address Book
11. Press the Ok button on the remote control. The address of the contact is copied to the number field. 12. Press the Dial button on the remote control or select the Call option on the screen when you are ready to initiate the call. 36 COLLABORATE Room: Installation and Setup Guide... -
Page 37: Accepting A Call
(if available), you can accept or reject the call using the buttons on the remote control or on the message on the screen. The ability to auto answer all calls is available via the Calls Settings screen. COLLABORATE Room: Installation and Setup Guide 37... -
Page 38: Chapter 6: Backup And Recovery
COLLABORATE Room configuration. It is recommended to take backup snapshots every time a configuration change is made. 1. Open your Internet Explorer browser. 2. In the browser’s address bar, type the direct IP Address of the COLLABORATE Room unit. The COLLABORATE Room web login page appears. For example: http://172.100.100.25 After logging in, click System>System Restore. - Page 39 7. Once it is done, press the Exit (F12) button and reboot the system. Shutdown the system by pressing few seconds on the power button; then press the power button again in order to turn on the system. COLLABORATE Room: Installation and Setup Guide 39...
-
Page 40: Performing System Restore From Backup File
Reset the COLLABORATE Room unit to a backup snapshot file using an IE browser: 1. Open your Internet Explorer browser. 2. In the browser’s address bar, type the direct IP Address of the COLLABORATE Room unit. The COLLABORATE Room web login page appears. For example: http://172.100.100.25... - Page 41 8. Once the restore process is completed, press OK and shutdown the system by pressing a few seconds on the power button; then press the power button again in order to turn on the system. 9. Copy the stored License Key to the system (Configuration>Option>License) COLLABORATE Room: Installation and Setup Guide 41...
-
Page 42: Performing System Restore From Ftp
To reset the COLLABORATE Room unit, using an attached keyboard and mouse, to its factory defaults: 1. Open your Internet Explorer browser. 2. In the browser’s address bar, type the direct IP Address of the COLLABORATE Room unit. The COLLABORATE Room web login page appears. For example: http://172.100.100.25 After logging in, click System>System Restore. - Page 43 8. Select the file from the listing, and then click on the Download (F6) button. 9. Once the download is completed, press on the Back (F11) button. 10. Select the Restore (F2) button and follow the restore steps listed above. COLLABORATE Room: Installation and Setup Guide 43...
-
Page 45: Chapter 7: Specifications
Up to 30 fps: 256 Kbps and higher Video Inputs SD: Composite and S-Video HD: HDMI or HD-SDI FHD: HDMI PHD: DVI Video Outputs HDMI, Digital Video Interface (DVI) HD Simulcast Integrated Broadcast Viewer COLLABORATE Room: Installation and Setup Guide 45... - Page 46 Sharing of file, or the VGA input H.239 support Tandberg DuoVideo support Sending and receiving capability 1 live video source + 1 data source Resolutions supported: XGA, SVGA, VGA, CIF, QVGA, QCIF, 4CIF 46 COLLABORATE Room: Installation and Setup Guide...
- Page 47 Monitors Configuration Single DVI or HDMI Dual: DVI + HDMI Pan-Tilt-Zoom Camera Unit PHD: 14x Zoom FHD: 14x Zoom HD: 10 or 14x Zoom SD: 18x Zoom COLLABORATE Room: Installation and Setup Guide 47...
- Page 48 15 - 80% humidity Universal Power Supply: Input 100~240VAC@1.8A Frequency 50/60 Hz PS Output / Appliance Input: 12VDC@6.67A Max Language Support English, French, German, Italian, Russian, Chinese, and Korean 48 COLLABORATE Room: Installation and Setup Guide...
Need help?
Do you have a question about the COLLABORATE Room and is the answer not in the manual?
Questions and answers