Table of Contents
Advertisement
Quick Links
Download this manual
See also:
Instruction Manual
Advertisement
Table of Contents

Subscribe to Our Youtube Channel
Related Manuals for Coemar Reflection LEDko


Summary of Contents for Coemar Reflection LEDko
- Page 1 Instruction manual Manuale di istruzioni Ver. 2.1 DIS140...
- Page 2 Please note in the space provided above the relative service information of the model and the retailer from whom you purchased your Reflection LEDko : this information will assist us in providing spare parts, repairs or in answering any technical enquiries with the utmost speed and accuracy.
-
Page 3: Table Of Contents
English Index 1.Packaging and transportation ............................... 6 1.1 Packaging ....................................6 1.2 Trasportation ..................................... 6 2. General information ..................................6 2.1 Important safety information..............................6 2.2 Warranty conditions .................................. 6 2.3 EC Norms ....................................6 3. Product specifications .................................. 7 3.1 Technical characteristics ................................ -
Page 4: Packaging And Transportation
2. For the connection to the mains, adhere strictly to the guidelines outlined in this manual. 3. The level of technology of Reflection LEDko requires the use of specialised personnel for all service applications; refer all work to your authorised Coemar service centre. -
Page 5: Product Specifications
English 3. Product specifications 3.1 Technical characteristics Power 90-250 Vac 50/60Hz Autosensing Maximum current 0,82A @230 Vac, - 1,7 A @115Vac Cos ϕ = 0,9 Power factor Light source wattage 163 W Maximum room temperature 35°C/95°F Weight 6 Kg./13.2 lbs (main body) Grado di protezione IP20 3.2 Dimensions... -
Page 6: Unit's Main Components
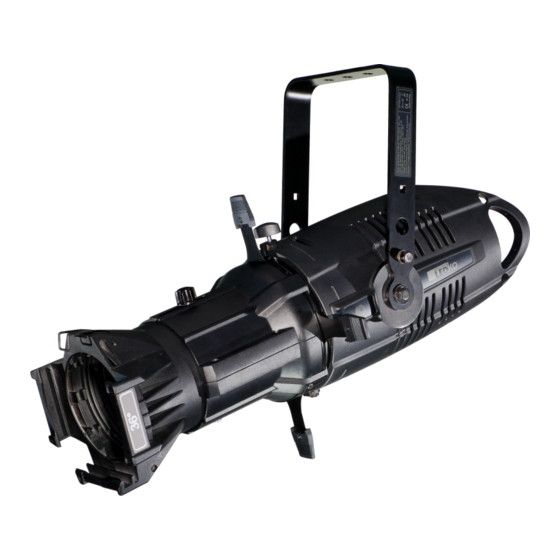
English 3.3 Unit’s main components Components description 1- Yoke 6- Light source 2- Casing 7- Shaping blade pack 3- Rear header 8- Optics 4- Electronic sector 9- Nose casing 5- Cooling sector WARNING! Never park the projector which hasn't installed optical without the dust cap. -
Page 7: Installation
4.2 Mechanical installation Reflection LEDko may be hung from an appropriate structure in any position or on tripode. If hanging the fixture from a lighting truss or similar, we recommend the use of an appropriate clamp “A”, as shown in the following diagram. -
Page 8: Safety Chain
If using steel cables and chains not Coemar's production, make sure they are suitable to support the weight of the unit according to normative UL/ETL ( required: the weight of 6 complete devices for at least one hour) 4.4 Adjusting unit’s tilt... -
Page 9: Powering Up
Connection to mains power Reflection LEDko is equipped with two power connectors, one as input and one as output, which can be used to connect more fixtures in series (no more than 16 units @ 230V or 8 units @ 115V.). -
Page 10: Control Signal Connections
1 to 12 from your DMX 512 controller . A second unit must be addressed as A013,a third one as A025 and so on. The operation must be carried out on every Reflection LEDko which has an address different from A001.. -
Page 11: Dmx Functions
English 7.2 DMX functions 7.2.1 FullSpectrum DMX chart d mx c ha nne l ty p e o f s ta nd a rd R GB s imula te d CMY e ffe c t d e c ima l p e rc e nta g e c o ntro l 12c h 8c h 4c h... - Page 12 English no effect no effect - 4% R E D Deep Salmon 42 CY A N Custom Cyan 1 - 28% re d to ne c y a n to ne step R E D Scarlet 24 CY A N Custom Cyan 2 - 133 28% - 52% R E D Red Salmon 40...
-
Page 13: Variwhite Dmx Chart
English 7.2.2 VariWhite DMX chart ty p e o f c ha nne l func tio n e ffe c t d e c ima l p e rc e nta g e c o ntro l ma s te r d imme r proportional adjust luminous output intensity from 0 to 100% - 255... - Page 14 English 600 Hz - 4% park LCD display off 134 - 185 53% - 73% LCD display on 186 - 199 73% - 78% led control frequency tuning 1000 Hz 200 - 205 78% - 80% led control frequency tuning 1500 Hz 206 - 211 81% - 83% s p e c ia l func tio ns...
-
Page 15: White 3200K Dmx Chart
English 7.2.3 White 3200K DMX chart ty p e o f d e c ima l p e rc e nta g e c ha nne l func tio n e ffe c t c o ntro l ma s te r d imme r proportional adjust luminous output intensity from 0 to 100% - 255... -
Page 16: Display Panel Functions
English 8. Display panel functions By suitably using all the functions of Reflection LEDko, which can be activated through its display panel, it is possible to change some of the parameters and to add some functions. Changing the preset settings made by Coemar can vary the functions of the projector so that it will respond differently to the controller;... -
Page 17: Main Function Menu (Func)
English 8.3 Main function menu (FUNC) The projector gives the opportunity to change and customize some functional settings. FUNC TUNG Dimmer mode: it can simulate dimmer effect with Tungsten or Xenon DIMM. XENO lamp. COLR See following sections for details. 8.3.1 FullSpectrum 8.3.2 VariWhite 8.3.3 White 3200K... -
Page 18: Test/Color Functions Fullspectrum
English 8.3.1 TEST/COLOR Functions FullSpectrum It allows to choose the primary colors and to emulate classic CMY in a wide gamut without DMX signal. It allows to vary the channel of white on several color temperatures COLR from 3200 °K to 9000 °K, without DMX signal. See diagram below. -
Page 19: Test Functions Variwhite
English The 24 gel presets bank is organized to allow you to arrange the custom gels in function of the primary color and/or the mixing method (RGB or CMY). For example, if you are going to store your “blue sky” blue obtained by RGB, it is recommendable to store it under RGB BLUE in one of the four available positions;... -
Page 20: Measures And Test S(Meas)
English 8.4 Measures and test s(MEAS) The internal microprocessor of Reflection LEDko allows for several diagnostic and output paramenter to be displayed. MEAS It shows the temperatures detected by the probe on the led module: TEMP It shows the volt value of the power of the unit. -
Page 21: User Settings (Mode)
English 8.5 User settings (MODE) MODE It restores to DMX the functioning A001 of the unit. FullSpectrum only It sets the unit as MASTER and runs a demo program. -MA- PRG.1 PROG PRG.1 PRG.4 P.ALL Speed of program’s step SPEE 0,1sec 60sec execution. -
Page 22: Connecting Dr1 And Dr1 Plus
8.7 Electronic alignment of the leds. The display panel of Reflection LEDko allows the electronic alignment of the leds, this procedure is performed by Coemar at the time of testing, this procedure may be useful for special effects or in case of replacement of internal components (PCBs, leds, etc. - Page 23 Note: Simultaneously pressing + and – buttons will return the calibration value to 128 (default). UPLD Function (Upload) this function allows to upgrade the firmware of Reflection LEDko only by DR1 or DR1 Plus and a Personal Computer. Read DR1 or DR1 Plus manual for further information.
-
Page 24: Error Messages
9. Error messages If a malfunction occurs, Reflection LEDko has a self-diagnostic system that will show the error message on the display. The following table will explain in detail the most common errors. If, despite of suggested intervention, the problem persists, call the Coemar Service center near you. -
Page 25: Maintenance
11.3 Fuses: Reflection LEDko has an automatic fuse that in most cases does not need to be replaced. 12. F.A.Q. and answers The following list shows common issues that may be simply solved. If issues persist, the unit must be repaired by qualified personnel or just contact your Coemar service near you. - Page 26 English Information on disposal of the equipment The equipment at the end of its useful life must be disposed of at an appropriate recycling center for waste electrical and electronic equipment. The treatment and disposal of environmentally friendly, helps prevent potential negative environmental and health and promote the reuse and / or recycling of materials making up the equipment.
Need help?
Do you have a question about the Reflection LEDko and is the answer not in the manual?
Questions and answers