Coemar LEDko EXT Basic User Manual
Hide thumbs
Also See for LEDko EXT Basic:
- User manual (45 pages) ,
- Instruction manual (38 pages) ,
- Manual (29 pages)
Table of Contents
Advertisement
Quick Links
Advertisement
Table of Contents

Related Manuals for Coemar LEDko EXT Basic


Summary of Contents for Coemar LEDko EXT Basic
- Page 1 EXT Basic USER MANUAL vrs. 1.1 - 15.05.2023...
- Page 2 Coemar ®. If you are downloading files from our web pages for your personal use, make sure to check for updated versions. Coemar ® cannot take any liability whatsoever for downloaded files, as technical data are subject to change without notice.
-
Page 3: Table Of Contents
Index 1. Packaging and transportation ...................Pag. 4 1.1 Packaging ........................Pag. 4 1.2 Transportation .......................Pag. 4 2. General information ......................Pag. 4 2.1 Safety informations ....................... Pag. 4 2.2 Warranty conditions ..................... Pag. 5 2.3 EC norms ........................Pag. 5 3. Product specifications .......................Pag. 6 3.1 Technical characteristics ....................Pag. -
Page 4: Packaging And Transportation
Packing list Ensure the packaging contains: 1 LEDko EXT Basic 1 Instruction manual Transportation The LEDko EXT Basic should be transported in either its original packaging or in an appro- priate flight case. . General information Safety information Fire prevention: 1. -
Page 5: Warranty Conditions
3. The level of technology of LEDko EXT Basic requires the use of special- ised personnel for all service applications; refer all work to your autho- rised Coemar service centre. 4. A good earth connection is essential for the proper functioning of the projector. -
Page 6: Product Specifications
Product specifications Technical characteristics Power supply 90-305 V, auto-sensing, 50/60 Hz Maximum current 0.6 A at 230 V, 1.27 A at 115 V Power factor Cosφ = 0.96 Max power consumption 140 W Color temperature Tungsten: 3.200 K - Daylight: 5.600 K Color Rendering Index (CRI) models: CRI 80, CRI 90 12.1 Kg - 26.6 lbs (with 80°... -
Page 7: Dimensions
Dimensions Width LEDko EXT 80° Optic 500 mm 218 mm 19.68 in 8.58 in With bracket: Width LEDko EXT 30°-60° Optic 580 mm 218 mm 27.7 lbs 22.83 in 8.58 in With bracket: Width LEDko EXT 14°-35° Optic 687.8 mm 28.07 in 218 mm 8.58 in... -
Page 8: Unit's Main Components
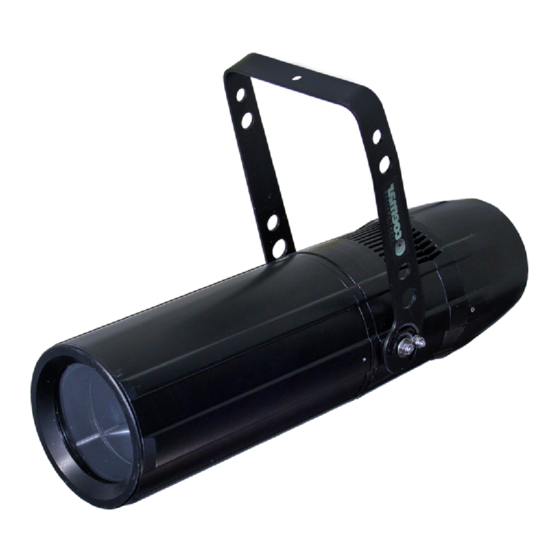
Unit’s main components Components description A Yoke with mounting holes Cooling unit C Optical holder tube Locking screw for yoke... -
Page 9: Back Panel Description
. Installation Mechanical installation LEDko EXT Basic may be hung from an appropriate structure in any position or on tripod. If hanging the fixture from a lighting truss or similar, we recommend the use of an appropriate clamp “A”, as shown in the following diagram. -
Page 10: Safety Chain
Safety chain When hanging LEDko EXT Basic it is recommended to use a safety chain, as required by current legislation. The safety chain must pass through the handles of the unit and then attached to the structure. If using steel cables and chains not Coemar’s production, make sure they are suitable to support the weight of the unit according to normative UL/ETL (required: the weight of 6 complete devices for at least one hour). -
Page 11: Adjusting Unit's Tilt
Adjusting unit’s tilt 1. In order to adjust the tilt of the unit simply loose the side screw “B” on the yoke, adjust the tilt and lock the yoke by tightening the screw again. 4.4 Optical group, framing system and gobos Follow these steps in order to configure the optical group properly: 1. - Page 12 3. Loose the thumbscrews “E” of the two lenses to set them at desired position. Turn on the fixture and check if the desired focus and zoom lever are correct, then tighten the thumbscrews;...
- Page 13 4. It is possible to regulate the shutter blades “H” to achieve the desired shape, use the four thumb screws “I” that you can see behind the shutter blades to free or block them; Four blade framing system, each shutter blade is adjust- able for radial position and angle...
- Page 14 5. It is possible to insert the gobo, to do so unscrew the thumb screws “I”, at this point it will be possible to extract the gobo holder “K”. Insert the gobo by loosening the 4 screws “L”, at this point we suggest you to unscrew 2 of them on one side in order to lift the gobo holder and insert the desired gobo “M”.
-
Page 15: Powering Up
The unit may operates at voltages ranges from 90 to 305 V at a frequency of 50 or 60 Hz. It is not needed to effect any setup procedures: LEDko EXT Basic will automatically adjust its operation to suit any frequency or voltage within this range. -
Page 16: Turning On The Projector
The use of a thermal/magnetic circuit breaker is recommended. Strict adherence to regulatory norms is strongly recommended. LEDko EXT Basic should not be powered through a dimmer as this may damage the in- ternal switching power supply. Prior to connecting the device to mains power, ensure that the mains characteristics are within the recommended range for the use of LEDko EXT Basic. -
Page 17: Accessories And Spare Parts
Check all electrical connections, in particular for correct grounding and correct attachment of all extractable connectors. Press the connectors if necessary and reposition as before. Fuses LEDko EXT Basic has an automatic fuse that in most cases does not need to be replaced. -
Page 18: And Answers
. F.A.Q. and answers The following list shows common issues that may be simply solved. If issues persist, the unit must be repaired by a qualified personnel or just contact your Coemar service. Question Possible solution Projector not powered on: LEDko EXT Basic does •... - Page 19 User notes .............................................................................................................................................................................................................................................................................................................................................................................................
- Page 20 Information on disposal of the equipment The equipment at the end of its useful life must be disposed of at an appropriate recycling center for waste electrical and electronic equipment. The treatment and disposal of environmentally friendly, helps prevent potential negative environmental and health and promote the reuse and / or recycling of materials making up the equipment.
- Page 21 Coemar Lighting s.r.l. Via Carpenedolo 90 46043 Castiglione delle Stiviere, Mantova, Italy phone. +39 0376/1514412 - fax +39 0376/1514380 info@coemar.com Coemar reserves the right to change specifications without prior notice...
Need help?
Do you have a question about the LEDko EXT Basic and is the answer not in the manual?
Questions and answers