Hunter Stoves Hawk 3 Installation And Operating Instructions Manual
Cleanburn stove
Hide thumbs
Also See for Hawk 3:
- Installation and operating instructions manual (14 pages) ,
- Installation, operating and maintenance manual (40 pages)

Related Manuals for Hunter Stoves Hawk 3


Summary of Contents for Hunter Stoves Hawk 3
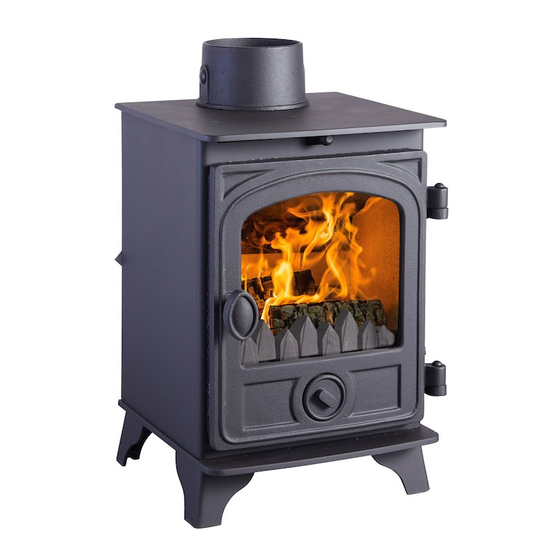
- Page 1 HAWK 3 CleanBurn Stove Installation and Operating Instructions JINHCR03 RevB 22/06/2012...
-
Page 2: Technical Specification
Technical Specification Appliance Mass 62 kg Total Efficiency 80.5 % Nominal Heat Output 4.0 kW Mean CO Emission (@13% O 0.24 % Mean Flue Gas Temperature 227 °C Flue Gas Mass Flow 3.9 g/s This appliance is not for use in shared flue This appliance is suitable for intermittent burning JINHCR03 RevB 22/06/2012... -
Page 3: General Guidance
OMPETENT ERSONS CHEME should not be allowed to come into contact Hunter Stoves recommend that this stove is with the skin. In case of contact, wash installed by a member of an accredited immediately with plenty of water. competent persons scheme e.g. HETAS. -
Page 4: D O Not Over -Fire
Never leave the stove unattended for long ETAL ARTS periods without first adjusting the controls to a When installing or servicing this stove, care safe setting. should be taken to avoid the possibility of personal injury. Careful air supply control should be exercised at all times. -
Page 5: I N The Event Of A Chimney Fire
advise on solutions to this problem (e.g. anti- downdraught cowl). Do not fit an extractor fan in the same room as this appliance. CO A LARM Your installer should have fitted a CO alarm in Place a flue outlet gasket in position on the top the same room as the appliance. -
Page 6: Fire Bricks
Rear Brick RICKS The Fire Bricks, in this appliance, are factory fitted. The following set of diagrams shows the removal sequence that you will need to employ when servicing your Hunter Stove. Side Bricks Remove the Ashpan, Riddling Bars. Slide out both Side Plates. -
Page 7: Installation Instructions
Installation ONNECTION TO THE HIMNEY The chimney must be swept before connection Instructions to the stove. An existing fireplace opening can be bricked up or sealed with a register plate. HIMNEY A short length of flue pipe of minimum 125mm The chimney height and the position of the internal diameter may then be used to connect chimney terminal should conform to Building... -
Page 8: Air Supply
made of non-combustible board / sheet UPPLY material or tiles, at least 12mm thick. The room or space containing this appliance should have purpose provided ventilation (where necessary) in accordance with Building Regulations. Due consideration should be given to air requirements for any other appliance in the same room or space. -
Page 9: Primary Air
stove up the chimney and emitted safely to ONTROLS atmosphere. This stove has been designed to burn far more efficiently than a traditional stove, with the Do not run the stove at full output for at least obvious notable feature of clean glass. 24 hours. -
Page 10: Riddling Grate
We advise that suitable gloves are used when Overloading the stove can cause excess smoke operating the Primary and Secondary air to be emitted. controls, and when opening the door. Wood burns most efficiently with the secondary air valve lever in the open position and the IDDLING RATE primary control closed. -
Page 11: Reduced Combustion
ECOMMENDED UELS firelighters, taking care not to smother the fire. Hunter Stoves recommend that wood logs are Close the stove door. Once the kindling is well burnt in this appliance. alight open the door and build the fire by... -
Page 12: General Maintenance
Do not clean whilst the stove is hot. The finish can be renovated with Hunter Stoves Check the rope around the door. If rope is becoming detached, use Hunter Stoves rope paint. -
Page 13: Troubleshooting
Troubleshooting Only wire-centred sweeps’ brushes fitted with a guide wheel should be used. If it is not possible to sweep all parts of the chimney through the appliance, ensure there is IRE WILL NOT BURN adequate access to cleaning doors. Check that: ... -
Page 14: Spares Information
Spares Information Door spares STANDARD DOOR Door – Standard (HCR06/037) Door Catch Door Glass Assembly(DCH4) (HCR06/039) Glass Clip (HHR08/164) Door Handle (HCR06/059) Glass Clip Screw (FSJM05008SS) Primary Air Spinner Rope Sealing Kit (HCR06/028) (SCPHKRSK) CONTEMPORARY DOOR Door – Standard (HCR06/056) Door Catch Assembly Glass Clip (DCH4) - Page 15 Body Assembly Spares – Multi-Fuel Gasket Hinge (CH05/042) (HCR03/039) Hinge Pin Baffle (FRRE10-1.50) (HCR03/044) Side Brick – M/F Tertiary Air Bar (HCR03/047) (HCR03/046) Rear Brick – M/F Side Plates (HCR03/048) (HCR06/031 A/B) Riddling Support (HCR03/020) Door Seal Bar (HCR06/030) Riddling Bar – Upper (HCR06/019) Ashpan Riddling Bar –...
Need help?
Do you have a question about the Hawk 3 and is the answer not in the manual?
Questions and answers