
Related Manuals for TurboChef ngo


Summary of Contents for TurboChef ngo
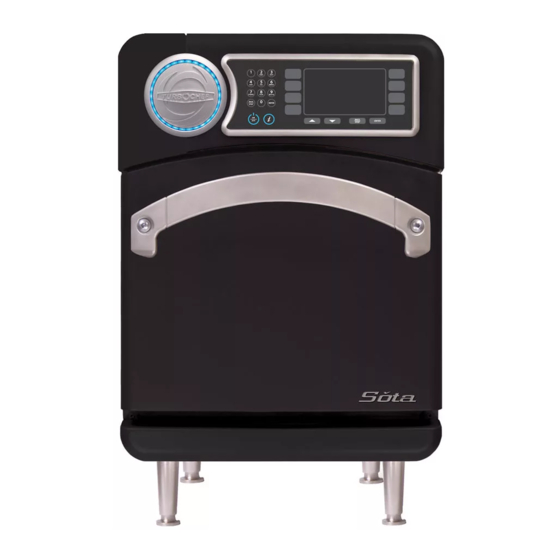
- Page 1 Service Manual f o r t h e tu rb och ef ngo /s o ˇ ta r api d co ok ov en ©2009-2014 TurboChef Technologies, Inc.
- Page 3 For further information, call 800.90TURBO +1 214.379.6000...
- Page 4 The information contained in this manual is important for the proper installation, use, maintenance, and repair of this oven. Follow these procedures and instructions to help ensure satisfactory baking results and years of trouble-free service. Errors – descriptive, typographic, or pictorial – are subject to correction. Specifications are subject to change without notice.
-
Page 5: Table Of Contents
Table of Contents Safety Instructions General Safety Information Reducing Fire Risk Grounding Instructions Power Cord Replacement Precautions to be Observed Before and During Servicing to Avoid Possible Exposure to Excessive Microwave Energy RF Interference Considerations Specifications and Installation Theory of Operation Dimensions Certifications Oven Construction... - Page 6 Info, Test, and Edit Mode Overview of the Info Mode Viewing Cook Counter/Time Logs Viewing the Fault Log Viewing the Service Numbers Setting the Language F2 Bypass Resetting the Oven Set Options Screens Network Setup Auto On and Off: Setting the Time Light Ring Catalytic Recondition Test Mode - Testing Oven Parts...
- Page 7 Microwave System Capacitors Testing a Capacitor Filament Transformers Wiring the Filament Transformers High-Voltage Transformers Wiring the High-Voltage Transformers Testing a Filament or High-Voltage Transformer High-Voltage Diodes Testing a High-Voltage Diode Magnetrons Testing a Magnetron for an Open/Shorted Filament Stirrer Motor and Assembly Waveguides Troubleshooting Control System...
- Page 8 Troubleshooting Overview of Troubleshooting Fault Code Descriptions Fault Code Troubleshooting - F1 Blower Running Status Bad Fault Code Troubleshooting - F2 Cook Temperature Low Fault Code Troubleshooting - F3 Magnetron Current Low Fault Code Troubleshooting - F4 Door Monitor Defective Fault Code Troubleshooting - F5 Magnetron Over Temperature Fault Code Troubleshooting - F6 Electrical Compartment Temperature High Fault Code Troubleshooting - F7 RTD Open...
-
Page 9: Important Safety Instructions
IMPORTANT SAFETY INSTRUCTIONS WARNING: When operating this oven, strictly adhere to the following safety precautions to reduce the risk of burns, electric shock, fire, injury, damage to oven or property near oven, or possible exposure to excessive microwave energy. General Safety Information Read all instructions before using this appliance. -
Page 10: Safety Instructions
Refer to page 22 for leakage test procedures. RF Interference Considerations The NGO oven generates radio frequency signals. This device has been tested and was determined to be in compliance with applicable portions of FCC part 18 requirements and to the protection requirements of Council Directive 89/336/EEC on the approximation of the laws of the Member States relating to electro- magnetic compatibility at the time of manufacture. -
Page 11: Theory Of Operation
Height: 7.2” (183 mm) Width: 12.5” (318 mm) This manual includes instructions for installing, Depth: 10.5” (267 mm) cleaning, operating, and servicing the NGO oven. Volume: 0.54 ft (15.4 liters) If you have questions that are not addressed in this... -
Page 12: Certifications
SPECIFICATIONS AND INSTALLATION * US/Canada models include a voltage sensor Certifications that detects 208 or 240 VAC, but does not com- cULus, UL EPH, TÜV, CE, FDA pensate for lack-of or over-voltage installations. Installation Install or locate this appliance only in accordance with the instructions below. -
Page 13: Lifting And Placing The Oven
Counter Top / Table Partition 25.0” (635 mm) Partition Above Counter Top 25.0” (635 mm) Above Counter Top TurboChef Grill NGO Oven Deep Fryer 12” 6” (305 mm) (152 mm) Minimum Minimum Figure 2: Installation Near Open Heat Source... -
Page 14: Oven Connect Suite
For more information, call TurboChef Ventilation Customer Support at 800.90TURBO or +1 214.379.6000. The TurboChef TurboChef So ˇ ta (model NGO) oven has been approved by Underwriter’s Laboratory for ventless operation (UL KNLZ list- ChefComm Limited ing) for all food items except for foods classified as Part Number: CON-7016 “fatty raw proteins.”... -
Page 15: Daily Maintenance
Daily Maintenance Supplies and Equipment Follow the steps below when cleaning your NGO TurboChef ® Oven Cleaner (Product Number: oven. Use only TurboChef ®-approved cleaning 103180), TurboChef ® Oven Guard (Product Number: chemicals. The use of any other cleaning products... - Page 16 DAILY MAINTENANCE Step 6: Clean the Oven Interior CAUTION: DO NOT spray Oven Cleaner into the holes on the back oven wall. Doing so can damage critical oven components, resulting in a non- warranty service call. Step 6 (Fig A) CAUTION: DO NOT attempt to scrub the upper jetplate (Fig B).
-
Page 17: Oven Controls
Figure 4: Oven Controls When the oven is ready to cook (i.e., warmed up Oven Controls and waiting for a cook command), or in the Info Mode (page 11), press the Back/Stop key to return 1. On/Off Key to the previous screen. Press to turn the oven on (begin warmup) or off (cool down), or to exit Info Mode (page 11). -
Page 18: Cooking
(Step 10). Step 1: Turn the Oven On When the oven is off (Figure 5), the oven temperature has receded below 150°F (66°C), but the display and keypad TURBOCHEF NGO OVEN OFF remain on. READY TO CLEAN Press the On/Off key to turn the oven on. -
Page 19: Step 4: Soaking
Step 4: Soaking Once the oven temperature reaches the set point, the oven will continue to warm for eight minutes to ensure the cook cavity surfaces absorb enough heat so as to not affect cooking results. This process is called “soaking.” NOTE: While the oven is soaking, the operator will be able to navigate through the menu, but will not be allowed to cook until the timer reaches 0:00. -
Page 20: Step 8: Check/Remove Food From Oven
OVEN CONTROLS AND COOKING Step 8: Check/Remove Food from Oven WARNING: Dish and inside of oven/oven door are hot! WA R M I N G D O NE PL E A S E C HE C K FOOD Open the oven door and check/remove food. Figure 10: Cooking Done Step 9: Additional Cooking Options The Additional Cooking Options screen (Figure 11) is... -
Page 21: Overview Of The Info Mode
Overview of the Info Mode Viewing Cook Counter/Time Logs From Screen 1 of the Info Mode (Figure 12), press To access the Info Mode, press the Info key when the the R1 soft key (Counts Scroll): oven is either off or cooling down. To toggle between - Once to display the cook counter. -
Page 22: F2 Bypass
INFO, TEST, AND EDIT MODE Press the DOWN arrow key to access the “2nd F2 Bypass Options Screen” (Figure 15, below). The F2 alarm indicates the oven temperature is too low - see page 31 for details. From screen 2 of the From the “2nd Options Screen,”... -
Page 23: Auto On And Off: Setting The Time
To set the auto-on or auto-off time, Auto On and Off: Setting the Time 1. Ensure the real-time clock is accurate. From screen 2 of the Info Mode (Figure 13, page 2. Press the R1 soft key to toggle between 11), press the L4 soft key to access the Set Date/ temperatures 1 and 2. -
Page 24: Test Mode - Testing Oven Parts
INFO, TEST, AND EDIT MODE Once the displayed time expires, the oven will begin Bottom Blower cooling down and display “Cooling to Setpoint. Press the L3 soft key (Figure 17) to increase bottom Please Wait.” The message and the oven temperature blower speed in 10% increments. -
Page 25: Manufacturing Mode
Manufacturing Mode Changing Temperature Measurement Setting Press the R4 soft key (Figure 18) to change the From Test Mode, press the R3 soft key (Figure 17, page 14) to place the oven in Manufacturing Mode temperature measurement to Fahrenheit or Celsius. (Figure 18). -
Page 26: Updating The Oven Menu
3. Insert the smart card (Figure 23). page 11). - White for SOTA 2. Press the R1 soft key to access the Load - Gray for SBK NGO Menu screen. 4. From the Load Menu screen, press the L2 3. Insert the smart card (Figure 23). -
Page 27: Updating The Oven Firmware
The oven allows use of either one or two set tem- peratures. Additionally, the SOTA can store up to To change a set temperature, 256 settings, while the SBK NGO can store 1,024. 1. Place the oven in Edit Mode (above). See Figure 24 below for the differences. -
Page 28: Edit Recipe Settings
INFO, TEST, AND EDIT MODE Editing Recipe Settings Changing Group/Item/Quantity Name Changing Cook Settings To change a food group, item, or quantity name: To change cook settings, 1. Place the oven in Edit Mode (see page 17). 1. Follow the steps in Changing Group/Item/ 2. -
Page 29: Convection System
Heater Elements Convection System The main convection heaters are sheathed-style The convection system is designed to rapidly heat, and rated at 3000 watts at 208 VAC, with a clean, and recirculate air into the cook cavity. resistance of 14.4 Ohms. The convection heaters This section contains information about the are controlled by the K4/K5 solid state relay, and following components:... -
Page 30: Oven Door
OVEN SYSTEMS 7. From Test Mode, check the status indicators Oven Door “P” “S” and “M” to verify the switches engage This section contains information about the (door closed) and disengage (door open) following components: properly. If they do not, adjust the switches - Oven door per the instructions on page 21. -
Page 31: Interlock Switches
NOTE: Do not push one end at a time, which 1. Ensure the oven has been at operating temperature could cause the opposite end to lift away from for at least fifteen minutes. the flange. 2. If adjusting the primary switch, confirm the primary switch’s latch toggle is in the correct 3. -
Page 32: Measuring Rf Leakage For Microwave Safety
OVEN SYSTEMS 7. As microwave leakage is observed while moving Measuring RF Leakage for Microwave Safety the sensor, note any meter spike areas that come WARNING: This procedure requires work with close to 5mW/cm for later re-measurement. hot surfaces and water loads. To avoid burns, be 8. -
Page 33: Microwave System
4. Check for an open or shorted capacitor by Microwave System placing ohmmeter leads between the capacitor ter- The NGO oven employs left and right microwave minals: systems. In the case of an over-current situation, the - Escalating ohm readings = capacitor OK... -
Page 34: High-Voltage Transformers
OVEN SYSTEMS High-Voltage Transformers Testing a Filament or High-Voltage Transformer High-voltage transformers are ferro-resonant, which DANGER: Never attempt to measure the limits faulty currents and minimizes magnetron power secondary voltage values of the HV changes due to input voltage changes. The high- transformers. -
Page 35: Testing A High-Voltage Diode
High Voltage Transformers Primary Voltage, Frequency, Taps, Secondary Taps and Resistance and Resistance NGC-3062-1 208 VAC, 60 Hz, 1 & 2, 4, Ground, 53.60–65.52 0.819–1.001 240 VAC, 60 Hz, 1 & 3, 0.972–1.188 NGC-3062-2 230 VAC, 50 Hz, 1 & 2, 3, Ground, 57.52–70.30 0.972–1.188 Filament Transformers... -
Page 36: Magnetrons
OVEN SYSTEMS 3. An ohmmeter connected between the filament Magnetrons terminals (F, FA) should indicate a reading of less Figure 32. Magnetrons supply the RF energy at 2.45 than 1 ohm. Figure 32. GHz and begin to oscillate when they are supplied 4. -
Page 37: Control System
If the control board is damaged to the point of not Control System allowing access to the Network Setup screen, have This section contains information about the the store contact its Oven Connect administrator following components: to obtain the proper network settings. - Control board - Cooling fans Cooling Fans... -
Page 38: Ethernet Extension Cable
OVEN SYSTEMS Ethernet Extension Cable Magnetron Thermostats The ethernet extension cable exits the oven at the The magnetron thermostats are “open-on rise.” They are designed to open at 270 º F (132 º C), back panel and allows the oven to be connected to a local network, in case the customer desires remote which triggers an F5 fault. -
Page 39: Relay - K7 Monitor
Relay - K7 Monitor Solid State Relay - K4/K5 Heater The K7 relay is a 240 VAC, 30 amp, double-pole, The solid state relay is a 240 VAC, dual 40-amp double-throw, 24 VDC relay coil. It shorts L1 and relay. K4 switches power to heater one, and K5 L2 if the monitor switch opens before the primary switches power to heater two. -
Page 40: Filtering System
In addition to the main catalytic converter, the The catalyst functions by substantially lowering NGO oven contains a secondary catalyst in the the combustion temperature of grease entrained in vent tube path. This catalyst further assists in the... -
Page 41: Overview Of Troubleshooting
F3: Magnetron Current Low Overview of Troubleshooting This fault is displayed when the current transformer This section contains information on the (CT) on the I/O control board detects less than 10 following: amps. The fault is monitored when the microwave is - Fault code descriptions on during a cook cycle or in Test Mode. - Page 42 TROUBLESHOOTING F7: RTD Open F9: Cook Cavity Temperature High This fault is displayed when the control detects that This fault will signal that the catalyst has “flashed” the RTD is “open.” The display will show a reading due to excessive grease. The fault occurs when the of “999 º...
-
Page 43: Fault Code Troubleshooting - F1 Blower Running Status Bad
Fault Code Troubleshooting From Test Mode, you can run oven diagnostics and check fault counts. To access Test Mode or turn on Diagnostic mode, see page 14. To locate oven components for testing, adjustment, or replacement, see the Appendix. Troubleshooting: F1: BLOWER (Blower Running Status Bad) Do resistance measurements Remove obstruc-... -
Page 44: Fault Code Troubleshooting - F2 Cook Temperature Low
TROUBLESHOOTING Troubleshooting: F2: LOW TMP (Cook Temperature Low) Is either of the heater ele- Reset (Figure 33, page Is the high-limit ments defective? (heaters 28) and determine why thermostat tripped? should have a resistance of it tripped – excess grease 14.4 Ohms) buildup, etc. -
Page 45: Fault Code Troubleshooting - F3 Magnetron Current Low
Troubleshooting: F3: MAG CURR (Magnetron Current Low) Is the K6 mechanical Energize the mag- relay in good working Intl. U.S. netron circuit from Is the oven International or U.S.? order? Test Mode (page 14). Are there 10+ amps present on the cur- Confirm the F3 fuse is a Replace the F3 fuse and Replace K6... -
Page 46: Fault Code Troubleshooting - F4 Door Monitor Defective
TROUBLESHOOTING Troubleshooting: F4: MONITOR (Door Monitor Defective) Is the F3 fuse blown? Replace the F3 fuse. Are the switches opening in the correct sequence (P, S, M) while the oven is hot? (Ensure Adjust the monitor safety switch. the oven has been at operating See page 21 for instructions. -
Page 47: Fault Code Troubleshooting - F6 Electrical Compartment Temperature High
Troubleshooting: F6: EC TEMP (Electrical Compartment Temperature High) Is the oven in an area of moderate temperature (120ºF [49ºC] or cooler)? Does the oven have Relocate oven to room to ventilate? cooler area. Move oven to open area or remove Required clearances: items that are in close proximity. -
Page 48: Fault Code Troubleshooting - F8 Heat Low
TROUBLESHOOTING Troubleshooting: F8: HEAT LOW Are both blower motors moving air? Check in Test Mode - see page 14. Is the high-limit Are either of the heaters defective? See page 33 thermostat tripped? Check in Test Mode - see page 14. to troubleshoot F1: BLOWER (Blower Running... -
Page 49: Non-Fault Code Troubleshooting - No Keypad Input
Non-Fault Code Troubleshooting This section provides troubleshooting tips for issues that may occur independently of an oven fault. Troubleshooting: No Keypad Input Is the keypad cable properly connected to the control board? Correct wiring. Replace the keypad. If the problem persists, replace the control board. -
Page 50: Non-Fault Code Troubleshooting - No Display (Screen Is Blank)
TROUBLESHOOTING Troubleshooting: No Display – Screen is Blank Does the keypad beep when a key is pressed? Is the power supply Replace the F1 and/or receiving power? the F2 fuse. Is wiring from the Correct wiring. If control board to the ribbon cable is display OK? damaged, replace the... -
Page 51: Non-Fault Code Troubleshooting - Food Not Cooking Properly
Troubleshooting: Food Not Cooking Properly Does the problem occur for all programmed recipes? For example, are all recipes undercooked/overcooked/etc.? Are there any fault Troubleshoot the Is the food item in the codes present? See fault(s) using the steps correct starting state pages 31-32. -
Page 52: Non-Fault Code Troubleshooting - "Read Fail" Message When Loading A Menu
TROUBLESHOOTING Troubleshooting: “Read Fail” Message When Loading Menu Is the connection from Does a backup copy of No backup copy smart card reader to the menu work? control board OK? If the menu card was created by TurboChef, Ensure the cable obtain a new menu card Replace the card connecting the reader... -
Page 53: Non-Fault Code Troubleshooting - Menu Settings Are Not Present
Troubleshooting: Menu Settings are Not Present Try loading a menu from a new smart card, ensuring the smart card is the correct type (gray for SBK ovens and white for SOTA ovens). Was the load successful? Perform a firmware update, following the instructions on page 17, then load the menu card again. -
Page 54: Plugged In Or Restarted
TROUBLESHOOTING Troubleshooting: “Defective Media” Message When Oven is Plugged in or Restarted Does the message prevent the oven from reaching the “Oven Off/ Cooling Down” screen? Unplug the oven and Operate the oven as then plug it back in. you would normally. Did this fix the problem? Perform a microwave leak-... -
Page 55: Oven Schematic
L1 L2 L3 N 60HZ 60HZ 50HZ 100546 9/10/09 GREG HAUN 230VAC 208/240VAC TERMINAL BLOCK TERMINAL BLOCK SCHEMATIC, i1/NGO 50HZ C-22 60HZ B-17 SINGLE PHASE, 208 - 240 VAC, 60 HZ WHITE C-21 BLUE WHITE MULTIPHASE, 380-415 VAC, 50 HZ... - Page 56 OVEN SCHEMATIC This page intentionally left blank.
-
Page 57: Replacing Oven Components
Replacing Oven Components This appendix provides illustrations for removing serviceable items, as well as the item numbers and descriptions for those items. It also includes the item numbers and descriptions for the fasteners used to secure each component to the oven chassis. The appendix is divided into the following sections: - No Cover Removal Required (pages A-2 through A-3) - Removing Outer Shell Required (pages A-4 through A-10) -
Page 58: Replacing Items - No Cover Removal Required
APPENDIX - REPLACING OVEN COMPONENTS Replacing Items - No Cover Removal Required (Figures A-1 through A-3) CAUTION: Before removing/installing any component, make sure it is disconnected from the wire harness (where applicable). NOTE: Fasteners listed are required for installing component to oven. 21 x4 Figure A-1: No Cover Removal Required See Figure A-3... - Page 59 Figure Item Description Item Part Number Fastener Description Fastener Part Number(s) Reference # Actuator, Door Latch NGC-1076-2 Screw, Torx w/ Post, Sht Mtl, .50 Lg, Blk Ox 102756 (qty 2) Bracket, Removable, Filter- i1-9559 (DARDEN only) Catalyst i1-9530-1-T004 (SOTA) Screw, #8 x 1/2, Serr Ph Truss Hd, Bk Oxide 101691 (qty 6) Cover, Outer Shell i1-9530-1-T002 (SBK)
-
Page 60: Replacing Items - Removing Outer Shell Required
APPENDIX - REPLACING OVEN COMPONENTS Replacing Items - Removing Outer Shell Required (Figures A-4 through A-16) DANGER: Before replacing any oven component, ensure the oven is removed from any power source. Replacing a component while the oven is plugged in can result in serious injury or death CAUTION: Be careful to not tear the insulation when servicing components. - Page 61 Screw, #4-40 x .25, PPH Sems Int Tooth, SS 101520 (qty 2) Catalytic Converter i1-9066 None None Cooling Fan, Sides: - NGO/Sota x2 100516 Screw, #10 x 1/2, PPHD, Type F 101694 (qty 4 each) - Single Magnetron Sota x1 Cooling Fan, Lower-Back Cover...
- Page 62 APPENDIX - REPLACING OVEN COMPONENTS See Figure A-9 for Waveguide Detail See Figs A-6 and A-7 See Figure A-9 for Waveguide Detail Figure A-9: Outer Shell Removed (Top View) and Stirrer Motor Detail Figure A-10: Outer Shell Removed (Top View) and Stirrer Motor Detail Single Magnetron Sota...
- Page 63 Item Part Number Fastener Description Fastener Part Number(s) Reference # Bracket, Mounting, Mag Fan: - NGO/Sota x2 i1-9478 Screw, #8 x 1/2, Serr Ph Truss Hd, Sheet Mtl 101688 (qty 2 each) - Single Magnetron Sota x1 100543 (1 Ph)
- Page 64 APPENDIX - REPLACING OVEN COMPONENTS Figure Item Description Item Part Number Fastener Description Fastener Part Number(s) Reference # Kit, Door Switch, Primary* NGC-3033* Included Included Hinge, LHS i1-3220-1 Screw, #8-32 x 5/8, PFH, 100 Deg, SS 102811 (qty 3) Hinge, RHS i1-3220-2 Screw, #8-32 x 5/8, PFH, 100 Deg, SS 102811 (qty 3)
- Page 65 Figure A-14: Left Hinge / Secondary Switch Detail Figure A-15: Right Hinge / Monitor Switch Detail...
- Page 66 A-10 APPENDIX - REPLACING OVEN COMPONENTS To prevent interference with display, do not apply push nut to this prong. Figure A-16: Outer Shell Removed - Control Panel Figure Item Description Item Part Number Fastener Description Fastener Part Number(s) Reference # Cable, Display, Power, 3-Pin, 3-Wire i1-9475 None None...
-
Page 67: Replacing Items - Removing Outer Shell And Back Cover Required
A-11 Replacing Items - Removing Outer Shell and Back Cover Required (Figure A-17) DANGER: Before replacing any oven component, ensure the oven is removed from any power source. Replacing a component while the oven is plugged in can result in serious injury or death. CAUTION: Be careful to not tear the insulation when servicing components. -
Page 68: Replacing Items - Removing Outer Shell And Back Cover Required, Single Magnetron Sota
A-12 APPENDIX - REPLACING OVEN COMPONENTS Replacing Items - Removing Outer Shell and Back Cover Required, Single Magnetron Sota (Figure A-18) DANGER: Before replacing any oven component, ensure the oven is removed from any power source. Replacing a component while the oven is plugged in can result in serious injury or death. - Page 69 A-13 This page intentionally left blank.
- Page 70 For service or information: w ith in n o r th a me r ic a c al l Customer Support at 800.90 T U R B O ou ts id e n o r th a me r ic a c al l +1 214.379.6000 or Your Authorized Distributor Global Operations Customer Support:...
Need help?
Do you have a question about the ngo and is the answer not in the manual?
Questions and answers