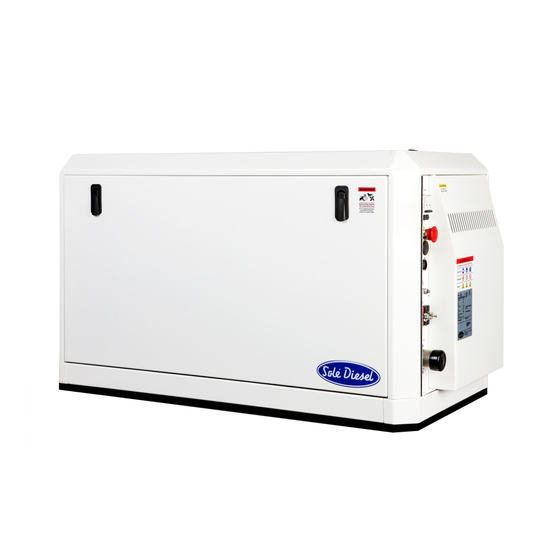
Sole Diesel 7 GSC Operator's Manual
Marine generator sets
Hide thumbs
Also See for 7 GSC:
- Operator's manual (82 pages) ,
- Operator's manual (94 pages) ,
- Operator's manual (108 pages)

Related Manuals for Sole Diesel 7 GSC


Summary of Contents for Sole Diesel 7 GSC
- Page 1 U_ GBAV_EN, U_GBMV_EN, U_ GBBA_EN, U_GBNA_EN, U_ GCAS_EN, U_GCMS_EN, U_ GCAW_EN, U_GCMW_EN, U_ GDAT_EN, U_GDMT_EN, U_ GDAX_EN, U_GDMX_EN Rev. 3...
- Page 2 Rev. 3...
-
Page 3: Introduction
Introduction Presentation Dear Customer, First of all, we would like to thank you for choosing a Solé Diesel product. We recommend that you read this manual carefully before carrying out any of the operations and keep it close at hand, near the genset, as it can be of great use in the future. -
Page 4: Table Of Contents
TABLE OF CONTENTS Introduction Safety Precautions and Instructions Service Assistance Section 1 Genset Information 1.1 Genset Identification 1.2 Technical Specifications 1.3 Genset Limited Warranty Restrictions After-sales Service Contact Section 2 Transport, Handling and Storage 2.1 Receipt 2.2 Transporting and Handling the Packed Genset 2.3 Transporting and Handling the Unpacked Genset 2.4 Storage of Packed and Unpacked Genset Section 3 Installation... - Page 5 7 GSC / 8 GSAC / 10 GSC / 12 GSAC / 14 GSC / 17 GSAC Earth Isolated 7 GSC / 8 GSAC / 10 GSC / 12 GSAC / 14 GSC / 17 GSAC 8 GTC / 10 GTAC / 11 GTC / 14 GTAC / 17 GTC / 20 GTAC...
- Page 6 Fig. 15. Genset covers Fig. 16. Location of genset elements 8 GTC / 10 GTAC / 7 GSC / 8 GSAC Fig. 17. Location of genset elements 11 GTC / 14 GTAC / 10 GSC / 12 GSAC / 17 GTC / 20 GTAC / 14 GSC / 17 GSAC Fig.
- Page 7 LIST OF TABLES Table 1. Technical Specifications 8 GTC / 10 GTAC / 7 GSC / 8 GSAC / 11 GTC / 14 GTAC Table 2. Technical Specifications 10 GSC / 12 GSAC / 17 GTC / 20 GTAC / 14 GSC / 17 GSAC Table 3.
-
Page 8: Safety Precautions And Instructions
Safety Precautions and Instructions Solé Diesel is concerned for your safety and your machine’s condition. Safety Precautions and Instructions are one of the primary ways to call your attention to the potential hazards associated with our genset operation. Follow the precautions listed throughout the manual before and during operation and maintenance procedures for your safety, the safety of others and the performance of your genset. -
Page 9: Fig. 2. Warning Label. General Precautions
In case of fire do not open sound shield compartment and follow these instructions: 1. Shut down genset(s) 2. Continuously discharge entire contents of a halon or CO portable fire extinguisher (or other provision) immediately. There are some aspects that you must consider: Obligations: Operator Manual of genset. -
Page 10: Fig. 4. Warning. Carbon Monoxide
Other WARNINGS (no adhesive label): Carbon monoxide (CO) can cause severe nausea, fainting or death. Genset exhaust contains carbon monoxide gas. Carbon monoxide is an odorless, colorless, tasteless, nonirritating gas that can cause death if inhaled for even a short time. Get fresh air and do not sit, lie down or fall asleep if anyone shows signs of carbon monoxide poisoning: Light-headedness, dizziness... -
Page 11: Fig. 8. Caution Label. Not A Step
Do not use the cabin of the genset as a step. Using it as a step can cause the cabin damage and, moreover, standing on the genset could impair its operation. Fig. 8. Caution label. Not a step NOTICE 1. The installer / operator of the genset has to wear suitable CLOTHING for the workplace and the situation;... -
Page 12: Service Assistance
Service Assistance For an updated list of our international distribution network, visit Dealers section in our web page www.solediesel.com. Or request this information by contacting Solé Diesel at: e-mail: info@solediesel.com Phone: +34 93 775 14 00 Rev. 3... -
Page 13: Section 1 Genset Information
Section 1 Genset Information 1.1 Genset Identification MANUFACTURER: GENSET MODEL: SOLÉ, S.A. 7 GSC / 8 GTC / 10 GSC / 11 GTC / Road from Martorell to Gelida, km 2 14 GSC / 17 GTC (1500 rpm) 08760 MARTORELL... -
Page 14: Technical Specifications
BTDC 17º Injection pressure (kPa) 13,73 (140 kg/cm Inlet and exhaust valve clearance - cold 0,25 genset (mm) 1500 (8 GTC) 1500 (7 GSC) 1500 (11 GTC) RPM (rpm) 1800 (10 GTAC) 1800 (8 GSAC) 1800 (14 GTAC) Starting system... -
Page 15: Table 1. Technical Specifications 8 Gtc / 10 Gtac / 7 Gsc / 8 Gsac / 11 Gtc / 14 Gtac
Minimal section of battery wire (mm Table 1. Technical Specifications 8 GTC / 10 GTAC / 7 GSC / 8 GSAC / 11 GTC / 14 GTAC For each curve of 90º of the installation, must increase 10 mm (for lengths superior to 3 m). -
Page 16: Diesel Engine
10 GSC 17 GTC 14 GSC 12 GSAC 20 GTAC 17 GSAC DIESEL ENGINE Type Water-cooled, Diesel 4-stroke cycle Direction of rotation Anti-clockwise observing genset from flywheel side No. of cylinders - arrangement 3 - in line 4 - in line 4 - in line Allowable Exhaust Back Pressure (kPa) Max. -
Page 17: Table 2. Technical Specifications 10 Gsc / 12 Gsac / 17 Gtc / 20 Gtac / 14 Gsc / 17 Gsac
10 GSC 17 GTC 14 GSC 12 GSAC 20 GTAC 17 GSAC DIESEL ENGINE Air supply Air cleaning by means of a dry-type air filter Cooled exhaust manifold Exhaust System Dry exhaust manifold (optional equipment) 12 - ground 12 / 24 (24V is optional) - ground Voltage –... -
Page 18: Genset Limited Warranty
1.3 Genset Limited Warranty The genset is designed and built as a power unit for generating electrical energy: ALL USES OTHER THAN THE PRESCRIBED APPLICATION AUTOMATICALLY RELEASE SOLÉ S.A. FROM LIABILITY FOR DAMAGES THAT MAY ENSUE. In any event, the use of products other than those agreed upon at the time of purchase RELEASES SOLÉ... -
Page 19: After-Sales Service Contact
c) The warranty covers reasonable costs of travel required to carry out the necessary operations. The travel distance is limited to 300 kilometers in conjunction with a travel time of 3 hours. Excluded from coverage: a) If Solé Diesel products are installed and used alongside other products not designed or manufactured by Solé... -
Page 20: Section 2 Transport, Handling And Storage
Section 2 Transport, Handling and Storage 2.1 Receipt When the genset is delivered make sure that the packing has not been damaged during transport and that it has not been tampered with or that components inside the packing have been removed (see information marked on covers, bases and cartons). -
Page 21: Transporting And Handling The Unpacked Genset
DETAIL B Fig. 12. 8 GTC / 10 GTAC / 7 GSC / 8 GSAC lifting eyebolts Fig. 13. 11 GTC / 14 GTAC / 10 GSC / 12 GSAC / 17 GTC / 20 GTAC / 14 GSC / 17 GSAC lifting eyebolts... -
Page 22: Storage Of Packed And Unpacked Genset
2.4 Storage of Packed and Unpacked Genset If the genset is left idle for prolonged periods, the client must check the possible conditions of conservation in relation to the place of storage. If the genset is unused for prolonged periods and stored, observe all the relative technical specifications. -
Page 23: Section 3 Installation
Continuously Temporary 8 GTC / 10 GTAC / 7 GSC / 8 GSAC / 11 GTC / 14 GTAC / 25º 30º (Max. 30 min.) 10 GSC / 12 GSAC / 17 GTC / 20 GTAC / 14 GSC / 17 GSAC Table 4. -
Page 24: Prestart Checklist
3.3 Prestart Checklist Follow these checks and inspections to ensure the correct genset operation. In addition, some checks require verification after unit starts. AIR CLEANER: Check for a clean and installed air cleaner element to prevent unfiltered air from entering the genset. AIR INLETS: Check for clean and unobstructed air inlets. -
Page 25: Section 4 Operation
Section 4 Operation 4.1 Starting Genset OPEN THE SEACOCK. Before starting the genset, open the seacock to allow cooling water passage. Failure to do so could damage the seawater pump impeller and cause serious engine overheating damage. PUSH THE START BUTTON of the MAIN / DOUBLE SCO 10 panel. -
Page 26: Genset Operation At Low Temperatures
4.3 Genset Operation at Low Temperatures Whenever the atmospheric temperature drops below zero, the following series of circumstances occur: The cooling liquids may freeze. The oil becomes thicker. There is a drop in the voltage at the battery terminals. ... -
Page 27: Restoration Of Operational Conditions
4. Renew and refill the heat exchanger to the maximum level with a mixture of fresh water and anti-freezing agent. 5. Renew the oil in the engine. 6. Cover the air intake. 7. If the fuel tank is small, empty it completely and clean it; fill it up again with a mixture of diesel and anti-corrosion additive. -
Page 28: Section 5 Systems And Scheduled Maintenance
Section 5 Systems and Scheduled Maintenance 5.1 Operating Description In order to carry out the scheduled maintenance it is necessary to remove some covers. For this reason, all covers are shown in the following figures. Fig. 15. Genset covers Information of special tools required and basic safety precautions. Disassembly: ... -
Page 29: Fig. 16. Location Of Genset Elements 8 Gtc / 10 Gtac / 7 Gsc / 8 Gsac
16 Starter motor 8 Valves 17 Alternator 12/24V INLET AND EXHAUST SYSTEM 18 Belt 9 Air filter 19 Relay emplacement ALTERNATOR 20 Main alternator Fig. 16. Location of genset elements 8 GTC / 10 GTAC / 7 GSC / 8 GSAC... -
Page 30: Fig. 17. Location Of Genset Elements 11 Gtc / 14 Gtac / 10 Gsc / 12 Gsac / 17 Gtc / 20 Gtac / 14 Gsc / 17 Gsac
8 (INSIDE THE COVER) Detail A LUBRICATION SYSTEM COOLING SYSTEM 1 Oil filter 10 Sea water pump 2 Oil drain plug 11 Coolant water pump 3 Dipstick 12 Coolant drain plug (engine) FUEL SYSTEM 13 Coolant drain plug (heat exchanger) 4 Fuel feed pump 14 Heat exchanger 5 Fuel filter... -
Page 31: Periodic Maintenance Schedule
5.2 Periodic Maintenance Schedule The maintenance and fault diagnostic procedures involve risks that may cause severe injury or even death. These procedures should therefore be carried out solely by qualified electrical and mechanical specialists. Before any maintenance and cleaning work, make sure that there are no moving parts, that the generator housing has cooled to ambient temperature, that the electricity generating set cannot be accidentally started up and that all procedures are strictly observed. -
Page 32: General
Intervals 1st 20h- Every Every Every Every Every 2 Inspection Item Daily Winter storage and Preservation 200h 400h 800h year years Screw tightening, fastening. Engine block. General Valve clearance. Exhaust gas, noise and vibrations. Compression pressure. Genset oil. Lubrication System* Oil filter. -
Page 33: Maintenance Task. Screw Tightening, Fastening
Crank angle Injection sequence 8 GTC / 10 GTAC / 7 GSC / 8 GSAC / 1 – 3 – 2 240º 11 GTC / 14 GTAC / 10 GSC / 12 GSAC 1 –... -
Page 34: Maintenance Task. Compression Pressure Inspection
If the rocker arms move, No. 1 piston is at TDC on the intake or exhaust stroke. In such a case, turn the crankshaft 360º in the direction of engine rotation again. No.1 piston is now at TDC on the compression stroke. -
Page 35: Lubrication System
8 GTC / 10 GTAC / 2,84 to 3,14 MPa 2,45 MPa 0,25 MPa 250 to 280 rpm 7 GSC / 8 GSAC (29 to 32 kgf/cm (25 kgf/cm (2,5 kgf/cm 11 GTC / 14 GTAC / 10 GSC /12 GSAC /... -
Page 36: Oil Specifications
See the table enclosed for modification level in dipstick. Decrease High level (H) to E, in case of 8 GTC / 10 GTAC / 7 GSC / 8 GSAC, on original oil dipstick. And, increase High level (H) to D, in case of 11 GTC / 14 GTAC / 10 GSC / 12 GSAC / 17 GTC / 20 GTAC / 14 GSC / 17 GSAC. -
Page 37: Maintenance Task. Oil Fill / Change
DIMENSION D GENSET INCLINATION (11 GTC / 14 GTAC / (17 GTC / 20 GTAC / 10 GSC / 12 GSAC) 14 GSC / 17 GSAC) 4º 7,6 mm 3 mm 8º 14 mm 6,3 mm 12º 21,5 mm 8,7 mm 16º... -
Page 38: Maintenance Task. Oil Filter Change
NOTICE Never overfill. Overfilling may result in white exhaust smoke, genset overspeed or internal damage. MAINTENANCE TASK. OIL FILTER CHANGE The oil filter is located under inlet manifold of the engine. Remove oil filter with a belt wrench. When fitting a fresh oil filter, smear a small quantity of oil into the annular seal and firmly tighten it with the hand. -
Page 39: Maintenance Task. Fuel Level Inspection
MAINTENANCE TASK. FUEL LEVEL INSPECTION Periodically, it is necessary to check the fuel level to assure the operation of the genset. On top of that, if fuel pump sucks air when the fuel level is lower than pump suction, it could break. Whenever possible, keep the fuel tank full. -
Page 40: Maintenance Task. Injector Inspection
The presence of exhaust smoke color. Procedure: quickly accelerate engine. Criteria: no remarkably black smoke exhaust, and correct function of fuel cut-off solenoid Any leaks at the body injection pump or fuel lines. MAINTENANCE TASK. INJECTOR INSPECTION To check the injection pressure of injectors (opening pressure) you have to follow these steps: Washer 1. -
Page 41: Maintenance Task. Bleeding Air From The Fuel System
7. If the nozzle is bad, remove the tip from the nozzle and wash needle valve and body in clean washing solution. And if the nozzle is still bad after the tip has been washed, replace the tip. When installing the new tip, remove synthetic resin film from the tip and slide the needle valve in the body in clean diesel fuel to wash off inhibitor completely. -
Page 42: Cooling System
Fig. 34. Coolant Coolant Circuit Capacity (l) 8 GTC / 10 GTAC / 7 GSC / 8 GSAC 11 GTC / 14 GTAC / 10 GSC / 12 GSAC 6,25 17 GTC / 20 GTAC / 14 GSC / 17 GSAC Table 13. -
Page 43: Maintenance Task. Coolant Check
package labels. It is advisable select the anti-freezing agent concentration based on a temperature approx. 5ºC under the actual atmospheric temperature. Other genset coolants may affect warranty coverage, cause an internal build-up of rust and scale and/or shorten genset life. NOTICE Never mix different types of coolants. -
Page 44: Maintenance Task. Seawater Filter Inspection
MAINTENANCE TASK. SEAWATER FILTER INSPECTION It is important to install a seawater filter (supplied as accessory) between seawater cock and the seawater pump to avoid that any impurity might clog the seawater circuit or seawater pump. To clean this filter: 1. -
Page 45: Inlet And Exhaust System
5.7 Inlet and Exhaust System EXHAUST CIRCUIT DESCRIPTION There are two possible installations of the exhaust system. You need to check the distance between water injection point and waterline to decide which type of installation you need. This information is specified in the following drawings. The elements included in the drawing are essential for the correct genset operation: Waterlock (supplied as accessory) to prevent seawater from entering inside the genset when it stops. -
Page 46: Maintenance Task. Air Filter Inspection
W.L. L = MAX. 3000 mm Fig. 41. Installation type 2 when between water injection point of wet exhaust and waterline there is less than 150 mm or the point of injection is below waterline WET EXHAUST / DRY EXHAUST The wet exhaust is the genset’s standard equipment. -
Page 47: Electrical System
1500 rpm (50 Hz) 1800 rpm (60 Hz) Panel reference Panel reference 7 GSC / 8 GSAC 60939230S 60939230S.18 7 GSC / 8 GSAC (24V) 60939230.2S 60939230.2S.18 10 GSC / 12 GSAC 60972230S 60972230S.18 10 GSC / 12 GSAC (24V) 60972230.2S... -
Page 48: Battery
12 V 24 V 8 GTC / 10 GTAC / 7 GSC / 8 GSAC 11 GTC / 14 GTAC / 10 GSC / 12 GSAC / 17 GTC / 20 GTAC / 14 GSC / 17 GSAC Table 16. Recommended battery capacity CIRCUIT PROTECTION AC Breaker interrupts the genset output in the event of an overload or short circuit. -
Page 49: Maintenance Task. Starter Motor Inspection
Rated voltage – Current 12 V 9,7 – 10,5 A Fig. 45. Glow plug behavior MAINTENANCE TASK. STARTER MOTOR INSPECTION STARTER MOTOR: 1. Check if there is any impurity in pinion teeth. 2. Make sure that the pinion shaft turns freely when turned in the direction of driving (clockwise) and it is locked when turned in the opposite direction. -
Page 50: Maintenance Task. Battery Level
MAINTENANCE TASK. BATTERY LEVEL Battery requires a very careful handling and frequent checking. Proceed as shown below: 1. Keep battery dry and cleaned. 2. Check terminal cleanliness regularly. If dust is settled, terminals should be loosened, cleaned and smeared with a neutral grease layer. 3. -
Page 51: Maintenance Task. Cleaning And Lubrication
NOTICE A bearing lifespan is closely linked to the working conditions and environment. Long periods of sustained vibrations can damage the bearing balls and their seat. Too high humidity can emulsify the grease and encourage corrosion. Intense vibrations caused by the motor or bad alignment of the components in the genset put the bearing under stresses that will reduce its lifespan. - Page 52 GENSET FAILURE PROBABLE CAUSES RECOMMENDED ACTIONS SECTION OFF mode Move to MAN mode. SCO 10 PANEL Replace the controller fuse. If the fuse blows again, troubleshoot the Blown fuse (red wire) controller. Battery discharged or dead Recharge or replace the battery. FAILURE TO CRANK Battery connections loose, Verify that the battery connections are correct, clean and tight.
- Page 53 GENSET FAILURE PROBABLE CAUSES RECOMMENDED ACTIONS SECTION GENERAL Governor inoperative Contact with our dealer Fuel pump faulty or clogged Check inlet of fuel pump. Fuel filter clogged Replace fuel filter. Air in fuel system Bleed fuel system. FUEL SYSTEM Injection pump incorrectly Contact with our dealer STARTS THEN STOPS Fuel outlet cock closed...
- Page 54 GENSET FAILURE PROBABLE CAUSES RECOMMENDED ACTIONS SECTION Calibrate the voltage. VOLTAGE TOO LOW IN NO ALTERNATOR (AC) Check the rpm's. LOAD CONDITIONS Check the windings. Calibrate the voltage. VOLTAGE TOO HIGH IN NO ALTERNATOR (AC) LOAD CONDITIONS Change the regulator. Calibrate the voltage.
- Page 55 GENSET FAILURE PROBABLE CAUSES RECOMMENDED ACTIONS SECTION Compression weak Check the compression. GENERAL Overload Reduce the electrical load. Faulty oil pump Contact with our dealer Check oil specifications (oil used must be chosen according to Technical LUBRICATION Oil viscosity too high Specifications).
-
Page 56: Table 20. Toubleshooting
GENSET FAILURE PROBABLE CAUSES RECOMMENDED ACTIONS SECTION Oil pressure relief valve Contact with our dealer sticking LUBRICATION OIL PRESSURE TOO HIGH SYSTEM Faulty oil pressure valve Contact with our dealer GENERAL Valve clearance incorrect Contact with our dealer Fuel filter clogged Contact with our dealer Fuel injectors dirty or faulty Contact with our dealer Water in fuel system... - Page 57 U_ 3002_EN Rev. 2...
- Page 58 Rev. 2...
- Page 59 TABLE OF CONTENTS Introduction to the SCO 10 1.1 Safety Instructions General Description 2.1 Technical Data Power Supply Operating Conditions Dimensions and weight Installation 3.1 Remote SCO 10 3.2 Isolation transformers (IG-MTU unit) Operator Interface SCO 10 4.1 Display Screens and Pages Structure 4.1.1 Measurement 4.1.2 Setpoint.
-
Page 60: Introduction To The Sco
1. Introduction to the SCO 10 The SCO 10 is a control and protection panel used for generating sets; it shows the settings measured on its displays. The Unit is designed for easy use, for both installer and end-user alike. 1.1 Safety Instructions Remote control SCO 10 controller can be remotely controlled. -
Page 61: General Description
2. General Description 2.1 Technical Data Power Supply Voltage supply 12/24V DC Consumption 0,080A at 12V DC 0,051A at 24V DC Allowed supply voltage drop-out 100ms from min. 10V, return to min. 8V Battery voltage measurement tolerance 2 % at 24V Hint: Short-term voltage drops (e.g. -
Page 62: Installation
3. Installation The controller is to be mounted onto the switchboard door. Requested cutout size is 175x115mm. Use the screw holders delivered with the controller to fix the controller into the door as described on the pictures below. Then, it is necessary to connect male connector (engine installation wire) to female connector (SCO 10) Rev. -
Page 63: Remote Sco
3.1 Remote SCO 10 The first step to install the remote SCO 10 is to Connect the communication wire from main SCO 10 to REMOTE SCO 10 as is specified in wiring diagrams. The black wire in REMOTE SCO 10 communication wire end must be connected to earth. -
Page 64: Isolation Transformers (Ig-Mtu Unit)
3.2 Isolation transformers (IG-MTU unit) To connect the isolation transformers (IG-MTU unit), first of all, you have to disconnect the male and female connectors located behind the SCO 10 panel. Then, connect the male connector from the SCO 10 panel to the female connector from the IG-MTU unit, and connect the female connector from the SCO 10 panel to the male connector from the IG-MTU unit. -
Page 65: Operator Interface Sco
4. Operator interface SCO 10 GENSET CONTROL BUTTONS POSITION BUTTON DESCRIPTION START button. Works in MAN mode only. Press this button to initiate the start sequence of the engine. STOP button. Works in MAN mode only. Press this button to initiate the stop sequence of the genset. - Page 66 POSITION BUTTON DESCRIPTION MODE RIGHT button. Use this button to change the mode. The button works only if the main screen with the indicator of currently selected mode is displayed. Note: inputs Remote OFF, Remote MAN, Remote AUT. GENSET OPERATION INDICATORS POSITION DESCRIPTION Genset failure.
-
Page 67: Display Screens And Pages Structure
4.1 Display Screens and Pages Structure The displayed information is structured into "pages" and "screens". Use PAGE button to switch over the pages. 1. The Measurement page consists of screens which display measured values like voltages, current, oil pressure etc., computed values like genset power, statistic data and the alarm list on the last screen. -
Page 68: Setpoint. Controller Information Screen
If the panel is more than 5 seconds 4.1.2 Setpoint. Controller information screen in a screen, it returns to initial screen automatically. In this case, you must begin all the procedure again. Rev. 2... -
Page 69: Setpoint. Maintenance Hours Change
4.1.3 Setpoint. Maintenance hours change When the following warning appears in the Alarm list screen of SCO 10: First of all you must carry out the maintenance tasks according to the Maintenance task table, attached in the end. You also can consult this information in the Warranty manual. Then, you must accept the alarm (press FAULT RESET button) and put the 200 hours to the next maintenance period, in accordance with these instructions: Press PAGE... -
Page 70: Setpoint. Entering The Password
4.1.4 Setpoint. Entering the password To obtain the password, it is necessary to contact with Solé Diesel: tec.dpt@solediesel.com +34 93 775 14 00 +34 93 775 30 13 (Fax) Rev. 2... -
Page 71: History Log
4.1.5 History log... -
Page 72: Alarm List
4.2 Alarms List Active unconfirmed alarm Active confirmed alarm Alarm deactivation 4.3 Display Contrast Adjustment Rev. 2... -
Page 73: Change Language
4.4 Change language If the panel is more than 5 seconds in a screen, it returns to initial screen You must follow these steps to change the panel language. automatically. In this case, you must begin all the procedure again. Hold ENTER button and, at the same time, press PAGE button. -
Page 74: Alarm Management
5. Alarm Management The following alarms are available: Sensor Fail Warning Shut down 5.1 Sensor Fail (FLS) Sensor Fail is detected when the measured value is 6 percent out of range. Controller screen displays in this case string ##### instead of the measured value. 5.2 Warning (WRN) When warning comes up, any measured value is lower/greater than setpoint. -
Page 75: Setpoints
6. Setpoints 6.1 Basic Settings CT Ratio [ /5A] Genset phases current transformers ratio. Step: 1 A Range: 1 – 5000 A / 5A Controller Mode [OFF, MAN, AUT] Equivalent to Controller mode changes by MODE→ or ←MODE buttons 6.2 Engine Protections Horn Timeout Max time limit of horn sounding. -
Page 76: Date/Time
IOM AI1/2/3/4 Del [s] Delay for IOM ANALOG INPUT 1 to 4 alarm. Step: 1 s Range: 0 - 900 s Hint: IG-IOM/IGS-PTM analog inputs protection alarms can be configured the following way: Configuration Protection Under Protection is activated only when measured value is under measured level. -
Page 77: Sms/E-Mail
Timer1/2 Repeat [NONE/MONDAY/TUESDAY/WEDNESDAY/ THURSDAY/WEDNESDAY/FRIDAY/SATURDAY/ SUNDAY/MON- FRI/MON-SAT/MON-SUN/SAT-SUN] Defines TIMER 1 activation. Binary output TIMER 1 is internally linked with Rem Start/Stop binary input. Refer to binary inputs for details. NONE: Timer function is disabled MONDAY, TUESDAY, WEDNESDAY, THURSDAY, WEDNESDAY, FRIDAY, SATURDAY, SUNDAY: Timer is activated on daily basis. -
Page 78: Function Description
Hint: The target address (GSM phone number or e-mail address) must be set correctly to the setpoint(s). Event Msg Tel No/Addr Ch1 / 2 SMS Language 7. Function Description OFF Mode No start of the genset is possible. Out STARTER and FUEL SOLENOID are not energized. No reaction if buttons START, STOP are pressed. - Page 79 ShutDowns Shut-down alarm activated Ready Genset is ready to run Cooling Genset is cooling before stop EmergMan Emergency Manual genset operation ELECTRIC STATE MACHINE MinStabTO Minimal Stabilization Timeout MaxStabTO Maximal Stabilization Timeout...
- Page 80 LIST OF POSSIBLE EVENTS Information Events on binary Protection type Description specification output available Oil Pressure Measured value is lower than setpoint. Oil Pressure SD . Measured value is lower than setpoint. Coolant temp. Measured value is greater than setpoint. Coolant temp.
- Page 81 8.1 History file SCO 10 stores a record of each important event into the history file. The history file seats 117 records. When the history file is full, the oldest records are removed. RECORD STRUCTURE Abbreviation Historical value Number of historical event Reason Event specification Date...
-
Page 82: Maintenance
9. Maintenance 9.1 Backup battery replacement The internal backup battery should be replaced approx. every 5-7 years. Replace the battery if the alarm Low BackupBatt occurs. Follow these instructions: 1. Disconnect all terminals from the controller and remove the controller from the switchboard. 2. -
Page 83: Connection Description
85 GTC/ 100 GTAC 60994400S / 60994400S.18 115 GTC/ 120 GTAC 60994401S/ 60994401S.18 1-PHASE Name SCO 10 Reference 7 GSC/ 8 GSAC 60939230S/ 60939230S.18 10 GSC/ 12 GSAC 60972230S/ 60972230S.18 14 GSC/ 17 GSAC 60973230S/ 60973230S.18 19 GSC/ 23 GSAC 60971230S/ 60971230S.18... -
Page 84: Sensors And Switches Specifications
11. Sensors and Switches specifications COOLANT TEMPERATURE SENSOR: Operating voltage: 6-24V Operating current: <85mA, Pmax<0.25W Operating temperature: -40°C to +120°C Measuring range: -40°C to +120°C Absolute max. value: 130°C, max. 1 min. Protection: BODY IP 67 Tightening torque: Max. 20Nm FUNCTION TABLE TEMPERATURE RESISTANCE... - Page 85 COOLANT TEMPERATURE SENSOR SPECIFICATIONS (TWO POLE): Operating voltage: 6-24V Operating current: <85mA, Pmax<0.25W Operating temperature: -40°C to +120°C Measuring range: -40°C to +120°C Absolute max. value: 130°C, max. 1 min. Protection: BODY IP 67 Tightening torque: Max. 20Nm FUNCTION TABLE TEMPERATURE RESISTANCE TOLERANCE...
- Page 86 OIL PRESSURE SWITCH: Operating voltage: 12V Operating power: 5W Operating pressure: 0.98bar (CLOSE CIRCUIT) TEMPERATURE SWITCH (TWO POLE) Operating voltage: 6-24V Operating power: Max 100W Operating temperature: 96°C ±3°C (CLOSE CIRCUIT) OIL PRESSURE SWITCH (TWO POLE): Operating voltage: 6-24V Operating current: <0.5A Operating pressure: 0.4bar±0.15bar (CLOSE CIRCUIT) Rev.
- Page 87 DESDE PANEL DE CONTROL AUXILIAR FROM AUXILIARY CONTROL PANEL OPT. MODULO COMUNICACIÓN / COMUNICATION MODULE VIOLETA OPT. NEGRO ROJO 120 Ω 120 Ω ROSA VERDE GREEN ROJO-BLANCO VERDE VERDE-BLANCO GREEN WHITE VERDE-BLANCO AMARILLO AMARILLO YELLOW BLANCO AZUL ROSA PINK GRIS MARRON GRIS MARRON...
- Page 88 DESDE PANEL DE CONTROL AUXILIAR FROM AUXILIARY CONTROL PANEL OPT. MODULO COMUNICACIÓN / COMUNICATION MODULE VIOLETA OPT. NEGRO ROJO 120 Ω 120 Ω ROSA VERDE GREEN ROJO-BLANCO VERDE VERDE-BLANCO GREEN WHITE VERDE-BLANCO AMARILLO AMARILLO YELLOW BLANCO AZUL ROSA PINK GRIS MARRON GRIS MARRON...
- Page 89 DESDE PANEL DE CONTRO L AUXILIAR FROM AUXILIARY CONTROL PANEL OPT. MODULO COMUNICACIÓN / COMUNICATION MODULE VIOLETA OPT. NEGRO ROJO 120 Ω ROSA VERDE GREEN ROJO-BLANCO VERDE VERDE-BLANCO GREEN WHITE VERDE-BLANCO AMARILLO AMARILLO YELLOW BLANCO AZUL ROSA PINK GRIS MARRON GRIS MARRON NEGRO...
- Page 90 DESDE PANEL DE CONTROL AUXILIAR FROM AUXILIARY CONTROL PANEL OPT. MODULO COMUNICACIÓN / COMUNICATION MODULE VIOLETA OPT. NEGRO ROJO 120 Ω 120 Ω ROSA VERDE GREEN ROJO-BLANCO VERDE VERDE-BLANCO GREEN WHITE VERDE-BLANCO AMARILLO AMARILLO YELLOW BLANCO AZUL ROSA PINK GRIS MARRON GRIS MARRON...
- Page 91 DESDE PANEL DE CONTROL AUXILIAR FROM AUXILIARY CONTRO L PANEL OPT. MODULO COMUNICACIÓN / COMUNICATION MO DULE VIOLETA OPT. NEGRO ROJO 120 Ω 120 Ω 120 Ω 120 Ω ROSA VERDE GREEN ROJO-BLANCO VERDE VERDE-BLANCO GREEN WHITE VERDE-BLANCO AMARILLO AMARILLO YELLOW BLANCO AZUL...
- Page 92 DESDE PANEL DE CO NTROL AUXILIAR FROM AUXILIARY CONTROL PANEL OPT. MODULO COMUNICACIÓN / COMUNICATION MODU LE VIOLETA OPT. NEGRO ROJO 120 Ω 120 Ω 120 Ω 120 Ω ROSA VERDE GREEN ROJO-BLANCO VERDE VERDE-BLANCO GREEN WHI TE VERDE-BLANCO AMARILLO AMARILLO YELLOW BLANCO...
- Page 93 FROM AUXILIARY CONTROL P ANEL DESDE PANEL DE CONTROL AUXILIAR OPT. MODULO COMUNICACIÓN / COMUNICATION MODULE VIOLETA OPT. NEGRO ROJO 120 Ω 120 Ω ROSA VERDE GREEN ROJO-BLANCO VERDE VERDE-BLANCO GREEN WHITE VERDE-BLANCO AMARILLO AMARILLO YELLOW BLANCO AZUL ROSA PINK GRIS MARRON GRIS...
- Page 94 FROM AUXILIARY CONTROL PANEL DESDE PANEL DE CONTROL AUXILIAR OPT. MODULO COMUNICACIÓN / COMUNICATION MODULE VIOLETA OPT. NEGRO ROJO 120 Ω 120 Ω 120 Ω 120 Ω ROSA VERDE GREEN ROJO-BLANCO VERDE VERDE-BLANCO GREEN WHITE VERDE-BLANCO AMARILLO AMARILLO YELLOW BLANCO AZUL ROSA PINK...
- Page 95 DESDE PANEL DE CONTROL AUXILIAR FROM AUXILIARY CONTROL PANEL OPT. MODULO COMUNICACIÓN / COMUNICATION MODULE VIOLETA OPT. NEGRO ROJO 120 Ω 120 Ω 120 Ω 120 Ω ROSA VERDE GREEN ROJO-BLANCO VERDE VERDE-BLANCO GREEN WHITE VERDE-BLANCO AMARILLO AMARILLO YELLOW BLANCO AZUL ROSA PINK...
- Page 96 DESDE PANEL DE CONTROL AUXILIAR FROM AUXILIARY CONTROL PANEL OPT. MODULO COMUNIC ACIÓN / COMUNICATION MODULE VIOLETA OPT. NEGRO ROJO 120 Ω 120 Ω 120 Ω 120 Ω ROSA VERDE GREEN ROJO-BLANCO VERDE VERDE-BLANCO GREEN WHITE VERDE-BLANCO AMARILLO AMARILLO YELLOW BLANCO AZUL ROSA...
- Page 97 DESDE PANEL DE CONTROL AUXILIAR FROM AUXILIARY C ONTROL PANEL OPT. MODULO COMUNICACIÓN / COMUNICATION MODULE VIOLETA OPT. NEGRO ROJO 120 Ω 120 Ω ROSA VERDE GREEN ROJO-BLANCO VERDE VERDE-BLANCO GREEN WHITE VERDE-BLANCO AMARILLO AMARILLO YELLOW BLANCO AZUL ROSA PINK GRIS MARRON GRIS...
- Page 98 DESDE PANEL DE CONTROL AUXILIAR FROM AUXILIARY CONTROL PANEL OPT. MODULO COMUNICACIÓN / COMUNICATION M ODULE VIOLETA OPT. NEGRO ROJO 120 Ω 120 Ω 120 Ω 120 Ω ROSA VERDE GREEN ROJO-BLANCO VERDE VERDE-BLANCO GREEN WHITE VERDE-BLANCO AMARILLO AMARILLO YELLOW BLANCO AZUL ROSA...
- Page 100 U_ 3002_EN Rev. 2 Rev. 2...
- Page 101 7.2 Genset Dimensions...
- Page 102 176.5 SEA WATER OUTLET (Ø20) (ONLY DRY EXHAUST) SEA WATER INLET (Ø20) FUEL INLET (Ø8) Note: Dimensions inmillimeters FUEL OUTLET (Ø6) 8 GTC / 10 GTAC / 7 GSC / 8 GSAC GENSET MATERIAL ACABADO PRESENTACIÓN ESCALA TRATAMIENTO DIBUJADO FECHA CREACIÓN VERIFICADO ÚLTIMA REVISIÓN...
- Page 103 (USE ONLY FOR A REFERENCE) VIEW E 387.5 107.5 8 x Ø16 MOUNTING HOLES VIEW D VIEW C FIRE EXTINGUISHER GENERATOR AIR INLET ACCESS HOLE AC BREAKER STAR/STOP SWITCH EMERGENCY STOP CUSTOMER LOAD LEAD ACCESS CUSTOMER PANEL CONNECTION EQUIPMENT GROUND CONNECTION BATTERY CONNECTIONS 105.5...
- Page 105 7.3 Alternator’s Connections...
- Page 108 7.4 Regulator’s Connections...
- Page 111 7.5 Electrical Wiring Drawings...
- Page 116 7.6 Tightening Torques...
- Page 117 Important bolts and nuts 7 GSC / 8 GSAC / 8 GTC / 10 GTAC TIGHTENING VALUES THREAD N · m (kgf · m) Cylinder head 73.5 to 83.4 (7.5 to 8.5) Rocker cover 4.9 to 6.9 (0.5 to 0.7) Crankshaft pulley 98.1 to 117.7 (10.0 to 12.0)
- Page 118 7.7 Instructions for decommissioning, scrapping and disposal...
- Page 119 When you decide to decommission the genset, please contact SOLÉ S.A., we will provide you with the relevant instructions in relation to the laws in force at the time. When scrapping the entire genset or components of the genset, observe the LAWS IN FORCE IN THE COUNTRY OF INSTALLATION.
- Page 120 U_ GBAV_EN, U_GBMV_EN, U_ GBBA_EN, U_GBNA_EN, U_ GCAS_EN, U_GCMS_EN, U_ GCAW_EN, U_GCMW_EN, U_ GDAT_EN, U_GDMT_EN, U_ GDAX_EN, U_GDMX_EN Rev. 3...
Need help?
Do you have a question about the 7 GSC and is the answer not in the manual?
Questions and answers