Table of Contents
Advertisement
Quick Links
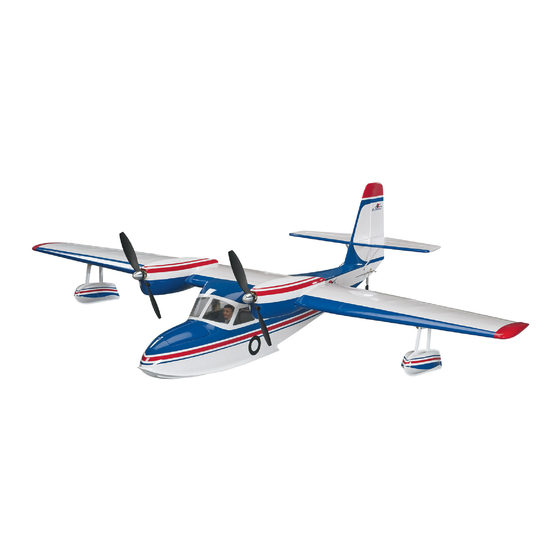
Wingspan: 51 in [1295 mm]
Wing Area: 373 in
Wing Loading: 25−28 oz/ft
Length: 36 in [915mm]
WARRANTY
Great Planes Model Manufacturing
be free from defects in both material and workmanship at the
date of purchase. This warranty does not cover any component
parts damaged by use or modification. In no case shall Great
Planes' liability exceed the original cost of the purchased kit.
Further, Great Planes reserves the right to change or modify this
warranty without notice.
In that Great Planes has no control over the final assembly or
material used for final assembly, no liability shall be assumed nor
accepted for any damage resulting from the use by the user of
the final user-assembled product. By the act of using the
user-assembled product, the user accepts all resulting liability.
If the buyer is not prepared to accept the liability associated
with the use of this product, the buyer is advised to return
READ THROUGH THIS MANUAL BEFORE STARTING CONSTRUCTION. IT CONTAINS IMPORTANT
INSTRUCTIONS AND WARNINGS CONCERNING THE ASSEMBLY AND USE OF THIS MODEL.
®
Entire Contents © 2011 Hobbico,
Inc. All rights reserved.
®
2
2
[24.1 dm
]
2
2
[76− 85 g /dm
]
Co. guarantees this kit to
®
Weight: 4− 4.5 lb
[1810 −2040 g]
Radio: 4 channel
transmitter & receiver
with four servos
this kit immediately in new and unused condition to the
place of purchase.
To make a warranty claim send the defective part or item to
Hobby Services at the address below:
Include a letter stating your name, return shipping address, as
much contact information as possible (daytime telephone
number, fax number, e-mail address), a detailed description of
the problem and a photocopy of the purchase receipt. Upon
receipt of the package the problem will be evaluated as quickly
as possible.
INSTRUCTION
MANUAL
SPECIFICATIONS
Motor: RimFire
™
two 25 amp ESCs
& two 8 × 6 props
Battery: 3200 mAh 3S,
11.1 V 20C battery
Hobby Services
3002 N. Apollo Dr. Suite 1
Champaign IL 61822 USA
Champaign, Illinois
(217) 398-8970, Ext 5
airsupport@greatplanes.com
400 (28-30-950),
GPMA1151 v1.1
Advertisement
Table of Contents

Related Manuals for GREAT PLANES G-44 widgeon


Summary of Contents for GREAT PLANES G-44 widgeon
- Page 1 3002 N. Apollo Dr. Suite 1 Champaign IL 61822 USA In that Great Planes has no control over the final assembly or material used for final assembly, no liability shall be assumed nor Include a letter stating your name, return shipping address, as...
-
Page 2: Table Of Contents
Follow These Important Safety Precautions site at www.greatplanes.com. Open the “Airplanes” link, then 1. Your G-44 Widgeon EP should not be considered a toy, select the Great Planes G-44 Widgeon EP ARF. If there is but rather a sophisticated, working model that functions very new technical information or changes to this model a “tech... -
Page 3: Decisions You Must Make
❍ 2 oz. [57g] spray CA activator (GPMR6035) ❍ Mixing sticks (50, GPMR8055) This is a partial list of items required to fi nish the Great Planes G-44 Widgeon EP that may require planning or decision ❍ Mixing cups (GPMR8056) making before starting to build. -
Page 4: Kit Inspection
● When you see the term test fi t in the instructions, it means To locate a hobby dealer, visit the Great Planes web site at www.greatplanes.com. Select “Where to Buy” in the menu that you should fi rst position the part on the assembly... -
Page 5: Kit Contents
KIT CONTENTS 1. Fuselage 8. Rudder 15. Top Nacelles 2. Cockpit Floor 9. Right Wing and Aileron 16. Bottom Nacelles 3. Sponsons 10. Motor Mounts 17. Wing Center Section 4. Spinners 11. Left Wing and Aileron 18. Wing Joiners 5. ESC Extensions 12. -
Page 6: Preparations
PREPARATIONS Tighten the Covering Refer to the separate instruction sheet titled How To Tighten Covering On ARF Models. Follow the instructions to tighten the covering. If you prefer to get started on assembly right away, the tightening process could be done later (but it is ❏... -
Page 7: Install The Aileron Servos And Join The Wing Panels
each motor to the motor mounts with three 4-40 x 1/4" [6mm] screws for each of the motors. Be sure to apply a couple of drops of thread locker to each of the screws before installing them. ❏ 5. Locate the 1/8" x 3/4" [3mm x 19mm] wood dowels. Glue them into the holes in the leading edge of the wing, making sure that approximately 1/2"... - Page 8 ❏ ❏ 2. Place your servo onto the plywood plate, making sure the servo fi ts through the hole in the aileron cover. Adjust the size of the hole in the servo cover as needed to fi t your brand of servo. When you are satisfi...
- Page 9 ❏ ❏ 10. Use tape to hold the ailerons in the neutral position. Make a mark on the pushrods where they cross the outer holes in the servo arms. Make a 90 degree bend at the mark on the pushrods and cut off the excess pushrod 1/4" [5mm] beyond the bend.
-
Page 10: Install The Motor Nacelles And Sponsons
Install the Motor Nacelles and Sponsons ❏ ❏ 1. Each nacelle is composed of a top and bottom half. Apply a bead of R/C Z 56 to the inside fl ange on the bottom nacelle. Move quickly to the next step. ❏... -
Page 11: Assemble The Fuselage
❏ ❏ 4. Install two 1/8" x 3/8" [3mm x 9.5mm] screws into the sponson and through the mounting tabs in the wing. Tighten a 1/8" [3mm] nylon lock nut onto the screws to secure the sponson. ❏ ❏ 3. Secure the top and bottom nacelle by screwing the 4-40 x 1-3/4"... - Page 12 described below for safely cutting the covering. If you do not have a hot knife use a sharp hobby knife, carefully cutting the covering from the stab. Important! Be sure you cut only through the covering and not into the stab. How to Cut Covering from Balsa A = A' B = B'...
- Page 13 ❏ 6. On the bottom of the stab and the side of the fuselage you will fi nd pre-drilled holes for stab supports. Install and then remove a 5/64" x 1/4" [2mm x 6mm] screw into each of the four holes. Apply a couple of drops of thin CA into the holes to harden the threads.
- Page 14 Tighten the screws into the nylon control horn plate on the top of the elevator. ❏ 10. Apply a couple of drops of thin CA onto the top and the bottom of the four elevator hinges. Make sure the glue saturates the hinges and fl...
-
Page 15: Install The Servos, Receiver And Speed Controls In The Fuselage
❏ 17. Apply a couple of drops of thread locker onto one of the 1/8" [3mm] set screws and install it into the aluminum coupler. Slide the water rudder into the coupler and tighten the set screw against the fl at spot on the water rudder. ❏... - Page 16 speed control be sure to feed the three motor leads and the signal lead back through the bulk head and into the area of the servos. Repeat this on the opposite side of the fuselage for the other speed control. ❏...
- Page 17 ❏ 9. From the 8" [203mm] adhesive backed Velcro cut a piece approximately 3-1/2" [89mm] long. Place the more rigid half of the Velcro onto the plywood (the fuzzy side of the Velcro will be applied to the battery). Insert the non-adhesive Velcro strip through the slots in the plywood plate.
-
Page 18: Final Assembly
receiver. Make sure the controls are all centered and moving the correct direction. If you have any question about the direction the surfaces should move refer to the instructions on page 20 of this manual. When you are satisfi ed that the radio system is set up properly, place the receiver on the Velcro ®... - Page 19 Glue the blocks where shown in the photo. They should be located just below the ABS plastic window insert. ❏ 6. You may wish to install a pilot. We used a Williams Brothers 1/8 scale Sportsman Pilot (WBRQ1130). Glue the pilot on the plastic fl...
-
Page 20: Apply The Decals
Battery Precautions We recommend the ElectriFly “Power Series” Lithium To ensure a successful fi rst fl ight, set up your G-44 Widgeon Polymer Battery (GPMP0623). The 3200mAh 3S, 11.1 EP according to the control throws specifi ed in this manual. -
Page 21: Balance The Model (C.g.)
2. With the wing attached to the fuselage, all parts of the model installed (ready to fl y) and an empty fuel tank, place the Right & Left Right & Left model on a Great Planes CG Machine, or lift it at the balance 5/8" 1" point you marked. -
Page 22: Balance The Model Laterally
C.G. after the weight has been installed. We use a Top Flite ® Precision Magnetic Prop Balancer (TOPQ5700) in the workshop and keep a Great Planes Balance the Model Laterally Fingertip Prop Balancer (GPMQ5000) in our fl ight box. ❏... -
Page 23: Radio Control
❏ 2) I will not fl y my model aircraft higher than approximately 2. Be certain the battery and receiver are securely mounted 400 feet within 3 miles of an airport without notifying the in the fuse. Simply stuffi ng them into place with foam rubber airport operator. -
Page 24: Flying
FLYING establish a gentle climb to a safe altitude before turning into the traffi c pattern. The Great Planes G-44 Widgeon EP is a great-fl ying model that fl ies smoothly and predictably. The G-44 Widgeon EP does Flight not, however, possess the self-recovery characteristics of a primary R/C trainer and should be fl...
Need help?
Do you have a question about the G-44 widgeon and is the answer not in the manual?
Questions and answers