La Spaziale S1 Vivaldi II Owner's Manual
Double boiler espresso machine
Hide thumbs
Also See for S1 Vivaldi II:
- Owner's manual (30 pages) ,
- Owner's manual (32 pages) ,
- Instruction manual (8 pages)

Related Manuals for La Spaziale S1 Vivaldi II


Summary of Contents for La Spaziale S1 Vivaldi II
- Page 1 La Spaziale S1 Vivaldi II Double Boiler Espresso Machine Owner’s Manual (Covers VII’s with and w/o Enhanced Temperature Offset and Programmable Preinfusion) Last Updated on 11/24/2008 to fix broken links...
-
Page 2: Table Of Contents
S1 Vivaldi II Owner’s Manual Table of Contents Feature Overview ..................... 1 Reference Photos ....................1 Basic Machine Operation ..................3 15A or 20 Amp Operation ................. 3 Initial Installation Before Connecting Power ............3 ... -
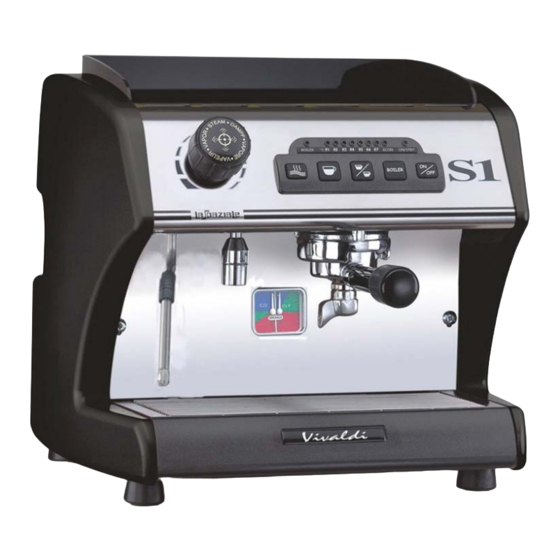
Page 3: Feature Overview
S1 Vivaldi II Owner’s Manual 1 Feature Overview Dual Boiler Steam Boiler 2.5 liter Steam Boiler Element 1250 Watts Group Boiler .45 liter Group Boiler Element 800 Watts Direct Plumbed tary Pump lumetric Dosing Adjustable Through Touch Pad roup Temperature Indicated by lamp Display Group Temperature Adjustable in 1°C Increments Through Touch Pad... - Page 4 S1 Vivaldi II Owner’s Manual Label Function Label Function Label Function Label Function Cup Warming On/Standby Drip Tray 92°C Lamp Tray Lamp Hot Water Steam Arm Control Panel 93°C Lamp Button Single Cup Rubber Feet Group 94°C Lamp Button Steam/Group...
-
Page 5: Basic Machine Operation
S1 Vivaldi II Owner’s Manual 3 Basic Machine Operation (BOLD = lamps, Reverse = buttons, numbers in parentheses reference to above table) 3.1 15A or 20 Amp Operation The LaSpaziale VII is available in 15A and 20A versions. In actuality, they are both identical machines. -
Page 6: Turning On And Heating The Machine
S1 Vivaldi II Owner’s Manual Be sure you connect the included water hose to the threaded water inlet on the bottom of the machine. Proper connection is ob vious since there is only one place it can attach. The opposite end of the hose - w hich connects to the water supply - may require adapters from your local hardware store depending on your specific situation. -
Page 7: Espresso Brewing
S1 Vivaldi II Owner’s Manual WARNING!! To activate and deactivate the boiler mode press the BOILER (26) button. Every t you turn on the machine, the boiler is in service. When the boiler is turned off, it is impossible to use hot water for infusions or steam delivery. -
Page 8: Hot Water Delivery
Steam boiler on and off 2. Entry and exit of Economy mode There are three possible operational m odes of the two boilers in the La Spaziale VII 20A model: 1. Both boilers are completely independent, turning on and off according to the needs of each. -
Page 9: V1/Vii Mode Switch
S1 Vivaldi II Owner’s Manual 3. The BOILER button can also be used to switch in and out of Economy mode. In this mode only one boiler can be on at a time. The VII automatically controls which is on according to demand with preference going to the group boiler. This is useful for thos e owning the 20A model but lacking a 20A circuit. -
Page 10: Espresso Group Water Temperature Regulation
S1 Vivaldi II Owner’s Manual 3.10 Espresso Group Water Temperature Regulation 3.10.1 Standard Temperature Adjustment 1. When the machine is On (ON/STBY solid green), press the button ON//OFF (27) and keep it pressed for 3 seconds, the control light (22) and the one concerning the set temperature start flashing. - Page 11 S1 Vivaldi II Owner’s Manual To Which Machines Do These Instructions Apply? Instructions are given in the two sections b elow both. This first is for machines with the original offset adjustment. The section that follows is for machines with the extended temperature offset adjustment.
- Page 12 S1 Vivaldi II Owner’s Manual 3.10.2.2 Extended Temperature Offset Adjustment Start with the machine in Standby mode (ON/STBY blinking green). Press and hold the BOILER button for about 10 seconds until the Boiler light and the ON/STBY light start flashing. You are now in the temperature offset programming mode.
-
Page 13: Programmable Preinfusion
S1 Vivaldi II Owner’s Manual See table below: Offset 91ºC 92ºC 93ºC 94ºC 95ºC 96ºC 97ºC ECON Lamp Lamp Lamp Lamp Lamp Lamp Lamp Lamp 0ºC ±1ºC ±2ºC ±3ºC ±4ºC ±5ºC ±6ºC ±7ºC ±8ºC 3.11 Programmable Preinfusion Note: only machines purchased or upgraded after 7/1/08 have this feature. -
Page 14: Alarm Handling
S1 Vivaldi II Owner’s Manual 4 Alarm Handling he VII u s comp rized s ors to r ustly ha le VII d evic e malf tions. are two typ es of ala s the V can gen Blocking Alarms –... -
Page 15: Connection Diagrams
S1 Vivaldi II Owner’s Manual 5 Connection Diagrams 5.1 Electrical Connection Diagram Page 13... -
Page 16: Control Board Connection Diagram
S1 Vivaldi II Owner’s Manual 5.2 Control Board Connection Diagram 5.3 Triac Board Connection Diagram BOILER TRIAC BD GROUP TRIAC BD (Cooling Fan is below this board and runs only when boiler is heating) Page 14... -
Page 17: Control Panel Connection Diagram
S1 Vivaldi II Owner’s Manual 5.4 Control Panel Connection Diagram 5 Wiring Diagram Definitions EV GR Coffee brewing group solenoid valve EV H Hot water delivery solenoid valve EV AL Automatic refill system solenoid valve Connection on control board of the triac that feeds the boiler heating element... -
Page 18: Water Flow Diagram
S1 Vivaldi II Owner’s Manual 6 VII Water Flow Diagram The information below is provided strictly as a reference for VII owners who are curious about the function of their VII Dual Boiler design. Page 16... -
Page 19: Adjustments And Maintenance
S1 Vivaldi II Owner’s Manual 7 Adjustments and Maintenance .1 External VII Surface Cleaning Use a damp sponge and wipe dry with a soft cloth. Alternately, window cleaner wiped off with a dry soft cloth works well. 7.2 Routine Group Cleaning The extra pair of shower screens was not included with your VII so you'd have an extra set. -
Page 20: Group Pressure Test And Adjustment
S1 Vivaldi II Owner’s Manual 7.3 Group Pressure Test and Adjustment This adjustment and the one covered in the next section require that use of a Portafilter with the rubber disk or blind filter basket. (The same one used for back flushing.) For clarity the portafilter is not shown in the photo but it MUST be used. -
Page 21: Expansion Valve Release Adjustment
S1 Vivaldi II Owner’s Manual 7.4 Expansion Valve Release Adjustment This procedure starts by removing the chrome front panel as in the above procedure and also requires the portafilter with rubber disk or blind filter basket. 1. Adjust the group pressure to 12.5 bar per the following instructions: a) Loosen lock nut "A"... -
Page 22: Quick Setting Guide
S1 Vivaldi II Owner’s Manual 9 Quick Setting Guide Page 20...
Need help?
Do you have a question about the S1 Vivaldi II and is the answer not in the manual?
Questions and answers