Satel CA-10 Installer Manual
Alarm control panel
Hide thumbs
Also See for CA-10:
- Programming manual (60 pages) ,
- User manual (26 pages) ,
- Quick user manual (12 pages)
Table of Contents
Advertisement
Quick Links
Advertisement
Table of Contents

Subscribe to Our Youtube Channel
Related Manuals for Satel CA-10


Summary of Contents for Satel CA-10
- Page 1 INSTALLER MANUAL GDAŃSK ca10i_e 01/05...
- Page 2 (+48 58) 320-94-00 fax. (+48 58) 320-94-01 Product description: Mainboard for CA-10 control panel intended for use in intruder alarm systems. This product meets the essential requirements and is in conformity with following EU Directives: LVD 73/23/EEC+93/68/EEC EMC 89/336/EWG + 91/263/EEC, 92/31EEC, 93/68/EEC R&TTE 1999/5/EC (network connection, TBR21)
-
Page 3: Table Of Contents
Connection of Voice Synthesizer ..................25 Connection of Printer or Computer..................25 Connection of Power Supply ....................26 Description of electrical connections to the CA-10 OBU housing..............27 Control panel power-up starting procedure ....................27 Starting the Control Panel ....................27 Hardware Access to the Service Mode ................28 Programming the Control Panel from the Computer ............ -
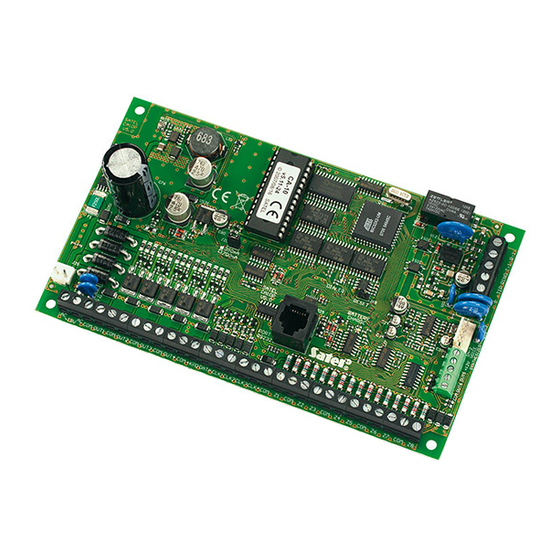
Page 4: General Description Of The Control Panel
The CA-10 alarm control panel is a state-of-the-art, microprocessor-based alarm control panel, developed in accordance with the latest trends in the field of burglary and assault signaling. Its comprehensive features and affordable price permit application of the CA-10 both in small and medium-size alarm systems. -
Page 5: Technical Description Of The Control Panel
TECHNICAL DESCRIPTION OF THE CONTROL PANEL Zones In its basic configuration, the CA-10 control panel has 10 zones: 8 on the panel main board and 2 in the keypad. In its full configuration, with four keypads (or an expander), the panel has 16 zones available. - Page 6 Installer Manual SATEL 8 - 24H audible - armed all the time, irrespective of whether the partition it is assigned to is armed, or not. Each violation of this zone will trigger alarm on the BURGLARY ALARM type outputs, in the keypad, and will send a “zone alarm” code. It makes possible to create anti-tampering circuits and panic buttons.
-
Page 7: Outputs
For each zone can be determined the 9 event codes to be sent to the monitoring stations. Outputs The CA-10 is equipped with 6 programmable outputs: 4 high-current and 2 low-current ones. The OUT1, OUT2, OUT3 and OUT4 outputs are protected by special electronic fuses with current limiters set at 2.2A. - Page 8 Installer Manual SATEL the alarm is cleared by the user. During operation, it can every second change its state (pulsate). 4 - keypad alarm - the output starts on detecting any keypad alarm (FIRE, PANIC, AUX., keypad tamper alarms). The output operation can be limited to the alarms from specified partitions.
- Page 9 CA-10 Installer Manual restricted to specified partitions. The output can remain active for a time from 01 to 99 seconds or from 01 to 99 minutes. 13 - switch BI (ON/OFF) - the output changes its state when the user function 8 is called or a code with authority level 6 is used.
-
Page 10: Partitions
41 - battery test result - the output whose state is updated after each battery voltage test. Partitions Creation of a partition consists in assigning at least 1 zone to it. The CA-10 permits 4 partitions to be created. Any outputs, telephone numbers and pager messages can be assigned to one partition, thus enabling four independent alarm systems to be built on the basis of one CA-10 control panel. -
Page 11: Access Codes And Authority Levels
The partitions have individual identifiers and event codes for monitoring purposes. Access Codes and Authority Levels The CA-10 panel can store in memory 32 access codes (4 to 6 digits long), with different authority levels. The codes are associated with the partitions they are assigned to. The each partition has a MASTER code. -
Page 12: Keypads
LED Keypad There are three types of LED keypads available to interface with the CA-10 panel, which have the following designations: CA-10 KLED, CA-10 KLED-M and CA-10 KLED-S. In LED keypads the status of partitions and zones is indicated by means of LEDs (the CA- 10 KLED keypad can display the status of up to 12 zones). -
Page 13: Monitoring
(see section: Activating selected functions). Monitoring The CA-10 control panel can transmit information about the system (partition) status to one or two monitoring stations. Communication with the monitoring stations takes place irrespective of the voice messaging and the messaging to paging systems. It has a priority and is realized before the voice messaging. -
Page 14: Dialer
Dialer The CA-10 control panel is equipped with a telephone dialer, which enables an alarm voice message to be transmitted. The message is stored in an external synthesizer. The control panel directly interfaces with the SM-2 voice synthesizer. -
Page 15: Remote Programming - Downloading
Operation with the computer can be realized in two ways: in the „local mode” by means of the RS-232 interface (after connecting the CA-10 directly to one of the computer COM ports), or in the „remote mode”, via the telephone line (in this case the computer must be equipped with a modem). -
Page 16: Installation Of The Control Panel
Installer Manual SATEL 3. Establishing of communication from the control panel by calling the user function 0 (zero). The control panel first notifies the monitoring station that the programming has started (when monitoring is active), then it dials the computer telephone number. - Page 17 16V AC. The CA-10 main board can be connected to an electric shock protection circuit (grounding). The protective cable terminal is designated by the symbol.
- Page 18 The telephone line must be of a four-wire type so that the control panel can be connected before the other equipment (telephone, fax, etc.). The CA-10 control panel should be installed in an enclosed space with normal humidity of air. The space should be fitted with an available permanent (not detachable) 230V power supply circuit with protective grounding.
-
Page 19: Connection Of Keypads
The control panel can operate both with LCD and LED keypads in any configuration. Notes: • We recommend keypads: CA-10 LED M v1.2 and CA-10 LED S v1.2 or newer to be used, because older keypads LED M and LED S may work incorrect with keypad LCD v3.08 (and next version). - Page 20 +KPD CLK DATA Z1 COM Z2 Figure 4. View of the CA-10KLCD Figure 3. View of the CA-10KLED keypad board. keypad board. anti-tampering contact RS-232 buzzer Figure 5. View of the CA-10KLCD-L keypad board. The CA-10 KLCD-S board only differs in its outside dimension.
- Page 21 CA-10 Installer Manual DESCRIPTION OF TERMINALS KEYPAD PANEL +KPD anti-tampering contact DATA buzzer CLK1 or CLK2 or CLK3 or CLK4 Z2 Z1 COM DATA CLK +KPD keypad adress Z1 – to Additional jumpers detector system Z2 – to zones detector Figure 6.
-
Page 22: Setting Keypad Addresses
Installer Manual SATEL COM +KPD DATA CLK1 CKL2 CLK3 CKL4 Control panel main board zone 9 zone 10 Partition keypad +KPD CLK DATA zone 11 zone 12 Partition keypad +KPD DATA zone 13 zone 14 Partition keypad +KPD DATA Figure 8. Connection of three keypads to the control panel. -
Page 23: Connection Of Zone Expander
• third and fourth – if the expander is connected to CLK3; • fourth – if the expander is connected to CLK4. Connection of Detectors The CA-10 can operate with any type of detectors. Each zone of the control panel can work in the configuration: • NC (normally closed), •... -
Page 24: Connection Of Signaling Devices
Figures 10 & 11 show how the signaling devices should be connected. The CA-10 panel can control signaling devices of any kind. Each of the panel outputs can perform any of 41 different functions. Therefore, the system is very flexible and can suit... - Page 25 CA-10 Installer Manual almost every application. If there are signaling devices installed in the system, the alarm function will have to be assigned to corresponding outputs. +12 V LIMITER LIMITER LIMITER LIMITER LIMITER 1.5A 2.2A 2.2A 2.2A 2.2A OUT1 OUT3...
-
Page 26: Connections Of Telephone Line
Installer Manual SATEL NR2-DSC transmitter socket CA-10 (PGM) low-current outputs (TAKT) connector output OUT5 output OUT6 to battery "+" DB-15 fuse WTAT250V/2A to mainboard AC contact to ground contact COM (next to contact OUT1) Figure 12. Connection of NR2-DSC controlled transmitter, made by NOKTON s.c. -
Page 27: Connection Of Voice Synthesizer
RS-232 port is linked to the J24 connector. The control panel RS-232 port also enables the panel to be connected to the computer. For programming the CA-10 control panel via the RS-232 serial port you can use a cable identical to that used for the CA-64 panel. -
Page 28: Connection Of Power Supply
Installer Manual SATEL DB-25 TO CONTROL PANEL TO COMPUTER panel DSR comp. DTR panel RTS comp. CTS panel RXD comp. TXD panel TXD comp. RXD DB-9 (connector on (female connectors as control panel board) seen from soldering points side) Serial port RS-232 Fig.15. -
Page 29: Description Of Electrical Connections To The Ca-10 Obu Housing
CA-10 Installer Manual Description of electrical connections to the CA-10 OBU housing 1. Connect the 230V alternating voltage leads to the transformer terminals marked "AC 230V". 2. Connect the output voltage wires of the transformer secondary winding to the "AC"... -
Page 30: Hardware Access To The Service Mode
Installer Manual SATEL Upon entering the default service code [1][2][3][4][5] and confirming it with the [#] key, the control panel will enter the service mode. The ALARM and ARMED LEDs (PARTITION in the LCD keypad) will be blinking alternately. Now, you can proceed to programming the control panel. -
Page 31: Programming The Control Panel From The Computer
CA-10 Installer Manual 5. Enter from keypad the code: [1][2][3][4][5] (the code should be entered within 15 seconds) and confirm by pressing the [#] or [ * ] key. Programming the Control Panel from the Computer Programming the control panel from the computer via the RS-232 port should be initiated by calling the service mode and the FS112 communication function in the control panel. -
Page 32: Reporting To Telephone Monitoring Station
Installer Manual SATEL Note: You should also program in FS95 what kind of message will be sent - if no message is selected for the pager, the control panel will notify with a voice message from the voice synthesizer. When the above parameters are correctly programmed and the alarm is triggered, the on- board LED (designated as „DIALER”) should go on, which indicates that the panel has... - Page 33 CA-10 Installer Manual identifiers composed from digits from 0 to 9 - then character “A” is to be programmed instead of digit “0” (e.g. “A1A2” instead of “0102”. At least three identifiers should be programmed (can be identical): − zone identifier, −...
-
Page 34: Downloading - Telephone Communication With The Computer
7 and 8 in FS-47, which makes the panel omit the codes unacknowledged in 16 consecutive retries. Problems of this type do not occur in professional, multi-format monitoring stations (including the Satel STAM-1). Downloading - Telephone Communication with the Computer Telephone communication with the computer requires a modem. -
Page 35: Programming The Lcd Keypad From The Computer
FS101 – number of rings before answer – if communication is to be initiated from the computer • start the DLOAD10 program, select the CA-10 control panel (CA10v1, 2, 3, 4) - program version 4 corresponds to the CA-10 panel, e.g. by opening the data of such a panel and, select the “MODEM”... -
Page 36: Remote Programming - Dload10
The DLOAD10 program delivered with the control panel is designed for programming the CA- 5, CA-6 and CA-10 panels, as well as the RX2K, RX4K radio controllers and GSM-4 module, from the computer. Additionally, the program makes it possible to create documentation of alarm systems, sets of settings for various configurations ("patterns"... -
Page 37: Program Configuration For Communication With The Panel
CA-10 Installer Manual A HELP system is provided which facilitates operating of the program, as well as the very programming of control panel parameters. The system is accessible from the „HELP” menu, or by pressing the F1 key on computer keyboard. To get an instant access to more detailed information, first select the required element in the program window (by moving the mouse pointer to and left-clicking on it), and then press the F1 key. - Page 38 Installer Manual SATEL Figure 16. Dialog boxes in DLOAD10 program. In order to start communication through the RS port, follow the instructions contained in section „Programming the control panel from the computer”. The modem communication can be started by clicking on the icon (or selecting the „MODEM”...
-
Page 39: Default Settings
CA-10 Installer Manual Calling the function of reading the control panel data (icon ) after the communication has been established may speed up the subsequent process of saving the changes made in the control panel programming. DEFAULT SETTINGS Control panel configuration (restore with FS 107 function): •... -
Page 40: Technical Data
Spacing of mainboard mounting holes............162.6x91.5mm Housing dimensions ................... 305x305x85 mm LED keypads Supply voltage ....................12V DC ±15% Current consumption min/max................35/90mA Dimensions: CA-10 KLED ................145x78x27mm CA-10 KLED-M ................. 72x112x22mm CA-10 KLED-S ................80x95x21mm LCD keypads Supply voltage ....................12V DC ±15% Current consumption min/max.. - Page 41 An efficient security system does not prevent burglary, assault or fire from happening, however it diminishes the risk that such a situation will cause no alarm or notification. Therefore, the SATEL Company recommends that operation of the whole security system be regularly tested.
- Page 42 (description of detectors (description of signaling connection on p. 21) transformer 17...24V AC devices connection on p. 22) keypads terminals (description of keypads connection on p. 17-20) CA-10 Control Panel connection diagram (detailed description of main board terminals - see p. 14).
- Page 43 History of the manual updates. Described in the table below are changes as compared with the manual for the CA-10 control panel with firmware in version 4.9. Date Version Introduced changes Supplemented information on battery cables (p. 16) and the Note regarding connection of the other devices to the control panel power supply (p.
Need help?
Do you have a question about the CA-10 and is the answer not in the manual?
Questions and answers