Table of Contents
Advertisement
Quick Links
Advertisement
Chapters
Table of Contents
Troubleshooting

Related Manuals for JLG 10VP


Summary of Contents for JLG 10VP
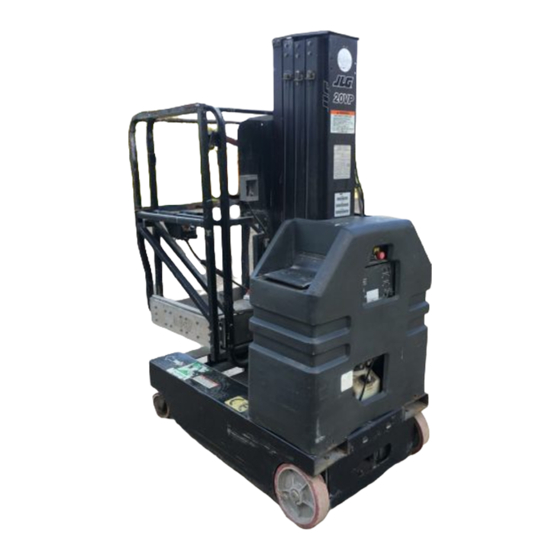
- Page 1 Service and Maintenance Manual Model 10VP 15VP 20VP 3120728 June 14 2001 ANSI...
- Page 3 TRIES, INC. OR THE LOCAL AUTHORIZED JLG DISTRIBUTOR FOR INFORMATION CONCERNING SAFETY RELATED BULLE- TINS WHICH MAY HAVE BEEN ISSUED FOR YOUR JLG PRODUCT. ALL ITEMS REQUIRED BY THE SAFETY RELATED BULLETINS MUST BE COMPLETED ON THE AFFECTED JLG PRODUCT.
- Page 4 This page left intentionally blank.
- Page 5 2. Relieve system pressure by activating the lift DOWN control with the platform completely lowered to direct any line pressure back into the return line to the reservoir. Pressure feed lines to system compo- nents can then be disconnected with minimal fluid loss. 3120728 – JLG Lift –...
- Page 6 INTRODUCTION - MAINTENANCE SAFETY PRECAUTIONS This page intentionally left blank – JLG Lift – 3120728...
- Page 7 October 19, 2000 – Revised – Pages Affected:Section-2, Pages 2-20 thru 2-22 also 2-32 and 2-33. Section-3, Page 3-16, added Table 3-3. November 15, 2000 – Revised – Pages Affected:Section-1, Page 1-1 Section-2, Pages 2-33 & 2-34. June 14, 2001 – Revised – Pages Affected:Section-2, Pages 2-23 thru 2-25 3120728 – JLG Lift –...
- Page 8 EFFECTIVITY PAGE This page intentionally left blank – JLG Lift – 3120728...
-
Page 9: Table Of Contents
Base Frame Components Troubleshooting ......... .3-42 3120728 – JLG Lift –... - Page 10 10VP Mast Assembly........
- Page 11 Pot Hole Protection (PHP) Bars Will Not Set......... .3-42 3120728 – JLG Lift –...
- Page 12 TABLE OF CONTENTS This page intentionally left blank – JLG Lift – 3120728...
-
Page 13: Maintenance
20VP – .049 cu. in./rev. (0.8cc/rev ) Extendible) Pump Output (Max.) – 10 & 15VP - 1.20 gpm @ 2200 psi 10VP –350 lbs. (160 kg) 20VP – 0.65 gpm @ 2200 psi 15VP –350 lbs. (160 kg) Hydraulic System Pressure Setting –... -
Page 14: Torque Requirements
+20°F (–7°C) JLG recom- mends using Mobil DTE 13 hydraulic oil. 10VP –16 ft. 6 in.(4.8m) Aside from JLG recommendations, it is not advisable to 15VP –21 ft.(6.4m) mix oils of different brands or types, as they may not con- 20VP –25 ft. -
Page 15: Hydraulic Pressure Adjustment
Pressure Gauge Installation. mast, just above the mast support bracket. Select a T-Fitting to exactly match the thread size of the pump (.562 x 18 THD), pressure line (.562 x 18 THD) and gauge fitting as required. 3120728 – JLG Lift –... -
Page 16: Torque Chart
SECTION 1 - SPECIFICATIONS Figure 1-3. Torque Chart. – JLG Lift – 3120728... -
Page 17: Lubrication Chart
3. Prior to checking hydraulic oil level, operate machine through one complete cycle of lift function (full up and down). Failure to do so will result in incorrect oil level reading on the hydraulic reservoir. 3120728 – JLG Lift –... - Page 18 SECTION 1 - SPECIFICATIONS This page intentionally left blank – JLG Lift – 3120728...
-
Page 19: Section 2 - Service Procedures
Lubricate new or used serviceable bearings before instal- lation. When pressing a bearing into a retainer or bore, At any time when oil lines are disconnected, clear adja- cent areas as well as the openings and fittings them- 3120728 – JLG Lift –... -
Page 20: Chain Stretch Tolerance
Fatigue and ultimate of baking soda and water. Rinse with clean water. After strength failures on JLG Lifts are incurred as a result of cleaning, thoroughly dry batteries and coat terminals with severe abuse as design specs are well within the rated lift- an anti-corrosion compound. -
Page 21: Lubrication Information
The design and manufacturing tolerances of the compo- quency rates of operation, and exposure to shock loads. nent working parts are very close, therefore, even the smallest amount of dirt or foreign matter entering a system 3120728 – JLG Lift –... -
Page 22: Positioning Lift For Access To Components Located Under The Base Frame
Hydraulic Oil 3. When lifting with a fork truck, lift only using the fork For best performance, JLG recommends the use of ISO- lift-truck pockets running the length of the machine’s Vg grade 32, 46 oil with a viscosity range between 15-250 base frame from rear to front. -
Page 23: Drive Motor Component Service Procedures
Check for any debris wedged in or wrapped CLUTCH around the clutch coupling chains and axle LOCATION shafts. Remove debris and clean area if neces- sary. Figure 2-2. Check Torque Limit Clutch - Torque Setting. 3120728 – JLG Lift –... -
Page 24: Torque Limit Clutch - Adjustment Components
MOUNTING PLATE FRICTION ARMATURE ADJUSTING NUT BRAKE PLATE DISK SET SCREWS TORQUE LIMIT CLUTCH ADJUSTING NUT SPRINGS SHIM WASHERS (AS REQUIRED) SPACER Figure 2-3. Torque Limit Clutch - Adjustment Components. Figure 2-4. Brake Assembly Components – JLG Lift – 3120728... -
Page 25: Brake Armature Plate & Brake Disk Adjustment
(brakes off) manually the screw head pulls in against the magnetic coil housing. Clean and remove debris the armature plate releasing the friction brake disk. as necessary. 3120728 – JLG Lift –... -
Page 26: Manual Release Brake Cable Adjustment
4. Lift the machine to gain access to the underside (See Section 2-4., "Positioning Lift For Access To Components Located Under The Base Frame"). 5. Reconnect the brake coil and brake limit switch wir- ing connectors to their respective wiring harness connectors. – JLG Lift – 3120728... -
Page 27: Drive Motor Assembly Removal
(2 EACH INSIDE FORK LIFT POCKET) DRIVE MOTOR MOUNT MANUAL PLATE FASTENERS RELEASE (THREE ON EACH MOUNT ALSO SEE INSET) BRAKE CABLE DRIVE MOTOR COVER DRIVE MOTOR MOUNT PLATE REAR PLATE WELDMENT Figure 2-7. Drive Motor Assembly Removal. 3120728 – JLG Lift –... -
Page 28: Drive Motor Gear Box Assembly
12. Lower the drive assembly and place on a suitable work surface. 1. Remove the drive motor/gear box/brake assembly from the machine using the procedure outlined pre- viously in this section of the manual. Figure 2-8. Drive Motor Gear Box Assembly. 2-10 – JLG Lift – 3120728... -
Page 29: Gear/Pinion Shaft Assembly
Keep the (brass) gear key for reuse during assembly. 10. Inspect the drive shaft seal for cuts, cracks and wear, or if showing signs of leakage. Replace if nec- essary. WORM GEAR Figure 2-9. Gear/Pinion Shaft Assembly. 3120728 – JLG Lift – 2-11... - Page 30 (smaller) bearing into it’s seat first, while wiggling PINION GEAR PINION GEAR KEY SPACER 42mm x 25mm x 12mm BEARING DRIVE SHAFT SIDE PROFILE 42mm x 20mm x 14mm BEARING Figure 2-10. Drive Shaft Assembly. 2-12 – JLG Lift – 3120728...
-
Page 31: Drive Motor Brush Location
DO NOT use solvents as they my damage non-metallic parts and adversely affect subse- quent brush commutation. SPRING BRACKET PIGTAIL WIRE Figure 2-12. Drive Motor Brush Installation. 3120728 – JLG Lift – 2-13... - Page 32 LOWEST BRUSH NOISE LEVEL. box. 7. Now release the spring bracket and check that it is lying flat against the brush box wall. If it is "cocked" it is improperly seated and will have to be reinstalled. 2-14 – JLG Lift – 3120728...
-
Page 33: Platform Control Box Service Procedures
TOUCH PAD ENABLE TOUCH PAD SWITCH) SWITCH UPPER HOUSING INTREGRATED CIRCUIT BOARD LOWER SPEED HOUSING CONTROL KNOB EMERGENCY STOP SWITCH BUTTON SPEED CONTROL SWITCH EMERGENCY STOP SWITCH Figure 2-14. Platform Control Box Assembly (Exploded View) 3120728 – JLG Lift – 2-15... - Page 34 (4) nuts from the studs on the bottom of the control box. 5. Unplug the wiring harness cable connector on the back of the lower housing half. 6. Lay control box mount and wiring harness assembly aside. 2-16 – JLG Lift – 3120728...
-
Page 35: Platform Control - Circuit Board Component Wiring Connections
TOUCHPAD JOYSTICK WIRING SWITCH WIRING (2 WIRES) CONNECTOR (5 WIRES) (Later Models With SOCKET Enable Button On Knob Only) SPEED CONTROL SWITCH (3 WIRES) Figure 2-15. Platform Control - Circuit Board Component Wiring Connections. 3120728 – JLG Lift – 2-17... - Page 36 J5. (See Fig- ure 2-15.) Unsolder the three (3) wires to the switch YELLOW to remove the switch from the platform box. CIRCUIT BOARD BLUE BLACK COMPONENT SIDE WHITE WIRES FROM JOYSTICK CONTROL 2-18 – JLG Lift – 3120728...
- Page 37 3. Remove the adhesive backing off the new touch pad switch, keep this surface clean and free of debris during assembly. 4. Assemble the new touch pad switch to the upper housing surface by first sliding the ribbon cable con- 3120728 – JLG Lift – 2-19...
-
Page 38: Battery Charger Assembly And Disassembly
ERS CHARGER MANUAL. The VP Series battery charger allows for replacement of the following internal components. Consult your Illustrated Parts Manual for part numbers of these components which are available from the JLG Parts Department: WIRING HARNESS • Transformer CONNECTOR SOCKET •... - Page 39 2. Remove the four nuts from the cap screws securing the transfromer brackets to the base of the charger chassis. 3. Remove transformer. 3120728 – JLG Lift – 2-21...
- Page 40 LOCKING TABS 2-22 – JLG Lift – 3120728...
-
Page 41: Hydraulic Lift Cylinder - Removal, Inspection And Rebuild
Scratching the groove may cause by-pass. 8. Remove and discard all old seals. 3120728 – JLG Lift – 2-23... - Page 42 The roughness of the bore should be between 10 and 20 µ inches RMS. Significant variation (greater than 8 µ inches difference) are unacceptable. In the event that an unacceptable condition occurs, the tube assembly should be repaired or replaced. 2-24 – JLG Lift – 3120728...
- Page 43 WIPER CYLINDER TUBE ASSEMBLY LOCKNUT (Torque PISTON 175-200 Ft. Lb.) WHEN ASSEMBLING CYLINDER APPLY ANTI-SEIZE CYLINDER COMPOUND CYLINDER HEAD AROUND THE HEAD IN THIS AREA ONLY Figure 2-17. Lift Cylinder Internal Component Assembly Cross-Section. 3120728 – JLG Lift – 2-25...
-
Page 44: Mast Assembly And Disassembly Procedures
SHEAVE WHEELS ARE ATTACHED) BOTTOM CLOSED RAIL (REFERS TO BOTTOM END OF (REFERS TO CLOSED RAIL MAST SECTION WHICH SETS IN BACK OF MAST SECTION) MACHINE’S BASE FRAME) Figure 2-18. Mast Section - Assembly Reference. 2-26 – JLG Lift – 3120728... - Page 45 15VP (cable actuated) & 20VP (cable/chain 21. Remove the hydraulic cylinder through BOTTOM of actuated) lifts. If servicing a 10VP mast, go to step mast section-2, be careful not to nick or score cylin- der rod surface while removing.
- Page 46 SECTION 2 - SERVICE PROCEDURES Figure 2-19. 10VP Mast Assembly. 2-28 – JLG Lift – 3120728...
- Page 47 SECTION 2 - SERVICE PROCEDURES Figure 2-20. 15VP Mast Assembly. 3120728 – JLG Lift – 2-29...
- Page 48 SECTION 2 - SERVICE PROCEDURES Figure 2-21. 20VP Mast Assembly. 2-30 – JLG Lift – 3120728...
- Page 49 NOTE: Top of cylinder assembly steps 12 and 13 applies to tom end of mast between section-1 and -2, (one on 20VP only. For 10VP & 15VP continue to step 14. each side of the mast), with beveled surface facing 12.
- Page 50 Attach to top of mast section-2 using two (2) 3/ NOTE: Step 23 and 24 applies to 20VP mast assembly only. 8"-16UNC x 1/2" long socket head-countersunk- 10VP and 15VP mast assembly continue at step 25. flathead cap screws each side. Coat threads with Loctite #171 and tighten.
- Page 51 28. Shim per instructions in step 7. with Loctite #171 and tighten. NOTE: Assembly of 10VP mast should now be complete. To NOTE: When sliding mast sections together, be careful not continue with 15VP assembly go to step 48. 20VP to scratch or score the anodized finish in the slide assembly continues following.
- Page 52 Check mast section for side play. If play exists use thicker shims dividing thickness equally between both sides of mast. 2-34 – JLG Lift – 3120728...
-
Page 53: Mast To Base Frame Installation
10. Before setting machine upright on base, install a short 90° elbow fitting, flow control valve and another short 90° elbow fitting on the end of the flow 3120728 – JLG Lift – 2-35... -
Page 54: Mast Chains/Cables And Sequencing Cables Adjustment
7. Retract the mast all the way and check if the top of the mast sections appear as shown in Figure 2-22. 8. Repeat steps (1) through (7) for remaining mast sec- tions. ENSURE THAT ALL CHAIN/CABLE PAIRS HAVE EQUAL TENSION. 2-36 – JLG Lift – 3120728... -
Page 55: Mast Chain/Cable/Sequence Cable Adjustment Components
Sequencing Cable Adjustment 1. Retract mast completely, and check each sequenc- ing cable on outside of masts for excessive slack. Adjust only to remove slack from cable. 3120728 – JLG Lift – 2-37... -
Page 56: Sequence Cable Replacement Kit
THE MANUFACTURER OF THE DRUM/SOCKET CLAMP RECOM- sequence cables. This kit consists of a replacement MENDS THE USE OF THEIR CABLE CLAMP ASSEMBLY KIT (JLG sequence cable with the threaded (top) end attached P/N - 7023275) TO ASSEMBLE THE CLAMP TO THE WIRE ROPE. - Page 57 NOTE: The end of the rope may not be visible in the inspec- tion hole after loading. 9. Install cable on machine and adjust per instructions shown previously in Section 2.11, MAST CHAINS/ CABLES AND SEQUENCING CABLES ADJUST- MENT. 3120728 – JLG Lift – 2-39...
-
Page 58: Preventive Maintenance And Inspection Schedule
Inspection Report” form. Forms are supplied with each inspection is to take place. Under the “AREA” portion of new machine and are also available from JLG Customer the table, the various systems along with the components Service. Form must be completed and returned to JLG that make up that system are listed. - Page 59 13. Check for evidence of scratches, nicks or rust and material. for straightness of rod. 7. Check for proper operation and freedom of move- 14. Check for condition of element; replace as neces- ment. sary. 3120728 – JLG Lift – 2-41...
- Page 60 SECTION 2 - SERVICE PROCEDURES This page intentionally left blank. 2-42 – JLG Lift – 3120728...
-
Page 61: Section 3 - Troubleshooting
NOTE: For aid in troubleshooting electrical problem, refer to Figure 3-3. for an ELECTRICAL DIAGRAM of the various circuits. Also a pictorial overview of the Section, see Figure 3-2. “Pictorial Overview of VP Electrical System”. 3120728 – JLG Lift –... -
Page 62: Led Battery/Fault Code Indicator Strip On Platform Controller Box
The fault code number is shown in the first column of the table and the number of LEDs flash- ing on the platform controller LED strip is shown in the second column of the table. – JLG Lift – 3120728... - Page 63 Properly attach pin or wire connections wire) No Tilt Switch - open circuit to ground Check ground wire connections (BLK1 wire) ---- Joystick E. Stop Counter Controller Log Only ---- Configuration Access Counter Controller Log Only 3120728 – JLG Lift –...
- Page 64 Joystick Box Replace Joystick Box Current Limiting - Motor Short Circuit - Gearmotor Replace Gearmotor defective 36v supply Replace controller Configuration Lost Reprogram using MC-1 software, if error reoccours then replace controller RAM ROM Replace controller – JLG Lift – 3120728...
- Page 65 Communication Error - Check Pins 4 & 5 at Joystick Properly attach wires or pins (Orange & Blue Wires) Defective Joystick Replace Joystick Defective Controller Replace Controller Watch Dog Replace Controller EEPROM Replace Controller Software Error Replace Controller 3120728 – JLG Lift –...
-
Page 66: Overview Of Standard Electrical System
GROUND CONTACTOR CONTROL RELAY PUMP START CONTACTOR MANUAL DUMP OVERRIDE/ VALVE LIFT DOWN EARLY VALVE DESIGN LATER DESIGN PUMP/MOTOR ASSEMBLY POT-HOLE PROTECTION LIMIT SWITCHES Figure 3-2. Overview of Standard Electrical System. (Sheet 1 of 2) – JLG Lift – 3120728... - Page 67 EXTERNAL DRIVE/HORN BRAKE RELAY RELEASE CONTACTOR RELAY WIRING BRAKE LIMIT SWITCH WIRING MOTOR/BRAKE DRIVE MOTOR ASSEMBLY POWER LEADS MOTOR/BRAKE (RIGHT SIDE) ASSEMBLY (LEFT SIDE) Figure 3-2. Overview of Standard Electrical System. (Sheet 2 of 2) 3120728 – JLG Lift –...
-
Page 68: Vp Electrical Diagram. (Vp Series - Standard)
ORN/RED 49-6 ORANGE 55-10(10) MOTOR ORN/RED 49-7 WHITE BLACK (10) X105 X101 X104 X102 X103 END VIEW OF MC-1 BOX 4932960 A SHOWING X CONNECTOR LOCATION Figure 3-3. VP Electrical Diagram. (VP Series - Standard) – JLG Lift – 3120728... - Page 69 BLACK (10) BLACK (10) KEY SWITCH BLACK GREEN 1 = PLATFORM CHARGER 2 = OFF WHITE 3 = GROUND TILT SENSOR 1.5° BLACK BLACK 4932960 A Figure 3-3. VP Electrical Diagram. (VP Series - Standard) 3120728 – JLG Lift –...
-
Page 70: Overview Of Vp Ul-Ee Approved Optional Electrical System
CONTROL CIRCUIT BREAKER PANEL PUMP START CONTACTOR MANUAL DUMP OVERRIDE/ VALVE LIFT DOWN VALVE PUMP/MOTOR ASSEMBLY POT-HOLE PROTECTION LIMIT SWITCHES Figure 3-4. Overview of VP UL-EE Approved Optional Electrical System. (Sheet 1 of 2) 3-10 – JLG Lift – 3120728... - Page 71 RELEASE CONTACTOR RELAY WIRING BRAKE LIMIT SWITCH WIRING MOTOR/BRAKE DRIVE MOTOR ASSEMBLY POWER LEADS MOTOR/BRAKE (RIGHT SIDE) ASSEMBLY (LEFT SIDE) Figure 3-4. Overview of VP UL-EE Approved Optional Electrical System. (Sheet 2 of 2) 3120728 – JLG Lift – 3-11...
-
Page 72: Vp Electrical Diagram. (With Ul-Ee Approved Option)
MOTOR 2 BRAKE 1 BRAKE 1 BRAKE2 BRAKE 2 HORN RELAY X105 X101 X104 X102 X103 END VIEW OF MC-1 BOX SHOWING X CONNECTOR LOCATION Figure 3-5. VP Electrical Diagram. (with UL-EE Approved Option) 3-12 – JLG Lift – 3120728... - Page 73 SECTION 3 - TROUBLESHOOTING MOTION ALARM BREAKER PUMP FUSE POWER RELAY KEY SWITCH BREAKER 4933134_A Figure 3-5 VP Electrical Diagram. (with UL-EE Approved Option) 3120728 – JLG Lift – 3-13...
-
Page 74: Hydraulic Diagram. (Vp Series)
COMPENSATED FLOW VALVE SOLENOID WITH MANUAL EXTEND TUBE OVERRIDE SOLENOID FILTER/SCREEN TWO POSITION/TWO WAY DUMP VALVE CHECK FILTER/ VALVE SCREEN ADJ. RELIEF VALVE PUMP MOTOR FILTER/SCREEN TANK 1282953 Figure 3-6. Hydraulic Diagram. (VP Series) 3-14 – JLG Lift – 3120728... -
Page 75: Ohm Ratings For Various Components
Pot Hole Protection (PHP) Bars Will Not Set ........3-42 3120728 – JLG Lift – 3-15... -
Page 76: Ohm Ratings For Various Components
16.0ohm - 17.6ohm @ 77deg F 9.9ohm - 21.8ohm Brake Coil 44.7ohm - 52ohm @ 68deg F 31.4ohm - 65.3ohm Drive Motor (Bodine) .1 to .3ohm (Can change depending on the rotation of the armature and temperature.) 3-16 – JLG Lift – 3120728... -
Page 77: Unit Will Not Power Up From Ground Control
With Main Contactor engaged, 24 volts or more should be present at the following terminal points; • Pump Motor - 21’ cable #1. — — — • Yel/Red, 2-6 wire on the Pump Contactor. • Yel/Red, 2-6 wires on the Lift Up/Down Relay. 3120728 – JLG Lift – 3-17... -
Page 78: No Power At Platform Control
Check voltage at the Battery Cable from Battery to Main Contactor. Check Battery 24 volts Go to Step 12 Cable Check voltage to the Yel/Red, 2-5 wire at the Main Contactor. Check Yel/Red 2- Replace Main 24 volts 5 Wire Contactor 3-18 – JLG Lift – 3120728... - Page 79 Check voltage on the Red/Blk wire, pin 9 on the Platform Control 24 volts Go to Step 16 Replace Cable box. Check for Ground on the BRN wire, pin 8 on the Platform Control Replace Platform Ground Replace Cable box. Control 3120728 – JLG Lift – 3-19...
-
Page 80: Won't Drive (Platform Lowered Or Elevated)
Go to Step 2 Connection Check for ground out of switch to the 49-5 wire. Adjust/Replace — Go to Step 3 Switch Check for ground from switch to X101, Pin 1. Repair Wire or — — Connection 3-20 – JLG Lift – 3120728... -
Page 81: Drive Motor/Circuit Check
Check for 24 volts at the 55-4 wire at the X104 connector, pin 5(for Check wiring and Problem in MC-1 right motor) and the 55-8 wire at the X103 connector, pin 5 (for left 24 volts connections box or Joystick motor). 3120728 – JLG Lift – 3-21... -
Page 82: Won't Drive With Platform Elevated
Main Con- tactor Relay Check for ground on the White to (O/R, 49-6) wire at connector. Repair connec- tion at the X101 Replace — connector end/ Tilt Sensor broken wire O/R 49-6 3-22 – JLG Lift – 3120728... -
Page 83: Php Limit Switch Circuit
Adjust/Replace — Go to Step 3 Right Switch Check for ground on O/R, 49-1 wire to MC-1 box, X105 connector, Repair connec- Adjust/Replace pin 12. — tion at the X105 Left Switch connector end 3120728 – JLG Lift – 3-23... -
Page 84: Won't Climb Grade
Check the condition of the drive motor brushes. Worn down, — OK, go to Step 6 replace brushes or drive motor If all above is OK, Drive motors are working properly. Consult Fac- — — — tory. 3-24 – JLG Lift – 3120728... -
Page 85: Drives In Opposite Direction
** Note: If platform controller is not under warranty, the internal components of the platform controller are replaceable and can be ordered and replaced seperately from the complete platform control box. See procedures in Section-2 of this Service Manual for Joystick Assembly/ Disassembly. 3120728 – JLG Lift – 3-25... -
Page 86: Only Drives A Short Distance
Service Manual) Is machine being operated in an environment with high static Machine may be charge? building static charge in the MC- — 1 controller, — which will make the drive system shut down. 3-26 – JLG Lift – 3120728... -
Page 87: E-Stop And Key Switch Circuit Check
Check voltage and continuity through the 5 amp fuse mounted inline Replace Fuse or outside of the ground control box assembly, on the Red, 1-1 wire. 24 Volts Go to Step 6 Fuse Holder if damaged Check connection at battery. 24 Volts Circuit OK 3120728 – JLG Lift – 3-27... -
Page 88: Won't Drive Straight
If possible, swap out with another platform control. Platform control Is MC-1 control box defective or connections not tight? Tighten Connec- If possible, swap out with another MC-1 control box. — tions or Replace — MC-1 box 3-28 – JLG Lift – 3120728... -
Page 89: Noise From Drive Assembly
Is the electrical signal and amperage draw to the drive motors 24 volts Recheck Steps Go to Step 7 equal? 15 amps 1 thru 5 Check the drive motor brushes, do they need replaced? Replace per — procedure in this — Service Manual 3120728 – JLG Lift – 3-29... -
Page 90: Platform Will Not Lift Up Using Platform Control
Service Manual Is the lift cylinder OK? Rebuild or — Go to Step 6 Replace Lift Cyl. Are the mast sections operating freely? Check Mast, Consult — Rebuild Factory if Necessary 3-30 – JLG Lift – 3120728... -
Page 91: Pump Circuit
24 volts Go to Step 13 tor, pin A1 for 24 volts. Connection Check the Yel/Red, 2-4 wire to the Power Relay, pin #87 for 24 Tighten/Repair 24 volts Go to Step 14 volts. Connection 3120728 – JLG Lift – 3-31... -
Page 92: Pump Valves Circuit
Tan, 4-1 wire - Ground LIFT DOWN - (CHECK WHEN NO FUNCTION ARE ENABLED ON THE PLATFORM CONTROL) Lift Down Valve Coil:Yel/Red, 2-6 wire - 24 volts — — — Tan, 4-1 wire - 24 volts 3-32 – JLG Lift – 3120728... -
Page 93: Platform Will Not Lower Using Platform Control
Check for ground on the Tan, 4-1 wire at the lift down coil. Replace/Repair — Go to Step 5 Wire or Connection Check complete pump motor circuit . (See Table 3-21) — — — 3120728 – JLG Lift – 3-33... -
Page 94: Unit Will Not Lift Up From Ground Control Toggle Switch
Check the wire from the lift switch (Tan 55-1) pump contactor to the Repair Wiring or — — battery (-) terminal for continuity. Is there continuity? Connection Check the pump motor pressure relief setting. Is it within specifica- — Set as Required tion per Service Manual? 3-34 – JLG Lift – 3120728... -
Page 95: Unit Will Not Lower From Ground Control Toggle Switch
Is there continuity? Connection Check the Yel/Red, 2-6 wire from the pump motor to the lift-down Repair Wiring or 24 volts — coil for voltage. Is there voltage? Connection 3120728 – JLG Lift – 3-35... -
Page 96: Platform Will Not Lower Manually
Go to Step 2 Open Check Steps 1 thru 6 of ( Table 3-30) Repair Go to Step 3 Place the maximum capacity of weight in the Platform. — Consult Factory Does it Lower? 3-36 – JLG Lift – 3120728... -
Page 97: Platform Lift Up And Down Jerky
Go to Step 5 HYDRAULIC Are the hydraulic valves working properly. — Replace Valve Go to Step 6 Pump drive cavitates. — Replace Pump Go to Step 7 Lift cylinder Rebuild or — — Replace Cylinder 3120728 – JLG Lift – 3-37... -
Page 98: Mast Noisy When Lifting And Lowering
Do slide pads and slide pad channels need to be cleaned of dust, Clean Pads and — Go to Step 2 dirt, or other debris? Channels Do chain/cables need to be lubricated per JLG specification in the Lubricate as — Go to Step 3 Service Manual? Required... -
Page 99: Platform (Mast) Won't Stay Elevated
Dump valve could be open due to incorrect electrical signal. Check Pump Valve Electrical — Go to Step 5 Circuit (Table 3-22) Oil could be passing around the lift cylinder bore packing. Replace or — Rebuild the Lift — Cylinder 3120728 – JLG Lift – 3-39... -
Page 100: Platform (Mast) Descends Too Slowly
Flow Valve Check if the lift down valve is opening completely. Clean or Replace — Go to Step 6 Valve Is there a restricted hydraulic line (smashed)? Replace Hydrau- — — lic Line 3-40 – JLG Lift – 3120728... -
Page 101: Hydraulic Leak Troubleshooting
— — in Pump Case Oil leaking around the (Red) manual descent valve. Replace Lift — — Down Valve Note: Do not overtighten the nut on the solenoid in steps 4, 5, and 6. 3120728 – JLG Lift – 3-41... -
Page 102: Caster Wheels Not Operating Freely
Go to Step 2 Check the PHP limit switch(s) at both sides of the machine for dam- Replace, Adjust age, adjustment and for continuity through switch to ground when — — or Repair Wiring bars are down. 3-42 – JLG Lift – 3120728... - Page 104 England Fax: (49) 421 693 5035 Fax: (61) 2 65 810122 Phone: (44) 870 200 7700 Fax: (44) 870 200 7711 JLG Latino Americana Ltda. JLG Europe B.V. JLG Industries (Norge AS) JLG Polska Rua Eng. Carlos Stevenson, Jupiterstraat 234 Sofeimyrveien 12 UI.
Need help?
Do you have a question about the 10VP and is the answer not in the manual?
Questions and answers