Table of Contents
Advertisement
Advertisement
Table of Contents

Related Manuals for Olivetti ECR 8200 S


Summary of Contents for Olivetti ECR 8200 S
- Page 1 Cash Register ECR 8200 S USER'S GUIDE...
- Page 2 PUBLICATION ISSUED BY: Olivetti S.p.A. www.olivetti.com Copyright © 2012, Olivetti All rights reserved Printed in Italy Your attention is drawn to the following actions that could Het is belangrijk te weten dat de volgende acties nadelige compromise the characteristics of the product:...
- Page 3 FIGURES - IMAGES ABBILDUNGEN - FIGURAS AFBEELDINGEN - FIGURAS FIGURER - BILDER...
- Page 4 SAFETY INFORMATION INFORMATIONS DE SECURITE SICHERHEITSVORSCHRIFTEN INFORMACIÓN DE SEGURIDAD VEILIGHEIDSINFORMATIE INFORMAÇÃO SOBRE SEGURANÇA SIKKERHEDSFORANSTALTNINGER SIKKERHETSINFORMASJON Connect the power cord to an electrical outlet that is near the product and easily accessible. Install your cash register on a flat and stable surface, at a location where no one can step on or trip over the power cord.
- Page 5 ECR Programming Utility running on acomputer that you connect to your cash register.If you wish to use this utility, download it from http://www.olivetti.com/site/public/support.asp afterselecting your cash register model from the Driver/Firmware drop-down list. Then install it on your computerby following the step-by-step instructions provided in the Installation and Reference Guide which isautomatically downloaded with the utility.
- Page 6 é executado num computador que será ligado à caixaregistadora.Se pretender usar este utilitário, poderá descarregá-lo do site http:// www.olivetti.com/site/public/support.aspapós seleccionar o modelo da sua caixa registadora na lista Driver/Firmware. Depois, instale o utilitário no seucomputador seguindo as instruções passo-a-passo fornecidas no Guia de Instalação e Referência que étambém descarregado automaticamente com o...
- Page 7 HOW DO I PROCEED? COMMENT JE DOIT PROCEDER? VORGEHENSWEISE ¿QUÉ DEBO HACER A CONTINUACIÓN? HOE GA IK TE WERK? O QUE DEVO FAZER? FREMGANGSMÅDE? HVORDAN GÅR MAN FREM? 1. Plug the cash register into a electrical outlet and insert the batteries. 2.
- Page 8 INSERTING MEMORY BACKUP BATTERIES INSÉRER LES BATTERIES TAMPONS DE LA MÉMOIRE BATTERIEN ZUR SPEICHERSICHERUNG EINSETZEN INSERCIÓN DE LAS BATERÍAS DE RESPALDO DE LA MEMORIA INSTALLEREN VAN DE BATTERIJEN VOOR NOODVOEDING INSERIR AS PILHAS DE BACKUP DA MEMÓRIA INDSÆT HUKOMMELSE BACKUP BATTERIER INSTALLERE MINNETS BACKUPBATTERIER...
- Page 9 LOADING THERMAL PAPER INSTALLATION DU PAPIER THERMIQUE EINLEGEN VON THERMOPAPIER CARGA DEL PAPEL TÉRMICO THERMISCH PAPIER PLAATSEN COLOCAR PAPEL TÉRMICO ISÆTNING AF TERMOPAPIR LADE TERMISK PAPIR...
- Page 10 DAILY JOB OPERATIONS OPÉRATIONS QUOTIDIENNES TÄGLICHE ARBEITEN OPERACIONES COTIDIANAS DURANTE EL TRABAJO DAGELIJKSE TAKEN OPERAÇÕES DIÁRIAS DAGLIGE ARBEJDSOPERATIONER DAGELIGE ARBEIDSHANDLINGER...
-
Page 11: Table Of Contents
ONTENTS Major Features ..........1 Training Clerk Logon ............32 Manager Logons ............. 32 Programmable Features ......1 Logging Off ..............32 Cash Register Components ......2 Printing Programming Reports ....33 Removable Cash Drawer and Box ........2 Training Mode ........... 33 Inserting Memory Card Storage Device ...... - Page 12 – When it to be disposed of, the device is to be taken to the equipped waste collection centres and is to be handled separately from urban waste; – Olivetti guarantees the activation of the treatment, collection, recycling and disposal procedures in accordance with Directive 2002/96/CE (and subsequent amendments).
-
Page 13: Major Features
AJOR EATURES 99 departments that can be grouped into up to 10 merchandise categories; • Up to 3,000 Price Look-Ups (PLU) with the possibility of associating a department and tax status to each; • 15 clerk numbers to monitor the sales of individual employees with programmable Clerk security system; •... -
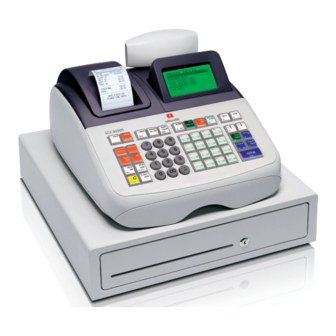
Page 14: Cash Register Components
EGISTER OMPONENTS With reference to figures 1 and 2: EMOVABLE RAWER AND 1. RJ45/USB cable for connecting a PC to the cash With reference to figure 3, the cash drawer has slots for register. banknotes and for coins. The drawer can be opened by 2. -
Page 15: Switching On For The First Time
REGISTRATION MODE PROGRAMMING MODE - Operator Display O.D. Ref. C.D. Meaning Navigation Mode. (3) n/a Receipts off - no receipts are issued Ref. (1) Data Entry Mode - Lowercase letters. until is pressed again. Ref. (1) Data Entry Mode - Uppercase letters. (3) n/a EJ nearly-full condition. -
Page 16: Cash Register Functions
EGISTER UNCTIONS The cash register functions available on the keypad are described below. Note that not all the functions provided with the cash register are available as actual keys. Some functions are provided in pop-up lists only, while others are not provided at all by default on the keypad, but can be mapped on if required using the Free Key Layout option in “Advanced Settings”. - Page 17 - In Programming mode, these keys can be used to move through the menu options and form fields in the direction indicated on the key. When the menu item required is highlighted, press to select it. When navigating forms, if line numbers are present on the left, jump to the line you want by entering its number followed by either arrow key.
-
Page 18: Unmapped Functions
- Pop-up list (2) allowing VOID and FULL VOID operations to be performed. As VOID deletes the last item entered, and corrects a particular entry after it is processed and printed. FULL VOID deletes full entries after a subtotal. - Pop-up list (1) allowing direct/percent discounts and add-on operations: As the 1% or 2% key, when appropriately programmed, applies a preset percentage reduction or add-on to the price of an item or to the sales total. - Page 19 3. [Chain Function1] to [Chain Function5] - a key sequence can be associated with a chain function to speed up and simplify repetitive operations during a sales transaction, such as registering cash payments in common denominations (£10, £20 and so on). You must first map the desired chain function onto a key using the Free Key Layout option, and then program the key sequence using Chain Functions.
-
Page 20: Using The Menus
8. [Table Proforma] - Prints a proforma receipt for the table before finalizing the sales transaction, for a transaction temporarily finalized using [Table #, New Balance]. Enter the table number using the numeric keys, then press [Table Proforma]. This operation can be performed by any clerk, even if the Excl. Clerk option has been enabled for table tracking. -
Page 21: Data Entry Forms
NTRY ORMS Description Field/Key Type Use these arrow keys to move upwards or downwards through a data entry form. Press this key to enter Data Entry mode to enter data for a Free Entry field (described below). The symbol A appears at bottom left. A set of values is provided for you to choose one. -
Page 22: Using The Character Table
Example: Enter the word BOOKS. Press NOTE: To abort a partially entered programming sequence, you can use SING THE HARACTER ABLE The Character Table provides all the letters and symbols that your cash register is capable of printing. With reference to figure 11, the Character Table is divided into two parts: one identified with "CAPS"... -
Page 23: Setting The Date Format
3. Select System Initialization by pressing to position on System Initialization, then press 4. The first field Language is highlighted. Check if the language indicated is the language you require for the cash register. If it is, proceed to the next step, otherwise change the language by pressing until the language you want is displayed, then press 5. -
Page 24: Setting The Time Format
ETTING THE ORMAT 1. Press to activate the menu system. 2. Select Programming Mode -> Configuration Setup -> Initial Setup -> Time system . 3. Press until the time format you require is displayed. 4. Press ETTING THE 1. Press to activate the menu system. -
Page 25: Creating Department Group Names
REATING EPARTMENT ROUP AMES You can assign a name of up to 12 characters long to each of the 10 merchandise categories (department groups) available. The merchandise category names that you define are printed on the customer receipts, journal reports and on all management reports. -
Page 26: Programming Price Look-Ups (Plus)
(PLU ROGRAMMING RICE Up to 3000 PLUs can be programmed. You can associate a specific sales item with each PLU code, specifying its name, price (that can be fixed or overridable), VAT rate and department. When programming a PLU you can either type in the numeric code or, if you have a barcode reader, you can scan the barcode of the article to input the code automatically, rather than typing it in. -
Page 27: Programming Percentage Discount/Add-On Keys
ROGRAMMING ERCENTAGE ISCOUNT Two functions %1 and %2 are present in and can each be programmed to apply either a percent discount or a percent add-on to a sale. A default rate can also be programmed: either a fixed rate or one that can be overridden at transaction time;... -
Page 28: Setting Up Foreign Currency Exchange Rates
ETTING OREIGN URRENCY XCHANGE ATES You can program up to four different foreign currency exchange rates. The foreign currency value is displayed when -> FC is selected during a sales transaction. Select Programming Mode -> Sales Programming -> Foreign Currencies . Navigate to the field you want to personalize and enter its data (see “Data Entry Mode”... -
Page 29: Creating A Receipt Header And Footer
REATING A ECEIPT EADER AND OOTER By default your cash register prints a header on all customer receipts. The default personalizable receipt header consists of up to 10 lines of 24 characters each. The cash register can also print a personalized footer which also consists of 10 lines of 24 characters each. -
Page 30: Creating The Invoice Message
REATING THE NVOICE ESSAGE An invoice is issued automatically when a transaction involving table tracking is finalized with a payment. The caption INVOICE appears on the receipt together with the Invoice message. You can print a single additional copy of the invoice by pressing the key, the caption INVOICE COPY appearing on the second invoice. -
Page 31: Initial Setup
NITIAL ETUP Programming Mode -> Configuration Setup -> Initial Setup . Navigate to the field you want to personalize and enter Select its data (see “Data Entry Mode” for the keys to use). At the end, press to return to the Main menu or return to the previous menu. - Page 32 Menu Item Possible Values Description VAT Calc VAT, ADD-ON Tax rate to apply to calculations: ADD-ON - Add-on tax rate, VAT - Value Mode Added Tax. Tax1 Rate (Numeric) Enter a 5-digit number to represent the VAT rate to associate with Tax Rate 1 - THREE digits come after the decimal point.
-
Page 33: Receipt Printing Mode
ECEIPT RINTING You can program the type of information you want the cash register to print on the customer receipt according to your business or country’s requirements. Select Programming Mode -> Configuration Setup -> Receipt Printing Mode . Navigate to the field you want to personalize and enter its data (see “Data Entry Mode” for the keys to use). At the end, you can press to return to the Main menu or to return to the previous menu. -
Page 34: Sample Receipts
Sample Receipts Printing VAT Information on Customer Receipts The following receipt is a typical receipt issued by the cash register. Receipt with Sales Total with VAT - Total Taxable option enabled. Time Date Machine number Overall sales Consecutive total with receipt number Clerk number Item price with... -
Page 35: Invoice Printing Mode
NVOICE RINTING When using table tracking, an invoice is issued when a sale is finalized and optionally a business receipt (see "Creating Automatic Business Receipts"). For the invoice, you can program the font, header/footer and if the ABR should be issued automatically afterwards. -
Page 36: Report Printing Mode
EPORT RINTING You can program what you want to see in reports and the fonts to be used. Select Programming Mode -> Configuration Setup -> Report Printing Mode . Navigate to the field you want to personalize and enter its data (see “Data Entry Mode” for the keys to use). -
Page 37: Individual Clerk
NDIVIDUAL LERK With the Clerk System active, you can assign an operational status to each clerk that defines whether the clerk can perform certain types of transaction. You can then also define a 3-digit password that the clerk must enter to operate the cash register. - Page 38 Description Menu Item Possible Values EJ System STNDARD, Set operation mode for EJ: DYNAMIC, STNDARD - Standard Mode - data is registered sequentially with memory ON SD nearly-full condition signaled (an indicator appears at bottom left of display). See below for further details. DYNAMIC - Dynamic Mode - data is registered cyclically in memory, starting again from the first line when memory is full.
-
Page 39: Function Key Setup
UNCTION ETUP You can program various parameters that affect how these function keys operate: • CASH, CHECK, CHARGE, CREDIT1, CREDIT2, CREDIT3, CREDIT4, CREDIT5, CREDIT6 • PO/RA • #/NS Select Programming Mode -> Configuration setup -> Function key setup . Navigate to the field you want to personalize and enter its data (see “Data Entry Mode”... -
Page 40: Advanced Settings
DVANCED ETTINGS You can set up manager passwords, change how the keys are configured on the keyboard, program key sequences and report printing. Select Programming Mode -> Configuration Setup -> Advanced settings . Navigate to the field you want to personalize and enter its data (see “Data Entry Mode”... - Page 41 Menu Item Description Popup List The cash register has five [POP-UP LIST] keys: Function In Registration mode, when one of the [POP-UP LIST] keys is pressed, a list of operations is displayed allowing you to select one to execute. From Popup List Function, you can reprogram the operations displayed in the list by specifying the operations for each list.
- Page 42 Setting Up Manager Passwords Select Programming Mode -> Configuration Setup -> Advanced settings->Manager Passwords . Navigate to the field you want to personalize and enter its data (see “Data Entry Mode” for the keys to use). At the end, you can press return to the Main menu or to return to the previous menu.
-
Page 43: Counter Settings
OUNTER ETTINGS Select Programming Mode -> Configuration Setup -> Counter Settings . Navigate to the field you want to personalize and enter its data (see “Data Entry Mode” for the keys to use). At the end, you can press to return to the Main menu or to return to the previous menu. -
Page 44: Logging Onto The System
OGGING NTO THE YSTEM The programming manager should keep a track of all ANAGER OGONS passwords set up on the system so as to be able to provide users with them when they need to access the 1. Press to activate the Main menu. system. -
Page 45: Printing Programming Reports
RINTING ROGRAMMING EPORTS This section explains how to print the different reports that show how your cash register is programmed. All programming reports can be requested from Main menu -> Programming Mode -> Programming dump . Make sure you have enough paper in the printer to print the report. NOTE: To interrupt printing, press and hold down 1. -
Page 46: Activating And Disactivating Training Mode
CTIVATING AND ISACTIVATING RAINING Training mode can be activated in one of these three ways: • from Programming mode • from Registration mode • when a Training clerk logs on. Programming mode: 1. Select Training Mode On/Off . 2. The prompt appears: Now off, turn on? Use to highlight YES and press... -
Page 47: System Initialization
YSTEM NITIALIZATION This section explains how to set system initialization parameters. This procedure is also described in the “Quick Start Programming”. Select Main menu -> Programming Mode -> System Initialization . Navigate to the field you want to personalize and enter its data (see “Data Entry Mode” for the keys to use). . -
Page 48: Andz Reports
EPORTS X mode prints the accumulated transaction information and RETAINS ALL TOTALS IN MEMORY. Take this report any time of the day to print periodic reading of the transactions performed (some users call the X report a mid-day report). X reports include the PLU Report, Clerk Report, and the X1 and X2 Financial Reports. -
Page 49: Mode-Specific Reports
Description Menu Item Open Table This report provides information regarding the tables that are still open and therefore not yet invoiced. Current subtotals are provided for each open table so that you can keep track of the Report sales underway. EJ Report An EJ report executed in X mode does not clear the electronic journal memory (and therefore all transaction data is retained). -
Page 50: Example Clerk Sales Report
Example X1/Z1 Dept and Financial XAMPLE LERK ALES EPORT Report Consecutive receipt number Time X report Consecutive identifier Clerk 1 receipt number Sales total of clerk 1 number or X counter assigned name X report identifier Department 1 activity counter Department 1 sales total Department number... -
Page 51: Sales Transaction Examples
ALES RANSACTION XAMPLES EGISTERING A INGLE ALE WITH EGISTERING A ALE OF ULTIPLE TEMS HANGE ENDER Up to eight digits can be used for entering the amount. Up to two digits can be used for the quantity multiplied. Example: Register a £1.00 item in Department 1. Example: Multiply two items costing £1.50 and Compute change for £5.00. -
Page 52: Registering A Charge Card Transaction
EGISTERING A HARGE 1. Press RANSACTION Example: Register a £2.50 item to Department 1 and a 2. Press -> CHECK then £3.00 item to Department 2 as an exact charge card transaction. HECK ENDER WITH HANGE 1. Press Example: Register a £19.50 item to Department 4, a £2.50 item to Department 5 and a £5.00 item to Department 29. -
Page 53: Split Check/Cash Tender
PLIT HECK ENDER ISCOUNTING OTAL SING A ROGRAMMED ISCOUNT Example: Register a £24.00 item to Department 1, a £36.00 item to Department 3 and a £4.00 item to Example: Register a programmed 10% discount to an Department 4. Split the tender between £60.00 check entire sales transaction. -
Page 54: Discounting Individual Items Using Programmed And Random Discount Rates
ISCOUNTING NDIVIDUAL TEMS SING PPLYING A ANDOM ERCENT ROGRAMMED AND ANDOM ISCOUNT ATE TO A OTAL ATES Up to 4 digits can be used for the percent add on rate (from 0.01 to 99.99%). Example: Register a £2.50 item to Department 1, apply the programmed discount to a £3.50 item of Example: Register a 20% add-on to a sales transaction. -
Page 55: Assigned To The Plu
4. Press [PLU Page 2] [Price 1] and then [PLU key 2] EGISTERING A ALES RANSACTION to register the sale of PLU 202 at its first price SING THE SSIGNED TO THE 5. Press [Price 2] and then [PLU key 2] to register the EVELS sale of PLU 202 at its second price. -
Page 56: Refunding Multiple Items
2. Press 4. Press -> VOID 3. Press 5. Press 4. Press 5. Press 6. Press -> VOID 6. Press -> VOID 7. Press 7. Press 8. Press 8. Press 9. Press EFUNDING ULTIPLE TEMS EGISTERING ONEY ECEIVED ON Example: Refund a £4.99 item to Department 4 and CCOUNT three £2.00 items to Department 5. -
Page 57: Registering Product Quantity Transactions
EGISTERING RODUCT UANTITY SSUING A OPY OF THE ALES RANSACTIONS ECEIPT OR AN NVOICE You can print one or more copies of the last receipt Example: Register the sale of 1.5 Kg of apples costing issued. For this feature to be operational, the £3.00 per kilogram to Department 3. -
Page 58: Transferring A Finalized Payment To Another Means Of Payment
FTER ENDER HANGE RANSACTIONS 3. Press . A line is displayed to indicate that the Allowed only for cash tenders, with this feature the transaction was put on hold. Tear off the sales clerk can finalize a sales transaction as an exact cash receipt and put it aside. -
Page 59: Customer Or Table Management
USTOMER OR ABLE ANAGEMENT Customer account operations allow you to associate 6. Define the number of guests: [Guest #]. expenses to specific customers. You have the possibility of opening and managing a total of 100 accounts (or 7. Take orders from table 2: [PLU Key 20], [PLU Key tables) to which you can associate the items sold. -
Page 60: Sales Transactions Using Alternative Vat Rates (Take-Out Sales)
18. Print invoices (with invoice caption) for each of the 2. Type and then press 3 guests: -> TAKE-OUT 3. Press to apply the department's alternative VAT rate. 4. Finalize the transaction by pressing 19. Finalize the transaction of table 1 by pressing a tender key [Table #, New Balance] 20. -
Page 61: Error Conditions
RROR ONDITIONS Clearing an Error Press to clear an error. The key tone ends, the displays clear and the keypad unlocks, allowing you to continue with the transaction. If an error condition cannot be cleared by pressing , reset the cash register by performing one of the cash register reset operations. -
Page 62: Cash Register Reset Operations
EGISTER ESET PERATIONS If the cash register does not function, for example while programming and the error signal cannot be stopped by pressing , reset the cash register in Off mode. There are four reset operations; be very careful when choosing the one to perform since you could unnecessarily cancel report data and cash register programming data. - Page 63 CAPTION TABLE Line Description Digits English Spanish French German COUPON COUPON CUPON COUPON COUPON TOTAL COUPON TL -COUPON TL-CUPON TL-COUPON TL-COUPON ADD ON ADD ON INCREMENTO MAJORATION AUFSCHLAG TOTAL ADD ON TL_ADD ON TL_INCREM. TL_MAJOR. TL_AUFSCHL DISCOUNT DISCOUNT DESCUENTO REMISE RABATT CHARGE KREDIT...
- Page 64 CAPTION TABLE Line Description Digits Dutch Portuguese Danish Norsk COUPON REDUCTIE CUPAO DEKORT KUPONG TOTAL COUPON TL_REDUCT. TL CUPAO TOT_DEKORT TOT_KUPONG ADD ON TOESLAG AUMENTO TILLÆG TILLEGG TOTAL ADD ON TL_TOESLAG TL_AUMENTO TL_TILLÆG TL_TILLEGG DISCOUNT KORTING DESCONTO RABAT RABATT CHARGE BET_OP_REK PAGAMENTO DANKORT...
- Page 65 PRINT CAPTIONS English Spanish Line Description E.J. USED LINE PRINT E . J O U R N A L U S E D D I A E L E C U S A D O E.J. FREE LINE PRINT E . J O U R N A L F R E E D I A E L E C...
- Page 66 PRINT CAPTIONS French German Line Description E.J. USED LINE PRINT E L J U T I L I S E E . J O U R N E I N E.J. FREE LINE PRINT E L J D I S P O N I B L E E .
- Page 67 PRINT CAPTIONS Dutch Portuguese Line Description E.J. USED LINE PRINT E . J O U R N . G E B R U I K T E L E C T R . U S A D O E.J. FREE LINE PRINT E .
- Page 68 PRINT CAPTIONS Line Description Danish Norsk E.J. USED LINE PRINT E . J . L I N I E R B R U G T E.J. FREE LINE PRINT E . J . L I N I E R F R I : REFUND R E T U R CLERK REPORT HEAD...
- Page 69 NGLISH RANÇAIS EGISTER PECIFICATIONS PÉCIFICATIONS TECHNIQUES DE LA CAISSE ENREGISTREUSE Technical Characteristics Listed below are the technical characteristics of this cash register Caractéristiques techniques model. Voici la liste des caractéristiques techniques de ce modèle de caisse enregistreuse. Type: Electronic cash register with clamshell thermal printer, 10 department groups, 99 departments, Type : Caisse enregistreuse électronique équipée...
- Page 70 EUTSCH SPAÑOL EGISTRIERKASSE ECHNISCHE ESCRIPCIONES Y EGURIDAD DE LA IGENSCHAFTEN EGISTRADORA Technische Eigenschaften Características Técnicas Im folgenden sind technischen Eigenschaften dieses Registrier- Se han incluido a continuación las características técnicas de este kassenmodells zusammengestellt. modelo de caja registradora. Typ: Elektronische Registrierkasse mit Klappendrucker Tipo: Caja registradora electrónica con impresora Klapp-Thermodrucker, 10 Abteilungsgruppen,...
- Page 71 EDERLANDS ORTUGUÊS PECIFICATIES SPECIFICAÇÕES DA AIXA EGISTADORA Technische eigenschappen Características Técnicas Hieronder vindt u de technische eigenschappen van dit model Abaixo estão descritas as características técnicas deste modelo de kasregister. caixa registadora. Type: Elektronisch kasregister met inklapbare Tipo: Caixa registadora electrónica com impressora thermische printer, 10 omzetgroepen, 99 térmica de abertura em forma de concha, 10 warencategorieën, 15 medewerkers, max.
- Page 72 ANSK ORSK ASSEAPPARATETS SPECIFIKATIONER ASSAAPPARATETS SPESIFIKKER Tekniske specifikationer Tekniske karakteristikker Nedenfor finder de kasseapparatets tekniske specifikationer. Nedenfor følger tekniske karakteristikker for dette kassaapparatet modell. Type: Elektronisk kasseapparat med termisk Clamshell ™ printer-mekanisme, 10 varegrupper, 99 Type: Elektronisk kassaapparat med termisk skriver, 10 varebetegnelser, 15 ekspedientnumre, op til avdelingsgrupper, 99 avdelinger, 15 3.000 PLU opsætninger.
- Page 74 FIGURES - IMAGES ABBILDUNGEN - FIGURAS AFBEELDINGEN - FIGURAS FIGURER - BILDER AMOUNT 0.00 SYMBOLS...
- Page 75 FIGURES - IMAGES ABBILDUNGEN - FIGURAS AFBEELDINGEN - FIGURAS FIGURER - BILDER CHARACTER TABLE - TABLEAU DES CARACTÈRES - ZEICHENTABELLE - TABLA DE CARACTERES - TEKENCODETABEL - TABELA DE CARACTERES - KARAKTERKODE TABEL - TEGNTABELL FREE KEY LAYOUT - PRG TOUCHE AU CLAVIER - FREIE TASTENANORDNUNG - DISEÑO TECLAS LIBRES VRIJE TOETS KEY LAYOUT - LAYOUT TECLAS LIVRE - LEDIG TASTE LAYOUT - FRI NYCKELLAYOUT feed menu...
- Page 76 Code: 576301...
Need help?
Do you have a question about the ECR 8200 S and is the answer not in the manual?
Questions and answers
ou telecharger Ecr_82x0S_software_6.****.zip?
je n'arrive pas à telecharger le logiciel olivetti ecr 8200s version 6 ou superieur sur quel site je peux telecharger?