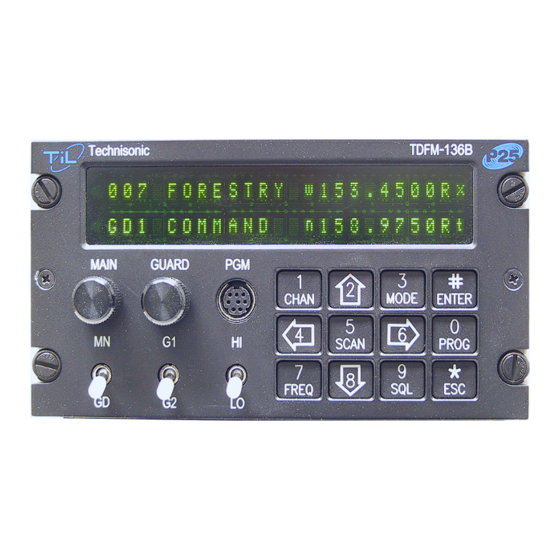
TIL TDFM-136B Installation Instructions Manual
Vhf/fm digital airborne transceiver
Hide thumbs
Also See for TDFM-136B:
- Operating instructions manual (75 pages) ,
- Quick reference manual (2 pages)
Table of Contents
Advertisement
Quick Links
Download this manual
See also:
Quick Reference Manual
TDFM-136B
VHF/FM DIGITAL AIRBORNE TRANSCEIVER
INSTALLATION INSTRUCTIONS
TiL Document No. 08RE398
Revision B Issue 2
JANUARY 2013
Technisonic Industries Limited
240 Traders Blvd. E. Mississauga, Ontario L4Z 1W7 Tel: (905) 890-2113 Fax: (905) 890-5338
This document contains designs and other information which are the property of Technisonic Industries Ltd. Except for rights expressly
granted by contract to the Canadian Government, or to the United States Government, this document may not, in whole or in part, be
duplicated or disclosed or used for manufacture of the part disclosed herein, without the prior permission of Technisonic Industries Ltd.
Advertisement
Table of Contents

Subscribe to Our Youtube Channel
Related Manuals for TIL TDFM-136B


Summary of Contents for TIL TDFM-136B
-
Page 1: Installation Instructions
TDFM-136B VHF/FM DIGITAL AIRBORNE TRANSCEIVER INSTALLATION INSTRUCTIONS TiL Document No. 08RE398 Revision B Issue 2 JANUARY 2013 Technisonic Industries Limited 240 Traders Blvd. E. Mississauga, Ontario L4Z 1W7 Tel: (905) 890-2113 Fax: (905) 890-5338 This document contains designs and other information which are the property of Technisonic Industries Ltd. Except for rights expressly granted by contract to the Canadian Government, or to the United States Government, this document may not, in whole or in part, be duplicated or disclosed or used for manufacture of the part disclosed herein, without the prior permission of Technisonic Industries Ltd. - Page 2 2 way mobile / base sections of the VHF and UHF bands. Low band VHF and 700/800 MHz are not affected. The TDFM-136B transceiver is affected by this new rule and has been modified to restrict Wideband operation on the above bands. When programming the radio from the front panel, if Wideband has been disabled then the Wideband ('w') Operating Mode will not be available as a selection.
- Page 3 W A R R A N TY I N F O R M A T I O N The Model TDFM-136B VHF/FM Digital Transceiver is under warranty for one year from date of purchase. Failed units caused by defective parts or workmanship should be returned to: Technisonic Industries Limited 240 Traders Blvd.,...
- Page 4 08RE398 Rev. B Issue 2 TDFM-136B Installation Instructions S T C A P P R O V A L S Presently, no TSO standard exists for airborne FM transceivers. To make it easier for installation agencies to provide their customers with an approved installation supported by an effective...
- Page 5 TDFM-136B Installation Instructions 08RE398 Rev. B Issue 2 Document Revision Table for 08RE398 Edited Rev. Page Description Date 15-May- F.M. Added 2.7.10 to describe Power Jumper. 2012 Updated figure 2-4 to reflect new MCU board. 02-Jan-2013 F.M. Corrected Table 1-6: DO-160G; Radio Frequency Susceptibility Category T.
-
Page 6: Table Of Contents
08RE398 Rev. B Issue 2 TDFM-136B Installation Instructions T A B L E O F C O N T E N T S Table of Contents ...........................iv List of Tables ...........................v List of Figures ..........................v SECTION 1 - GENERAL DESCRIPTION ..................1-1 1.1 Introduction ........................1-1... - Page 7 Table 1-1. TDFM-136B – Model Variation..................1-2 Table 1-2. TDFM-136B – General Characteristics...............1-2 Table 1-3. TDFM-136B – Operational Characteristics..............1-3 Table 1-4. TDFM-136B – Receiver Characteristics – Main and Guard........1-3 Table 1-5. TDFM-136B – Transmitter Characteristics..............1-4 Table 1-6. TDFM-136B – Environmental Testing Summary............1-4...
-
Page 8: Introduction
(in the U.S.) only by government agencies or contractors thereto who have obtained licensing for operation in the 136-150 MHz portion of the band. If the TDFM-136B transceiver is used in CANADA, operation is restricted to the following sub bands: 138-144, 148-148.99, 149.005-150.005, and 150.05-174 MHz. -
Page 9: Model Variation
TDFM-136B Installation Instructions 1.4 Model Variation The base Part Number for the Model TDFM-136B is 081252. There are three parameters that affect model variation: display lighting, number of antennae, and encryption operation. The combinations result in 12 possible extensions to the base part number and are shown in Table 1-1 below. -
Page 10: Table 1-3. Tdfm-136B - Operational Characteristics
$0000 to $FFFF ( 0 to 65535 ) P25 Network Access Code (NAC) $000 to $FFF ( 0 to 4095 ) DPL is a trademark of Motorola Corporation Table 1-4. TDFM-136B – Receiver Characteristics – Main and Guard Characteristic Specification Sensitivity at 12 dB SINAD... -
Page 11: Certification Summary
Audio Distortion Less than 5% 1.6 Certification Summary The following table gives a summary of DO-160G Environmental Testing for Technisonic Model TDFM-136B VHF Digital Transceiver. Table 1-6. TDFM-136B – Environmental Testing Summary Conditions Section Conducted Test Temperature and Altitude Equipment tested to Categories B2 and D1. -
Page 12: Equipment Packing Log
1.0 meter (40 inches) from any occupant in the airframe. Consult the instructions provided with the antenna. Connect RF cable from antenna to the back of the TDFM-136B unit by utilizing the BNC mating connector provided in the installation kit. Technisonic Industries Ltd. -
Page 13: Installation - Pin Locations And Connections
A single 15 pin DSUB connector, mounted on the rear of the unit, provides the means to connect all power, control, and audio signals between the TDFM-136B and the airframe. The pin numbers and locations for the 15 pin DSUB connector are shown in Figure 2-1 below. - Page 14 TDFM-136B Installation Instructions 08RE398 Rev. B Issue 2 Figure 2-2. Detailed Wiring Connections for TDFM-136B Transceiver Technisonic Industries Ltd.
-
Page 15: Figure 2-3. Outline Drawing For Tdfm-136B Transceiver
08RE398 Rev. B Issue 2 TDFM-136B Installation Instructions 2.6 Physical Dimensions Figure 2-3 below shows the physical dimensions of the unit. Figure 2-3. Outline Drawing for TDFM-136B Transceiver Technisonic Industries Ltd. -
Page 16: Wiring Instructions
TDFM-136B Installation Instructions 08RE398 Rev. B Issue 2 2.7 Wiring Instructions Figure 2-2 shows all required connections and recommended wire sizes for the TDFM- 136B Transceiver operation in the airframe. 2.7.1 Main Power +28VDC The main power +28VDC (±15%) is connected to pins 7 and 14 of the transceiver. Both pins should be connected. -
Page 17: Power Jumper
08RE398 Rev. B Issue 2 TDFM-136B Installation Instructions 2.7.10 Power Jumper The radio must be turned on manually each time the avionics bus is switched on. If it is desired that the radio comes on with the radio master in the aircraft, remove the right side panel from the radio and install the supplied 0.1”... -
Page 18: Reference Layouts
POWER series800 MCU BOARD ASSY# 053662- REV- SERIAL# Figure 2-4. Control points for the TDFM-136B MCU Board JP1: Power jumper (see text). Not installed by default. JP2: Rear panel serial communications protocol select jumper: 1-3 & 2-4: RS-232 - default All other combinations are invalid. - Page 19 Technisonic Industries Ltd.
-
Page 20: Section 3 - Appendices
S E C T I O N 3 A p p e n d i c e s 3.1 Appendix A CTCSS TONE TABLES and DCS CODE TABLES Available CTCSS Tones Available DCS Codes Tone Code Code 67.0 69.3 71.9 74.4 77.0 79.7... -
Page 21: Appendix B - Post Installation Emi Test Instructions
TDFM-136B Installation Instructions 3.2 Appendix B - POST INSTALLATION EMI TEST INSTRUCTIONS 3.2.1 PURPOSE The purpose of these tests is to identify any interference that the TDFM-136B may cause with existing aircraft systems. 3.2.2 TEST CONDITIONS The TDFM-136B transceiver should be installed and function tested. The antenna VSWR should be checked. -
Page 22: Results
If the interference is not rectified, the unit shall be placarded to avoid use during the appropriate phase of flight. For example, if the unit causes undesired operation of the ILS, then the TDFM-136B should be placarded, “Not to be used during an IFR ILS approach.” Technisonic Industries Ltd. -
Page 23: Procedure
08RE398 Rev. B Issue 2 TDFM-136B Installation Instructions 3.2.5 PROCEDURE Operate the TDFM-136B transmitter on the following frequency for at least 20 seconds. Observe the GPS for any degradation in satellite status or availability or flags. Frequencies GPS #1 GPS #2... - Page 24 Determine if the image frequency for the VHF Comm falls within the range of the TDFM-136B. If so, select a set of frequencies that will cause the TDFM-136B to be set as close as possible to the image frequency. Any one of the many possible sets will suffice. Record those values in the spaces provided in the following chart.
- Page 25 Determine if the image frequency for the VOR/ILS Nav falls within the range of the TDFM- 136B. If so, select two sets of frequencies that will cause the TDFM-136B to be set as close as possible to the image frequency. Choose one set in the localizer frequency range and one in the VOR frequency range.
- Page 26 With a portable glide slope generator, provide enough signal to firmly activate the indicator needle and hide all flags. Increase the signal level by 3 dB. Modulate the TDFM-136B transmitter on the following frequencies for at least 20 seconds. Observe the Glide Slope displays.
- Page 27 08RE398 Rev. B Issue 2 TDFM-136B Installation Instructions Frequencies Results Glide Slope #1 TDFM-136B Pass Fail 334.7 (108.1) 167.3500 MHz Frequencies Results Glide Slope #2 TDFM-136B Pass Fail 334.7 (108.1) 167.3500 MHz NOTES: Technisonic Industries Ltd.
- Page 28 Frequency No. 2 Frequency No. 3 At a safe altitude, engage the autopilot or stability augmentation system. Modulate the TDFM-136B on the above frequencies for at least 20 seconds. Observe any effect on the autopilot or stability augmentation system. Observations: Perform a coupled ILS approach to the aircraft’s certified limits.
- Page 29 08RE398 Rev. B Issue 2 TDFM-136B Installation Instructions List the power plant, fuel, and other electric instruments in the chart provided and note any anomalies that occur while transmitting. Assess the results. Step System Pass Fail Notes Comm 1 and Comm 2...
- Page 30 TDFM-136B Installation Instructions 08RE398 Rev. B Issue 2 Step System Pass Fail Notes NOTES: Technisonic Industries Ltd. 3-11...
-
Page 31: Appendix C - Warranty Information
Technisonic. This Warranty shall not be transferable or assignable to any other persons, firms, or corporations. For warranty registration, please complete the on-line Warranty Registration Form found at www.til.ca. 3-12 Technisonic Industries Ltd.
Need help?
Do you have a question about the TDFM-136B and is the answer not in the manual?
Questions and answers