Table of Contents
Advertisement
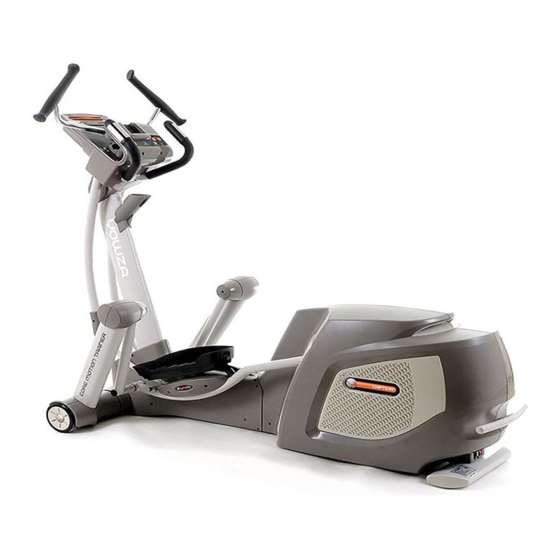
Captiva Elliptical
※TABLE OF CONTENTS
1. PRECAUTIONS................................. P2
2. POWER REQUIRMENTS............................. P3
3. BEFORE YOU BEGIN..............................
P4
4. SUPPLIED COMPONENTS / SUPPLIED HARDWARE.............. P5~P6
5. PARTS LIST................................ P7~P12
6. ASSEMBLY INSTRUCTIONS........................ P13~P21
7. EXPLODED DIAGRAM........................... P22~P27
8. STABILIZER ADJUSTMENT.......................... .P28
9. TRANSPORT INSTRUCTIONS.......................... P29
10. IMPORTANT STEPS.............................. P30
12. MUSCLE CHART............................... P31
13. STRETCHING ROUTINE............................ P32
14. WARRANTY............................... P33~P34
15. COMPUTER OPERATION......................... P35~P42
877-969-9240
Yowza Technical Support:
Serial Number:
________________________
Original Sales Order # ________________________
Purchase Date:
______________
Advertisement
Table of Contents

Related Manuals for Yowza Captiva Elliptical


Summary of Contents for Yowza Captiva Elliptical
- Page 1 Captiva Elliptical ※TABLE OF CONTENTS 1. PRECAUTIONS................................. P2 2. POWER REQUIRMENTS............................. P3 3. BEFORE YOU BEGIN.............................. 4. SUPPLIED COMPONENTS / SUPPLIED HARDWARE.............. P5~P6 5. PARTS LIST................................ P7~P12 6. ASSEMBLY INSTRUCTIONS........................ P13~P21 7. EXPLODED DIAGRAM........................... P22~P27 8. STABILIZER ADJUSTMENT.......................... .P28 9. TRANSPORT INSTRUCTIONS.......................... P29 10.
- Page 2 YOWZA CAPTIVA CROSSTRAINER PRECAUTIONS Open the boxes: You are now ready to open the boxes of your new equipment. Make sure to inventory all of the parts that are included in the boxes. Check the Parts List for a full count of the number of parts included for this product to be assembled properly. If you are missing any parts or have any assembly questions call your local dealer or contact us directly.
-
Page 3: Power Requirements
http://www.yowzafitness.com/ POWER REQUIREMENTS IMPROPER CONNECTION OF THE EQUIPMENT GROUNDING CONNECTOR CAN RESULT IN THE RISK OF AN ELECTRIC SHOCK. CHECK WITH A QUALIFIED ELECTRICIAN OR SERVICE MAN IF YOU ARE IN DOUBT AS TO WHETHER THE PRODUCT IS PROPERLY GROUNDED. DO NOT MODIFY THE PLUG PROVIDED WITH THE PRODUCT, IF IT WILL NOT FIT THE OUTLET;... -
Page 4: Before You Begin
Product-Preparation: Follow the steps of the assembly instruction carefully. Product-Preparation: Only use suitable tools for assembly and ask for assistance if necessary. Product-Preparation: Only use original Yowza parts as delivered (see checklist). Use-Preparation: Tighten all adjustable parts to prevent sudden movement while training. ... - Page 5 http://www.yowzafitness.com/ SUPPLIED COMPONENTS This list identifies the major components you will use to assemble this product. Description Qty. Moving Handlebar-Left Moving Handlebar-Right Incline Frame Lower Cover-Rear Incline Frame Lower Cover-Front Action Arm Lower Cover Pedal Arm Front Pivot Cover Incline Frame Front Cover Undercarriage Cover - Left Undercarriage Cover -Right Incline Frame Holder - Front...
- Page 6 YOWZA CAPTIVA CROSSTRAINER SUPPLIED HARDWARE This list identifies the hardware you will use to assemble the product. To help distinguish between the various types of screws and bolts, use the scale below to measure them and compare them to the sizes listed.
-
Page 7: Part List
http://www.yowzafitness.com/ PART LIST Item No. Description Qty. Part No. CAPTIVA-100 Console Support Tube CAPTIVA-101 Moving Handlebar – Left CAPTIVA-102 Moving Handlebar – Right CAPTIVA-103 Moving Linkage – Left CAPTIVA-104 Moving Linkage – Right CAPTIVA-105 Pedal Arm – Left CAPTIVA-106 Pedal Arm – Right CAPTIVA-107 Pedal Swing Arm CAPTIVA-108... - Page 8 YOWZA CAPTIVA CROSSTRAINER PART LIST Item No. Description Qty. Part No. Speed Sensor Base CAPTIVA-236 Overlay CAPTIVA-239 Button Overlay CAPTIVA-240 Bearing 6904 CAPTIVA-241 Pedal Buffer fixed Plate CAPTIVA-244 CAPTIVA-300 Handlebar End Cap CAPTIVA-301 Hand Pulse Sensor Cover – Bottom CAPTIVA-302 Hand Pulse Sensor Cover –Top...
- Page 9 http://www.yowzafitness.com/ PART LIST Item No. Description Qty. Part No. Incline Frame Top Cover – Front CAPTIVA-344 20x32x7.2mm Bushing CAPTIVA-345 iPod Dock Bracket Cover – Top CAPTIVA-346 iPod Dock Bracket Cover – Bottom CAPTIVA-347 Handlebar Grip Foam CAPTIVA-348 Right Pedal CAPTIVA-349 PC Board Frame CAPTIVA-350 iPod Bracket...
- Page 10 YOWZA CAPTIVA CROSSTRAINER PART LIST tem No. Description Qty. Part No. M8x50mm Allen Head CAP Bolt CAPTIVA-439 32x6x2.0 Washer CAPTIVA-440 10x20mm Washer CAPTIVA-441 M10x45mm Bolt CAPTIVA-442 M10x95mm Allen Head CAP Bolt CAPTIVA-443 M12x20mm Allen Head Bolt CAPTIVA-444 Pedal Arm Pivot CAPTIVA-445 3/4”...
- Page 11 http://www.yowzafitness.com/ PART LIST Item No. Description Qty. Part No. 4x12mm Screw – Flat Point CAPTIVA-506 M10x56mm Allen Head Bolt CAPTIVA-507 M10 Nylon Nut CAPTIVA-508 4x19mm Screw CAPTIVA-509 4.5x12mm Screw CAPTIVA-510 M10x40mm Allen Head CAP Bolt CAPTIVA-511 4x12mm Screw – Cone Point CAPTIVA-512 8x27x2mm Washer CAPTIVA-513...
- Page 12 YOWZA CAPTIVA CROSSTRAINER PART LIST Item No. Description Qty. Part No. Undercarriage Cover – Left CAPTIVA-704 Undercarriage Cover – Right CAPTIVA-705 Nylon Bushing CAPTIVA-706 Incline Frame Holder – Front CAPTIVA-708 Water Bottle Holder CAPTIVA-709...
- Page 13 (D) Carefully separate all parts by size and type. This is critical as many are of similar size and shape. Use supplied ruler to size. (E) After verifying inventory, if any parts are missing, please contact Yowza fitness at 877-969-9240.
- Page 14 YOWZA CAPTIVA CROSSTRAINER STEP1 ASSEMBLY STEP 1a) Attach the Incline Frame Lower Cover (341, 342) to the incline frame. STEP 1b) Carefully snap pieces together using plastic guides. STEP 1c) Secure using cone point screw (408).
- Page 15 http://www.yowzafitness.com/ STEP2 ASSEMBLY STEP2-C STEP2-A STEP2-B STEP2-D STEP2-A). Remove the Undercarriage Cover (704, 705) by carefully lifting pedal Assembly and removing each piece one at a time. Be careful not to snap Plastic push pins when taking apart. Place Styrofoam block (8) under 511 X4 Main Frame tube to provide clearance for positioning of Main Frame (112) for...
- Page 16 YOWZA CAPTIVA CROSSTRAINER STEP3 ASSEMBLY STEP3-A STEP3-B STEP3-C STEP3-A). Assemble the Console Support Tube (101) to the Main Frame and secure Using four Allen Head CAP Bolts (504). Connect the 8Pin Power Wire – Upper (601) to 8Pin Power Wire – Lower (602) by sliding plastic extrusion on connector under plastic clip on second connector .
- Page 17 http://www.yowzafitness.com/ STEP4 ASSEMBLY STEP4-A STEP4-B STEP4-C 20x79.9 STEP4-A). Slide the Bolt (505) through the Wave Washer (521), Pedal Arm, and Pedal Swing Arm (108) then secure by 8mm Allen Key (C). 505 X2 STEP4-B). Secure the Back Out Screw (516) to the Pedal Swing Arm (108) using the 2.5mm Allen Key (A) 521 X2 NOTE: PLEASE FULLY TIGHTEN Screw (516).
- Page 18 YOWZA CAPTIVA CROSSTRAINER STEP5 ASSEMBLY STEP5-A C 502 104 STEP5-B STEP5-A). Connect the Action Arm to the Moving Linkage and secure using the M6x10mm Bolt (502) and M8x15mm Bolt (503) by 6mm Allen Key (D). Do not over tighten or squeaking may occur.
- Page 19 http://www.yowzafitness.com/ STEP6 ASSEMBLY STEP6-A STEP6-B STEP6-C STEP6-A). Please release that Plastic Gear Bushings (360) first, and keep 8x27x2mm Washers (513), M8x20mm Allen Head Bolts for STEP6-B. STEP6-B). Install the Moving Handlebar have Plastic Washer (519) first, then the second is Washer (513) and finally tight the Allen Head Bolt (514) to lock the moving handlebar on the console.
- Page 20 YOWZA CAPTIVA CROSSTRAINER STEP7 ASSEMBLY STEP7-A). Connect 8 pin connectors by carefully sliding connector with plastic Extrusion under plastic clip on second connector. STEP7-B). Attach the Button Control Panel (A1), and secure using Screw (510). STEP7-C). Use Screw (512) to hold the Button Control Panel on left and right side to...
- Page 21 http://www.yowzafitness.com/ STEP8 ASSEMBLY STEP8-A). Attach the Water Bottle Holder (709), and secure using Cone point screw (501) with Washer (518). Your cross trainer is now fully assembled.
- Page 22 YOWZA CAPTIVA CROSSTRAINER EXPLODED DIAGRAM 102 514 401 415 502 503 211 412...
- Page 23 http://www.yowzafitness.com/ EXPLODED DIAGRAM...
-
Page 24: Exploded Diagram
YOWZA CAPTIVA CROSSTRAINER EXPLODED DIAGRAM 430 429 429 332 411 507 329 516 219 435 425 437 334 426 333 332 441 417 226 446 230 229... - Page 25 http://www.yowzafitness.com/ EXPLODED DIAGRAM 326 411 456 620...
- Page 26 YOWZA CAPTIVA CROSSTRAINER EXPLODED DIAGRAM...
- Page 27 http://www.yowzafitness.com/ WIRE DIAGRAM...
- Page 28 YOWZA CAPTIVA CROSSTRAINER STABILIZER ADJUSTMENT LEVEL ADJUSTMENT: To adjust the level of the Captiva cross trainer simply rotate the Level Adjusters clockwise or counter clockwise. Tilt the cross trainer to access stabilizers.
-
Page 29: Transport Instructions
http://www.yowzafitness.com/ TRANSPORT INSTRUCTIONS TRANSPORT INSTRUCTIONS: The casters located on the rear of the unit allow for easy transport. Simply lift the front of the unit until the wheels touch the floor. Then roll the unit to a desired location. - Page 30 YOWZA CAPTIVA CROSSTRAINER IMPORTANT STEPS Warning: Before using this product, please consult your personal physician for a complete physical examination. Frequent and strenuous exercise should be approved by your doctor first. If any discomfort should result from your use of this product, stop exercising and consult your doctor.
- Page 31 http://www.yowzafitness.com/ MUSCLE CHART Targeted muscle groups: The exercise routine that is performed on this product will develop primarily lower body muscle groups. These muscle groups are shown in gray color on the chart below. MUSCLE GROUPS Shoulder muscles Calf muscles Pectoral muscles Trapezius muscles Bicep muscle...
- Page 32 YOWZA CAPTIVA CROSSTRAINER STRETCHING ROUTINE Warm up and cool down: A successful exercise program consists of a warm-up, aerobic exercise, and a cool-down. Do the entire program at least two and preferably three times a week, resting for a day between workouts. After several months, you can increase your workouts to four or five times per week.
- Page 33 $75.00 per service issue. Service issue is defined as an approved service claim. Limit of one $75.00 payment will be made on each service claim. All repairs must be authorized by YOWZA FITNESS prior to performance of work. Claims on unauthorized repairs may be denied.
- Page 34 YOWZA CAPTIVA CROSSTRAINER WARRANTY DISCLAIMER OF WARRANTIES AND LIMITATION OF REMEDIES: It is impossible to eliminate all risks inherently associated with use of the product. Personal injury or other unintended consequences may result because of factors beyond our control. WE MAKE NO OTHER WARRANTIES OF ANY KIND.
-
Page 35: Computer Operation
http://www.yowzafitness.com/ COMPUTER OPERATION HEIGHT TIME MOTION LEVEL RESISTANCE UP/DOWN PULSE DISTANCE / PROGRAM BUTTON iPod VOL CONTROLS WEIGHT GENDER RESISTANCE LEVEL RPM DIAGRAM RESISTANCE PROFILE SPEED WATT CALORIES MOTION UP/DOWN BUTTON STOP/ENTER BUTTON START BUTTON FAN CONTROL BUTTON... - Page 36 YOWZA CAPTIVA CROSSTRAINER COMPUTER OPERATION DISPLAY FUNCTIONS: RESISTANCE LEVEL DISPLAY: Displays RESISTANCE level from 25W to 400W each step 5W. MOTION LEVEL DISPLAY: Displays motion level from 1 to 12. 8 X 16 DOT MATRIX RESISTANCE LEVEL PROFILE DISPLAY: Displays all operating instructions prior to the workout and displays RESISTANCE level profile during the workout.
- Page 37 http://www.yowzafitness.com/ COMPUTER OPERATION PROGRAM OPERATION INSTRUCTION: At POWER ON status, press ENTER button to enter preset PROGRAM MODE and to set user parameters. SET UP USER CODE: At first, the LCD will show a blinking U1, and will also display only factory default setting values for user Weight, Height, Age and Target Heart Rate.
- Page 38 YOWZA CAPTIVA CROSSTRAINER COMPUTER OPERATION PROGRAM 4 – FAT BURNING After enter this program, the TIME display shows factory default setting “32:00”. Press RESISTANCE UP/DOWN button to adjust the target time and press STOP/ENTER to confirm. Press START button to start the FAT BURNING program. Time counts down to 0, Distance and Calories count up. Dot Matrix display shows the pre-set RESISTANCE and MOTION profile.
- Page 39 http://www.yowzafitness.com/ COMPUTER OPERATION TIME /zone MOTION Segment Segment Segment Segment Segment Segment Segment Segment /level LEVEL PROGRAM 7 – ENDURANCE After enter this program, the TIME display shows “L1”, Press RESISTANCE UP/DOWN button to adjust the workout level and press STOP/ENTER to confirm.
- Page 40 YOWZA CAPTIVA CROSSTRAINER COMPUTER OPERATION PROGRAM 8 – WATTS CONTROL The function of Watts Control program is to allow the user to set a desired workout load (watts). The user’s workout load is controlled automatically by increasing or decreasing the resistance as the user changes their stride cadence (RPM). The RESISTANCE will be reduced when user increases RPM and the RESISTANCE will be increased when the user decreases the RPM.
- Page 41 http://www.yowzafitness.com/ COMPUTER OPERATION PROGRAM 10: Customer Course When the user selects P10 CUSTOM program and press ENTER button, C1 will display and flash on the LCD. The program can allow each user to create 5 individual custom programs and store the settings for repeated workouts. To select the program from C1 to C5, press the RESISTANCE UP/DOWN button.
- Page 42 YOWZA CAPTIVA CROSSTRAINER COMPUTER OPERATION USING THE CHEST BELT HEART RATE MONITOR: For proper operation, the chest belt should be worn with the monitor strapped across the front of your body just above the chest line as shown in the drawing on the right. The monitor needs a little body heat and moisture in order to work properly. To ensure correct operation you may want to wet the two rubber pickups under the belt prior to exercising.
Need help?
Do you have a question about the Captiva Elliptical and is the answer not in the manual?
Questions and answers