
Related Manuals for Viadrus Hercules P 1


Summary of Contents for Viadrus Hercules P 1
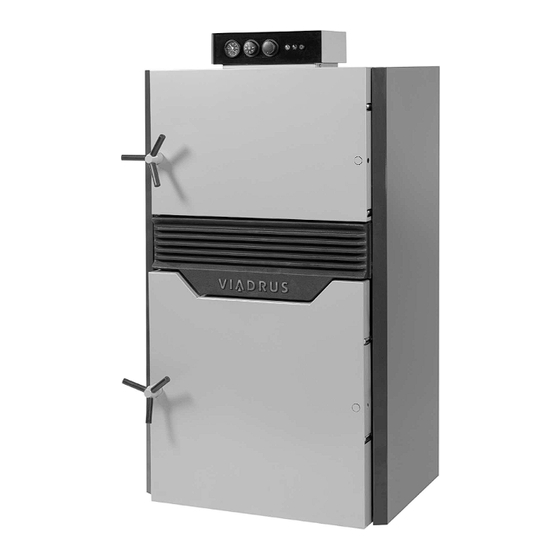
- Page 1 Hercules U26 Hefaistos P 1 MANUAL FOR BOILER OPERATION Návod k obsluze AND INSTALLATION...
-
Page 2: Table Of Contents
Table of contents: page Produced variants of boilers ........................3 Order ..............................3 Technical information ..........................3 The use of boiler..........................3 Advantages of boiler ........................... 3 Technical data of boiler Hefaistos P1 ....................4 The main dimensions of the boiler ...................... 5 2.4.1 The main dimensions of the boiler Hefaistos P1 T .............. -
Page 3: Produced Variants Of Boilers
Dear Customer, Thank you for purchasing the pyrolytic boiler Hefaistos P1 and thus showing your confidence in the company VIADRUS a.s. Before you start to use your new product please read this manual (especially the chapter No. 5.1 - Operation of boiler by user, and Chapter 8 – Important notices) so that from the beginning you get used to its proper handling. -
Page 4: Technical Data Of Boiler Hefaistos P1
Ecological operation that meets the requirements for the granting the trademark ESV (Environmentally friendly product) Technical data of boiler Tab. No. 1 Dimensions, technical parameters – fuel: wood Number of sections Rated thermal output 49,5 Fuel consumption at rated thermal output kg.h 10,66 13,32... -
Page 5: The Main Dimensions Of The Boiler
The main dimensions of the boiler 2.4.1 The main dimensions of the boiler Hefaistos P1 T [mm] 1139 Fig.no. 2 The main dimensions of the boiler Hefaistos P1 T... -
Page 6: The Main Dimensions Of The Boiler Hefaistos P1 E
2.4.2 The main dimensions of the boiler Hefaistos P1 E [mm] Fig. no. 3 The main dimensions of the boiler Hefaistos P1 E... -
Page 7: The Main Parts Of Boiler
The main parts of boiler 2.5.1 The main parts of boiler Hefaistos P1 T boiler drum 12 outlet pipe combustion chamber lining 13 exhaust ventilator ash pan door 14 boiler shell-right part stoking door 15 smoke adaptor nozzle 16 inlet pipe feed hopper lining 17 two-way safety valve DBV 1 –... -
Page 8: The Main Parts Of Boiler Hefaistos P1 E
2.5.2 The main parts of boiler Hefaistos P1 E boiler drum 11 boiler shell-rear part combustion chamber lining 12 outlet pipe ash pan door 13 exhaust ventilator stoking door 14 boiler shell-right part nozzle 15 smoke adaptor feed hopper lining 16 inlet pipe boiler shell-left part 17 two-way safety valve DBV 1 –... -
Page 9: Installation Instructions
Installation instructions Boiler construction The sectional boiler drum made of grey cast iron according to EN 1561, quality 150 is the main part of the boiler. Pressure parts of boiler correspond to strength requirements according to EN 303 - 5 – Heating boilers – Part 5: Heating boilers for solid fuels with manual or automatic stoking and nominal heat output of up to 300 kW –... -
Page 10: Regulations And Guidelines
Regulations and guidelines A solid fuel boiler can only be installed by a firm holding a valid concession for boiler installation and maintenance. A project according to the valid regulations must be prepared for the installation. Before the boiler installation to an older heating system, the installation company must ensure that the whole heating system is rinsed out (washed out). -
Page 11: Placement Options
Placement options Boiler is approved for installation in non-residential premises (for example cellar, corridor etc.) and in AA5/AB5 basic environment according to ČSN 33 2000-3. The boiler is equipped with a movable mains supply and a plug. According to EN 60 335 – 1 ed. 2 Art. 7.12.4 the boiler must be positioned in a way so that the plug is accessible. - Page 12 Location boiler with regard necessary handling space: − at least 1000 mm handling space must be left in front of the boiler; − the minimum distance between the rear part of the boiler and wall is 400 mm; − on both sides keep the space at least 400 mm for access to the rear part of the boiler.
-
Page 13: Delivery And Accessories
Delivery and accessories Boiler is delivered according to the order and on the pallet there is placed the complete boiler drum plus boiler shell in a wooden casing. The accessories are inside the boiler drum and are accessible when opening the stoking door has been opened. -
Page 14: Installation Process
Installation process 3.5.1 Installing the boiler drum 3.5.1.1 Installing the boiler drum – Hefaistos P1 T (see Fig. no. 8 and 9) Set the boiler drum on the socle (underlay). Dismount the rear part of the shell (1) by means of 4,8 x13 screws and serrated lock washers 5,3 - see detail A and the upper part of the shell (2) according to the Figure no.8. - Page 15 1. boiler shell-rear part 2. boiler shell-front part 3. boiler shell-upper part Fig.no. 8 Dismantling of the upper rear part of the boiler shell...
- Page 16 filling and drain valve G 1/2“ interconnecting hose 3/4“ shell with ventilator 10 air-release valve 1/2“ return water input (with distribution pipe) 11 pipe-output boiler plug 1/2“ 12 long bend 1 1/2“ sleeve 1 1/2“ 13 T-joint 1 1/2“ heating water output 14 interconnecting hose 1 1/2“...
- Page 17 filling and drain valve G 1/2“ interconnecting hose 3/4“ shell with ventilator 10. air-release valve 1/2“ return water input (with distribution pipe) 11. pipe-output boiler plug 1/2“ 12. long bend 1 1/2“ sleeve 1 1/2“ 13. T-joint 1 1/2“ heating water output 14.
-
Page 18: Mounting The Control Box
3.5.2 Mounting the control box 3.5.2.1 Mounting the control box – Hefaistos P1 T (see Fig. no. 10) Dismount the upper part of the control box (3) by means of 2 screws M5 x 12 and serrated lock washers 5,3 – see detail B. Thread the capillaries of the control box thermostats through the opening in the upper part of the shell and by means of 2 pc screws M5 x 25 and serrated lock washers 5,3 screw the control box to the upper front part of the shell (4) –... - Page 19 left side part of shell with insulation right side part of shell upper part of the control box Mounting the control box to the upper part of the shell upper front part of the shell Mounting the upper part of the control box upper part of the shell rear part of the shell Fig.
-
Page 20: Limit Switch Installation - Hefaistos P1 E
3.5.3 Limit switch installation – Hefaistos P1 E Connect the limit switch according to the electrical connection see. Chap. 4.8 Insert the rod (9) into the left hole (A) in consoles (2). Then mount the circlip 7 (8). By means of screws M4 x 40 (4) and washers 4.3 (6) mount the limit switch (3) to the consoles (2) and the upper part of shell (1) and secure with nuts M4 (7) and washers 4.3 (6). -
Page 21: Commissioning
Commissioning Putting the boiler into operation can be performed only by professional installation companies authorized to carry out this work. Control activities before starting Before putting the boiler into operation it is necessary to check: Filling the heating system with water (inspection of the thermomanometer) and the tightness of the system. -
Page 22: Putting The Boiler Into Operation
Closing Blind flange Axis of handle Locking screw of the handle Handle 10. Locking screw of closing Flexible circlip 11. Counterpart of closing Securing nut 12. Sealing cord Washer 13. Sealing surface of feed hopper Setscrew Fig.no. 12 Setting of the handle of ash pan door and stoking door Putting the boiler into operation Make a fire in boiler Bring the boiler to the necessary operating temperature. -
Page 23: Regulatory And Signaling Elements
Regulatory and signaling elements 4.3.1 Regulatory and signaling elements – Hefaistos P1 T Combustion air is brought to boiler by means of a throttle valve (choking valve), which is placed on the smoke adaptor. By means of the air exchanger the combustion air will be distributed to the nozzle as the primary air and into lining of combustion chamber as the secondary combustion air and both are controlled by draft controller. -
Page 24: Equipment To Remove Excess Heat
Flap of throttle valve (choking valve) - opens automatically when fan is running. When you stop the fan the flap is closed by means of counterweight. The weights should be adjusted so that the flap at full fan power is opened to about 45 °. 1 –... - Page 25 Usage The two way safety valve DBV 1 – 02 is used as a protection of heating boilers against overheating. In the valve body there is the drain and filling valve controlled by a thermostatic member. When the limit temperature is reached both the drain and filling valve are opened which means that cold water is flowing into boiler and the hot water is discharged.
-
Page 26: Equipment For Heat Removal - Storage Tanks
Equipment for heat removal - storage tanks We require the connection of pyrolytic boiler with storage tanks. Advantages: • A lower fuel consumption (by 20 – 30 %), the boiler is working at full power and optimal efficiency till the fuel has burnt out •... - Page 27 Fig.no. 17 Recommended diagram of the boiler connected with a three-way mixing valve Fig.no.18 Recommended diagram of the boiler connected with a storage tank Legend to Fig. no. 16 – 18: 1 – Boiler 9 – Storage tank 2 – Safety valve 10 –...
-
Page 28: Electrical Connection
Electrical connection 4.8.1 Electrical connection – Hefaistos P1 T Fig.no. 19 Circuit diagram of connection - boiler Hefaistos P1 T... - Page 29 LEGEND: Wire colour SAFETY THERMOREGULATOR GNYE green yellow GLUE GASES THERMOREGULATOR SPALIN green OPERATING THERMOREGULATOR yellow PUMP THERMOREGULATOR FUSE 6,3 A black SIGNALLING THE RUN OF VENTILATOR (GREEN) brown SIGNALLING THE SAFETYHO THERMOREGULATOR (ORANGE) blue CONTACTOR OF EXHAUST VENTILATOR EXHAUST VENTILATOR PUMP TERMINAL BOARD OF BOILER CONNECTOR OF VENTILATOR (SOCKET)
-
Page 30: Electrical Connection - Hefaistos P1 E
4.8.2 Electrical connection – Hefaistos P1 E Fig.no. 21 Circuit diagram of connection - boiler Hefaistos P1 E... - Page 31 Fig.no. 22 Diagram of connection - boiler Hefaistos P1 E...
-
Page 32: Operating Manual
Operating manual WOOD Dry split wood logs from 80 to 150 mm. Length according to Table 3 Tab. No. 3 Length of logs počet článků L mm] Calorific value 15 – 17 MJ /kg Moisture 12 – 20 % Manufacturer’s warning: Boiler output and its functionality are guaranteed for moisture up to 20%. When burning the wet wood the boiler does not work in the gasification regime, its output is reduced and emissions are worse and there occurs the flue gases condensation in the boiler. - Page 33 9. Set the flue gases thermoregulator to 0°C and operating thermo-regulator to operating temperature (recommended working temperature is 800°C). This will switch on the flue gases ventilator. 10. Let the kindling flare. 11. Close the throttle valve and hold the stoking door ajar, wait approx. 10 seconds before you open it fully and then fill the whole volume of feed hopper with fuel.
-
Page 34: Operation Of Boiler By User - Hefaistos P1 E
5.1.2 Operation of boiler by user – Hefaistos P1 E User guide for controller ST 81 is delivered separately. Making a fire 1. Check the water quantity in the heating system indicated on the thermo-manometer. 2. Open the stop valves between boiler and heating system. 3. -
Page 35: Boiler Cleaning - Maintenance
Boiler cleaning - maintenance ATTENTION! Carry out the cleaning exclusively before making fire(firing) and when the combustion chamber is cold. Remove ashes from the combustion chamber and feed hopper. This must be done before every firing and once a week in case of top-fed stove operation. Or it must be cleaned as soon as by the visual control it is indicated that the level of ashes has reached the openings in the back side of the combustion chamber. - Page 36 Cleaning of boiler drum and combustion space (see Fig. no. 26): Firstly switch on the exhaust ventilator, then open the stoking door and through the slot sweep ashes into combustion chamber of the boiler drum. By means of a cleaner remove ashes and unburnt pieces of fuel from the combustion chamber. Clean the boiler drum vent holes by means of a brush.
-
Page 37: Fault Conditions
Fault conditions Fault conditions Cause Remedy The boiler output is too low Calorific value of fuel is insufficient Use the prescribed fuel of prescribed fuel moisture is above 20% moisture Clogged or deformed fan propeller Clean the fan propeller or replace it Reverse fan revolutions Check direction of fan revolutions Clogged nozzle... -
Page 38: Important Notices
IMPORTANT NOTICES The boiler only can be used for the purposes that it is destined for. The boiler only can be operated by adults who are made acquainted with this operation manual. It is not permitted to let the children unattended by adults near the boiler being in operation. It is not permitted to tamper with boiler in a way, which could endanger operators or eventually roommates’... -
Page 39: Instructions For Disposal Of The Product After Its Life Time
Instructions for disposal of the product after its life time VIADRUS a.s. is a contracting partner of the firm EKO–KOM a.s. with the client number F00120649. The packing complies with EN 13427. We recommend disposing the packing in the following way:... - Page 40 Information for customer Packaging edentification Assessment reference PE Plastic sacks, folie, corrugaled board, iron and plastic fix line Identification od principál materials used. Paper, Polyethylene, iron, wood Part 1: Summary of assessment Standard/Report Assessment requirement Claim Note 1.1 Prevention by source reduction 1.2 Heavy metals and ensure below maximum permitted...
- Page 41 Heating boilers – Part 5: Heating boilers for solid fuels, hand and automatically stocked, nominal heat output of up to 300 kW – Terminology, requirements, testing and marking VIADRUS a.s. provides the guarantee: – for the boiler during 24 months after it was put into operation, but at the most 30 months after the boiler was dispatched from the production plant –...
- Page 42 Annex to the guarantee certificate for customer- the user Record of accomplished guarantee and post-guarantee repairs and regular product checks Contractual service Record Customer’s Carried out activity organization date signature (stamp, signature)
- Page 43 300 kW – Terminology, requirements, testing and marking VIADRUS a.s. provides the guarantee: for the boiler during 24 months after it was put into operation, but at the most 30 months after the boiler –...
- Page 45 300 kW – Terminology, requirements, testing and marking VIADRUS a.s. provides the guarantee: for the boiler during 24 months after it was put into operation, but at the most 30 months after the boiler –...
- Page 48 Update Date 42/2012 – GB...
Need help?
Do you have a question about the Hercules P 1 and is the answer not in the manual?
Questions and answers