
Related Manuals for SMA SUNNY BOY 5000-US


Summary of Contents for SMA SUNNY BOY 5000-US
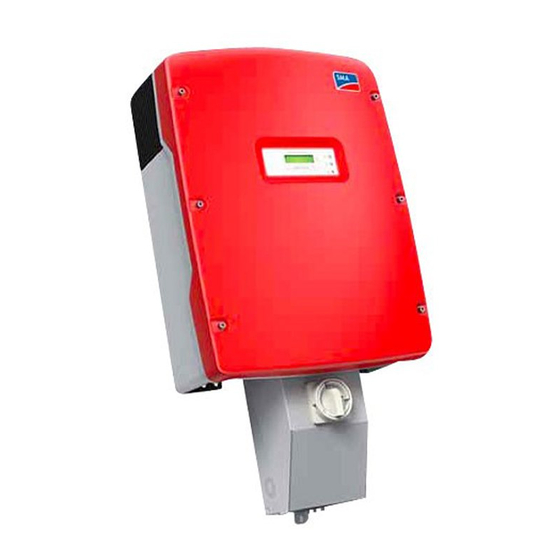
- Page 1 PV Inverter SUNNY BOY 5000-US / 6000-US / 7000-US / 8000-US Installation Manual SB50US-80US-IA-en-36 | TBUS-SB50_60_70US | Version 3.6...
- Page 3 All such warranties are expressly disclaimed. Neither SMA America, LLC nor its distributors or dealers nor SMA Solar Technology Canada Inc. nor its distributors or dealers shall be liable for any indirect, incidental, or consequential damages under any circumstances.
-
Page 4: Important Safety Instructions
A warning describes a hazard to equipment or personnel. It calls attention to a procedure or practice, which, if not correctly performed or adhered to, could result in damage to or destruction of part or all of the SMA equipment and/or other equipment connected to the SMA equipment or personal injury. DANGER DANGER indicates a hazardous situation which, if not avoided, will result in death or serious injury. - Page 5 SMA America, LLC Important Safety Instructions Other symbols in this document In addition to the safety and hazard symbols described on the previous pages, the following symbol is also used in this installation guide: Information This symbol accompanies notes that call attention to supplementary information that you must know and use to ensure optimal operation of the system.
- Page 6 The Sunny Boy contains no user-serviceable parts except for the fans on the bottom of the enclosure and the filters behind the fans as well as the handle covers on the sides of the unit. For all repair and maintenance, always return the unit to an authorized SMA Service Center.
-
Page 7: Table Of Contents
SMA America, LLC Table of Contents Table of Contents Information on this Manual......11 Validity ......... . . 11 Target Group . - Page 8 Table of Contents SMA America, LLC Electrical Connection ......34 Connection Area of the Sunny Boy..... . 36 Sunny Boy Circuit Diagrams .
- Page 9 Technical Data ........91 11.1 Sunny Boy 5000-US (SB 5000US and SB 5000US-12) ..91 11.2 Sunny Boy 6000-US (SB 6000US and SB 6000US-12) .
-
Page 11: Information On This Manual
1.4 Additional Information Additional information on specific topics can be found in the download area at www.SMA‑America.com. 1.5 Nomenclature In this document, SMA America Production, LLC and SMA Solar Technology Canada Inc. will be referred to as SMA. SB50US-80US-IA-en-36 SB50US-80US-IA-en-36... -
Page 12: Safety
Safety SMA America, LLC 2 Safety 2.1 Intended Use The Sunny Boy is a PV inverter which converts the DC current of the PV array to AC current and feeds it into the power distribution grid. The Sunny Boy is suitable for use with fuel cells, small wind turbine systems, and other DC current sources. -
Page 13: Operating Temperature
SMA America, LLC Safety Arc Fault Circuit Interrupter AFCI Only the following Sunny Boy types are equipped with an automatic arc fault circuit interrupter (AFCI): • SB 5000US-12 • SB 6000US-12 • SB 7000US-12 • SB 8000US-12 ®, Edition 2011 of the National Electrical Code Section 690.11, requires that all PV plants attached... -
Page 14: Safety Instructions
Safety SMA America, LLC Interconnection Code Compliance The Sunny Boy has been checked by the certification body and certified according to the guidelines in UL 1741 Static Inverters and Charge Controllers for use in Photovoltaic Power Systems, IEEE 929- 2000 Recommended Practice for Utility Interface of Photovoltaic Systems, and IEEE 1547 Standard for Interconnecting Distributed Resources with Electric Power Systems. -
Page 15: Installation Overview
SMA America, LLC Safety 2.3 Installation Overview This section provides a brief overview of the installation process of a Sunny Boy. Section 3: Unpacking and Inspection This section provides instructions and information on unpacking the Sunny Boy and inspecting shipping damage. -
Page 16: Unpacking And Inspection
SMA America, LLC 3 Unpacking and Inspection Check the delivery for completeness and any visible external damage. Contact your SMA specialty retailer or SMA if the delivery is incomplete or you find any damage. If it is necessary to send the Sunny Boy back, use the original packaging. -
Page 17: Ac Voltage Configuration
SMA America, LLC AC Voltage Configuration 4 AC Voltage Configuration 4.1 Opening the Sunny Boy 1. Remove the six screws and conical spring washers from the enclosure cover. Pull the cover forward smoothly. 2. Put the cover, screws, and conical spring washers to one side so that they do not get in the way. -
Page 18: Locating Internal Component Parts
AC Voltage Configuration SMA America, LLC 4.2 Locating Internal Component Parts 2 3 5 7 A B + - GROUNDING ELECTRODE CONDUCTOR UNGROUNDED GROUNDED Position Description Sockets for optional communication Piggy-Back (RS485 or wireless) Display Status LEDs Jumpers for configuring the AC voltage and the fan test... -
Page 19: Ac Voltage Configuration
SMA America, LLC AC Voltage Configuration Position Description Output AC conductor terminals (N, L1, and L2) Connecting terminal plate, PV grounding conductor, + DC grounding conductor DC varistor terminal with DC varistors* Output AC conductor terminals (L1, L2, N and PE) -
Page 20: Automatic Grid Voltage Detection
AC Voltage Configuration SMA America, LLC Tightening torque of the screw terminals for the left terminal block: Gray terminal blocks (Weidmüller) 18 in-lb. (2 Nm) Green terminal blocks (Phoenix) 22 in-lb. (2.5 Nm) Do not remove the cable in the left terminal block with the marking 0 V (B). - Page 21 SMA America, LLC AC Voltage Configuration *The Sunny Boy 8000-US must not be connected to a 208 V grid. When using grounded 240 V or 208 V Delta grids: • Connect terminal L2 to the grounded phase. SB50US-80US-IA-en-36 SB50US-80US-IA-en-36...
-
Page 22: Jumper For System Configuration
AC Voltage Configuration SMA America, LLC 4.4 Jumper for System Configuration By setting the jumper, you configure the Sunny Boy for different grid topologies. This means that operation in system configurations without neutral conductors, such as 208 V and 240 V Delta, is possible. - Page 23 SMA America, LLC AC Voltage Configuration The following figures display the correct arrangement of the jumpers for the 240 V Delta system configuration: Note the order in which the inverters are connected to the phases. Configuration Examples for Jumpers with 240 V Delta, 120 V Stinger...
-
Page 24: Assembly
Assembly SMA America, LLC 5 Assembly 5.1 Safety DANGER Danger to life due to fire or explosions. With electrical devices, there is always a certain danger that a fire may break out. • Do not install the inverter in the vicinity of combustible materials. -
Page 25: Requirements For The Mounting Location
SMA America, LLC Assembly 5.2 Requirements for the Mounting Location Observe the following conditions during installation: • The installation method and mounting location must be suitable for the weight and dimensions of the Sunny Boy (see section 11 ”Technical Data” (page 91)). - Page 26 Assembly SMA America, LLC • Observe recommended clearances to walls, other inverters or other objects. As a result, sufficient heat dissipation is ensured. ® The National Electrical Code may stipulate greater clearances (see National Electrical ® Code , Section 110.26). Installations in Canada must be carried out in accordance with the applicable Canadian standards.
-
Page 27: Mounting With Wall Mounting Bracket
SMA America, LLC Assembly Dimensions of the Sunny Boy 5.3 Mounting with Wall Mounting Bracket The Sunny Boy is supplied with a T-shaped wall mounting bracket that is suitable for most walls. The wall must be vertical and stable enough to carry a weight of 145 lb. (67 kg) for a long period of time. - Page 28 Assembly SMA America, LLC Dimensions of the Wall Mounting Bracket 2 in. 2 in. 2 in. 2 in. 2 in. 2 in. 2 in. 2 in. 50 mm 50 mm 50 mm 50 mm 50 mm 50 mm 50 mm...
-
Page 29: Possibilities For Mounting The Wall Mounting Bracket
SMA America, LLC Assembly 5.3.1 Possibilities for Mounting the Wall Mounting Bracket Mounting on a Stone Wall Secure the wall mounting bracket with at least 3 screws. The position of the screws on the wall mounting bracket is as follows: •... -
Page 30: Mounting The Wall Mounting Bracket
Assembly SMA America, LLC 5.3.2 Mounting the Wall Mounting Bracket 1. Position the wall mounting bracket at the installation location. If possible, select eye level. 2. Align the wall mounting bracket with a spirit level. The bottom end of the wall mounting bracket reaches approximately to the bottom corner of the inverter. - Page 31 SMA America, LLC Assembly Position Description Terminals for DC varistors 1. Open the DC disconnect as described in Section 6.4 ”Opening the DC Disconnect” (page 40). 2. Equip the 3 terminals (A) with DC varistors: – Insert the insertion tool into the rectangular opening of the terminal.
-
Page 32: Mounting The Dc Disconnect
Assembly SMA America, LLC 5.4.1 Mounting the DC disconnect Dimensions of the DC Disconnect Attach the DC disconnect to the two lower holes of the wall mounting bracket using the two screws and washers provided. 1. Insert the screws with the washers through the holes of the anchorage brackets of the DC disconnect. -
Page 33: Mounting The Sunny Boy On A Wall Mounting Bracket
To help you identify the sides, the ventilation grids are marked "rechts/right" and "links/left" on the inside. The ventilation grids prevent dirt and insects from entering the inverter and can be reordered from SMA if required. See section 12 ”Spare Parts and Accessories” (page 101). SB50US-80US-IA-en-36 SB50US-80US-IA-en-36... -
Page 34: Electrical Connection
Electrical Connection SMA America, LLC 6 Electrical Connection DANGER High voltages on the AC and DC cables Risk of death or serious injury due to electric shock. • Only connect the inverters as described in this manual. • Only electrically qualified persons may work on the inverter. - Page 35 SMA America, LLC Electrical Connection AC Grounding The AC outputs and the neutral conductors are not connected with PE The circuits of the AC input and the AC output are isolated from the enclosure. The electrically qualified person is responsible for grounding the plant according to Section 250 of the National Electrical Code ANSI/NFPA 70.
-
Page 36: Connection Area Of The Sunny Boy
Electrical Connection SMA America, LLC 6.1 Connection Area of the Sunny Boy The DC input of the PV array and the output of the AC power distribution grid are connected inside the enclosure. The internal AC and DC connecting terminal plates are designed for a maximum size of 6 AWG. -
Page 37: Sunny Boy Circuit Diagrams
SMA America, LLC Electrical Connection 6.2 Sunny Boy Circuit Diagrams Sunny Boy Connections for 208 V and 240 V AC Grids SMA SOLAR TECHNOLOGY Betrieb Betrieb Operation Operation Erdschluss Erdschluss Earth Fault Earth Fault SUNNY BOY Störung Störung Failure Failure... -
Page 38: Wiring With Dc Disconnect
Electrical Connection SMA America, LLC 6.2.1 Wiring with DC disconnect Procedure and Order 1. Switch off all energy sources. Open all AC and DC disconnect switches and breakers. 2. Wiring from AC breaker to DC disconnect. 3. AC wiring from DC disconnect to Sunny Boy. -
Page 39: Opening The Sunny Boy
SMA America, LLC Electrical Connection 6.3 Opening the Sunny Boy DANGER High voltages are present in the Sunny Boy during operation. Death or serious injury due to electric shock. • Only open the Sunny Boy in the order described as follows. -
Page 40: Opening The Dc Disconnect
Electrical Connection SMA America, LLC 6.4 Opening the DC Disconnect 1. Switch the DC disconnect to "0". 2. Loosen the screw on the rotary switch of the DC disconnect. Use a cross-head screwdriver (screw used: UNC no. 5x in., cross-head, flat-head, metal). -
Page 41: Ac Connection
Only use solid wire or stranded wire • Do not use fine-wire strands. • Use the free of charge "Sunny Design" at www.SMA-America.com to design your PV plant. Ambient temperature The higher the ambient temperature, the higher the power losses. -
Page 42: Ac Connection In The Dc Disconnect
Electrical Connection SMA America, LLC 6.5.2 AC Connection in the DC Disconnect If you replace an existing inverter • In the switchbox, disconnect the cables for the AC line on which you are working. 1. Switch off the main switch in the main switchbox. - Page 43 SMA America, LLC Electrical Connection 277 V System Configuration 9. Connect conductor L1 (AC conductor 1 or UNGROUNDED) to terminal L1. Do not use terminal 10. Connect conductor N (AC conductor N) to terminal 11. Tighten the cables with a torque of 15 in-lb. (1.7 Nm).
-
Page 44: Connecting The Ac Cables In The Sunny Boy
A B + - 4. Pull the cable back slightly so as to seal the rubber grommet. 2 3 5 7 A B + - 5. Connect the green-yellow cable of the SMA DC disconnect to the terminal labeled SB50US-80US-IA-en-36 Installation Manual... - Page 45 SMA America, LLC Electrical Connection 208 V and 240 V System Configuration Do not connect the Sunny Boy 8000-US to a 208 V grid. 6. Connect the white cable of the DC disconnect to the terminal labeled N. Connect the black cable of the DC disconnect to the terminal labeled L1.
-
Page 46: Dc Connection
• Check the polarity and the open-circuit voltage of the PV strings before connecting the DC cables to the inverter. • Configure the DC input voltage range accordingly before connecting the PV modules to the inverter. Use "Sunny Design" on www.SMA-America.com for string configuration. SB50US-80US-IA-en-36... -
Page 47: Dc Connection Requirements
• Use only solid wire or rough wire strands. Do not use fine-wire strands. • Route the PV lines precisely in the entire PV plant and do not coil. Correct String Configuration • Use "Sunny Design" on www.SMA-America.com for string configuration. SB50US-80US-IA-en-36 SB50US-80US-IA-en-36... -
Page 48: Dc Input Grounding
Electrical Connection SMA America, LLC Fuses The DC disconnect for the inverter must have a minimum rating of 600 V DC and 36 A continuous. The DC disconnect is supplied with 4 fuses (one fuse per string) designed for 15 A and 600 V DC. -
Page 49: Connecting The Dc Cables In The Dc Disconnect
DC cables of the DC disconnect. The breakout opening is on the left side of the DC disconnect. Secure the cable gland to the inner side of the SMA DC disconnect with the matching locknut. 3. Install a ⁄... - Page 50 Electrical Connection SMA America, LLC Negative Grounding In order to check whether your inverter is grounded as intended, observe section 6.6.2 ”DC Input Grounding” (page 48). 7. Connect the positive DC cables to the terminal (A) labeled PV UNGROUNDED in the DC disconnect.
- Page 51 SMA America, LLC Electrical Connection 12. Pull the DC cables from the SMA DC disconnect inside the Sunny Boy. 2 3 5 7 A B + - 13. Pull the cable back slightly so as to seal the sealing grommet.
- Page 52 Electrical Connection SMA America, LLC Positive Grounding In order to check whether your inverter is grounded as intended, observe section 6.6.2 ”DC Input Grounding” (page 48). 1. Connect the negative DC cable to the terminal labeled PV UNGROUNDED (A) in the DC disconnect.
- Page 53 9. Connect the black cable (PV UNGROUNDED) to the terminal labeled DC − in the Sunny Boy. 10. Tighten all cables in the AC and DC terminal blocks in the SMA DC disconnect: Gray terminal blocks (Weidmüller) 10 … 6 AWG: 18 in-lb. (2 Nm) Green terminal blocks (Phoenix) 8 …...
-
Page 54: Dc Connection With Additional Dc Distribution
Electrical Connection SMA America, LLC 6.6.4 DC Connection with Additional DC Distribution For a parallel connection of more than 1 string in front of the integrated DC disconnect, use the COMBINED terminal on the non-grounded side. Using the Spring Terminal labeled COMBINED 1. -
Page 55: Communication
3. Tighten all cables in the terminal blocks in the DC disconnect with a torque of 15 in‑lb. (1.7 Nm). 6.7 Communication The Sunny Boy can be equipped with a communication interface in order to communicate with SMA communication products. -
Page 56: Closing The Sunny Boy
Electrical Connection SMA America, LLC 6.8 Closing the Sunny Boy NOTICE Damage to the enclosure lid may affect the seal between the enclosure lid and the enclosure. There may be an ingress of moisture. Potential damage to the Sunny Boy. -
Page 57: Closing The Dc Disconnect
SMA America, LLC Electrical Connection 6.9 Closing the DC Disconnect All string fuses must be securely mounted GROUNDING ELECTRODE CONDUCTOR UNGROUNDED GROUNDED UNGROUNDED GROUNDED 1. Mount the cover onto the DC disconnect and insert the rotary handle. Turn the rotary handle to position "0". -
Page 58: Commissioning
Commissioning SMA America, LLC 7 Commissioning DANGER High voltages in the PV plant when exposed to sunlight. Risk of death or serious injuries due to incorrect commissioning. • Only commission the Sunny Boy in the following order. • Do not insert the GFDI fuse into the Sunny Boy without a fuse holder. -
Page 59: The Sunny Boy Does Not Resume Operation
Data” (page 91). 2. If the input voltage is not sufficient, perform troubleshooting in the PV array and rectify the fault. 3. If the input voltage is sufficient, contact the SMA Service Line. Observe section 14 ”Contact” (page 103). SB50US-80US-IA-en-36... - Page 60 Commissioning SMA America, LLC The Message "Disturbance AFCI" Is Displayed An electric arc occurred in the PV system. The yellow LED is continuously lit up. The AFCI has been triggered and operation of the Sunny Boy is permanently inhibited. CAUTION Danger of fire from electric arc •...
- Page 61 "0" and switch off the AC disconnect switch to the inverter. If the AFCI self-test fails permanently • Contact the SMA Service Line. Observe section 14 ”Contact” (page 103). In the event of inverter inspection 1. Turn the DC disconnect to position "0".
-
Page 62: Displays And Messages
Displays and Messages SMA America, LLC 8 Displays and Messages The Sunny Boy LED Status Indicators Each Sunny Boy inverter is equipped with three LED status indicators that display the operating mode of the inverter. The green LED indicates standard operation of the inverter. -
Page 63: Led Operation Indicators
SMA America, LLC Displays and Messages If the yellow LED and the red LED light up simultaneously, the inverter has a ground fault. The ground fault may also trip the GFDI fuse. • Observe section 8.2 ”LED Fault Indicators” (page 66). - Page 64 Displays and Messages SMA America, LLC Start The inverter calibrates the internal systems. The calibration lasts 10 seconds and the inverter begins standard operation. If the inverter was manually placed into STOP mode, this status is displayed as well. Waiting The inverter checks the grid requirements and whether enough voltage from the array is available to feed into the power distribution grid.
- Page 65 SMA America, LLC Displays and Messages Standard Operation The inverter feeds into the power distribution grid in either "MPP", "Constant Voltage", or "Turbine" mode. "MPP" mode: The Sunny Boy adjusts the voltage and the current from the PV array in order to receive the highest possible PV output power.
-
Page 66: Led Fault Indicators
Displays and Messages SMA America, LLC 8.2 LED Fault Indicators Ground Fault If the yellow and red LEDs light up simultaneously, the inverter detected a ground fault. The inverter will not restart automatically after detecting a ground fault. • Locate the ground fault and rectify it. Observe section 9 ”Troubleshooting” (page 77). -
Page 67: Grid Failure
The inverter no longer feeds into the power distribution grid and must be serviced by a qualified service technician. • Follow section 7.2 ”The Sunny Boy Does Not Resume Operation” (page 59) or contact SMA. Grid Failure The yellow LED lights up for 5 seconds, goes out for 3 seconds, then flashes 2 times. This sequence is repeated 3 times. - Page 68 3 times. If the status does not change, the flashing code repeats itself. The inverter has detected an internal fault that interrupts standard operation. The inverter must be maintained by a qualified service technician. Contact SMA. SB50US-80US-IA-en-36 Installation Manual...
-
Page 69: Status Messages On The Lcd Display
SMA America, LLC Displays and Messages 8.3 Status Messages on the LCD Display The Sunny Boy is equipped with the LCD "Sunny Display" in the enclosure lid as standard. Activation of the Background Illumination Tapping on the enclosure lid activates the background illumination. Additional taps will scroll through the display messages. - Page 70 Displays and Messages SMA America, LLC Message 4: Energy output accrued since the installation E-Total 724.4kWh of the inverter and the total operating hours. h-total 512h Knocking on the lid of the inverter takes you to the next display message.
-
Page 71: Setting The Display Language
SMA America, LLC Displays and Messages 8.4 Setting the Display Language The LCD can display information in 1 of 4 different languages. The language is configured via 2 slide switches that are located on the lower edge of the LCD. 1. Open the Sunny Boy as described in Section 6.3 ”Opening the Sunny Boy” (page 39). -
Page 72: Measurement Channels
Displays and Messages SMA America, LLC 8.5.1 Measurement Channels Vpv: PV input voltage Vpv Setpoint: MPPT DC target voltage Iac: Grid current Vac: Grid voltage L1 - L2 Vac L1: Grid voltage L1 - N Vac L2: Grid voltage L2 - N... -
Page 73: Operating Mode
SMA America, LLC Displays and Messages 8.5.2 Operating Mode Stop: Manual system stop Offset: Offset calibration of the electronics (at start-up) Waiting: PV voltage is not high enough to start Grid monitoring: Synchronizing to grid (at start-up) MPP-Search: MPPT range test (at start-up) - Page 74 Displays and Messages SMA America, LLC Name Unit Range Standard Password Description Level Default USA/UL1741/ USA/ Electrically Used for adjusting the country 2005, OFF_Grid, UL1741/ qualified specific parameter settings. NON IEEE1547 2005 person Note: After changing one of the parameters marked with "*", the parameter "default"...
- Page 75 SMA America, LLC Displays and Messages Name Unit Range Standard Password Description Level Operating Mode MPP-Operation, Electrically Operating modes of the Sunny Boy: Turbine, V-const, qualified MPP-Operation: Sets the Sunny Boy Stop person in Maximum Power Point Tracking Mode V-const: Constant Voltage Mode (target value defined in "Vconst-...
-
Page 76: Fixed Operating Parameters Of The Sunny Boy
Displays and Messages SMA America, LLC Name Unit Range Standard Password Description Level SB 5000-US - SB 5000-US - Vpv-Start Electrically Minimum DC voltage for the Sunny SB 7000-US: SB 7000-US: qualified Boy to connect to the grid. 250 ... 600... -
Page 77: Troubleshooting
• Monitor the DC and AC voltage at the terminals in the inverter. Please observe all safety precautions listed in the course of this manual. • If the fault cannot be rectified, contact SMA Service Line. For contact data, see section 14 ”Contact” (page 103). - Page 78 Sunny Boy disconnects itself from the power distribution grid. If the power frequency is within the tolerable range and the error message "Fac-Ocu" or "Fac- Srr" continues to be displayed, contact SMA. Warning GFDI Fuse Open The GFDI fuse is cleared. Before replacing the fuse, check the PV array for a ground fault error.
- Page 79 SMA America, LLC Troubleshooting Error type Error code Description Interference VacL1-Ocu, VacL2- Voltage is too high or too low on the indicated Ocu, VacL1-Srr, VacL2- branch. Interference VpvMax The DC input voltage is exceeding the maximum tolerable value. !PV Overvoltage! Disconnect the DC line immediately.
-
Page 80: Maintenance
Maintenance SMA America, LLC 10 Maintenance Regular maintenance ensures a long operating life and optimal efficiency of the entire PV plant. 10.1 Cleaning the Fans The Sunny Boy is fitted with two fans on its underside. The fan intakes and handle covers should be cleaned periodically with a vacuum cleaner. For more thorough cleaning, completely remove the fans. - Page 81 SMA America, LLC Maintenance Cleaning the Fans 5. Press the front latches backward and the rear latch forward. 6. Remove the fan by pulling it slowly and carefully downward. 7. Unlock and remove the plug. The cables of the fans are long enough to disconnect the plug in the inside of the Sunny Boy.
-
Page 82: Cleaning The Handle Covers
Maintenance SMA America, LLC 10.2 Cleaning the Handle Covers For optimal heat dissipation of the device, the handle covers must be clean. Clean the handle covers regularly. NOTICE Insects can enter the Sunny Boy Potential damage to the Sunny Boy. -
Page 83: Fan Test
Sunny Boy. Setting the Parameter 1. Ask for the installer password from SMA Service Line. See "Contact" on page 103. 2. Set the "Fan Test" parameter to "1" in installer mode. 3. Check the air flow of the fans. - Page 84 Maintenance SMA America, LLC Setting the Jumper The Sunny Boy recognizes the jumpers after the restart. All LEDs must be off prior to a restart. 1. Disconnect the Sunny Boy on the AC and DC sides. Wait 5 minutes until the residual voltage has been drained.
-
Page 85: Exchanging The Fuses
SMA America, LLC Maintenance 10.5 Exchanging the Fuses CAUTION Risk of fire due to incorrectly dimensioned fuse. Risk of injury due to fire. • Only replace faulty fuses with fuses of the same type and size. 10.5.1 Exchanging the GFDI Fuse within the Sunny Boy 1. -
Page 86: Exchanging Pv String Fuses Within The Dc Disconnect
Maintenance SMA America, LLC 10.5.2 Exchanging PV String Fuses within the DC disconnect 1. Disconnect the Sunny Boy on the AC and DC sides. 2. Wait 5 minutes until the residual voltage has been drained. 3. Open the DC disconnect as described in section 6.4 ”Opening the DC Disconnect” (page 40). - Page 87 SMA America, LLC Maintenance PV String Fuse Sizing If the fuses are designed too small, they may open too early and cause interference. If fuses are designed too large, they do not provide the required protection as they open too late.
-
Page 88: Testing And Replacing The Dc Varistors
PV plant is not equipped with an additional overvoltage protection. To ensure that the functionality of the DC varistors remains at a constant level, SMA recommends in such cases to replace the DC varistors after an operating time of 10 years with new ones. - Page 89 6. Ensure that no voltage is present at the DC varistors. • If no voltage is present, replace all DC varistors: Only use spare parts from SMA • Always replace the entire set of DC varistors. • Order number in Section 12 ”Spare Parts and Accessories” (page 101).
- Page 90 Maintenance SMA America, LLC – Insert the new DC varistor into the terminal. – Pull the insertion tool out of the rectangular opening of the terminal. 7. Ensure that all DC varistors in the terminals are securely in place. 8. Re-insert all string fuses into the DC disconnect: –...
-
Page 91: Technical Data
SMA America, LLC Technical Data 11 Technical Data 11.1 Sunny Boy 5000-US (SB 5000US and SB 5000US-12) PV Array Connection Maximum MPP voltage 250 V … 480 V Nominal operating voltage 310 V Range of input operating voltage 250 V … 600 V... - Page 92 Technical Data SMA America, LLC Efficiency SB 5000-US V = 250 V DC = 310 V DC = 480 V DC Output power / Rated power Range of output power factor 0.95 … 1.0 Output power factor, nominal value 0.99 Peak inverter efficiency 96.8 %...
-
Page 93: Sunny Boy 6000-Us (Sb 6000Us And Sb 6000Us-12)
SMA America, LLC Technical Data 11.2 Sunny Boy 6000-US (SB 6000US and SB 6000US-12) PV Array Connection Maximum MPP voltage 250 V … 480 V Nominal operating voltage 310 V Range of input operating voltage 250 V … 600 V... - Page 94 Technical Data SMA America, LLC Efficiency SB 6000-US V = 250 V DC = 310 V DC = 480 V DC Output power / Rated power Range of output power factor 0.95 … 1.0 Output power factor, nominal value 0.99 Peak inverter efficiency 97.0 %...
-
Page 95: Sunny Boy Sb 7000-Us (Sb 7000Us And Sb 7000Us-12)
SMA America, LLC Technical Data 11.3 Sunny Boy SB 7000-US (SB 7000US and SB 7000US-12) PV Array Connection Maximum MPP voltage 250 V … 480 V Nominal operating voltage 310 V Range of input operating voltage 250 V … 600 V... - Page 96 Technical Data SMA America, LLC Efficiency SB 7000-US V = 250 V DC = 310 V DC = 480 V DC Output power / Rated power Range of output power factor 0.95 … 1.0 Output power factor, nominal value 0.99 Peak inverter efficiency 97.1 %...
-
Page 97: Sunny Boy Sb 8000-Us (Sb 8000Us And Sb 8000Us-12)
SMA America, LLC Technical Data 11.4 Sunny Boy SB 8000-US (SB 8000US and SB 8000US-12) PV Array Connection Maximum MPP voltage 300 V … 480 V Nominal operating voltage 345 V Range of input operating voltage 300 V … 600 V... -
Page 98: Ambient Conditions
Technical Data SMA America, LLC Efficiency SB 8000-US V = 300 V DC = 345 V DC = 480 V DC Output power / Rated power Range of output power factor 0.95 … 1.0 Output power factor, nominal value 0.99 Peak inverter efficiency 96.5 %... -
Page 99: Dc Disconnect
SMA America, LLC Technical Data 11.5 DC Disconnect Maximum DC input current 30 A Maximum DC short-circuit current 36 A Maximum system voltage 600 V Maximum nominal size for string fuses 20 A Maximum AC operating current 34 A Dimensions W x H x D ⁄... -
Page 100: Trip Limits/Trip Times
Technical Data SMA America, LLC 11.6 Trip Limits/Trip Times Frequency Nominal Trip Limit Trip Frequencies Trip Times Frequency 60 Hz > 60.5 Hz 60.45 Hz … 60.55 Hz max. 0.1602 s < 57.0 Hz … 59.8 Hz 56.95 Hz … 59.85 Hz adjustable, 0.16 s …... -
Page 101: Torque Values And Cable Sizes
DC disconnect cover Cover screws 53 in-lb. (6 Nm) 12 Spare Parts and Accessories If needed, you can order these from SMA or your SMA specialty retailer. Spare Parts Name Brief Description SMA Order Number... -
Page 102: Compliance Information
• Consult the dealer or an experienced radio/TV technician for help. The user is cautioned that changes or modifications not expressly approved by SMA America, Inc. could void the user’s authority to operate this equipment. IC Compliance This device complies with Industry of Canada licence-exempt RSS standard(s). Operation is subject to the following two conditions: •... -
Page 103: Contact
SMA America, LLC Contact 14 Contact If you experience technical problems with our products, please contact SMA Service Line. We require the following information in order to provide you with the necessary assistance: • Inverter type • Type and number of modules connected •... - Page 104 SMA America, LLC Installation Manual SB50US-80US-IA-en-36...
Need help?
Do you have a question about the SUNNY BOY 5000-US and is the answer not in the manual?
Questions and answers