
Subscribe to Our Youtube Channel
Related Manuals for Adam Equipment HIGHLAND SERIES


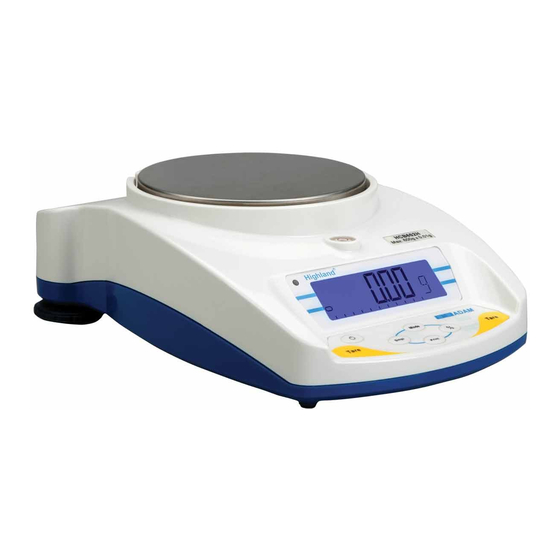
Summary of Contents for Adam Equipment HIGHLAND SERIES
- Page 1 Adam Equipment HIGHLAND SERIES (P.N. 9520, Revision E, October 2011) © Adam Equipment Company 2011...
- Page 2 Easy Reference: Model name of the scale: Serial number of the unit: Software revision number (Displayed when power is first turned on): Date of Purchase: Name of the supplier and place: © Adam Equipment Company 2011...
-
Page 3: Table Of Contents
SETTING USER PARAMETERS............19 CALIBRATION..................20 TROUBLE SHOOTING................22 ERROR MESSAGES ...............22 REPLACEMENT PARTS AND ACCESSORIES.......23 SPECIFICATIONS................24 TECHNICAL SPECIFICATIONS............24 COMMON SPECIFICATIONS ............24 RS-232 / USB SPECIFICATIONS ............24 10.0 CALIBRATION CERTIFICATE ............28 11.0 WARRANTY STATEMENT..............28 © Adam Equipment Company 2011 P a g e... - Page 4 © Adam Equipment Company 2011 P a g e...
-
Page 5: Introduction
4) Place the draft shield on top of the balance, the location notches in the breeze shield should align with the cut outs on the balance. For optimum performance the balance should be used with the draft shield (if provided). © Adam Equipment Company 2011 P a g e... -
Page 6: Display / Keyboard Function
Setting parameters it will show the is not automatic. previous option or decrease the value of a flashing digit. © Adam Equipment Company 2011 P a g e... -
Page 7: Internal Rechargeable Battery
AC adapter at the back of the balance and attach it to the main power supply. The charging indicator at the left top corner of the LCD will be © Adam Equipment Company 2011 P a g e... -
Page 8: Locating And Protecting Your Balance
Highland has a stacking feature for stacking more than one unit on top of each other which does not apply weight to the pan. For more details on this see the section on storing. © Adam Equipment Company 2011 P a g e... -
Page 9: Storing When Not In Use
Core models with the larger ø 5.7” / 145mm may be stacked at the top of the pile but other balances should NOT be stacked on top of them due to the larger pan size. © Adam Equipment Company 2011 P a g e... -
Page 10: Basic Operation
The balance will not tare a value for a container unless the stability light indicates that the weight is stable thus ensuring a correct taring function. © Adam Equipment Company 2011 P a g e... -
Page 11: Weighing
WEIGHING UNITS To change the weighing units, press [Mode] to cycle through the options of units that are enabled. See Parameters 6.1 Enabling Weighing Units, to enable or disable the weighing units. © Adam Equipment Company 2011 P a g e... -
Page 12: Functions
4) The balance will initially show SP 10 asking for a sample size of 10 parts. Press [Mode] to cycle through the options: 10, 20, 50, 100, 200 and back to 10 to select the sample you have placed on the balance. 10 | © Adam Equipment Company 2011 P a g e... -
Page 13: Accumulation
2 seconds before returning to displaying the weight of the item on the balance. 6) Continue until all weights have been added. 11 | © Adam Equipment Company 2011 P a g e... - Page 14 At the same time the total will also be sent via the RS-232 interface. To clear the memory, press [Smpl] once the total accumulation value is displayed, after the pressing [Print]. 12 | © Adam Equipment Company 2011 P a g e...
-
Page 15: Parameters
5) Pressing the [Mode] key will change the setting of a particular unit. For example, to enable the weighing unit Carats, change the setting to on by pressing the [Mode] key. 13 | © Adam Equipment Company 2011 P a g e... -
Page 16: Setting The Backlight
Sets the backlight to operate automatically when a weight is placed on the balance or a key is pressed. EL Off Sets the backlight to be off. EL On Sets the backlight to be on for full time. 14 | © Adam Equipment Company 2011 P a g e... -
Page 17: Setting The Printing Parameters / Accumulation
Accumulation P1 Prt Data is sent whenever the [Print] key is Manual accumulation when pressed. the [Print] key is pressed. P2 Con Data is sent continuously. Accumulation is disabled. 15 | © Adam Equipment Company 2011 P a g e... - Page 18 7 data bits, even parity 7 data bits, odd parity 7 0 1 Press the [Mode] key to change the setting. Press [Tare] to confirm and move to the next parameter. 16 | © Adam Equipment Company 2011 P a g e...
-
Page 19: Auto Power Off
[Mode] to go to the next function. SELECTING THE INTERNAL OR EXTERNAL CALIBRATION You can select if the internal mass or an external mass is to be used to calibrate the balance. 17 | © Adam Equipment Company 2011 P a g e... -
Page 20: Adjust The Value Of The Internal Mass
6) Press [Tare] to store a particular setting. The display will return to F6 CA 7) When F6 CA is displayed press the [Print] key to return to weighing or press [Mode] to go to the next function. 18 | © Adam Equipment Company 2011 P a g e... -
Page 21: Setting User Parameters
Pressing [Mode] will then show TECH. This function is a manufacturing function for qualified technicians only and you can press [Mode] again to scroll through parameter options, or press [Print] to return to normal weighing. 19 | © Adam Equipment Company 2011 P a g e... -
Page 22: Calibration
7.0 CALIBRATION The Highland series of balances comes standard with HandiCal internal calibration to make calibrating the balance quick and easy. However you can also calibrate the balance using an external verification weight if needed. The HandiCal method is the default but if you would like to use external calibration then you must first enable this via the parameter (section 6.5 Selecting The Internal Or External Calibration). - Page 23 NOTE: If the calibration fails retry. The balance will show FAl l l l L H (when the weight is higher) or FAl l l l L L (when the weight is lower). Repeat the process using the correct calibration weight. 21 | © Adam Equipment Company 2011 P a g e...
-
Page 24: Trouble Shooting
Charge the battery or on front replace internal panel rechargeable battery. No Power when Internal battery may be flat. Charge the battery or turning on. replace internal rechargeable battery. 22 | © Adam Equipment Company 2011 P a g e... -
Page 25: Replacement Parts And Accessories
AC adapter SA plug 12VDC 800mA 3.02.4.0.9159 AC adapter Australian plug 12VDC 800mA 3.08.1.2.2009 Stainless steel pan, 120mm 3.08.2.3.2008 Sub Pan 120mm 3.08.2.3.2024 Draft shield (includes lid) 3.08.1.2.2044 HandiCal calibration handle 3.09.4.0.9012 Battery, 6V/1.3ah 23 | © Adam Equipment Company 2011 P a g e... -
Page 26: Specifications
6.3 Setting The Printing Parameters / Accumulation section for full information on settings The standard Interface parameters are: RS-232 output of weighing data ASCII code 4800 Baud 8 data bits No Parity 24 | © Adam Equipment Company 2011 P a g e... - Page 27 22 Characters, ST for stable/US for unstable followed by GS for Gross Weight/ NT for Net Weight and then a minus sign for negative weight, or a space for positive weight. 25 | © Adam Equipment Company 2011 P a g e...
- Page 28 Prints the results to a PC or printer using the optional RS-232 interface. It also adds the value to the accumulation memory if the accumulation function is not set to automatic. 26 | © Adam Equipment Company 2011 P a g e...
- Page 29 27 | © Adam Equipment Company 2011 P a g e...
-
Page 30: Calibration Certificate
10.0 CALIBRATION CERTIFICATE 11.0 WARRANTY STATEMENT Adam Equipment offers Limited Warranty (Parts and Labor) for the components failed due to defects in materials or workmanship. Warranty starts from the date of delivery. During the warranty period, should any repairs be necessary, the customer must inform the supplier or Adam Equipment. - Page 31 Shielded interconnect cables must be employed with this equipment to insure compliance with the pertinent RF emission limits governing this device. Changes or modifications not expressly approved by Adam Equipment could void the user's authority to operate the equipment. WEEE COMPLIANCE...
- Page 32 ADAM EQUIPMENT is an ISO 9001:2008 certified global company with more than 35 years experience in the production and sale of electronic weighing equipment. For a complete listing of all Adam scales and balances visit our website at: www.adamequipment.com © Copyright by Adam Equipment Co. Ltd. All rights reserved. No part of this publication may be reprinted or translated in any form or by any means without the prior permission of Adam Equipment.
Need help?
Do you have a question about the HIGHLAND SERIES and is the answer not in the manual?
Questions and answers