Table of Contents
Advertisement
Advertisement
Table of Contents

Related Manuals for Adam Equipment HCB 123


Summary of Contents for Adam Equipment HCB 123
- Page 1 (Includes HCB xxxM EU & NTEP approved models) (HCB Software ver. 2.5 or higher – standard models) (HCB-M Software. rev 2.38 or higher – EU approved models) (HCB-aM Software rev. 3.10 or higher – NTEP approved models) © Adam Equipment Company 2016...
- Page 2 COPY Easy Reference: Model name of the scale: Serial number of the unit: Software revision number (Displayed when power is first turned on): Date of Purchase: Name of the supplier and place: © Adam Equipment Company 2016...
-
Page 3: Table Of Contents
8.2 REPLACEMENT PARTS AND ACCESSORIES………………………………………………………………….. 25 9.0 SPECIFICATIONS……………………………………………………………………………………………………………………… 26 9.1 TECHNICAL SPECIFICATIONS………………………………………………………………………………………. 26 9.2 COMMON SPECIFICATIONS……………………………………………………………………………………….. 9.3 RS232 / USB SPECIFICATIONS ……………………………………………………………………………………. 27 10.0 CALIBRATION CERTIFICATE…………………………………………………………………………………………………… 11.0 WARRANTY STATEMENT………………………………………………………………………………………………………. 30 12. WEEE DIRECTIVE……………………………………………………………………………………………………..2.0 INTRODUCTION © Adam Equipment Company 2016... -
Page 4: Set Up
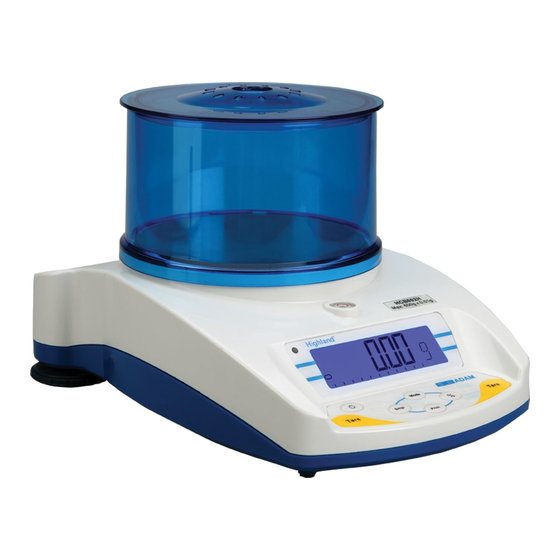
4) Place the draft shield on top of the balance, the location notches in the breeze shield should align with the cut outs on the balance. For optimum performance the balance should be used with the draft shield (if provided). © Adam Equipment Company 2016... -
Page 5: Display/ Keyboard Function
Setting parameters it will show the is not automatic. previous option or decrease the value of a flashing digit. © Adam Equipment Company 2016... -
Page 6: Internal Rechargeable Battery
The display will show an indication when the battery needs to be charged. To charge the battery, plug in the DC adapter at the back of the balance and attach it to the main power supply. The charging indicator at the left top corner of the LCD will be © Adam Equipment Company 2016... -
Page 7: Locating And Protecting Your Balance
For more details on this see the section on storing. Avoid operating in high static areas, or weighing high static materials, such as plastics or powders, as this may damage electronics and affect measurements. Use grounding mats or bonding straps to reduce potential © Adam Equipment Company 2016... -
Page 8: Storing When Not In Use
Core (CQT) models with the larger ø 5.7” / 145mm may be stacked at the top of the pile but other balances should NOT be stacked on top of them due to the larger pan size. © Adam Equipment Company 2016... -
Page 9: Basic Operation
Note: When the container is removed a negative value will be shown equivalent to the total value of the amount tared (Except on approved models). The balance will not tare a value for a container unless the © Adam Equipment Company 2016... -
Page 10: Weighing
To change the weighing units, press [Mode] to cycle through the options of units that are enabled. See Parameters 6.1 Enabling Weighing Units, to enable or disable the weighing units. Weighing Units on approved models = g , Kg, ct © Adam Equipment Company 2016... -
Page 11: Functions
2) When the balance is in normal weighing mode with the initial quantity on the balance, press the [Smpl] key to start the parts counting function. 3) The initial number of samples should match the options for parts counting, 10, 20, 50, 100 or 200 pieces. © Adam Equipment Company 2016... -
Page 12: Accumulation
3) The weight will be transmitted to a printer or PC. 4) Remove the weight, allowing the balance to return to zero. © Adam Equipment Company 2016... - Page 13 At the same time the total will also be sent via the RS-232 interface. To clear the memory, press [Smpl] once the total accumulation value is displayed after pressing [Print]. © Adam Equipment Company 2016...
-
Page 14: Parameters
1) To set this parameter press and hold the [Mode] key during self-checking test when turning on the balance. 2) After a few seconds, the display will show the first function F1 UNT. 3) Press the [->0/T<-] key to view the current settings of each unit. © Adam Equipment Company 2016... - Page 15 0.026667 TL.t Tola An Asian weighing unit 0.085735 Newtons Used to measure force 0.009807 Grams Grams with last digit suppressed Tales J. Japan Taels 0.026717 TL.J * Lbs are not available on HCB 123 Model © Adam Equipment Company 2016...
-
Page 16: Setting The Backlight And Audible Alert Beep
1) To set this parameter press the [Mode] key during self-checking test when turning on the balance. 2) After a few seconds, the display will show the first function F1 UNT. 3) Keep pressing the [Mode] key until F3 SEr is displayed. © Adam Equipment Company 2016... - Page 17 7) Setting the baud rate. This is the transmission speed for communication with printers and computers. The selected rate must match that of the other device for communications to work. The following settings are available: b 1200 b 2400 b 4800 b 9600 © Adam Equipment Company 2016...
-
Page 18: Auto Power Off
The auto power off function helps conserve power, when using the internal rechargeable battery or DC adapter. The Auto switch-off time may be set up by the user. 1) To set this parameter press the [Mode] key during self-checking test when turning on the balance. © Adam Equipment Company 2016... -
Page 19: Selecting The Internal Or External Calibration
6) Press [->0/T<-] to store a particular setting. The display will return to F5 IEC 7) When F5 IEC is displayed press the [Print] key to return to weighing or press [Mode] to go to the next function. © Adam Equipment Company 2016... -
Page 20: Adjust The Value Of The Internal Mass
Changing the value of the internal weight will affect the calibration when using the internal calibration. To check if your internal weight is correct you should only use high quality weights that are accurate to the readability of the balance. © Adam Equipment Company 2016... -
Page 21: Setting User Parameters
Pressing [Mode] will then show TECH. This function is a manufacturing function for qualified technicians only and you can press [Mode] again to scroll through parameter options, or press [Print] to return to normal weighing. © Adam Equipment Company 2016... -
Page 22: Calibration
Use the handle to help lower the weight as far as it will go. Press the [->0/T<-] key once the stable sign is shown. 7) The display will show PASS. Rotate the weight back to its off position. Once removed the balance will return to zero. © Adam Equipment Company 2016... - Page 23 3) The display will show PASS. Remove the weight from the pan. NOTE: If the calibration fails retry. The balance will show FAlL H (when the weight is higher) or FAlL L (when the weight is lower). Repeat the process using the correct calibration weight. © Adam Equipment Company 2016...
-
Page 24: Trouble Shooting
Low Battery indicator. Internal battery may be flat. Charge the battery or on front replace internal panel rechargeable battery. No Power when Internal battery may be flat. Charge the battery or turning on. replace internal rechargeable battery. © Adam Equipment Company 2016... -
Page 25: Replacement Parts And Accessories
Replacement batteries should match the type fitted by the manufacturer. Please dispose of and recycle used batteries carefully and according to local laws and regulations. Do not crush, incinerate or place in normal waste. © Adam Equipment Company 2016... -
Page 26: Specifications
1.0g OIML Class Repeatability * 0.02g Std Dev 0.02g Std Dev 0.2g Std Dev 0.5g Std Dev 0.2g Std Dev Linearity (±) * 0.03g Max ECL error * 0.03g Tare Range Full capacity Tare Range* © Adam Equipment Company 2016... -
Page 27: Common Specifications
Pin 2 Input computer or printers. Pin 5 Signal Ground USB Connection is using a standard USB connector. Software for using the USB interface with a PC is available from the Adam Equipment web site. © Adam Equipment Company 2016... - Page 28 If it is 2 letters long, the 1st and second position is used with a space after the second letter, (i.e. 0.12345lb__ ) or if it is 3 letters long all 3 positions are used, (i.e 123.45dwt). © Adam Equipment Company 2016...
- Page 29 Would be same as entering a preset tare value of 5.345 from keypad P<cr><lf> Prints the results to a PC or printer using the optional RS-232 interface. It also adds the value to the accumulation memory if the accumulation function is not set to automatic. © Adam Equipment Company 2016...
-
Page 30: Calibration Certificate
11.0 WARRANTY STATEMENT Adam Equipment offers Limited Warranty (Parts and Labor) for the components failed due to defects in materials or workmanship. Warranty starts from the date of delivery. During the warranty period, should any repairs be necessary, the customer must inform the supplier or Adam Equipment. -
Page 31: Weee Directive
State of California to cause cancer and birth defects or other reproductive harm. Adam Equipment products have been tested with, and are always supplied with mains power adaptors which meet all legal requirements for the intended country or region of operation, including electrical safety, interference and energy efficiency. - Page 32 E-mail: info@adamequipment.com.cn © Copyright by Adam Equipment Co. All rights reserved. No part of this publication may be reprinted or translated in any form or by any means without the prior permission of Adam Equipment. Adam Equipment reserves the right to make changes to the technology, features, specifications and design of the equipment without notice.
Need help?
Do you have a question about the HCB 123 and is the answer not in the manual?
Questions and answers