Table of Contents
Advertisement
Available languages
Available languages
Advertisement
Chapters
Table of Contents

Related Manuals for Adam Equipment HIGHLAND HCB 602M


Summary of Contents for Adam Equipment HIGHLAND HCB 602M
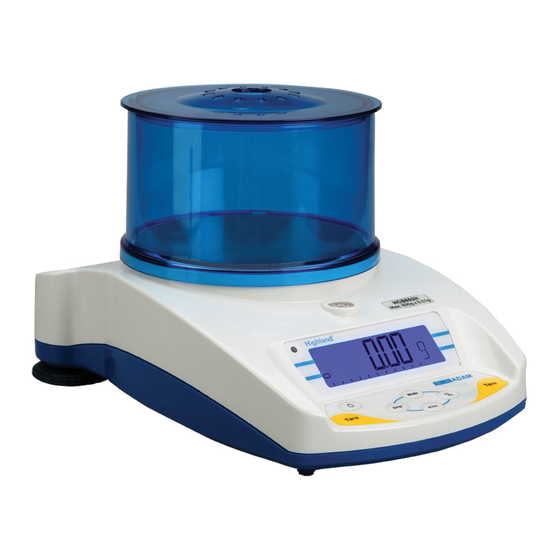
- Page 1 EN Adam Equipment HIGHLAND SERIES (Includes HCB xxxM EU & NTEP approved models) (HCB Software ver. 2.33 or higher – standard models) (HCB‐M Software. rev 2.39 – EU approved models) (HCB‐aM Software rev. 3.11 – NTEP approved models) © Adam Equipment Company 2018 1 ...
- Page 2 EN Easy Reference: Model name of the scale: Serial number of the unit: Software revision number (Displayed when power is first turned on): Date of Purchase: Name of the supplier and place: © Adam Equipment Company 2018...
-
Page 3: Table Of Contents
6.6 ADJUST THE VALUE OF THE INTERNAL MASS…………………………………………………………….. 20 6.7 SETTING USER PARAMETERS……………………………………………………………………………………… 21 7.0 CALIBRATION……………………………………………………………………………………………………….... 22 8.0 TROUBLE SHOOTING ……………………………………………………………………………………………………………… 24 8.1 ERROR MESSAGES …………………………………………………………………………………………………….. 24 9.0 SPECIFICATIONS……………………………………………………………………………………………………………………… 25 9.1 TECHNICAL SPECIFICATIONS………………………………………………………………………………………. 25 9.2 COMMON SPECIFICATIONS……………………………………………………………………………………….. 26 9.3 RS232 / USB SPECIFICATIONS ……………………………………………………………………………………. 26 10.0 CALIBRATION CERTIFICATE…………………………………………………………………………………………………… 29 11.0 WARRANTY STATEMENT………………………………………………………………………………………………………. 29 © Adam Equipment Company 2018... -
Page 4: Introduction
2) Remove the shipping protection screw and transit disc from the top of the balance and place the plastic top pan support on the balance. Do not use excessive force when removing and installing the screw. 3) Gently place the plastic pan support into the receptacle and secure with the supplied screw. To not over‐tighten the screw. It should be finger tight only. Put the Stainless steel pan on top of the pan support © Adam Equipment Company 2018... -
Page 5: Display / Keyboard Function
[Print] To print the results to a PC or printer Secondary function is to return to using RS‐232 or USB interface. It also normal operation when the balance is adds the value to the accumulated in a parameter setting mode. memory if the accumulation function Setting parameters it will show the is not automatic. previous option or decrease the value of a flashing digit. © Adam Equipment Company 2018... -
Page 6: Internal Rechargeable Battery
NLY PPROVED MODLES 3.3 INTERNAL RECHARGEABLE BATTERY The balance can be operated from the internal rechargeable battery or using a DC adapter. The battery discharge time, is approximately 24 hours depending on the usage of the backlight. The display will show an indication when the battery needs to be charged. To charge the battery, plug in the DC adapter at the back of the balance and attach it to the main power supply. The charging indicator at the left top corner of the LCD will be on. © Adam Equipment Company 2018... - Page 7 The Highland has a stacking feature for stacking more than one unit on top of each other which does not apply weight to the pan. For more details on this see the section on storing. Avoid operating in high static areas, or weighing high static materials, such as plastics or powders, as this may damage electronics and affect measurements. Use grounding mats or bonding straps to reduce potential © Adam Equipment Company 2018...
- Page 8 EN 3.5 STORING WHEN USE If you have any of the Highland series or Core Balance lines you can store them easily on top of each other. To save space and protect them from damage. Without Shield With Shield Note: Only models equipped with a ø 4.7” / 120mm pan, can be stacked for storage. Core (CQT) models with the larger ø 5.7” / 145mm may be stacked at the top of the pile but other balances should NOT be stacked on top of them due to the larger pan size. © Adam Equipment Company 2018...
-
Page 9: Basic Operation
[‐>0/T<‐] key. Providing the container weight is more than 4% of the maximum capacity of the balance (+/‐ 2% for approved models), the digits will show zero and NET will light up on the display. You can then weigh your sample in the container. Taring weight subtracts from the total balance capacity. © Adam Equipment Company 2018... -
Page 10: Weighing
The stable indicator will light when the reading is stable. WEIGHING UNITS To change the weighing units, press [Mode] to cycle through the options of units that are enabled. See Parameters 6.1 Enabling Weighing Units, to enable or disable the weighing units. Weighing Units on approved models = g , Kg, ct © Adam Equipment Company 2018... -
Page 11: Functions
1) Place your container on the balance and press the [‐>0/T<‐] key as described in 4.2 Zeroing / Tare section. This will remove the weight of the container from your count. 2) When the balance is in normal weighing mode with the initial quantity on the balance, press the [Smpl] key to start the parts counting function. 3) The initial number of samples should match the options for parts counting, 10, 20, 50, 100 or 200 pieces. © Adam Equipment Company 2018... -
Page 12: Accumulation
1) Place the weight on the balance. If automatic then the balance will automatically accumulate the weight. If set to manual then you will need to press the [Print] key. 2) The display will show ACC 1 followed by the total value in the memory for 2 seconds before returning to displaying the weight of the item on the balance. 3) The weight will be transmitted to a printer or PC. 4) Remove the weight, allowing the balance to return to zero. 5) Put a second weight on. If set to automatic it will accumulate the weight 2 automatically. If in manual mode, press [Print], the display will show ACC © Adam Equipment Company 2018... - Page 13 6) Continue until all weights have been added. To view the totals in memory press the [Print] key when the balance is at zero. The display will show ACC xx (where “xx” is the total number of readings) and the total weight, before returning to zero. At the same time the total will also be sent via the RS‐232 interface. To clear the memory, press [Smpl] once the total accumulation value is displayed after pressing [Print]. © Adam Equipment Company 2018...
-
Page 14: Parameters
Sets the print parameters F3 oFF See section 6.4 Sets the auto power‐off parameter F4 SEt See section 6.7 User Parameters for autozero, filter and stability tECH Service agents only Technical parameters setting mode / factory setting 6.1 ENABLING WEIGHING UNITS ) NOT APPROVED MODELS You can enable and disable the weighing units available to the user when they press the [Mode] key as described in section 4.4 Weighing Units. 1) To set this parameter press and hold the [Mode] key during self‐checking test when turning on the balance. 2) After a few seconds, the display will show the first function F1 UNT. 3) Press the [‐>0/T<‐] key to view the current settings of each unit. 4) Pressing the [‐>0/T<‐] key will cycle through the other units along with their current settings. For example, if oFF is displayed with the weighing unit Carats, the user will not be able to use this unit while weighing. © Adam Equipment Company 2018... - Page 15 Hongkong Taels‐ used to weigh coral, 0.026717 TL.H pearls, etc. Taels C. China (Singapore)Taels 0.026455 TL.C Taels t. Taiwan Taels 0.026667 TL.t Tola An Asian weighing unit 0.085735 t Newtons Used to measure force 0.009807 N Grams Grams with last digit suppressed Tales J. Japan Taels 0.026717 TL.J * Lbs are not available on HCB 123 Model © Adam Equipment Company 2018...
-
Page 16: Setting The Backlight And Audible Alert Beep
6.3 SETTING PRINTING PARAMETERS ACCUMULATION 1) To set this parameter press the [Mode] key during self‐checking test when turning on the balance. 2) After a few seconds, the display will show the first function F1 UNT. 3) Keep pressing the [Mode] key until F3 SEr is displayed. 4) Press the [‐>0/T<‐] key to view the current settings. © Adam Equipment Company 2018... - Page 17 Press the [Mode] key to change the setting. Press [‐>0/T<‐] to confirm and move to the next parameter. 7) Setting the baud rate. This is the transmission speed for communication with printers and computers. The selected rate must match that of the other device for communications to work. The following settings are available: b 1200 b 2400 b 4800 b 9600 © Adam Equipment Company 2018...
-
Page 18: Auto Power Off
POWER OFF The auto power off function helps conserve power, when using the internal rechargeable battery or DC adapter. The Auto switch‐off time may be set up by the user. 1) To set this parameter press the [Mode] key during self‐checking test when turning on the balance. 2) After a few seconds, the display will show the first function F1 UNT. © Adam Equipment Company 2018... -
Page 19: Selecting The Internal Or External Calibration
2) After a few seconds, the display will show the first function F1 UNT. 3) Keep pressing the [Mode] key until F5 IEC is displayed. 4) Press the [‐>0/T<‐] key to view the current settings. 5) To change the settings press the [Mode] key to change from INt (internal calibration) or E (external calibration) 6) Press [‐>0/T<‐] to store a particular setting. The display will return to F5 IEC 7) When F5 IEC is displayed press the [Print] key to return to weighing or press [Mode] to go to the next function. © Adam Equipment Company 2018... -
Page 20: Adjust The Value Of The Internal Mass
7) When CA is displayed, press the [Print] key to return to weighing or press [Mode] to go to the next function. NOTE: Changing the value of the internal weight will affect the calibration when using the internal calibration. To check if your internal weight is correct you should only use high quality weights that are accurate to the readability of the balance. © Adam Equipment Company 2018... -
Page 21: Setting User Parameters
ZEO 4 ZEO 0 to 8, 0 being with auto zero off, and 8 is the zero range of 4 divisions. Stability symbol range, 0 to 5 n STA 2 STA 0 is the smallest stability range and 5 is largest. n ZTR Weight Tracking Range, 0 to 5 3 ZTR Press the [‐>0/T<‐] key to view the current settings. To change the settings press the [Mode] key. Press the [‐>0/T<‐] key to advance to the next parameter. When completed the display will show F7 SET again. Pressing [Mode] will then show TECH. This function is a manufacturing function for qualified technicians only and you can press [Mode] again to scroll through parameter options, or press [Print] to return to normal weighing. © Adam Equipment Company 2018... -
Page 22: Calibration
4) When the stable indicator shows press the [‐>0/T<‐] key. 5) The display shows C Int. Press the [‐>0/T<‐] key 6) The display shows LoAd. Lower the internal calibration mass located behind the pan. Use the handle to help lower the weight as far as it will go. Press the [‐>0/T<‐] key once the stable sign is shown. 7) The display will show PASS. Rotate the weight back to its off position. Once removed the balance will return to zero. © Adam Equipment Company 2018... - Page 23 2) The display shows LoAd. Place your weight on the pan. Press [‐>0/T<‐] key once the stable sign is shown. 3) The display will show PASS. Remove the weight from the pan. NOTE: If the calibration fails retry. The balance will show FAlL H (when the weight is higher) or FAlL L (when the weight is lower). Repeat the process using the correct calibration weight. © Adam Equipment Company 2018...
-
Page 24: Error Messages
Air movement, nothing touching the pan. Make vibration or instability. sure the internal weight is in the off position. Make sure the balance is level. Try recalibrating. Low Battery indicator. Internal battery may be Charge the battery or replace flat. internal rechargeable battery. Unstable – balance Possible damage to the Make sure the balance is on a flat cannot get a stable mechanics / Loadcell. surface and away from vibration. reading. Make sure the calibration weight is in its off position. Red Light Low Battery indicator. Internal battery may be Charge the battery or replace on front flat. internal rechargeable battery. panel No Power when Internal battery may be Charge the battery or replace turning on. flat. internal rechargeable battery. © Adam Equipment Company 2018... -
Page 25: Specifications
Readability (d) 0.001 g 0.05 g 0.01 g 0.01 g 0.5 g 0.5 g Repeatability (s.d.) Readability (e) 0.01 g 0.05 g 0.1 g 0.1 g 0.5g 0.5.0 g Linearity ± Pan 120mm / 4.7” ø Draft shield Included as standard Units of Measure g / ct / oz / GN / ozt / dwt certain models include: kg / lb © Adam Equipment Company 2018... - Page 26 OR APPROVED MODELS THESE VALUES ARE FOR GUIDE PURPOSES ONLY COMMON SPECIFICATIONS Interface USB and RS‐232, bi‐directional Stabilization Time 3 Seconds typical Operating Environment (M) 15°C to 35°C / 59°F to 95°F Power supply (external) 12VDC 800 mA Calibration HandiCal Internal calibration or external calibration ‐ User selectable Display 18mm high 6 digits LCD With auto backlight and loading bar graph Scale Housing ABS Plastic with Stainless Steel Pan Overall Dimensions (wxdxh) 170 x 245 x 150mm / 6.7” x 9.6” x 6” HCB 6001 With Draft Shield 170 x 245 x 80mm / 6.7” x 9.6” x 3.1” Net Weight 1.7 kg / 3.7 lb 1.9 kg / 4.1 lb © Adam Equipment Company 2018...
- Page 27 N o . _ _ _ _ _ _ _ _ _ 0 1 <cr> <lf> 16 ASCII Characters, Increments every time a weight is stored in memory T o t a l _ _ _ 1 2 3 . 4 5 _ g _ <cr> <lf> 19 Characters, The total weight stored in memory <cr> <lf> Includes 2 blank lines <cr> <lf> © Adam Equipment Company 2018...
- Page 28 (i.e 123.45dwt). Input command format: The scale can be controlled with the following commands. The commands must be sent in upper case letters, i.e. “T” not “t”. T<cr><lf> Tares the scale to display the net weight. This is the same as pressing [‐>0/T<‐] key. Z<cr><If> Sets the zero point for all subsequent weighing. Display shows zero. T5.345<cr><if> Would be same as entering a preset tare value of 5.345 from keypad P<cr><lf> Prints the results to a PC or printer using the optional RS‐232 interface. It also adds the value to the accumulation memory if the accumulation function is not set to automatic. © Adam Equipment Company 2018...
- Page 29 Repairs carried out under the warranty does not extend the warranty period. Components removed during the warranty repairs become the company property of Adam Equipment. The statutory right of the purchaser is not affected by this warranty. The terms of this warranty are governed by the Laws of England and Wales. For complete details on Warranty Information, see the terms and conditions of sale available on our web‐site. © Adam Equipment Company 2018...
- Page 30 WARNING: This product includes a sealed lead-acid battery which contains chemicals known to the State of California to cause cancer and birth defects or other reproductive harm. Adam Equipment products have been tested with, and are always supplied with mains power adaptors which meet all legal requirements for the intended country or region of operation, including electrical safety, interference and energy efficiency.
- Page 31 EN © Adam Equipment Company 2018...
- Page 32 E-mail: sales@adamequipment.com.au E-mail: info@adamequipment.com.cn © Copyright by Adam Equipment Co. All rights reserved. No part of this publication may be reprinted or translated in any form or by any means without the prior permission of Adam Equipment. Adam Equipment reserves the right to make changes to the technology, features, specifications and design of the equipment without notice.
- Page 33 FR Adam Equipment SERIES HIGHLAND (Comprends les modèles HCB xxxM approuvés par l’UE & NTEP) (Logiciel HCB ver. 2.33 ou supérieure – modèles standards) (Logiciel HCB‐M rev. 2.39 – modèles approuvés par l’UE) (Logiciel HCB‐aM rev. 3.11 – modèles approuvés par NTEP) © Adam Equipment Company 2016 1 ...
- Page 34 FR Référence simple: Nom du modèle de la balance: Numéro de série de l’unité: Numéro de révision du logiciel (Affiche lors de la mise en marche): Date d’achat: Nom du fournisseur et lieu: © Adam Equipment Company 2016 2 ...
- Page 35 8.1 MESSAGES D’ERREUR ...................... 2 3 9.0 CARACTERISTIQUES ........................ 24 9.1 CARACTERISTIQUES TECHNIQUES .................. 2 4 9.2 CARACTERISTIQUES COMMUNES .................. 2 4 9.3 CARACTERISTIQUES RS‐232 / USB .................. 2 5 10.0 CERTIFICAT DE CALIBRAGE ..................... 28 11.0 INFORMATION SUR LA GARANTIE .................. 28 12.0 DIRECTIVE DEEE .……………………………………………………………………………………………………………… 29 © Adam Equipment Company 2016 3 ...
-
Page 36: Introduction
Mettez le plateau en inox sur le dessus du support du plateau. 4) Mettez la cage de pesée sur le dessus de la balance, la cage de pesée doit s’emboiter dans les encoches localisée à l’arrière du plateau de pesée, sur le boitier de la balance. Afin d’obtenir des performances optimales de la balance, il est recommandé d’utiliser la cage de pesée si celle‐ci est fournie. © Adam Equipment Company 2016 4 ... - Page 37 [Print] Pour imprimer les résultats vers La fonction secondaire est de retourner au un PC ou une imprimante en fonctionnement normal lorsque la balance est dans utilisant l’interface RS‐232 ou un mode de réglage de paramètre. USB. Elle ajoute aussi la valeur à Lors du réglage des paramètres, elle indiquera la mémoire accumulée, la l’option précédente ou diminuera la valeur du chiffre fonction d’accumulation n’est clignotant. pas automatique. © Adam Equipment Company 2016 5 ...
-
Page 38: Batterie Interne Rechargeable
3.3 BATTERIE INTERNE RECHARGEABLE Les balances peuvent fonctionner à partir de la batterie interne rechargeable ou en utilisant l’adaptateur DC. Le temps de déchargement de la batterie est environ 24 heures dépendant de l’usage du rétro éclairage. L’écran affichera une indication lorsque la batterie a besoin d’être rechargée. Pour recharger la batterie, connectez l’adaptateur DC à l’arrière de la balance et branchez sur le secteur. L’indicateur de chargement de la batterie sera allumé dans le coin en haut à gauche de l’écran LCD. © Adam Equipment Company 2016 6 ... - Page 39 De façon à toujours faire fonctionner votre balance dans les meilleures conditions nous vous suggérons quelques recommandations : Evitez les températures extrêmes. Ne pas la placer sous les rayons directs du soleil ou proche d’un ventilateur ou climatiseur. Soyez sûr que la balance soit localisée sur une table stable et sans vibration. Evitez des sources d’alimentations instables. Ne pas fonctionner prés de gros utilisateurs d’électricités tels que les postes à souder ou gros moteurs. Ne pas laisser la batterie de la balance se vider entièrement – si vous ne l’utilisez pas pendant une longue période vous devrez charger la batterie périodiquement pour être sûr que la batterie ne perde pas sa charge. Gardez‐les à distances des vibrations. Ne pas les placer prés de machines vibrantes ou industrielles. Eviter les zones très humides qui pourraient causer de la condensation, et gardez loin de tout contact avec l’eau. Ne pas les placer prés de fenêtres ouvertes, climatisation, ventilateurs, qui pourraient causer des courants d’air et donc des lectures instables. Gardez les balances propres, et ne pas empiler du matériel dessus quand elles ne sont pas utilisées. La Highland possède la fonction d’empilement permettant d’empiler les balances les unes sur les autres. Pour plus de renseignements sur cette fonction allez à la section suivante. Évitez d’opérer la balance dans des endroits avec beaucoup d’électricité statique et de peser des matériels très statiques comme des plastiques ou des poudres car ils peuvent endommager les composants électroniques et affecter les mesures. Utilisez un tapis antistatique ou des sangles pour réduire le potentiel d’erreur. © Adam Equipment Company 2016 7 ...
- Page 40 Avec cage de pesée Note: Seulement les modèles avec des plateaux de 120mm de ø peuvent être empilés pour le rangement. Les modèles Core avec des plateaux de 145mm ø peuvent seulement être posés sur le dessus des modèles avec le plus petit plateau mais ne peuvent pas être elles‐mêmes empilées à cause de leur plus grande taille de plateau. © Adam Equipment Company 2016 8 ...
-
Page 41: Fonctionnement De Base
L’indicateur de zéro sera affiché dans le coin en haut à gauche de l’écran LCD. Si vous utilisez un récipient pour peser, alors vous pouvez le placer sur le plateau et appuyez sur [Tare], en vous assurant que le poids du récipient n’est pas supérieur à 4% de la capacité maximum de la balance (+/‐ 2% pour modèles homologués), l’écran affichera le zéro et NET s’allumera sur l’écran. Vous pouvez ensuite peser vos objets dans le récipient. Faire la tare revient à soustraire le poids de la capacité total de la balance. © Adam Equipment Company 2016 9 ... -
Page 42: Pesage
L’indicateur de stabilité sera allumé et la lecture sera stable. UNITES PESAGE Pour changer les unités de pesage, appuyez sur [Mode] pour faire défiler les différentes unités qui sont activées. Voir les Paramètres 6.1 Activation des unités de pesage, pour activer ou désactiver les unités de pesage. Unités de Pesage sur modèles homologués : g, Kg, ct © Adam Equipment Company 2016 10 ... -
Page 43: Fonctions
1) Placez votre récipient sur la balance et appuyez sur [Tare] comme décrit dans la section 4.2 Remise à zéro / Tare. Ceci enlèvera le poids du récipient du comptage. 2) Lorsque la balance est dans le mode de pesage normal avec la quantité initiale sur la balance, appuyez sur [Smpl] pour commencer la fonction de comptage de pièces. 3) Le nombre initial d’échantillon devra correspondre aux options pour le comptage de pièces, 10, 20, 50, 100 ou 200 pièces. © Adam Equipment Company 2016 11 ... -
Page 44: Accumulation
à la mémoire quand la balance enregistré une fois que [Print] sera devient stable. actionnée et le que le poids sera stable. 1) Placez le poids sur la balance, si le mode est sur automatique alors la balance accumulera le poids automatiquement, si elle réglée sur manuelle alors vous aurez besoin d’appuyez sur [Print]. 2) L’écran affichera ACC 1 suivi de la valeur totale dans la mémoire pendant 2 secondes avant de retourner à l’affichage du poids de l’article sur la balance. 3) Le poids sera transmis vers une imprimante ou un PC. 4) Retirez le poids, permettant à la balance de retourner à zéro. © Adam Equipment Company 2016 12 ... - Page 45 Pour voir le total en mémoire, appuyez sur [Print] quand la balance est à zéro. L’écran affichera ACC xx (ou “xx” est le nombre total de lectures) et le poids total, avant de retourner a zéro. Au même moment le total sera envoyé sur l’interface RS 232. Pour effacer la mémoire, appuyez sur [Smpl] une fois que la valeur d’accumulation totale est affichée ensuite appuyez sur [Print]. © Adam Equipment Company 2016 13 ...
-
Page 46: Parametres
Vous pouvez activer et désactiver les unités de pesage qui sont disponibles pour l’utilisateur lorsqu’il appui sur [Mode] comme décrit dans la section 4.5 Unités de Pesage. 1) Pour régler ce paramètre, appuyez sur [Mode] lors du test initial quand vous mettez en marche la balance. 2) Après quelques secondes, l’écran affichera la première fonction F1 UNT. 3) Appuyez sur [Tare] pour voir les réglages actuels de chaque unité. © Adam Equipment Company 2016 14 ... - Page 47 Une unité de pesage utilisée au Japon pour peser des 0.266667 MM perles. Taels Hk. Hongkong Taels‐ utilisée pour peser le corail, perles etc. 0.02675 TL.H Taels C. Chine (Singapore) Taels 0.026455 TL.C Taels t. Taiwan Taels 0.026667 TL.t Tola Une unité de pesage Asiatique 0.085735 t Newtons Utilise pour mesure la force 0.009807 N Grammes Gramme avec le dernier chiffre supprimé 1.0 g2 Tales J. Japan Taels 0.026717 TL.J * Lbs ne sont pas disponibles sur le modèle HCB123 © Adam Equipment Company 2016 15 ...
-
Page 48: Reglage Du Retro Eclairage
2) Après quelques secondes, l’écran affichera la première fonction F1 UNT. 3) Appuyez sur [Mode] pour sélectionner F2 EL . 4) Appuyez sur [Tare] pour visualiser les réglages actuels du rétro éclairage. 5) Pour modifier les réglages, appuyez sur [Mode] afin de faire défiler les autres réglages disponibles comme décrit ci‐dessus. 6) Appuyez sur [Tare] pour enregistrer un réglage particulier. L’écran retourner à F2 EL 7) Quand F2 EL est affiché, appuyez sur [Print] pour retourner au pesage ou appuyez sur [Mode] pour aller à la prochaine fonction. © Adam Equipment Company 2016 16 ... - Page 49 7) Réglage du taux de Baud. C’est la vitesse de transmission pour la communication avec les imprimantes et les ordinateurs, la vitesse doit correspondre à celle de l’autre appareil afin que la communication fonctionne. © Adam Equipment Company 2016 17 ...
- Page 50 7 bits de données, parité 7 E 1 paire 7 bits de données, parité 7 0 1 impaire Appuyez sur [Mode] pour changer le réglage. Appuyez sur [Tare] pour confirmer et aller vers le prochain paramètre. 9) L’écran reviendra à F3 SEr. Appuyez sur [Print] pour retourner au pesage ou appuyez sur [Mode] pour aller à la prochaine fonction. © Adam Equipment Company 2016 18 ...
-
Page 51: Auto Extinction
Vous pouvez sélectionner soit la masse interne ou la masse externe devant être utilisée pour calibrer la balance. 1) Pour régler ce paramètre, appuyez sur [Mode] pendant le test initial lors de la mise en marche de la balance. 2) Après quelques secondes, l’écran affichera la première fonction F1 UNT. 3) Maintenez appuyé le bouton [Mode] jusqu’a ce que F5 IEC soit affiché. 4) Appuyez sur [Tare] pour visualiser les réglages actuels. 5) Pour modifier les réglages, appuyez sur [Mode] pour changer de INt (calibrage interne) ou E (calibrage externe) 6) Appuyez sur [Tare] pour enregistrer un réglage particulier. L’écran retournera à F5 IEC © Adam Equipment Company 2016 19 ... -
Page 52: Ajuster La Valeur De La Masse Interne
Vous pouvez appuyer de nouveau sur [Mode] pour faire défiler les paramètres en options, ou appuyez sur [Print] pour retourner au pesage normal. Le fait de changer la valeur de la masse interne affectera le calibrage lorsque vous utiliserez le calibrage interne. Pour vérifier si votre masse interne est correcte vous devez seulement utiliser des poids de haute précision et de qualité correspondant à la précision de la balance. © Adam Equipment Company 2016 20 ... -
Page 53: Calibrage
2) Appuyez sur [Smpl] et [Print] en même temps pendant le test initial de la mise en marche. 3) L’écran affichera unLoAd retirez tout poids du plateau en inox. 4) Quand l’indicateur de stabilité est allumé appuyez sur [Tare]. 5) L’écran affichera C Int appuyez sur [Tare 6) L’écran indiquera LoAd, poussez alors la masse interne de calibrage située derrière le plateau. Utilisez la poignée pour vous aider à poussez la masse au maximum. Appuyez sur [Tare] une fois que le symbole de stabilité est indiqué. 7) L’écran affichera PASS, remettez le poids de retour dans sa position initiale. La balance retournera à zéro. © Adam Equipment Company 2016 21 ... - Page 54 HCB 3001 HCB 6001 Poids 1 500g 500g 1000g 1000g 2000g Poids 2 1000g 1000g 2000g 2000g 4000g Poids 3 ‐ 1500g ‐ 3000g 6000g 6) Une fois que le poids de calibrage a été sélectionné, appuyez sur [Tare]. 8) L’écran affichera LoAd, mettez votre poids sur le plateau. Appuyez sur [Tare] une fois que le symbole de stabilité est allumé. 9) L’écran affichera PASS, retirez le poids du plateau. NOTE: Si le calibrage échoue, réessayez. La balance affichera FAlL H (lorsque le poids est trop grand) ou FAlL L (quand le poids est trop faible). Répétez cette procédure en utilisant un poids de calibrage approprié. © Adam Equipment Company 2016 22 ...
- Page 55 Instable – la balance Endommagement Soyez sûr que la balance soit sur une ne peut pas obtenir mécanique possible ou du surface plate et loin de toute vibration. une lecture stable. capteur. Vérifiez que le poids de calibrage soit dans sa position initiale. Voyant Indicateur de batterie Batterie interne Chargez la batterie ou remplacez la rouge sur faible. rechargeable entièrement batterie interne rechargeable. le panneau déchargée de devant Pas d’alimentation lors Batterie interne Chargez la batterie ou remplacez la de la mise en marche. rechargeable entièrement batterie interne rechargeable. déchargée © Adam Equipment Company 2016 23 ...
-
Page 56: Caracteristiques
HCB 1002M HCB 5001M Capacité Maximum 600g 1000g 5000g Précision (d)* 0.01g 0.01g 0.1g Précision (e) 0.1g 0.1g 1.0g Classe OIML II Reproductibilité (s.d.)* 0.02g Std Dev 0.02g Std Dev 0.2g Std Dev Linéarité ± 0.03g 0.03g 0.3g Erreur ECL Max* 0.03g 0.03g 0.3g Étendue de Tare Étendue de Tare Pleine Capacité * © Adam Equipment Company 2016 24 ... - Page 57 Voir la section des paramètres 6.3 Réglage des Paramètres d’impression / Accumulation pour plus de renseignements sur les réglages. Les paramètres standards de : Sortie des données de pesage RS‐232 Code ASCII 4800 Baud 8 bits de données No Parity Les détails de la connexion sont: Connecteur: prise 9 pin d‐subminiature Pin 3 Sortie Pin 2 Entrée Pin 5 Signal de terre Généralement un câble modèle Null est recommandé pour connecter un ordinateur ou une imprimante. © Adam Equipment Company 2016 25 ...
- Page 58 ± _ _ _ _ _ _ 1 2 3 . 4 5 _ g _ <cr> <lf> Exemple de Compte de Pièces: ± _ _ _ _ _ _ _ _ _ 1 2 5 P C S <cr> <lf> 16 caractères, commence avec un signe moins pour un poids négatif, ou un espace pour un poids positif. © Adam Equipment Company 2016 26 ...
- Page 59 P<cr><lf> Imprime les résultats vers un PC ou une imprimante en utilisant l’interface RS‐232. Cela ajoute aussi la valeur dans la mémoire d’accumulation si la fonction accumulation n’est pas règle sur automatique. © Adam Equipment Company 2016 27 ...
-
Page 60: Certificat De Calibrage
Au cours de la période de garantie, pour toutes les réparations nécessaires, l'acheteur doit informer son fournisseur ou Adam Equipment. La société ou son technicien agréé se réserve le droit de réparer ou de remplacer les composants sur le site de l'acheteur ou dans l'un de ses ateliers en fonction de la gravité des problèmes, sans frais supplémentaires. -
Page 61: Directive Deee
State of California to cause cancer and birth defects or other reproductive harm. Adam Equipment products have been tested with, and are always supplied with mains power adaptors which meet all legal requirements for the intended country or region of operation, including electrical safety, interference and energy efficiency. - Page 62 FR © Adam Equipment Company 2016 30 ...
- Page 63 FR © Adam Equipment Company 2016 31 ...
- Page 64 E-mail: sales@adamequipment.com.au E-mail: info@adamequipment.com.cn © Copyright par Adam Equipment Co. Ltd. Tous droits réservés. Aucune partie de cette publication ne peut être reproduite ou traduite sous quelque forme ou par tout moyen, sans l'autorisation préalable d'Adam Equipment. Adam Equipment se réserve le droit d'apporter des modifications à la technologie, les caractéristiques, les spécifications et la conception de l'équipement sans préavis.
- Page 65 ES Adam Equipment SERIE HIGHLAND (Includes HCB xxxM EU & NTEP approved models) (HCB Software ver. 2.33 or higher – standard models) (HCB‐M Software. rev 2.39 – EU approved models) HCB‐aM Software rev. 3.11 – NTEP approved models) © Adam Equipment Company 2016 1 ...
- Page 66 ES Referencia: Nombre del modelo de la balanza: Numero de serie de la unidad: Numero de revisión del software (Demostrado al encender la balanza): Fecha de compra: Nombre y lugar del suministrador: © Adam Equipment Company 2016...
- Page 67 6.6 AJUSTANDO EL VALO DE LA MASA INTERNA ……………………………………………………….. 20 7.0 CALIBRACION……………………………………………………………………………………………………….... 22 8.0 TRATAMIENTO DE PROBLEMAS……………………………………………………………………………………………… 24 8.1 MENSAJES DE ERROR………………………………………………………………………………………………… 24 9.0 ESPECIFICACIONES…………………………………………………………………………………………………………………. 25 9.1 ESPECIFICACIONES TECNICAS…………………………………………………………………………………….. 25 9.2 ESPECIFICACIONES COMUNES…………………………………………………………………………………… 26 9.3 ESPECIFICACIONES RS‐232 / USB…..………………………………………………………………………….. 26 10.0 CERTIFICADO DE CALIBRACION……………………………………………………………………………………………. 30 11.0 GARANTIA……………………………………………………………………………………………………………………………. 30 12. DIRECTIVA DE WEEE……………………………………………………………………………………………..... 31 © Adam Equipment Company 2016...
-
Page 68: Introduccion
3) Coloque el soporte plástico del plato con cuidado en el receptáculo y asegúrelo con el tornillo suministrado. Para no sobre‐apretar el tornillo, debe ser apretado con los dedos. Coloque al plato de pesaje de acero inoxidable encima del soporte. 4) Coloque el parabrisas encima de la balanza. Los cortes debajo del parabrisas deben ser alineadas con los cortes en la balanza. Para el desempeño óptimo la balanza debe ser utilizada con el parabrisas (si suministrado). © Adam Equipment Company 2016... -
Page 69: Funcion Del Display /Teclado
Vacía el valor acumulado de la memoria pulsado durante la suma. Cuando ajustando algunos parámetros esta tecla moverá el dígito intermitente a la izquierda. [Mode] Con esta tecla pueden acceder las Indicia el peso de la unidad, peso total y contaje unidades de pesaje que están en el modo cuenta piezas. activadas. Ajustando los parámetros indicará la próxima opción o aumentará el valor de un dígito intermitente. [Print] Para imprimir los resultados a un La función secundaria es para regresar a la ordenador o impresora usando operación normal cuando la balanza esta en un interfaces RS‐232 o USB. También modo de colocación de parámetro. agrega el valor a la memoria Ajustando los parámetros indicará la opción acumulada si la función de anterior o disminuirá el valor de un dígito acumulación no es automática. intermitente © Adam Equipment Company 2016... -
Page 70: Bateria Interna Recargable
MODELOS APROBADOS 602M, 1002 HCB5001M 3.3 BATERIA INTERNA RECARGABLE La balanza puede ser operada utilizando la batería recargable o usando el adaptador AC. El tiempo de descarga de la batería es aproximadamente 24 horas, depende del uso de la retroiluminación. El display ilustrará una indicación cuando la batería debe ser cargada. Para cargar la batería, enchufe el adaptador AC en la parte trasera de la balanza y conéctelo. El indicador de carga en el rincón izquierdo del display LCD estará encendido. © Adam Equipment Company 2016... - Page 71 Evite la operación en áreas de alta estática, o el pesaje de material de alta estática, como plásticos o polvos, ya que esto puede dañar los componentes electrónicos y afectar a las mediciones. Utilice alfombrillas de tierra o correas de unión para reducir el potencial. © Adam Equipment Company 2016...
-
Page 72: Almacenando Cuando No En Uso
Sin parabrisas Con parabrisas NOTA: Sólo os modelos con el tamaño del plato de ø 4,7”/120mm el pueden ser amontonados para el almacenamiento. Modelos Core con platos de 5,7”/145mm ø puede ser amontonado encima de el pilar, pero balanzas adicionales no pueden ser amontonadas encima de este modelo debido al tamaño más grande del plato. © Adam Equipment Company 2016... -
Page 73: Operacion Basica
(+/‐ 2% para modelos aprobados), el display mostrará cero y NET se iluminará en el display. Ahora puede pesar su objeto en el contenedor. Peso tarado es restado de la capacidad de la balanza total. NOTA: Cuándo se remueve el contenedor un valor negativo será indicado equivalente al total valor total de la cantidad tarada (Excepto en modelos aprobados). La balanza no tara un valor para un contenedor a menos que la luz de la estabilidad indique que el peso es estable, asegurando una función de tara correcta. © Adam Equipment Company 2016... -
Page 74: Pesando
UNIDADES PESAJE Para cambiar las unidades de pesaje, pulse [Mode] para ver las unidades disponibles. Vea la sección de parámetros 6.1 Activando las Unidades de Pesaje para activar o desactivar las unidades de pesaje. Unidades de pesaje en los modelos aprobados = g, kg, ct © Adam Equipment Company 2016... -
Page 75: Funciones
1) Coloque el contenedor sobre la balanza y pulse la tecla [Tara] como descrito en 4.2 Ajuste a cero / Tara. Esto removerá el peso del contenedor del contaje. 2) Cuando la balanza está en el modo de pesaje normal con la cantidad inicial en la balanza, pulse la tecla [Smpl] para comenzar la función cuenta piezas. 3) El número inicial de muestras debe emparejar las opciones para el contaje de piezas, 10, 20, 50, 100 o 200 pedazos. 4) La balanza indicara inicialmente SP 10 preguntando por el tamaño de una muestra de 10 piezas. Pulse [Mode] para recorrer las opciones: 10, 20, 50, © Adam Equipment Company 2016... -
Page 76: Acumulacion
Si esta en manual, el usuario tiene que pulsar la tecla [Print]. 2) EL display indicara ACC 1 seguido por el valor total en la memoria por 2 segundos antes de volver a ilustrar el peso del artículo sobre la balanza. 3) El peso será transmitido a una impresora u ordenador. 4) Remueva el peso, permitiendo que la balanza regrese acero. © Adam Equipment Company 2016... - Page 77 ACC 2 seguido por la nueva suma en la memoria por 2 segundos antes de volver a indicar el peso del artículo sobre la balanza. 6) Continúe hasta que todos los pesos hayan sido añadidos. Para ver el total en la memoria pulse la tecla [Print] cuando la balanza está en cero. El display indicará ACC xx (donde "xx" es el número total de lecturas) y el peso total, antes de regresar a cero. Al mismo tiempo el total también será enviado a través de la interfaz R‐232. Para vaciar la memoria, pulse [Smpl] al indicarse el valor total de acumulación el display, después pulse [Print]. © Adam Equipment Company 2016...
-
Page 78: Parametros
6.3 F3 oFF Véase sección Ajusta el parámetro del apague automático 6.4 F4 SEt Véase sección Parámetros de usuario de auto cero, filtro y la 6.7 estabilidad tECH Sólo los agentes Parámetros técnicos modo de ajuste/ajuste de de servicio fábrica © Adam Equipment Company 2016... -
Page 79: Activando Las Unidades De Pesaje
6) Cuando la unidad F1 Unt es indicada, puede pulsar la tecla [Print] para regresar al pesaje o pulse [Mode] para avanzar a la próxima función. La mesa siguiente muestra las unidades de pesaje disponibles al usuario y los factores de conversión para cada una (Nota: Modelos aprobados tienen solo g / kg / ct). © Adam Equipment Company 2016... - Page 80 Tales Hong Kong ‐ usados para pesar 0.026717 coral, perlas, etc. Tales CH China (Singapore)Taels 0.026455 TL.C Tales T. Usado para pesar coral, perlas etc. 0.026667 TL.t Tical Uns unidad de pesaje asiática 0.085735 Newton Usado para pesar fuerza 0.009807 Gramos Gramos con el último dígito suprimido Tales J. Japon Tales 0.026717 TL.J * En el Modelo HCB123 libras no son disponibles © Adam Equipment Company 2016...
- Page 81 6) Pulse [‐>0/T<‐] para guardar el ajuste particular. El display regresará a F2 EL 7) Cuando F2 EL es indicado, pulse la tecla [Print] para regresar al modo de pesaje o pulse [Mode] para avanzas a la próxima función. 6.3 AJUSTANDO PARÁMETROS IMPRESIÓN /ACUMULACIÓN 1) Para ajustar este parámetro pulse la tecla [Mode] durante la prueba de auto‐ verificación al encender la balanza. 2) Después de unos segundos el display indicara la primera función F1 UNT. 3) Continúe pulsando la tecla [Mode] hasta que F3 SEr sea indicado. © Adam Equipment Company 2016...
- Page 82 7) Ajustando la tasa de baudios. Esto es la velocidad de transmisión de la comunicación con impresoras y ordenadores. La tasa seleccionada debe emparejar el otro dispositivo para que funcione la comunicación. Los siguientes ajustes son disponibles: b 1200 b 2400 b 4800 b 9600 © Adam Equipment Company 2016...
- Page 83 1) Para ajustar este parámetro pulse la tecla [Mode] durante la prueba de auto‐ verificación al encender la balanza. 2) Después de unos segundos el display indicara la primera función F1 UNT. 3) Siga pulsando la tecla [Mode] hasta que F4 oFF sea indicado. 4) Pulse la tecla [‐>0/T<‐] para ver el ajuste presente. 5) Pulse [Mode] para cambiar el ajuste (0, 5, 10, 20 y 30 minutos). 6) Pulse [‐>0/T<‐] para guardar el ajuste particular. el display regresará a F4 oFF 7) Cuando F4 oFF es indicado, pulse la tecla [Print] para regresar al pesaje o pulse [Mode] para avanzar al la próxima función. © Adam Equipment Company 2016...
- Page 84 [%] para cambiar la posición, pulse [Mode] para aumentar el valor y pulse [Print] para disminuir el valor. La pesa interna de calibración solo debe de cambiar entre 95.000 y 105.000 gramos o 495.00 y 505.00 gramos (dependiendo del modelo). © Adam Equipment Company 2016...
- Page 85 [Mode] nuevamente para recorrer las opciones de parámetro, o pulse [Print] para regresar a pesaje normal. NOTA: Cambiando el valor del peso interno afectará la calibración cuando se utilice la calibración interna. Para verificar si su peso interno es el correcto usted debe utilizar sólo pesas de alta calidad que son exactas a la legibilidad de la balanza. © Adam Equipment Company 2016...
-
Page 86: Calibracion
4) Cuando el indicador de estabilidad es ilustrado, pulse la tecla [‐>0/T<‐]. 5) El display indicará C Int. Pulse la tecla [‐>0/T<‐] 6) El display indica LoAd. Enganche la masa interna de calibración localizada detrás del plato de pesaje. Use el pin para encajarla. Al ser ilustrado el signo de estabilización, pulse la tecla [‐>0/T<‐]. 7) El display indicará PASS. Gire la pesa a la posición de desenganche. Al removerla la balanza regresará a cero. © Adam Equipment Company 2016... - Page 87 HCB 3001 HCB 6001 1000g Pesa 500g 500g 1000g 2000g 1 Pesa 2000g 1000g 1000g 2000g 4000g 2 ‐ Pesa ‐ 1500g 3000g 6000g 3 1) Al seleccionar la pesa de calibración, pulse la tecla [‐>0/T<‐] 2) El display indicará LoAd. Coloque la pesa sobre el plato. Pulse la tecla [‐>0/T<‐] al ser ilustrado el signo de estabilización. 3) El display indicará PASS. Remueva la pesa del plato. NOTA: Si la calibración falla, vuelva a intentar. La balanza indicará FAlL H (si el peso es mas alto) o FAlL L (cunado el [eso es mas bajo). Repita el proceso usando la pesa correcta de calibración. © Adam Equipment Company 2016...
- Page 88 Indicador de batería Batería interna no tiene carga. Cargue o cambie la batería baja. interna recargable. Balanza – inestable no Daño a la celda de Asegure que la balanza esté en puede obtener un pesaje/mecánica. una superficie plana y lejos de resultado estable. vibración. Asegure que la masa de calibración esté desenganchada. La Luz roja Indicador de batería Batería interna no tiene carga. Cargue o cambie la batería en el panel baja. interna recargable. delantero No prende al Batería interna no tiene carga. Cargue o cambie la batería encender. interna recargable. © Adam Equipment Company 2016...
-
Page 89: Especificaciones
Modelos aprobados (EU): EN45501:2015 OIML R76:2006 (E) HCB 602M HCB 1002M HCB 5001M Capacidad 600g 1000g 5000g Legibilidad (d)* 0.01g 0.01g 0.1g Legibilidad (e) 0.1g 0.1g 1.0g OIML Class II Repetibilidad * 0.02g Std Dev 0.02g Std Dev 0.2g Std Dev Linealidad (±) * 0.03g 0.03g 0.3g Max ECL error * 0.03g 0.03g 0.3g Rango de Tara Rango de tara plena capacidad * © Adam Equipment Company 2016... - Page 90 No Igualados Los detalles de la conexión son: Conector: 9 pin d-sub miniatura Por lo general se necesita un cable tipo nulo para la Pin 3 Salida Pin 2 Entrada conexión a una computadora o impresora Pin 5 Señal Tierra Para la conexion USB se utiliza un conector USB estándar. El programa para el uso del interaz con una PC esta disponible para ser descargada en nuestra pagina web. © Adam Equipment Company 2016...
- Page 91 El valor total almacenado en la memoria <cr> <lf> Incluye 2 lineas en blanco <cr> <lf> La balanza no imprimirá si el valor esta en cero solamente el numero de artículos y el total será imprimido. Si la balanza es configurada para salida continua (no disponible en unidades certificadas ) solamente el peso sera imprimido seguido por dos líneas en blanco. Un ejemplo de salida en modo continuo se muestra en el cuadro de abajo. © Adam Equipment Company 2016...
- Page 92 16 Caracteres, empieza con el signo el signo de menos para pesaje negativo, o un espacio para pesaje positivo. Para todos los ejemplos si la unidad de pesaje es una letra (gramos = g) la segunda posicion de la unidad es utilizada con un espacio antes y despues, si la unidad de pesaje es 2 letras la primera y seguna posicion son utilizadas con un espacio despues de la segunda letra (0.12345 lb_) y si la unidad de pesaje son 3 letras todos los espacios son utilizados ( 123.45dwt ) Comando del formato de entrada: © Adam Equipment Company 2016...
-
Page 93: Certificado De Calibracion
Ajusta el punto cero para todos los pesajes subsiguiente. La pantalla indicara cero. T5.345<cr><if> Sería lo mismo que entrar un valor presente de tara de 5.345 con teclado numérico P<cr><lf> Imprime los resultados a una PC o impresora utilizando la interfaz R‐232. También agrega el valor a la memoria de acumulación si la función de acumulación no está en modo automático. 10.0 CERTIFICADO CALIBRACIÓN © Adam Equipment Company 2016... -
Page 94: Garantia
El derecho reglamentario del comprador no es afectado por esta garantía. Los términos de esta garantía son gobernados por la ley de Inglaterra. Para detalles completos en la Información de Garantía, vea los términos y las condiciones de venta disponible en nuestra página Web © Adam Equipment Company 2016... -
Page 95: Directiva De Weee
State of California to cause cancer and birth defects or other reproductive harm. Adam Equipment products have been tested with, and are always supplied with mains power adaptors which meet all legal requirements for the intended country or region of operation, including electrical safety, interference and energy efficiency. - Page 96 Fax: +49 (0)4340 40300 20 e-mail: sales@adamequipment.co.uk e-mail: sales@adamequipment.com e-mail: sales@adamequipment.co.za Adam Equipment S.A. (Pty) Ltd. Adam Equipment (S.E. ASIA) PTY Ltd Adam Equipment (Wuhan) Co. Ltd. 7 Megawatt Road, 2/71 Tacoma Circuit A Building East Jianhua Spartan EXT 22...
- Page 97 © Adam Equipment Company 2016...
- Page 98 IT Adam Equipment SERIE HIGHLAND Include i modelli approvati HCB‐ EU and NTEP Software HCB ver.2.33 o maggiore su modelli standard Software HCB ver.239 su modelli approvati EU Software HCB ver.311 su modelli approvati NTEP 1 © Adam Equipment Company 2016 ...
- Page 99 IT ITALIANO Dati strumento: Modello: Numero di serie: Revisione software (Appare all’accensione): Data di acquisto: Dati Fornitore: 2 © Adam Equipment Company 2016 ...
- Page 100 IT 1.0 INDICE P.N: 9520rev I luglio 2017 1.0 INDICE ............................. 2 2.0 INTRODUZIONE........................ 4 3.0 INSTALLAZIONE ........................ 4 3.1 RIMOZIONE IMBALLO E INSTALLAZIONE ................ 4 3.2 DISPLAY / TASTI FUNZIONE .................... 5 3.3 BATTERIA INTERNA RICARICABILE .................. 6 3.4 POSIZIONARE E PROTEGGERE LA BILANCIA ............... 7 3.5 IMMAGAZZINAMENTO ....................... 8 4.0 FUNZIONAMENTO ........................ 8 4.1 ACCENSIONE ........................ 8 4.2 AZZERARE /INSERIRE UNA TARA .................. 9 4.3 PESATURA ...
-
Page 101: Introduzione
IT 2.0 INTRODUZIONE Grazie per aver acquistato una nuova bilancia portatile HCB. Ogni bilancia HCB è dotata di tutto ciò che e veramente necessario: adattatore DC e batteria interna ricaricabile, c alibratura HandiCal , (non disponibile su modelli approvati) display TM retroilluminato, e ShockProtect con indicatore di sovraccarico. Anche le interfacce RS‐232 e USB per la comunicazione con stampanti e computer, la tastiera ... -
Page 102: Display / Tasti Funzione
IT 3.2 DISPLAY / TASTI FUNZIONE Il display e la tastiera hanno una serie di caratteristiche di seguito elencate: TASTO FUNZIONE PRINCIPALE FUNZIONE SECONDARIA [On/Off] Per accendere e spegnere la bilancia ‐‐‐‐ Azzera la bilancia e mostra il peso La funzione secondaria di "Enter" è [Tare] netto. Premere ancora [Tare] per l’impostazione dei parametri o altre azzerare di nuovo. ... -
Page 103: Batteria Interna Ricaricabile
IT Simbolo percentuale Batteria quasi scarica Blocco visualizzaz. Peso netto Zero Display alfanumerico Stabile Indicatore di capacità Indicazione del peso NB: Virgole mostrate intorno all’ultima cifra HCB 602M/HCB 1002M/HCB5001M solo su modelli approvati 3.3 BATTERIA INTERNA RICARICABILE Questa bilancia può funzionare a batteria o utilizzando un adattatore DC. Il tempo approssimativo di durata della batteria è 24 ore a seconda dell’uso della retroilluminazione. ... -
Page 104: Posizionare E Proteggere La Bilancia
IT 3.4 POSIZIONARE E PROTEGGERE LA BILANCIA Perché la bilancia funzioni al meglio, si consiglia quanto segue: Evitare temperature estreme. Non esporre alla luce diretta del sole o in prossimità di ventole per il condizionamento dell’aria. Assicurarsi che la bilancia si trovi su un tavolo robusto ed esente da vibrazioni. Quando si spegne la bilancia premendo (ON/OFF) la potenza non e’ ... -
Page 105: Immagazzinamento
IT 3.5 IMMAGAZZINAMENTO Le bilance della serie H C B possono essere riposte facilmente una sull’altra per ottimizzare lo spazio senza danneggiarle. Senza protezione Con protezione Nota: Solo i modelli con piatto di ø 4.7” / 120mm, possono essere impilati. I modelli con piatto di ø 5.7” / 145mm possono essere posti in cima alla pila, ma altre bilance con piatto più grande non possono essere impilate. 4.0 FUNZIONAMENTO 4.1 ACCENSIONE Collegare la bilancia alla corrente elettrica tramite l’adattatore D C o utilizzare la ... -
Page 106: Pesatura
IT 3) Per spegnere la bilancia dopo l’uso, premere di nuovo il tasto [on/off]. Se la bilancia non viene utilizzata per un certo lasso di tempo impostabile da parametro, si spegne automaticamente. Se viene visualizzato un errore all’accensione, controllare che il peso interno per la taratura non sia in posizione taratura. Spostare la levetta completamente verso sinistra. Spegnere e riaccendere la bilancia. 4.2 AZZERARE / TARARE Premere il tasto [Tare] per impostare lo zero e visualizzare zero se la lettura è inferiore al 4% del totale della portata della bilancia. (+/‐ 2% per modelli appovati) ... -
Page 107: Unitá Di Misura
IT 4.4 UNITÁ DI MISURA Per cambiare l’unità di misura, premere [Mode] per scorrere le opzioni abilitate. Si veda il paragrafo 6.1 Abilitazione delle unità di misura, per abilitare o disabilitare le unità di misura. NB: Unita’ di peso su modelli approvati = g, kg, ct 5.0 FUNZIONI 5.1 PESATURA PERCENTUALE La bilancia permette che un peso di riferimento sia visualizzato come 100%. In seguito, ogni altro peso posto sulla bilancia viene visualizzato come percentuale del campione originale. 1) Porre il peso sulla bilancia. 2) Premere il tasto [%]. Il peso viene visualizzato come 100.00%. 3) Togliere il peso e porre il prossimo peso sul piatto. La nuova lettura sarà visualizzata come percentuale del primo peso/riferimento utilizzato. ... - Page 108 IT 3) Il numero iniziale di parti dovrebbe corrispondere alle seguenti opzioni: 10, 20, 50, 100 o 200. 4) La bilancia visualizza inizialmente SP 10 in attesa di un campione composto da 10 pezzi. Premere [Mode] per scorrere le opzioni: 10, 20, 50, 100, 200 e selezionare la quantità desiderata. 5) Premere ancora [Smpl] una volta selezionata la dimensione del campione. Il display visualizza il numero. All’aggiunta di altri pezzi, il display visualizza il numero totale di pezzi (PCS – viene visualizzato nel display alfanumerico). 6) Premendo il tasto [Mode] è possibile visualizzare il peso unitario (W/P), il peso totale (g) o il conteggio (PCS). Il totale e il peso unitario sono visualizzati ...
-
Page 109: Totalizzazione
IT 5.3 TOTALIZZAZIONE Ci sono due tipi di totalizzazione – automatica e manuale. Totalizzazione automatica Totalizzazione manuale Quando la bilancia è impostata per la Quando la bilancia è impostata per la totalizzazione automatica, si veda il totalizzazione automatica, si veda il paragrafo 6.3 Impostazione dei paragrafo 6.3 Impostazione dei ... -
Page 110: Parametri
IT 6.0 PARAMETRI La bilancia può essere programmata dall’utente impostando 7 parametri. FUNZIONE PARAGRAFO DESCRIZIONE F1 UNT Si veda il par. Imposta l’unità di misura da utilizzare 6.1 / g ct / Lb / oz / d / GN / OZt / dWt / MM / TL.T / TL.C / TL.t /t / N /g2. F2 EL Si veda il par. Imposta la retroilluminazione e audibile allarme acustico 6.2 bL on : retroilluminazione sempre attiva bL AU : la retroilluminazione si attiva alla pressione di un tasto bL oFF : retroilluminazione sempre disattivata bP on: Audibile allarme acustico acceso bP oFF: ... -
Page 111: Abilitazione Delle Unitá Di Misura
IT 6.1 ABILITAZIONE DELLE UNITÁ DI MISURA (Modelli non approvati) È possibile abilitare e disabilitare le unità di misura disponibili premendo il tasto [Mode] come descritto al paragrafo 4.5 Unità di misura. 1) Per impostare questo parametro, tenere premuto il tasto [Mode] durante l’autodiagnostica all’accensione della bilancia. 2) Dopo alcuni secondi, il display visualizza la prima funzione F1 UNT. 3) Premere il tasto [Tare] per visualizzare le impostazioni correnti di ogni unità. 4) Premendo il tasto [Tare] si scorrono le alter unità di misura e le loro impostazioni correnti. Ad esempio, se con l’unità Carati viene visualizzato ... - Page 112 IT La tabella seguente mostra le diverse unità di misura disponibili e i relativi fattori di conversione. NB: Modelli approvati hanno g.kg.ct. solo UNITÀ DI DESCRIZIONE FATTORE DI SIMBOLO MISURA CONVERSION VISUALIZZ Grammo Una unità di misura standard 1.0 g Carato Per la pesatura di gioielli e gemme, ecc. 5.0 ct Libbra Unità di misura standard in UK/USA. * 0.0022046 Lb Oncia Avoirdupois ounce. 0.035274 oZ 16 once formano una libbra. Dram Un’antica unità di misura del peso. 0.564383 d Corrisponde a 1/16 di oncia. Grano Una unità di misura del peso nel sistema 15.43236 ...
-
Page 113: Impostazione Della Retroilluminazione
IT 6.2 IMPOSTAZIONE DELLA RETROILLUMINAZIONE La retroilluminazione può essere abilitata o disabilitata dall’utente. Se è disabilitata, la batteria ha durata maggiore. Sono selezionabili le seguenti impostazioni: bL AU La retroilluminazione si attiva automaticamente quando si pone un peso sulla bilancia o si preme un tasto. bL Off Retroilluminazione disattivata. bL On Retroilluminazione sempre attiva bP on Audibile allarme acustico ‐ acceso bP oFF Audibile allarme acustico ‐ spento 1) Premere il tasto [Mode] durante l’autodiagnostica all’accensione. 2) Dopo alcuni secondi, il display visualizza la prima funzione F1 UNT. 3) Premere il tasto [Mode] per selezionare F2 EL . 4) Premere il tasto [Tare] per visualizzare le impostazioni correnti della ... - Page 114 IT Lo schermo visualizza S 232 o S USb. Premere il tasto [Mode] per selezionare l’interfaccia desiderata. Premere [Tare] per confermare l’impostazione e configurare l’interfaccia. 6) Le seguenti opzioni possono essere selezionate per impostare le funzioni di trasmissione e di totalizzazione: Modalità Stampa Totalizzazione P1 Prt Totalizzazione manuale I dati sono inviati premendo il tasto [Print]. premendo il tasto [Print]. P2 Con I dati sono inviati continuamente. ...
-
Page 115: Autospegnimento
IT 8 n 1 8 data bits, no parity 7 E 1 7 data bits, even parity 7 0 1 7 data bits, odd parity Premere il tasto [Mode] per modificare l’impostazione. Premere [Tare] per confermare e passare al parametro successivo. 9) Impostazione formato. La bilancia stampa o con un formato con indicazioni ... -
Page 116: Selezione Calibratura Interna O Esterna
IT 7) Quando F4 oFF è a display, premere il tasto [Print] per tornare alla pesatura o premere [Mode] per passare alla funzione successiva. 6.5 SELEZIONE CALIBRATURA INTERNA O ESTERNA (non possibile su modelli approvati) È possibile scegliere di utilizzare la massa interna o quella esterna per c a l i b rare la bilancia. 1) Premere il tasto [Mode] durante l’autodiagnostica all’accensione. 2) Dopo alcuni secondi, il display visualizza la prima funzione F1 UNT. 3) Premere il tasto [Mode] fino alla visualizzazione di F5 IEC. 4) Premere il tasto [Tare] per visualizzare le impostazioni correnti. ... -
Page 117: Impostazione Parametri Utente
IT per la taratura dovrebbe cambiare solo fra 95.000 e 105.000 grammi o 495.00 e 505.00 grammi (a seconda del modello). 6) Premere [Tare] per salvare una selezione. Il display visualizza F6 CA 7) Quando F6 CA è a display, premere il tasto [Print] per tornare alla pesatura o premere [Mode] per passare alla funzione successive. Le modifiche al valore del peso interno influiscono sulla taratura interna. Per verificare che il peso interno sia corretto, utilizzare solo pesi di alta qualità che siano adatti alla leggibilità della bilancia. 6.7 IMPOSTAZIONE PARAMETRI UTENTE La bilancia ha un numero di parametri che possono essere impostati dall’utente. Display Descrizione Valore di default Livelli filtro 1, 2 o 3 n FIL 1 FIL 1 è il filtro più veloce, 3 il più lento. Range di zero automatico n ZEO 4 ZEO da 0 a 8, dove 0 è disattivato, e 8 è il range di zero di quattro divisioni. ... - Page 118 IT Se si preme [Mode] viene visualizzato TECH. Questa è una funzione riservata a tecnici qualificati. Premere [Mode] per scorrere le opzioni del parametro o premere [Print] per tornare alla pesatura. 21 © Adam Equipment Company 2016 ...
-
Page 119: Calibratura
IT 7.0 CALIBRATURA (non disponibile su modelli approvati) TM La serie H C B di bilancia è dotata di c a l i b r a t u r a interna HandiCal che facilita e velocizza la calibratura. È comunque possibile calibrare la bilancia servendosi ... - Page 120 IT Calibratura esterna NON DISPONIBILE SU MODELLI APPROVATI 1) Premere il tasto [on/off] per l’accensione. 2) Premere i tasti [Smpl] e [Print] contemporaneamente durante l’autodiagnostica. 3) Il display visualizza unload. Rimuovere l’eventuale peso dal piatto di acciaio inossidabile. 4) Premere il tasto [Tare] quando appare il simbolo di peso stabile. 5) Il display visualizza il primo peso da utilizzare per calibrare lo strumento. È possibile modificare questo valore premendo il tasto [Mode]. Di seguito i pesi che possono essere utilizzati: ...
-
Page 121: Risoluzione Problemi
IT 8.0 RISOLUZIONE PROBLEMI 8.1 MESSAGGI DI ERRORE Se appare un messaggio di errore, ripetere l’azione che ha causato l’errore. Se il messaggio ricompare, contattare il fornitore. CODICE DESCRIZIONE POSSIBILI CAUSE SOLUZIONI ERRORE Err 4 Lo Zero iniziale è Peso sul piatto all’accensione. Togliere la vite per il maggiore della Eccessivo peso sul piatto trasporto e assicurarsi che tolleranza (4% della all’azzeramento. il piatto sia correttamente portata) Errata taratura della bilancia. posizionato e che il peso ... -
Page 122: Specifiche
IT 9.0 SPECIFICHE 9.1 SPECIFICHE TECNICHE HCB 123 HCB 153 HCB 302 HCB 602 HCB 602H 120 g 150 g 300 g 600 g 600 g Portata Divisione 0.001 g 0.005 g 0.01 g 0.02 g 0.01 g Ripetibilità 0.002 g 0.01 g 0.02 g 0.04 g 0.02 g Linearità ± 0.003 g 0.015 g 0.03 g 0.06 g 0.03 g Piatto 120mm / 4.7” ø Protez. correnti Fornito con la bilancia ... -
Page 123: Specifiche Generiche
IT 9.2 SPECIFICHE GENERICHE Interfaccia USB e RS‐232, bidirezionali Tempo di stabilizzazione Tipicamente 3 secondi Temperatura da 15°C a 35°C / da 59°F a 95°F Alimentazione (esterna) 12VDC 800 mA Calibratura Calibratura interna HandiCal o esterna – Selezionabile dall’utente Display Altezza 18mm a 6 cifre con LCD retroilluminazione e indicatore di carico Custodia Plastica ABS con piatto di acciaio inossidabile 170 x 245 x 150mm / 6.7” x 9.6” x 6” Dimensioni (larg.xprof.xalt.) HCB 6001 Con protez. correnti 170 x 245 x 80mm / 6.7” x 9.6” x 3.1” Peso netto 1.7 kg / 3.7 lb 1.9 kg / 4.1 lb 9.3 SPECIFICHE RS‐232 / USB Le interfacce RS‐232 e USB possono essere utilizzate contemporaneamente. Evitare ... - Page 124 IT È necessario un cavo per la connessione a stampanti o computer. La connessione USB utilizza un connettore USB standard. Un software per utilizzare l’interfaccia USB con il PC è disponibile sul sito www.adamequipment.com. I formati dati per le normali operazioni di pesatura, contapezzi o richiamo totali sono tutti diversi. Tutte le righe si chiudono andando a capo e con un line feed, (0dH e 0aH in ASCII). Output Formato 1: Le righe includono un’intestazione ogni riga e il valore. Sotto si riporta un tipico output di pesatura. 3 righe di dati seguite da due righe vuote. 19 caratteri ASCII, GS per Peso Lordo, NT per Peso Netto G S _ _ _ _ _ _ 1 2 3 . 4 5 _ g _ <cr> <lf> N o .
- Page 125 IT Output Formato 2: L’output è lo stesso valore che appare a display. In modalità contapezzi è il conteggio, in modalità pesatura è solo il peso. Esempio di output: ± _ _ _ _ _ _ 1 2 3 . 4 5 _ g _ <cr> <lf> Contapezzi: ± _ _ _ _ _ _ _ _ _ 1 2 5 P C S <cr> <lf> ...
-
Page 126: Certificato Di Calibratura
IT 10.0 CERTIFICATO DI CALIBRATURA 11.0 INFORMAZIONI DI GARANZIA ADAM Equipment offre una Garanzia Limitata (Parti di ricambio e mano d’opera) per i component che non funzionano a causa di difetti in materiale o di lavorazione. La garanzia decorre dalla data di consegna. Durante il periodo di garanzia qualora si renda necessaria una riparazione l’acquirente deve informare il fornitore o ADAM Equipment. L’impresa o il suo tecnico autorizzato si riservano il diritto di riparare o sostituire I componenti sul posto dell’acquirente o in una delle officine ADAM a seconda della gravita’ dei problemi a nessun costo aggiuntivo. Tuttavia le spese relative all’invio delle parti difettose al centro di assistenza sono a carico dell’acquirente. La garanzia cesserebbe di funzionare se l’apparecchiatura non venisse restituita in confezione originale e con una corretta documentazione per validare il reclamo.Tutti i reclami sono alla sola discrezione di ADAM Equipment. ... -
Page 127: Conformita' Della Direttiva Wee
State of California to cause cancer and birth defects or other reproductive harm. Adam Equipment products have been tested with, and are always supplied with mains power adaptors which meet all legal requirements for the intended country or region of operation, including electrical safety, interference and energy efficiency. - Page 128 IT 31 © Adam Equipment Company 2016 ...
- Page 129 E-mail: sales@adamequipment.com.au E-mail: info@adamequipment.com.cn © Copyright by Adam Equipment Co. All rights reserved. No part of this publication may be reprinted or translated in any form or by any means without the prior permission of Adam Equipment. Adam Equipment reserves the right to make changes to the technology, features, specifications and design of the equipment without notice.
Need help?
Do you have a question about the HIGHLAND HCB 602M and is the answer not in the manual?
Questions and answers