Table of Contents
Advertisement
Quick Links
Advertisement
Table of Contents

Summary of Contents for Francotyp-Postalia mymail
- Page 1 Franking machine Operator Manual...
- Page 2 (only for mymail with scales). Quick reference The Quick Reference Guide gives you an overview of the operating menu and franking with the mymail. Installation guide Please read the Installation Guide to find out how to install and commission the mymail.
- Page 3 The operating panel Display (showing the main menu Clear key for a mymail with optional scales here) – Clear inputs – Back to the higher menu Postage value Weight Account Available special characters: ? ! $ 1 % ” # & , . * + - = _ ( )[ ] <...
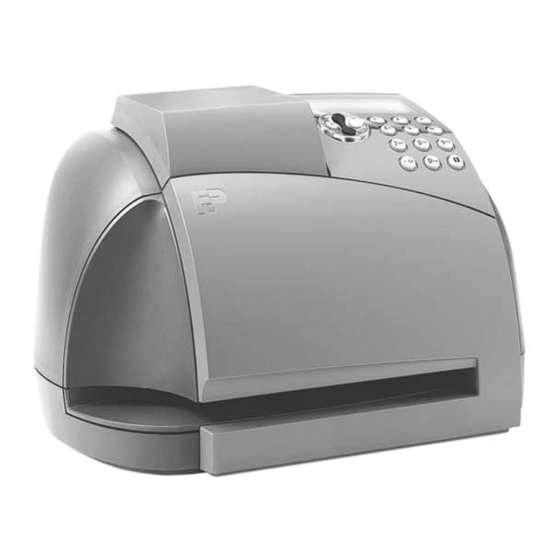
- Page 4 Scales* Operating panel ink cartridge below it Display Keyboard Card reader with MasterCard* Letter slot Battery compartment (on the bottom) Modem socket Power connection * optional...
-
Page 5: Table Of Contents
The mode of operation ___________________________________11 Enter text ______________________________________________13 The info window ________________________________________15 Trial run _______________________________________________15 Switching the scales on and off (only mymail with scales) ____________16 Franking ____________________________________________________17 Setting the franking imprint ________________________________17 Positioning and franking a letter ____________________________20 Ending franking – logging off ______________________________21... - Page 6 10 Basic settings ________________________________________________ 41 10.1 Changing the town circle _________________________________ 41 10.2 Reloading endorsements _________________________________ 42 Update rate table (only for mymail with scales) _____________________ 43 10.3 10.4 Reloading advertising imprint ______________________________ 44 10.5 Delete advertising imprint _________________________________ 45 10.6...
-
Page 7: Safety Tips
Call the after-sales service. • Make sure that no liquids or foreign objects penetrate the interior of the mymail. If this happens, pull out the mains plug immediately. Have the mymail checked by the after-sales service before reconnecting the mains plug. -
Page 8: Short Description Of The Mymail
2 kg scales. mymail uses these to calculate the exact postage value for every mailpiece. Advertising imprint and slogan The mymail prints a logo or slogan of your choice on every letter. By means of the freely editable slogans you can put important messages right on the envelope. -
Page 9: The Abc Of Mymail Operation
The ABC of mymail operation The ABC of mymail operation In this chapter you will learn about the basic mymail Arrow up key functions and how to handle the operating menu. With the arrow keys , the Enter key and the Clear key... -
Page 10: Standby
Operator Manual Standby The mymail is left connected to the mains all the time to ensure it is always ready for quick use. If the mymail is not being used, i.e. you have not inserted any letters or not pressed any keys, after a while the mymail will switch to sleep mode. -
Page 11: The Mode Of Operation
You go back to the higher menu with Try it! Familiarise yourself with the operating menu using the example overleaf. The mymail “remembers” where you left the menu level. This menu item is selected automatically the next time you select this menu level. - Page 12 Operator Manual Presentation of the operating procedures This manual presents operating procedures for inputs /settings in the operating menu as follows: Sequences of key symbols and displays show the procedure. A short text describes the operating steps. Key symbols represent the following actions:...
-
Page 13: Enter Text
The ABC of mymail operation Enter text Letters, punctuation marks and special characters are assigned to the numeric keys for entering texts such as account name or short dialling abbrevia- tions. The assignment is printed on every key. On the... - Page 14 “Configuration” “Memories” “Memory 2” “Change name”). The mymail opens the input window for quick select name 2. The factory set names for the 10 quick select memories are “Memory 0” to “Memory 9”. Clear the text letter by letter by repeatedly pressing the key.
-
Page 15: The Info Window
Push the sheet into the letter slot as far as it will go. The sensor (in the back right hand corner of the letter slot) recognises a letter. The mymail starts the trial run after a short time. -
Page 16: Switching The Scales On And Off (Only Mymail With Scales)
Operator Manual Switching the scales on and off (only mymail with scales) If you have chosen a mymail with scales, you can have the mymail determine the right postage. No weight display If no rate i.e. 1st class has been selected, you will not see a weight display in the main menu –... -
Page 17: Franking
In this chapter you can read how to set the franking imprint, frank letters and switch the mymail to standby. If you want to use the account function of the mymail for separate accounting, read Chapter 7 on page 31. - Page 18 The date for the franking imprint is set automatically to today’s date by the built-in clock. You can set the date of the stamp forward by up to 30 days manually. The mymail does not allow backdating! Select “Menu” and confirm.
- Page 19 Franking Setting the optional endorsement Specific types of mail can be marked with the respective endorsement imprint (e.g. FIRST CLASS, Special Delivery, Overseas Mail). Select “Menu” and confirm. Select “Set endorsement” and confirm. Select the desired endorsement and confirm. The endorsement is set.
-
Page 20: Positioning And Franking A Letter
Caution! Never lift up the operating panel during franking. Opening the flap causes the mymail to abort printing immediately for safety reasons. Franking may be incomplete and useless. You can frank letters up to a thickness of 6 mm. -
Page 21: Ending Franking - Logging Off
Ending franking – logging off Caution! If you wish to disconnect the mymail from the mains: Make sure that the mymail is in standby (display is dark, showing the date), otherwise the safety functions installed for the protection of the print head cannot be operational. -
Page 22: Weighing And Franking (Only Mymail With Scales)
Weighing and franking (only for mymail with scales) Selecting postal rates Postal rates can be selected using the mymail’s built-in rate table, i.e. the mymail requests all the data required for calculating postage one after the other: destination type special service. You select the desired setting respectively with the arrow... - Page 23 An arrow ( ) appears in front of the set additional service. You can select other services in the same way. The mymail does not allow illegal Service selected combinations. If all desired services have been set: Exit the Rate menu with the Home key.
-
Page 24: Changing And Correcting Postal Rates
Clear all selected postal rates … Call the main menu. Type any postage value (type “0” preferably) and confirm. The mymail clears the selected postal rates. You can then call the Rate menu and re- select the postal rates (see Chapter 5.1). -
Page 25: Weighing And Franking A Letter
Caution! The scales are designed for a maximum weight of 2 kg. Caution! Place large mailpieces (e.g. ISO B4 size letters) on the scales so that these are not touching the housing of the mymail. This prevents you getting false weighing results. - Page 26 You can frank other mailpieces with the determined postage value. Caution! The mymail can only determine a new weight and recalculate the postage if the scales has been emptied shortly beforehand, a beep tone sounded and the weight display is showing “0 g”. Therefore always remove the mailpiece from the scales before adding the next one.
-
Page 27: Quick Select Memories
Quick select memories Quick select memories The mymail has 10 quick select memories. You can save frequently used franking imprints (postage value + advertising imprint + endorsement) in these. You can save the mail settings for postage calculation as well on a mymail with scales. -
Page 28: Saving Settings
Operator Manual Saving settings You will find out more about the postage value and postal rates in the chapters 4.1 and 5.1. When the desired franking imprint has been set, as well as if necessary the desired postal rate for calculating postage: Select “Menu”... -
Page 29: Renaming The Quick Select Memories
Quick select memories Renaming the quick select memories The factory set names for the 10 quick select memories are “Memory 0” to “Memory 9”. You can assign your own names to the quick select memories. Select “Menu” in the main menu and confirm. -
Page 30: Clearing The Quick Select Memories
Operator Manual Clearing the quick select memories Select “Menu” in the main menu and confirm. Select “Configuration” and confirm. Select “Memories” and confirm. Select the quick select memory you want to clear (e.g. “Memory 8”) and confirm. Select “Clear memory” and confirm. -
Page 31: Account Function
(e.g. “Miller”). After having logged into an account you can start using the mymail. The postage costs are charged to the active account. You will find details about this in Chapter 4 and Chapter 5. -
Page 32: Change Account
Operator Manual Change account Select “Log off” in the main menu and confirm. The mymail switches to standby. Activate the mymail from the standby mode with any key. Select the account you want to frank in and confirm. The main menu appears showing the... -
Page 33: Setting Up Accounts
Account function Setting up accounts Select “Menu” in the main menu and confirm. Select “Accounts” and confirm. Select “Create account” and confirm. Enter the desired account name (maximum 8 characters) and confirm. The account is set up. If you wish to select the newly created account for franking: Press to confirm. -
Page 34: Saving Standard Setting For An Account
Operator Manual Saving standard setting for an account The mymail offers you the possibility of saving settings as a standard for every account. The appropriate standard setting is preset when you select the account when logging in. Set the advertising imprint, endorsement and postal rates (only for mymail with scales). -
Page 35: Renaming Accounts
Enter the new account name (e.g. “Miller”) and confirm. The account has the new name. If you press the key again after clearing all the letters, the mymail jumps back one level and the previous account name is retained. -
Page 36: Deleting Accounts
Operator Manual Deleting accounts Select “Menu” in the main menu and confirm. Select “Accounts” and confirm. Select “Account settings” and confirm. Select the account you want to clear (e.g. “Miller”) and confirm. Select “Delete account” and confirm. Confirm the prompt if you really want to clear the account. -
Page 37: Register
Register Register The mymail saves important parameters and postage used information in registers. You can have the register states displayed and printed as a register report. Displaying register states Select “Menu” in the main menu and confirm. Select “Funds status” and confirm. - Page 38 Operator Manual Print register report Select “Menu” in the main menu and confirm. Select “Reports” and confirm. Select “Register” and confirm. Place a folded sheet folded edge first in the letter slot. The mymail prints the register report.
-
Page 39: Loading Postage - Teleset
£ 10 Loading postage Make sure that the mymail is connected to the telephone line for the duration of the loading process. If you are using a telephone system: Make sure that the outside dialling parameters are set correctly (see Chapter 10.9). - Page 40 Operator Manual As a check, the mymail displays the set amount to be loaded. If you now wish to to load the amount indicated, confirm the prompt. Your mymail now establishes a connection with the TELESET data centre and notifies it with …...
-
Page 41: Basic Settings
10.1 Changing the town circle If the town circle for your franked mailpieces changes, you have to load the new town circle in your mymail. Francotyp-Postalia will supply a “Town Circle” chip card on request. Select “Menu” in the main menu and confirm. -
Page 42: Reloading Endorsements
Postalia. Francotyp-Postalia will supply you with a chip card containing the endorsements you have ordered. Caution! It is not possible to load single endorsement imprints. The mymail will always load all endorsement imprints and overwrite any which may already exist. -
Page 43: Update Rate Table (Only For Mymail With Scales)
10.3 Update rate table (only for mymail with scales) If you retrofit your mymail with a scales you have to load the rate table for postage calculation in the mymail. You get the “Rate Table” with the scales from Francotyp- Postalia. -
Page 44: Reloading Advertising Imprint
10.4 Reloading advertising imprint If you need new advertising imprints you can order these from Francotyp-Postalia. FP supplies the logos on chip card. The mymail can store up to three different advertising imprints. Select “Menu” in the main menu and confirm. -
Page 45: Delete Advertising Imprint
Basic settings 10.5 Delete advertising imprint You can clear advertising imprints you no longer need to make room for new ones. Select “Menu” in the main menu and confirm. Select “Configuration” and confirm. Select “Adverts” and confirm. Select “Delete advert” and confirm. Select the advertising imprint you want to delete and confirm. -
Page 46: Setting A High Postage Value
Operator Manual 10.6 Setting a high postage value You can set a warning for too high postage values in the mymail. If you try to set a postage value which exceeds the fixed limit, the mymail displays a warning. The high postage value is set to £... -
Page 47: Setting Available Postage Warning
10.7 Setting available postage warning The “Available postage warning” function warns you when the available postage in your mymail drops below a preset minimum amount. The limit is set to £ 100.00 at the factory. Select “Menu” in the main menu and confirm. -
Page 48: Standby Time
(i. e. 9) or leave blank for a direct line. You also set whether or not the mymail should wait for the dial tone. Select “Menu” in the main menu and confirm. - Page 49 You will see the current settings. Select “Yes” or “No” with the arrow keys and confirm. “Yes” – Standard setting (recommended) “No” – for operation on an extension “without dial tone” The TELESET data centre number is stored in your mymail at the factory.
-
Page 50: Setting The Clock
Operator Manual 10.10 Setting the clock The mymail has a built-in clock. You can switch between Summer and Winter time and set the time forward or back 5 minutes. It is rarely necessary to correct the time. Setting Summer time Select “Menu”... - Page 51 Basic settings Correcting the time Select “Menu” in the main menu and confirm. Select “Configuration” and confirm. Select “Clock” and confirm. Select “Adjust clock” and confirm. Set the clock forward or back with the arrow keys . Every keypress adjusts the clock by one minute. Confirm the desired time.
-
Page 52: Switching Access Control On And Off (Optional)
The access control by MasterCard is switched on. The access control is switched on and off in the same way. The mymail asks “MasterCard out?” before switching off. The MasterCard must be inserted to be able to switch the access control on... -
Page 53: Printing Reports
Basic settings 10.12 Printing reports You can print out a series of status information for the mymail. Register Report Important parameters and postage used information (see also Chapter 8). User account Report Set up accounts and their postage used data. -
Page 54: Zeroing Scales (Only For Mymail With Scales)
Operator Manual 10.13 Zeroing scales (only for mymail with scales) You only have to tare the scales when you – see a display which deviates from “0 g” when there is no load on the scales or – you want to set a pre-load (e.g. for a weighing tray). -
Page 55: Maintenance And Care
11.1 Cleaning the mymail Caution! Make sure that no liquids or foreign objects penetrate the interior of the mymail. If this happens, pull out the mains plug immediately. Have the mymail checked by the after-sales service before reconnecting the mains plug. -
Page 56: Changing The Ink Cartridge
Operator Manual 11.3 Changing the ink cartridge The mymail warns you when the ink in the cartridge is running out. We recommend you to always keep a replacement cartridge handy. Caution! This avoids faults in the printing system: Leave the power cable plugged in so that the cartridge can move to the changing position. - Page 57 Maintenance and care Lift up the cartridge lock. Hold the ink cartridge with your thumb and forefinger and lift it up out of the cartridge compartment. Preparing the new ink cartridge Remove the ink cartridge from the packing and remove the protective strip.
- Page 58 Remove the cartridge and try again. Fold down the operating panel back into position. The mymail restarts. The ink cartridge adjustment procedure then begins. Caution! Never lift up the operating panel during the start routine. This can cause faults in the printing system.
- Page 59 Continue with Continue with Test print Place an empty envelope in the letter slot. The mymail generates a test imprint for adjusting the ink cartridge. During printing, the display shows the message “Please wait…”. Do not remove the envelope until the...
- Page 60 This is “5” in the example. Enter the relevant number using the number keys. Confirm by pressing once. Second test print Place the second envelope into the letter slot as far as it will go. The mymail prints the second test print.
- Page 61 Maintenance and care Correct: Check Examine the circles on the second test print. The ink cartridge is well adjusted if the circle pattern looks more or less as shown on the test print in the example. 2 crossed lines The adjustment procedure is complete. Closed circles Insufficient: If the circle pattern exhibits any misalign-...
-
Page 62: Cleaning The Ink Cartridge
Select “Clean cartridge” and confirm. The cartridge is cleaned. 11.5 Adjusting the ink cartridge You only need to adjust the ink cartridge if the stamp of the mymail has shifted position. The ink cartridge adjustment procedure commences automatically: – during installation directly after completion of the start routine –... -
Page 63: Test Print
The test print is primarily for service. Select “Menu” in the main menu and confirm. Select “Service” and confirm. Select “Test print” and confirm. Place a folded sheet folded edge first in the letter slot. The mymail creates a test print. -
Page 64: Changing The Battery
Warning! Observe the instructions enclosed with the battery for correct use and disposal. The mymail monitors the charging state of the battery. An appropriate message appears in the display when it is time to change the battery. Select “Log off” in the main menu and confirm. - Page 65 Remove the old battery. Insert the new battery (90.4701.8004.00) in the specified position. Close the battery compartment. Turn the mymail back to the upright position. Dispose of the old battery as prescribed. Replace the scales if necessary: Reconnect the scales to the mymail and...
-
Page 66: Hints For Transporting The Mymail
– Always remove the ink cartridge. – Remove the scales. There is room for them in the original mymail box. – Transport the mymail in the original box. – Transport the mymail upright. -
Page 67: Error Messages And Help
Postalia. Otherwise your warranty will be voided. You will be liable for any damages. You can eliminate minor faults and problems with the mymail yourself. On the following pages you will find help and tips for eliminating and avoiding faults. -
Page 68: Error Messages (Alphabetically)
Wrong card or card inserted incorrectly. Check the card and re-insert it (chip must face backwards). Error xxx Note the error number and call service. Ink level low The ink cartridge is almost empty. Insufficient funds The postage in the mymail is insufficient. Load new postage. - Page 69 No dial tone The modem gets no dialling tone. Check the connection of the modem cable on the mymail and at the BT jack. For operation on a telephone system/extension: Switch off wait for dial tone if necessary (see Chapter 10.9).
- Page 70 TDC error Check the connection of the modem cable on the no connection mymail and at the BT jack. Repeat the procedure. Modem gets no dialling tone: Set the right outside dialling parameters for your telephone connection (see Chapter 10.9) .
- Page 71 TDC error Desired amount too high. Select a smaller amount and no credit repeat the procedure. TDC: data record Call Service. locked TDC: mymail Call Service. disabled TDC: mymail Call Service. not available TDC: mymail Call Service. not released TDC: mymail Call Service.
-
Page 72: Helpful User Tips
The mymail does not show the main menu. Press the (at the bottom left) and try again. The letter was already in the letter slot when you made the settings in the operating menu. - Page 73 You can change the time span (see Chapter 10.8) . inserted … when weighing and for postage calculation Menu “Rate” The mymail does not “recognise” the scales. “Log off” missing from the main and then pull out the mains plug. Wait briefly and then menu reconnect the mymail.
-
Page 74: Automatic Error Diagnosis (Self-Test)
Operator Manual 12.3 Automatic error diagnosis (self-test) The automatic error diagnosis is a self-test program in which the mymail checks all components. Select “Menu” in the main menu and confirm. Select “Service” and confirm. Select “Self test” and confirm. -
Page 75: Menu Tree
Menu tree Menu tree... -
Page 76: Technical Data
Operator Manual Technical Data Dimensions* 300 mm x 183 mm x 194 mm (11.81" x 7.20" x 7.64") Width x height x depth Weight 2.5 kg (5.51 lb.) Power connection 230 V / 50 Hz (on the side of the rear housing panel) - Page 77 140 mm x 85 mm (0.55" x 0.34") Thickness up to 6 mm (0.23") Paper quality Ink absorbent material Operating and storage conditions for mymail franking machine and ink cartridge Temperature +15°C to +35°C only use in closed rooms do not expose to direct sunlight Rel. humidity...
-
Page 78: Declaration Of Conformity
Operator Manual Declaration of Conformity Declaration of Conformity... -
Page 79: Glossary
You have received the Personal Identification (PIN) Number (PIN) for your mymail from Francotyp- Postalia by separate post. Enter the PIN in the mymail the first time you use it. The PIN is your authorisation to load postage via modem. - Page 80 24 hours a day via the built-in modem. TELESET remote value setting Franking machine accounting system of the Francotyp-Postalia AG & Co. KG. The mymail and the Teleset data centre exchange value specifications via modem when loading postage which release the desired postage amount.
-
Page 81: Index
Battery compartment 4, 65 reloading 42 Blanks 13 set 19 Enter digits 3 Enter key 3, 9 Enter letters 3, 13 Card reader 4 Envelope material 20, 77 Cartridge. See ink cartridge Chip card 8 See also mymail card Cleaning 55... - Page 82 Mail type 22 select for postage calculation 22 Main menu 3 Info key 3 call 3, 11 Info window mymail standard version 10 accounts 34 mymail with scales 10 close 3, 15 MasterCard 4, 9, 52, 79 franking imprint 17...
- Page 83 Remote value setting. See TELESET Royal Mail rate change 43 Personal identification number. See PIN PIN 79 Position the letter 20 Postage value determine with the mymail 16, 22 determining the maximum value 46 maximum value exceeded 46 set 17 Postage value ”0” 15...
- Page 84 Operator Manual Time correct 51 Safety tips 2, 7 show 50 Scale report 53 switching Summer time on/off 50 Scales 4, 53 Town circle, other 41 remove 64 Trial run 15, 80 replace 65 Troubleshooting 67 switch off 16...
-
Page 85: Service
Service Every mymail franking machine is thoroughly checked before leaving the factory. Should any faults occur with your mymail in spite of our extensive quality control, please contact your local servicing dealer. Our main office will be pleased to tell you the address of your local servicing dealer.
Need help?
Do you have a question about the mymail and is the answer not in the manual?
Questions and answers