Table of Contents
Advertisement
®
SIDE-
SIDE-POWER
Thruster Systems
POWER
Installation and user manual
SLEIPNER MOTOR AS
P.O. Box 519
N-1612 Fredrikstad
Norway
Tel: +47 69 30 00 60
Fax: +47 69 30 00 70
SX80/185T & SX100/185T
SX80/185T & SX100/185T
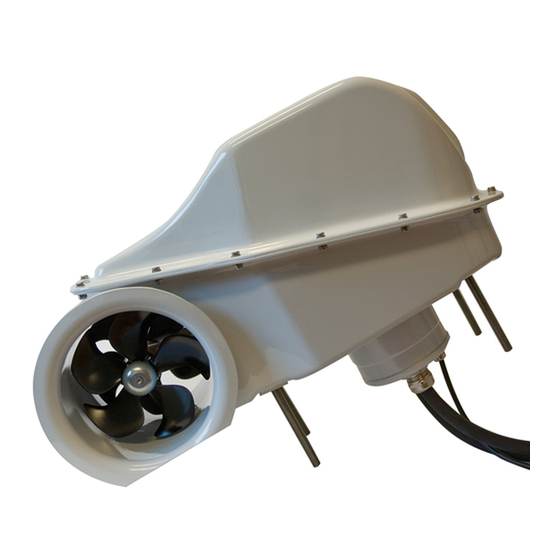
External sternthruster assembly
w w w . s i d e - p o w e r . c o m
s i d e p o w e r @ s l e i p n e r. n o
External sternthruster
assembly
© Sleipner Motor AS version 1.1 - 2010
Advertisement
Table of Contents

Related Manuals for Side-Power SX80/185T


Summary of Contents for Side-Power SX80/185T
- Page 1 ® SIDE- SIDE-POWER here the inside Thruster Systems r installation SX80/185T & SX100/185T POWER SX80/185T & SX100/185T huster assembly External sternthruster assembly ls enables good External sternthruster assembly ve legs which Installation and user manual ternal installation. line powered...
-
Page 2: Table Of Contents
Integrated microprocessor monitors solenoids, reducing wear and risk of solenoid lock-in. Auto-stop of thruster in case of accidental solenoid lock-in or if run signal is continous for more than 3 minutes. Max. stern thickness: 100mm (80mm recommended) SX80/185T & SX100/185T External sternthruster assembly 1.1 - 2010... -
Page 3: Planning & Important Precautions
With sterndrives , we recommend the use of our additional cowls. IMPORTANT! Do not remove the label stating serial number from the cables! This serial number is required to get the correct spare and service parts! SX80/185T & SX100/185T External sternthruster assembly 1.1 - 2010... -
Page 4: Bolt On Installation
4. When fitting the thruster assembly, ensure that there is ample sealant (Sikaflex or similar) around the center tube with cable connectors and around the bolts to make a water tight fitting (Fig. 1/2). Bolts diameter: ø 12mm stainless steel SX80/185T & SX100/185T External sternthruster assembly 1.1 - 2010... -
Page 5: Installation Measurements
Installation measurements SX80/185T & SX100/185T External sternthruster assembly 1.1 - 2010... -
Page 6: Electrical Installation
The negative / minus cable connects to the (-) terminal. Bolt M10. Tighten with 25 Nm / 18,43 lb/ft. • The positive / plus cable connects to the "+" terminal. Bolt M10. Tighten with 25 Nm / 18,43 lb/ft. SX80/185T & SX100/185T External sternthruster assembly 1.1 - 2010... -
Page 7: Control Panel And Control-Leads
Pin configuration of 4 pole AMP contact: Pin1: BLACK = Ground Pin2: BLUE = Engages thruster SB solenoid Pin3: GREY = Engages thruster Port solenoid Pin4: RED = Positive voltage for control panel SX80/185T & SX100/185T External sternthruster assembly 1.1 - 2010... -
Page 8: "Visual" Wiring Diagram
"Visual" wiring diagram SP75Ti / SP95Ti ignition protected thruster assembly SX80/185T & SX100/185T External sternthruster assembly 1.2.1 - 2007 1.1 - 2010... -
Page 9: Technical Wiring Diagram
STERN SP75Ti / SP95Ti ignition protected thruster assembly SX80/185T & SX100/185T External sternthruster assembly 1.2.1 - 2007 1.1 - 2010... -
Page 10: Important User Precautions
If there is a problem with your Ignition Protected stern thruster, please contact your dealer. Danger: NEVER Disassemble any part of the Ignition Protected stern thruster assembly SX80/185T & SX100/185T External sternthruster assembly 1.1 - 2010... -
Page 11: How To Use Sidepower Thrusters
• Again, if in doubt, try in open water first! • Again, if in doubt, try in open water first! SP75Ti / SP95Ti ignition protected thruster assembly SX80/185T & SX100/185T External sternthruster assembly 1.2.1 - 2007 1.0 - 2010... -
Page 12: Maintenance
If there is a problem with your Ignition Protected stern thruster, please contact your dealer. Danger: NEVER Disassemble any part of the Ignition Protected stern thruster assembly SX80/185T & SX100/185T External sternthruster assembly 1.1 - 2010... -
Page 13: Troubleshooting
Solenoid flapping, most probable cause: low Re-charge battery(ies), if this is not sufficient, replace battery(ies). voltage. Check for bad cable connections, if necessary tighten/re-adjust connections. Check cable size in accordance to manual. SX80/185T & SX100/185T External sternthruster assembly 1.1 - 2010... -
Page 14: Warranty Statement
8. The Warrantor assumes no liability for incidental or consequential damages of any kind including damages arising from collision with other vessels or objects. 9. This warranty gives you specific legal rights, and you may also have other rights which vary from country to country. SX80/185T & SX100/185T External sternthruster assembly 1.1 - 2010... -
Page 15: Checklist
Ref: Part# Description Zink anode 7 1190 90080 PVC Cowls, long model - A=242mm, kit of two Locknut 4 1260 Propeller washer 7 1181 Propeller drivepin 6 1241 Propeller 7 1261 SX80/185T & SX100/185T External sternthruster assembly 1.1 - 2010... -
Page 16: Service Centres
Fax: +44 1364 649 399 www.imtra.com Fax: +385 51 704 600 andy@sleipner.co.uk side-power@imtra.com acyachting@gmail.com Sleipner Motor AS • P. O. Box 519, N-1612 Fredrikstad • Norway Tel: +47 69 30 00 60 • Fax: +47 69 30 00 70 • sidepower@sleipner.no • www.side-power.com...
Need help?
Do you have a question about the SX80/185T and is the answer not in the manual?
Questions and answers