
Related Manuals for Healthstream HS312TM EQUINOX


Summary of Contents for Healthstream HS312TM EQUINOX
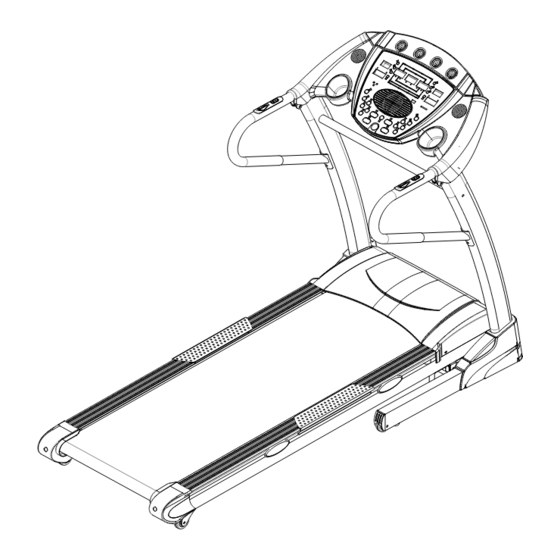
- Page 1 Motorized Treadmill Owner’s Manual HS312TM EQUINOX PLEASE READ ALL INSTRUCTIONS IN THE OWNER'S MANUAL. CAREFULLY BEFORE ASSEMBLY AND USE OF THE TREADMILL, AND KEEP IT FOR FUTURE REFERENCE.
-
Page 2: Table Of Contents
CONTENTS------------------------------------------------------------------------------------1 IMPORTANT SAFETY PRECAUTIONS----------------------------------------------2 ASSEMBLY INSTRUCTIONS--------------------------------------------------------- 3-5 FOLDING & UNFOLDING INSTRUCTIONS-----------------------------------------6 INCLINE INSTRUCTIONS----------------------------------------------------------------7 GROUNDING METHODS-----------------------------------------------------------------8 OPERATION GUIDE--------------------------------------------------------------------9-14 GETTING STARTED GUIDE -----------------------------------------------------------15 SAFETY EXERCISE-----------------------------------------------------------------------16 WARM-UP EXERCISE---------------------------------------------------------------------17 MOTOR BELT ADJUSTMENT----------------------------------------------------------18 MAINTENANCE INSTRUCTIONS----------------------------------------------------19 BELT ADJUSTMENT----------------------------------------------------------------------20 EXPLODED DRAWING-------------------------------------------------------------------21 PARTS LIST----------------------------------------------------------------------------- 22-23 ERROR CODE AND SIGNIFICANCE-------------------------------------------------24... -
Page 3: Important Safety Precautions
Important Safety Precautions • Before starting any exercise Programme, consult with your physician or health professional. • This applies especially to persons above 35 years old or to people who have had health problems before. • Please do not turn on the power to the Treadmill until assembly is completely finished and the motor cover is attached. - Page 4 WHEN YOU OPEN THE CARTON, YOU WILL FIND THE PARTS AS SHOWN BELOW. If any are missing, please contact your dealer as soon as possible MAIN FRAME ALLEN WRENCH SCREW DRIVER FRONT COVER 2PCS WIRELESS ALLEN WRENCH L POWER PLUG BOLT M8*30 CHEST BELT 2PCS...
- Page 5 Assembly: STEP 1: Open the box and take out all of the parts. Please make sure all of the parts are there and if not please contact your dealer immediately. Place the main frame on a flat surface and then using both hands, hold the COMPUTER (18) and pull up the UPRIGHTS (4L)(4R) in the arrow direction until the screw holes at the bottom are in alignment.
- Page 6 STEP 3: Connect the HAND PULSE sensors (29) and the HANDPULSE WIRES (93). The Fix HANDRAIL BEND PIPE Supports (91) onto the UPRIGHTS (4L) and (4R) with COUNTERSUNK SCREWS M6*10(92),and HALF ROUND HEAD HEX BOLTS M8*15(62) and ∮ 8.4*∮ 14.5*t0.8 INNER WASHER(76) as required.
-
Page 7: Folding & Unfolding Instructions
FOLDING INSTRUCTIONS: Lift up the bed of the machine and continue to lift until you hear a "click" that is made by the safety casing engaging the pneumatic cylinder. UNFOLDING INSTRUCTIONS Holding the bed of the machine with both hands, use your foot to kick the safety sleeve lightly, to disengage it. -
Page 8: Incline Instructions
INCLINE INSTRUCTIONS: Buttons marked 【INCLINE+】 【 INCLINE-】 and 【 + 】 【 - 】 on the left handrail are incline add and subtract buttons in 2% increments. To adjust the incline when the treadmill is running, press the button for more than 2 seconds, to add or subtract inclination. The computer also has shortcut keys 2%, 4%, 6%, 8%, and 10% Picture A shows incline “0%”, Picture B shows incline “12%”. - Page 9 Grounding: This product must be grounded. If the machine should malfunction or breakdown, the grounding will provide a path of least resistance for the electric current thus reducing the risk of electric shock. This product is equipped with a power cord having an equipment-grounding conductor and a grounding plug.
- Page 10 WINDOWS DISPLAYS • PROGRAM (PROG): Displays “---” in manual mode. • TIME: Indicates the time you have exercised. • SPEED: Displays the speed, speed range is 1km/h-20km/h. • INCLINE and PULSE: Displays the incline when “INCL” flashes, then displays the pulse value when “PULSE”...
- Page 11 • FAN BUTTON: Fan start and stop. MAIN FUNCTIONS: Turn on the power, every window will be lit for 2 seconds, then the machine will enter manual mode. MANUAL MODE: Put on the safety key then press the START button. •...
- Page 12 and incline, and will continue to follow the steps of the programs stages until the last section. • When the program is over, the incline will reduce to 0, and the treadmill will slow down and stop. • When you are running you can press “INCLINE + -” to adjust the incline and also press “SPEED+-”...
- Page 13 BODY TESTER (FAT) Press PROGRAM and continue pressing until entering FAT body fat tester. • The window displays FAT. • Press MODE and enter your parameters (-1- SEX, -2- AGE, -3- HEIGHT, -4- WEIGHT, -5- FAT TESTER). Press SPEED+, SPEED- to set. •...
- Page 14 Notes: • When you are in HRC program mode, you can press "SPEED +/-" or "INCLINE +/-" buttons on the hand rails to adjust your speed and incline, but the default program will still adjust automatically to let your pulse reach the target Pulse rate. •...
- Page 15 INCLINE SPEED INCLINE SPEED INCLINE SPEED 10 7 10 10 7 10 10 6 INCLINE SPEED INCLINE SPEED INCLINE SPEED INCLINE SPEED 10 8 10 8 INCLINE SPEED 10 6 10 6 INCLINE SPEED INCLINE SPEED INCLINE SPEED INCLINE SPEED INCLINE SPEED 10 8...
- Page 16 SPEED INCLINE SPEED 10 8 10 8 INCLINE SPEED INCLINE SPEED INCLINE SPEED INCLINE SPEED INCLINE SPEED INCLINE SPEED INCLINE SPEED INCLINE SPEED INCLINE SPEED INCLINE SPEED INCLINE 10 10 10 12 12 8 SPEED INCLINE SPEED INCLINE 10 10 8 SPEED 10 7 10 10 7...
- Page 17 INCLINE SPEED 10 8 10 8 INCLINE SPEED 10 6 10 6 INCLINE SPEED INCLINE SPEED INCLINE SPEED INCLINE 10 8 10 8 SPEED INCLINE SPEED 10 8 10 8 INCLINE SPEED 10 6 10 6 INCLINE SPEED INCLINE SPEED INCLINE SPEED INCLINE...
- Page 18 adjust the speed to 3--5 km/h and keep going for gradually lengthening periods. BEGINNING EXERCISE To walk 1 km at constant speed needs about 15-25 minutes depending on your comfort level, so please try this then record it. Next, try walking 1km at 4.8 km/h which should take about 12 minutes.
- Page 19 If you have no experience or can't be sure of the exercise speed for you, then you can reference the below standards: Speed 1-3.0 km people with weaker constitutions. Speed 3.0-4.5 km sedentary people who do not often exercise. Speed 4.5-6.0 km moderately fast walking people.
-
Page 20: Warm-Up Exercise
Warm Up Exercises: It is better to do some warm-up exercise. Warm the muscles by easy stretching, and use 5-10 minutes to warm-up. Then stop and the illustrated methods do stretch exercises repeating five times, and then for each foot do 10 seconds or more every time. After running, repeat these stretch exercises. -
Page 21: Maintenance Instructions
Maintenance Instructions: Checking Belt Tension: If you feel the running belt has occasional pause when you are running, the running belt or motor belt is probably too loose and you’ll need to adjust it. Judgment methods: Step 1: Open the motor cover then let the Treadmill work at the slowest speed. Step 2: Stand on the running belt and move together with it, hang on to the handrails and try your best to press down and stop the running belt with your feet. - Page 22 • Make sure your running shoes are clean. • The top of the belt may be cleaned with a wet soapy cloth but be careful to keep the cleaning liquid away from inside the motorized Treadmill frame or from underneath the belt. •...
- Page 23 Adjusting the Running Belt: Place the Treadmill on a level surface then set it to run at approximately 6-8 km/h. Observe the running belt deviation to the right or left. If the belt is drifting to the right, unplug the safety lock and power switch, and turn the right adjusting bolt 1/4 turn clockwise, then insert the power switch and safety lock, run the Treadmill and...
- Page 24 EXPLODED DIAGRAMS...
-
Page 25: Parts List
PARTS LIST DESCRIPTION REMARK DESCRIPTION REMARK ADJUSTABLE ∮9*∮62*23.5 MAIN FRAME WHEEL WIRELESS CHEST BASE FRAME BELT RECEIVER MOVING WHEEL INCLINE BRACKET 40*80*t1.8 PIPE PLUG UPRIGHT EDGING MOTOR BRACKET HAND PULSE FRONT ROLLER PLANAR PAD ∮30*∮6.5*16 REAR ROLLER CUSHION RING PROTECTING COMPUTER BRACKET WIRE PLUG COMPUTER CHIP... - Page 26 DESCRIPTION REMARK DESCRIPTION REMARK ∮ 8.1* ∮ COMPUTER MIDELE WIRE SPRING WASHER 12.3*t2.1 ∮ 8.4* ∮ COMPUTER BOTTOM WIRE INNER WASHER 14.5*t0.8 COUNTERSUNK HEAD SENSOR M5*30 SCREW SINGLE LINE LOCK NUT CONTROLLER LOCK NUT HANDRAIL BAR HEX NUT ∮ ∮ HEX NUT FLAT WASHER M10*45...
- Page 27 Fault Codes and Significances Fault Code Fault Description Fault Processing Stops and goes into fault Status. The machine will not run, the Communication computer shows fault code “E1”, and the alarm Beeps three abnormal: The times. control board and Possible Reasons: Check all the connection points between the computer are not console and controller.
Need help?
Do you have a question about the HS312TM EQUINOX and is the answer not in the manual?
Questions and answers