Table of Contents
Advertisement
Advertisement
Table of Contents

Related Manuals for Healthstream T790


Summary of Contents for Healthstream T790
- Page 1 AC TREADMILL INSTRUCTION MANUAL...
-
Page 2: Table Of Contents
INDEX TREADMILL FEATURES ........... 1 IMPORTANT SAFETY PRECAUTIONS ......3 Grounding instructions Electrical safety Mechanical safety Protective circuit III. ASSEMBLY INSTRUCTIONS..........5 Tools and accessories Hardware kit content Assembly instruction SETTING UP THE TREADMILL ........11 Placement of the treadmill Leveling the base Use dedicated circuit OPERATING THE TREADMILL ....... -
Page 3: Treadmill Features
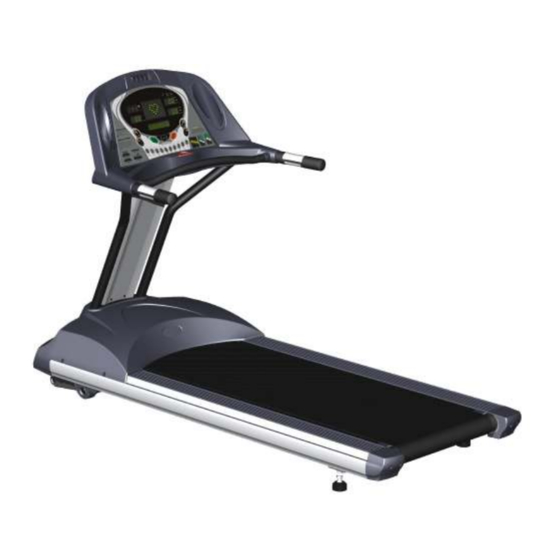
I. TREADMILL FEATURES User-friendly console design with Built- in fan keeps user text messages makes customizing cool and refreshed your workouts easy. Big LED and during training. dot matrix display windows for real time feed back of all workout stats. Water bottle holder. - Page 4 Big LED displays and dot matrix display for easy viewing during workout. Large running surface makes running a joyful experience with T790 Club. Low impact design with cushions to minimize impact to the joints. Self-centering belt alignment so that the running belt is tracked properly in the center.
-
Page 5: Important Safety Precautions
IMPORTANT SAFETY PRECAUTIONS When using an electrical product, basic precautions should always be followed. Read all instructions before using this treadmill. GROUNDING INSTRUCTIONS This product must be grounded! Proper grounding provides a path of least resistance for electrical current WARNING! if treadmill should malfunction or breakdown. -
Page 6: Electrical Safety
ELECTICAL SAFETY To reduce the risk of burns, fire, electrical shock, or injury to persons, take the following precautions. Do not use the treadmill if the unit is wet or the plug or cable is damaged or the treadmill is not working properly. Keep the power cable and plug away from heated surfaces. -
Page 7: Assembly Instructions
III. ASSEMBLY INSTURCTIONS TOOLS AND ACCESSORIES Qty When to use Description For assembling steps 1&2 Hex wrench For assembling step 3 13mm box end wrench For assembling step 4 Phillips screwdriver Power cable For operating treadmill For operating treadmill Safety key Wireless heart rate For wireless pulse transmission transmitter... -
Page 8: Hardware Kit Content
HARDWARE KIT CONTENT # Description Qty When to use Step 1 Bolt, dome head, M8x80mm Step 1 x 4pcs Washer, flat, Step 2 x 5pcs M8x1.6t Step 3 x 3pcs Step 1 Bolt, dome head, M8x60mm Step 1 Washer, curve, M8x1.5t Screw, dome head, Step 2... -
Page 9: Step By Step Instruction
STEP BY STEP INSTRUCTION 1. ASSEMBLE THE UPRIGHT POST Detail view Detail view Use hex wrench to perform this assembly procedure. NOTE 1. Connect the cables (K, L) before you assemble the upright post (J) to base Take care that the frame (M). - Page 10 2. ASSEMBLE THE CONSOLE BASE Use hex wrench to perform this assembly procedure. 1. Secure console base (N) to the upright post (J) with five M8x15mm bolts (E) and five flat washers (B) from the bottom and secure two M8x15mm bolts (E) and two star washers (F) from the top. Be careful not to pinch or damage the cables.
- Page 11 3. ASSEMBLE THE CONSOLE Use 13mm box end wrench to perform this assembly procedure. 1. Do not pull on the cable O. Carefully connect the cables (O) and (Q). Push down the cables so that they lay inside the plastic. Then gently set the console (P) on the console base (R) by aligning the three pins.
- Page 12 4. ASSEMBLE THE FRONT MOTOR COVER Use Philips screwdriver to perform this assembly procedure. 1. Turn on the treadmill to ensure that all connections are connected properly by checking that the console display functions properly. 2. Then secure the front motor cover (S) to base frame (M) with four screws (H) along the top and four self-tapping screws (I) along the bottom.
-
Page 13: Setting Up The Treadmill
IV. SETTING UP THE TREADMILL CAUTION PLACEMENT OF THE TREADMILL Make sure the running To optimize user safety, please take the following precautions when deck is level to the selecting location for the treadmill. ground. If the deck is positioned so that you are running downhill, Do not place the treadmill outdoors. -
Page 14: Operating The Treadmill
V. OPERATING THE TREADMILL TURN POWER ON The On/Off switch for the treadmill is located next to the power supply cord at the front of the motor cover. Flip this switch to the "ON" position. The switch will become lighted to indicate that the power is on. SAFETY TETHER KEY AND CLIP WARNING The safety key is designed to cut the main power to the treadmill should you fall. -
Page 15: Operating The Console
OPERATING THE CONSOLE DISPLAY VALUES Range Resolution Increment Display windows Display Pulse 40-240 Left top LED window Elevation (%) 0-15 Left bottom LED window Distance (Miles) 00.1-99.0 XX.X Right top LED window Distance (Km) XX.X 00.1-99.0 Right top LED window Right bottom LED window Speed (Miles/H) XX.X... - Page 16 Basic function buttons Increase elevation grade by 1% increment Elevation up Functional even when the running belt is not in motion Decrease elevation grade by 1% increment Elevation down Functional even when the running belt is not in motion Activates treadmill Quick start Running belt starts moving at 1 Km/H or 0.5 Mi/H Start...
- Page 17 Advanced function buttons Ten program options during workout selection. Numerical input during program setup Direct speed control during workout Example: Press 1 and 2 for changing speed to 12Km/H Speed interval Speed program - automatically adjust by speed only Speed program - automatically adjust by speed only Aerobic Weight loss Elevation program - automatically adjust by elevation only...
- Page 18 Additional feature buttons Turns speaker on or off Speaker ON/OFF Speaker light on indicates audio instruction is in operation Turns fan on or off Fan ON/OFF Fan light on indicates fan is in operation Indicators and displays Tool light on indicates deck lubrication is required Service required indicator Other maintenance and routine check should also be performed...
-
Page 19: Console Functions
CONSOLE FUNCTIONS SPEED ADJUSTMENT There are two ways to adjust speed during workout. SPEED+and SPEED_ will adjust speed by increments of 0.1Km/H. Or you may hold these buttons to ramp up or down. If the speed adjustment increment is large, it is easier to use the number buttons which function as direct speed control buttons during workout. -
Page 20: Pause Function
PAUSE FUNCTION When STOP button is pressed during workout, program is suspended. Message center will flash "WORKOUT PAUSED". After the running belt has come to a complete stop, dot matrix display window will count down from 2:59. During pause mode, only START and STOP buttons will function. If START is pressed within three minutes during the pause mode, treadmill will bring the running belt movement back to the speed at which the treadmill was paused. -
Page 21: Vii. Workout Programs
VII. WORKOUT PROGRAMS QUICK START Once the power is turned on and the safety key is secured in place, simply press the green quick START button. Treadmill will activate at 1.0 Km/H. You may increase or decrease speed or elevation at any time during your QUICK START workout. -
Page 22: Elevation Programs
ELEVATION PROGRAMS Once the power is turned on and the safety key is secured in place, you may press the number button 2 or 3 to choose one of the two pre-set elevation programs, WEIGHT LOSS or HILL CLIMB. Message center will prompt user to set up workout duration, and intensity level based on max elevation value. -
Page 23: Heart Rate Control Programs
HEART RATE CONTROL PROGRAMS Users have the option to customize their heart rate control programs based on their target heart rate value. Once the power is turned on and the safety key is secured in place, you may press the number button 7 to select HRC program adjust by speed or number button 8 to select HRC program adjust by elevation. -
Page 24: Fitness Test Program
CALCULATE YOUR TARGET HEART RATE The most common method for calculating your target heart rate is to find your maximum heart rate first. The standard formula for calculating maximum heart rate = 220 minus your age. You DO NOT want to workout at your maximum heart rate. You want to workout in your target heart rate zone. -
Page 25: Maintenance
VIII. MAINTENANCE The following maintenance procedures should be performed on a regular basis. Frequency of the routine check up should depend on usage level. When the service indicator lights up on the console, it is a reminder that you need to lubricate the deck and perform other maintenance procedures if you had not done them recently. -
Page 26: Running Belt Centering Adjustment
RUNNING BELT CENTERING ADJUSTMENT When you run or walk, you may push off harder with one foot than the other. This will cause the running belt to run off centered. This treadmill is designed and built to ensure proper tracking of the belt so that it is always centered on the deck. -
Page 27: Ix. Trouble Shooting
IX. TROUBLE SHOOTING WHEN TO CALL FOR HELP This treadmill is designed with user safety as the number one priority. In the event of electrical failure, the treadmill will shut off automatically to prevent user injury and to prevent damage to expensive components such as the motor. When you encounter unusual behavior from the treadmill, simply turn the power switch off and on to reset the treadmill. -
Page 28: Safety Key
ERROR 3 Safety Tether Key Error Error 3 occurs when safety tether key is not in positive contact with the console. Check for positive contact of the safety key to the console. ERROR 5 Incline Motor Error This error occurs when the incline motor is not functioning properly. 1. - Page 29 Note : Owner's Manual...
- Page 30 Note : Owner's Manual...
- Page 31 Note : Owner's Manual...
- Page 32 Note : Owner's Manual...
- Page 33 Note : Owner's Manual...
- Page 34 Read and follow all instructions in this manual. Retain this instruction manual for future reference. 2004 Healthstream Taiwan Inc.
Need help?
Do you have a question about the T790 and is the answer not in the manual?
Questions and answers