DMP Electronics XTL Series User Manual
Hide thumbs
Also See for XTL Series:
- User manual (52 pages) ,
- Programming manual (48 pages) ,
- Installation manual (4 pages)
Table of Contents
Advertisement
Advertisement
Table of Contents

Subscribe to Our Youtube Channel
Related Manuals for DMP Electronics XTL Series


Summary of Contents for DMP Electronics XTL Series
- Page 1 XTL Series U S E R G U I D E...
-
Page 2: Silencing An Alarm
Silencing an Alarm When the alarm siren is sounding, enter your user code or present your card to a keypad or reader during the Status List display. IS THIS A FALSE ALARM? YES NO or CANCEL VERIFY displays. • If a burglar alarm is valid, press NO or VERIFY to send a verification message to the Central Station. -
Page 3: Table Of Contents
XTL Series User Guide Table of Contents Section Page Section Page Introduction ..............1 Home/Away System Disarming ........15 XTL, XTLN, XTLN-WiFi, and XTLC Systems ......1 Keypad Shortcut Keys ............ 16 About Your Security System ..........1 User Menu ...............18 Emergency Evacuation Plans .......... - Page 4 Supervisory Event Displays ..........40 System Monitor Event Displays ........40 Wireless Jamming Event Displays ........40 Appendix B ..............41 1100 Series Wireless Description ........41 Appendix C ..............42 User’s Guide ..............42 Entering User Names ............. 44 XTL Series User Guide...
-
Page 5: Introduction
All the information user friendly, wireless security and fire system available. contained here can help you quickly, and comfortably, learn the XTL Series system operation. The system combines ease of use with a simple to understand keypad display to offer the full range of features requested by Note: There may be a 30-second alarm communication delay today’s security system owners. -
Page 6: Emergency Evacuation Plans
The best way to survive a fire or other emergency is to get out authorities. Never enter a building to look for someone. early. A fire alarm system installation, with smoke and carbon monoxide detectors in each room, can greatly decrease your risk of loss or injury. XTL Series User Guide... -
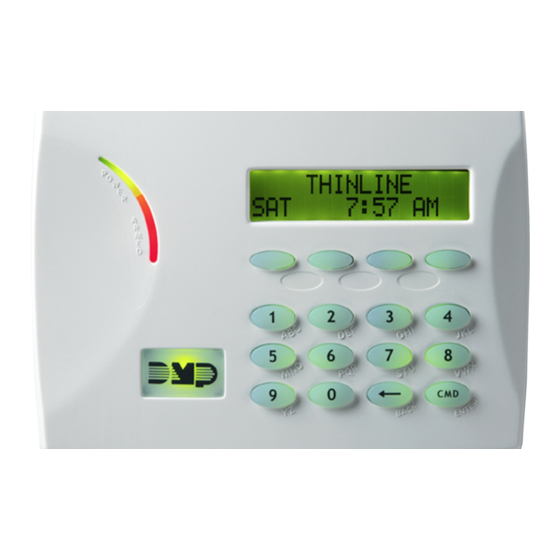
Page 7: Keypads
Select key is the second from the left; third Select key is second from the right; and the fourth Select key is Police Emergency Fire the far right key. DMP 9000 Series Wireless Keypad Panic Keys With Shaded Buttons To Indicate Police Panic Keys Introduction XTL Series User Guide... -
Page 8: Common Keys On All Keypads
Internal Speaker Tone Set the tone of the keypad internal speaker. At the SET TONE display, use the top left Select key to make the tone lower. Use the right Select key to make the tone higher. XTL Series User Guide Introduction... -
Page 9: 1100 Series Wireless
Key Fob Examples and pressing another button. The key fob Button Names may not complete sending the signal for the button press if another button is pressed too quickly. Introduction XTL Series User Guide... -
Page 10: Special Wireless Displays
Also, your system may be pre-programmed at installation to send an Abort signal to the Central Station. Refer to the Introduction section. XTL Series User Guide Introduction... -
Page 11: Email/Cell Phone Messages
During the entry delay time, enter a valid user code to disarm the system or an alarm occurs. Introduction XTL Series User Guide... - Page 12 If your system contains any Panic zones, these do not display The Exit Error feature allows the central station to acknowledge on the keypad for security reasons. the arming error without dispatching the police on a false alarm. XTL Series User Guide Introduction...
-
Page 13: Arming And Disarming
Throughout this guide, any differences between the were armed. The keypad displays ALL SYSTEM ON if all areas in the systems are noted for your convenience. system are armed. Arming and Disarming XTL Series User Guide... -
Page 14: Key Fob Arming
ONLY before displaying the armed message. YES to arm all areas authorized for your user code. Arming Report: Your system may be pre-programmed at installation to send arming or zone bypass reports to a central station. XTL Series User Guide Arming and Disarming... -
Page 15: Area System Disarming
Disarmed Message: The keypad displays ALL SYSTEM OFF after the system disarms. Central Station Report: Your system may be pre-programmed at installation to send a report of the disarming to the central station. Arming and Disarming XTL Series User Guide... -
Page 16: All/Perimeter System Arming
Perimeter arming allows you to move freely 4. Select YES to disarm all areas authorized for your user about inside without setting off any interior alarms. code. XTL Series User Guide Arming and Disarming... -
Page 17: All/Perimeter System Disarming
5a. If a problem exists on any zones, the zone name and seconds or an invalid user code is entered, the prewarn tone begins problem display followed by: OKAY BYPASS STOP. sounding again. 5b. Select OKAY to force arm the zone(s) before arming. Arming and Disarming XTL Series User Guide... -
Page 18: Home/Away System Arming
SYSTEM NOT READY. Pressing any Select key during this the system. This display remains on the keypad until a display shows the faulted zone name. selection is made, the Back Arrow is pressed, or the internal system bell cutoff timer expires. XTL Series User Guide Arming and Disarming... -
Page 19: Home/Away System Disarming
The keypad sounds the exit delay alert and when the sta tion and/or to your email address or cell phone. delay expires, all zones are armed. Arming and Disarming XTL Series User Guide... -
Page 20: Keypad Shortcut Keys
Easy Exit (Monitor) system is disarmed. Sleep Perimeter If the alarm is valid, select NO or VERIFY to send a verify Keypad Shortcut Keys message to the Central Station. The system will remain armed. XTL Series User Guide Arming and Disarming... -
Page 21: Arming Function
You can also press the Easy Exit, shortcut key 8 again, to cancel the exit delay countdown. For example, the telephone rings before you retrieve the newspaper so you press shortcut key 8 to rearm the system. Arming and Disarming XTL Series User Guide... -
Page 22: User Menu
System Setup section of this guide. FAVORITES Allows you to activate any Favorite described in the System Setup section of this guide. XTL Series User Guide User Menu... -
Page 23: User Check-In
Activity Check Enabled message to the central station. 3. When NO is selected, the keypad displays CHECK DISABLED for four seconds and then sends the Activity Check Disabled message to the central station. User Menu XTL Series User Guide... -
Page 24: Sensor Reset
The system output names and numbers are located in the System Setup section at the back of this guide. Turning the Outputs On and Off 1. Access the User Menu. 2. Press the COMMAND key until OUTPUTS ON/OFF? displays. XTL Series User Guide User Menu... -
Page 25: Z-Wave Setup
Remaining devices can be viewed by pressing the COMMAND key. Lighting control modules, are displayed first, followed by door locks and then thermostat controls. User Menu XTL Series User Guide... - Page 26 Press the COMMAND key to advance through the list of Z-Wave devices. 5. Press any Select key to display DEVICE RENAME STATUS. 6. Select STATUS to confirm radio communication with the Z-Wave device. XTL Series User Guide User Menu...
- Page 27 7. Press COMMAND to save the Favorite and the Favorite name 4. The Favorite name and the next Z-Wave device stored and ADD EDIT REMOVE displays. in the system displays. ADD Devices to FAVORITES 1. Access the User Menu. User Menu XTL Series User Guide...
- Page 28 Select key under the desired new setting to change. name and the next Z-Wave device stored in the selected 12. The Favorite name and the next Z-Wave device stored Favorite displays. in the system displays. XTL Series User Guide User Menu...
- Page 29 DEVICES. Pressing the Back Arrow key cancels the transfer. Select NO to exit the XFER menu and return to ZWAVE SETUP?. All programming will still be intact on the DMP Z-Wave controller and will cancel the transfer. User Menu XTL Series User Guide...
-
Page 30: Bypass Zones
4. To reset a zone, enter the zone number and Select RST. 6. When the rediscovery is complete, the keypad returns to ZWAVE SETUP? 5. To Bypass a zone, enter the zone number and Select BYPS. XTL Series User Guide User Menu... -
Page 31: Zone Monitor (Chime)
This initiates the Zone Monitor operation for all Exit zones in an Area system or all zones assigned to the perimeter in a Home/ Sleep/Away or All/Perimeter system. The keypad displays MONITOR ON and chimes or displays MONITOR OFF and no tone is sounded. User Menu XTL Series User Guide... -
Page 32: System Test
John Smith KEYPAD SOUNDING during a two second keypad test, Authority Level Master then: User Number - The XTL Series panel supports 30 users. Each user is BATTERY - OKAY or BATTERY - TRBL to indicate the numbered from 1 to 30. This number identifies them to the system battery condition, then:... - Page 33 4. Select ADD to add a new user code. system and access all Standard level functions in the 5. At the USER NUMBER: — prompt, enter a user number and User Menu. press COMMAND. User Menu XTL Series User Guide...
-
Page 34: Deleting User Codes
2 may have their user code changed from 1234 to 5678 but 6. If a lock does not receive the user codes, the keypad displays they are still user number 2. CODES NOT SENT TO ALL LOCKS. XTL Series User Guide User Menu... -
Page 35: Schedules
Select key. 3. The keypad displays PRM EXT. Select EXT. The keypad displays – : AM PM. Enter in the new time for the closing schedule to expire. User Menu XTL Series User Guide... -
Page 36: Time And Date
The display returns to TIME DAY DATE. Press the Back Arrow key to exit the User Menu. WiFi Version User Code Level: Master or Standard. Displays the software version of the XTLN-WiFi panel. XTL Series User Guide User Menu... -
Page 37: System Setup
This System Setup section is provided to allow you to track the Your system may be divided into six separate areas, each area can current status of programmable options on your XTL Series have a name or description that displays at the keypad. This can help system. -
Page 38: Z-Wave Device Name
___________________________________________________ ___________________________________________________ 10 ___________________________________________________ 11 ___________________________________________________ ___________________________________________________ 12 ___________________________________________________ ___________________________________________________ 13 ___________________________________________________ ___________________________________________________ 14 ___________________________________________________ ___________________________________________________ 15 ___________________________________________________ ___________________________________________________ 16 ___________________________________________________ ___________________________________________________ 17 ___________________________________________________ ___________________________________________________ 18 ___________________________________________________ ___________________________________________________ 19 ___________________________________________________ ___________________________________________________ 20 ___________________________________________________ ___________________________________________________ XTL Series User Guide System Setup... -
Page 39: Favorite List
_________________________________________________________________________________ ___________ _________________ _________________________________________________________________________________ ___________ _________________ _________________________________________________________________________________ ___________ _________________ _________________________________________________________________________________ ___________ _________________ _________________________________________________________________________________ ___________ _________________ _________________________________________________________________________________ ___________ _________________ _________________________________________________________________________________ ___________ _________________ _________________________________________________________________________________ ___________ _________________ _________________________________________________________________________________ ___________ _________________ _________________________________________________________________________________ ___________ _________________ _________________________________________________________________________________ ___________ _________________ _________________________________________________________________________________ System Setup XTL Series User Guide... -
Page 40: Key Fob Button Programming
User Codes Enter the user name assigned to each key fob and the button The XTL Series system provides 30 user codes you can program action programmed for each button in the table below. Refer to for individual users. As you add new users or change current user the Introduction and Appendix B for more information. - Page 41 1 2 3 4 5 6 Standard (STD) 1 2 3 4 5 6 (Photocopy this page before using.) 1 2 3 4 5 6 1 2 3 4 5 6 Circle Your Selections System Setup XTL Series User Guide...
-
Page 42: Appendix A
Once the full Swinger Bypass which is an automatic function that allows the 100 events are reached, any new event received clears the oldest system to bypass a zone. event from the list. XTL Series User Guide Appendix A... -
Page 43: Zone Event Displays
US:19 BY US:12 User Code Event Types - There are three event types you may see here: ADD - User added DEL - User deleted CHG - User code or authority level was changed. Appendix A XTL Series User Guide... -
Page 44: Supervisory Event Displays
October 17. AC POWER System Monitor Event Types - There are two event types: TBL - Trouble RST - Restore System Monitor Event Names - There are two system monitors: AC POWER BATTERY XTL Series User Guide Appendix A... -
Page 45: Appendix B
Description 2.0 Seconds All System On Green 2.0 Seconds All System Off System On Green/Red 2.0 Seconds (Some Areas Armed) When a button is pressed that is not programmed, the LED does not operate. Appendix B XTL Series User Guide... -
Page 46: Appendix C
User’s Guide This section of the user’s guide provides information on using the XTL Series card read capability if enabled for your system. The card reader is located under the keypad logo. The keypad displays for All/Perimeter or Home/Away operation are dependent on how your keypad was programmed by your alarm dealer. - Page 47 See Arming and Disarming above and on the previous page. Using the access reader for user menu access You can also use a card read to access the User Menu when MENU? NO YES displays. Appendix C XTL Series User Guide...
-
Page 48: Entering User Names
Pressing the 0 (zero) key provides with Y, Z, and a space to use you with a – (dash), . (period), between names. For example: * (asterisk), and a # (pound sign). BOB SMITH. XTL Series User Guide Appendix C... -
Page 49: Email/Cell Phone Message User's Guide
Email/Cell Phone Message User’s Guide From: John's Home System (mailto: AlarmAdmin@ABCSecurity.com) Sent: Wednesday, October 07, 2009 8:33 AM Your XTL Series security system’s reporting capability can be used To: JohnSmith@myhome.com to send reports to an email address or cell phone number (XTL and... -
Page 50: Myaccess™ Text Messaging Commands
If the system is already disarmed, you will receive a message saying system that the system is already disarmed. Arming Partial Areas with Text Commands 1. Text message your system panel with the following command: XTL Series User Guide Appendix D... - Page 51 3. To turn a specific light off, text TURN OFF followed by the name. For example, to activate the Favorite named House light name. For example, to turn Bedroom Light off, you Lights, you would text: ACTIVATE HOUSE LIGHTS. would text: TURN OFF BEDROOM LIGHT. Appendix D XTL Series User Guide...
-
Page 52: Subscribe To Text Messages
Text the word SUBSCRIBE to show the current subscription status and the available subscription options. To receive the Status of Z-Wave compatible locks, text: STATUS LOCKS. To receive the Status of Z-Wave compatible thermostats, text: STATUS THERMOSTATS XTL Series User Guide Appendix D... -
Page 53: Common Keypad Displays
Only one keypad at a time can access Z-Wave Setup. If a The user must exit Z-Wave Setup in one keypad before ZWAVE BUSY user attempts to access the menu from a second keypad accessing it in a second keypad. Z-WAVE BUSY will be displayed. Appendix D XTL Series User Guide... - Page 54 COMMAND 20, 21, 22, 23, 24, 25, 26 Zone Bypass 38 Types 3 COMMAND (CMD) Key 4 Zone Events 39 User Menu 1 Common Keypad Displays 46 Exit Error 8 User Options 4 Extending Schedules 31 Volume 4 Wireless Displays 6 XTL Series User Guide Index...
- Page 55 Arming Function 13, 15, 17 Zone Event Display 39 Check-in (Latch Key) Report Function 17, 19 Z-Wave 20, 21, 22, 23, 24, 25, 26, 30 Easy Exit™ Function 17 Z-Wave devices 20, 21, 22, 23, 24, 25, 26 Index XTL Series User Guide...
-
Page 56: Quick Reference Wallet Cards
Quick Reference Wallet Cards Quick Reference Wallet Cards MyAccess™ Text Messaging Quick Commands Text Messaging Quick Commands Panel Phone Number: _______________________ Panel Phone Number: ________________________ Text For this action Text For this action HELP List of text commands HELP List of text commands ARM, AWAY, ALL Arm all areas of your system ARM, AWAY, ALL... - Page 57 Text For this action Call the panel phone number. The panel answers and sounds one OFF (Output name or #) Turns the Output specified to OFF short tone. MOMENTARY (Output name or #) Turns the Output specified to MOMENTARY Enter your code within eight seconds. One beep means the code is Z-WAVE HELP List of Z-Wave compatible text commands good.
- Page 58 LT-1109 1.03 14185...
Need help?
Do you have a question about the XTL Series and is the answer not in the manual?
Questions and answers