
Subscribe to Our Youtube Channel
Related Manuals for Eiki EIP-UHS100


Summary of Contents for Eiki EIP-UHS100
- Page 1 Owner's Manual Multimedia Projector Model EIP-UHS100 EIP-XHS100 (Projection lens is optional.)
-
Page 2: Feature And Design
Seven types of motorized projection maintenance. Custom Power Level lens can be an option for EIP-UHS100/ option allows you to adjust the lamp EIP-XHS100, the projection lenses can power from 100% to 80.4% to fine-tune cover the throw ratio range from 0.75:1... -
Page 3: Table Of Contents
Index Feature and Design ....................2 To the Owner ......................5 Safety Instructions ....................6 Installing the Projector in Proper Directions ............7 Positioning Precautions ..................7 Compliance ............................8 Standard Accessories ....................9 Optional Accessories ....................10 Optional Lenses and Projection Size ..................10 Complete projection lens series as below table ................10 Projection Size v.s Distance ......................11 Overview..................12 Projector contents ....................12... - Page 4 Basic Operation ................29 Turning On the Projector ..................29 Turn Off the Projector ....................29 Selecting an Input Source ..................30 Selecting a Aspect Ratio ..................30 How to Operate the On-Screen Menu ..............31 OSD Operation..........................31 Changing the OSD Language .......................32 OSD Tree ............................33 OSD Operation-INPUT ........................37 OSD Introduction –...
-
Page 5: To The Owner
To the Owner Before installing and operating the projector, read this manual thoroughly. The projector provides many convenient features and functions. Operating the projector properly enables you to manage those features and maintains it in good condition for many years to come. Improper operation may result in not only shortening the product life, but also malfunctions, fire hazard, or other accidents. -
Page 6: Safety Instructions
required distance from the ceiling. If the projector is to be built into a compartment or similarly enclosed, these minimum distances must be maintained. 70cm 50cm 50cm 30cm Do not cover the ventilation slots on the projector. Heat buildup can reduce the service life of your projector, and can also be dangerous. -
Page 7: Installing The Projector In Proper Directions
Prevent the power cord from being treaded or pressed, especially the power cord near the plug, outlet and the connection between the power cord and the equipment. Unplug the power cord during a lighting or when the equipment is not used for long periods. -
Page 8: Compliance
Compliance Federal Communications Commission Notice This equipment has been tested and found to comply with the limits for a Class A digital device, pursuant to Part 15 of FCC Rules. These limits are designed to provide reasonable protection against harmful interference when the equipment is operated in a commercial environment. -
Page 9: Standard Accessories
Standard Accessories AC Power cord Remote control with batteries Owner's Manual (CD) US Type*1 ; Euro Type*1 (AA or LR6) EIP-UHS100 EIP-XHS100 VGA cable Quick start guide Lens cap Color type Wired remote Cable Lens lock screw (M4*1) Color Wheel Module... -
Page 10: Optional Accessories
Optional Accessories Optional Lenses and Projection Size Seven types of motor-powered projection lens can be an option for EIP-UHS100/EIP- XHS100, the projection lenses can cover the throw ratio range from 0.75:1 to 8.56:1. These lenses support to Lens Memory features to EIP-UHS100/EIP-XHS100, lens memory function offers ten memory set for storing. -
Page 11: Projection Size V.s Distance
Projection Size v.s Distance EIP-UHS100 Distance unit : m Fixed Short Throw Long Throw Long Throw Long Throw Short Throw Model Name AH-CD20203 AH-CD20202 AH-CD20101 AH-CD20401 AH-CD20301 AH-CD20302 AH-CD20201 W x H (mm) Inch Wide Tele Fixed Wide Tele Wide... -
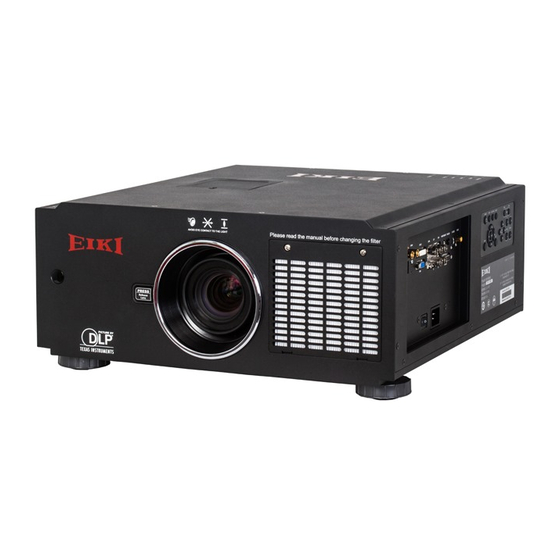
Page 12: Overview
Overview Projector contents Part Names and Functions ① Color Wheel Cover ② Infrared Remote Receiver(Front) ③ Lens Release Button ④ Air Intake Vent and Filter Cover ⑤ Adjustable Foot ⑥ AC Power Switch ⑦ Power Cord Connector ⑧ Terminals and Connectors ⑨... -
Page 13: Terminals And Connectors
Terminals and Connectors HDMI DVI-D B/Pb R/Pr WIRED REMOTE TRIGGER RS-232 Input SDI signals to IN and outputs the SDI signals from OUT. HDMI Connect the HDMI signal from the video device to this terminal. DVI-D Connect the DVI-D output on the computer to the terminal, the terminal can support to HDCP compatible signal. -
Page 14: Control Keys And Indicators
Control Keys and Indicators Control Keys POWER INPUT AUTO SYNC ASPECT OPEN CLOSE SHUTTER LENS ENTER FOCUS ZOOM SHIFT MENU EXIT POWER Turn on/off the projector. INPUT Select the input source, press the button once to select next source option, the sequence of the source is HDMI, DVI, VGA, Component/BNC, Composite, 3G-SDI. -
Page 15: Led Indicator
LED Indicator This indicator flashes green when the projector is warming up and POWER keep green when turning on. STATUS Indicates the status of the projector. LAMP 1 The indicator lights green when the lamp 1 is on, the indicator is off when the lamp is off. -
Page 16: Remote Control
Remote Control 1 ON Turn the projector on. 2. OFF Turn the projector off. 3. FOCUS Focuses the projected images. 4. ZOOM Zoom in/out the projected image. 5. TEST PATTERN Display test pattern. 6. LENS SHIFT Shift the lens, up/down or left/right. 7. -
Page 17: Remote Control Battery Installation
Notes on Remote Control Operation In most situations, you can simply point the remote control at the screen which will reflect the IR signal from the remote back toward the IR receiver on the projector. In some cases, however, ambient light may prevent this. If so, try again. If the effective range of the remote control decreases, or it stops working, replace the batteries with new ones. The remote control may fail to operate if the infrared remote sensor is exposed to bright sunlight or fluorescent lighting. -
Page 18: Wired Remote Control
Wired Remote Control The remote control can be used as a wired remote control. Wired remote control helps you use the remote control outside the operating range. Connect the remote control and the projector with the remote control cable (supplied). If the remote control is connected to the cable, the remote control does not emit signal. -
Page 19: Installation
Installation Lens Installation Before setting up the projector, install Projection Lens on the projector. Before installation, check where the projector is used and prepare a suitable lens. For the details, contact the sales dealer where you purchased the projector. To install and change the projector Lens: 1. -
Page 20: Lens Replacement
Lens replacement To replace the projector Lens 1. Press and hold the lens lock button. Support the lens and turn counterclockwise to loosen the lens. Pull the lens backward and slide the lens out of the lens holder. 2. Insert the lens and ensure the lens touches the lens holder. Align the " "... -
Page 21: Positioning Projector
Positioning Projector Picture Level and Pitch Adjustment The projection angle is adjustable up to 5 degrees upward and downward respectively by rotating front and rear. To raise the projector, rotate the front feet clockwise, rotate the rear foot clockwise to lower the projector. Adjusting the Picture Orientation This projector is designed to be installed in one of four possible installation locations. -
Page 22: Lens Shift Adjustment
Lens Shift Adjustment Projection lens can be moved up, down, right and left with the motor-driven lens shift function. This function makes the positioning of images easy on the screen. Lens shift is generally expressed as a percentage of the image height or width, see below illustration. Vertical / Horizontal Lens Shift For ceiling mounted projectors, the lens can be moved 50% (0.5V) downward, while the lens can be moved 50% (0.5V) up or down on a desktop mounted projector. -
Page 23: Connecting To Computer
Connecting to Computer Cables used for connection • HDMI Cable (One cable is supplied, Other cables are not supplied with this projector) 1 3 5 7 9 11 13 15 17 19 2 4 6 8 10 12 14 16 18 •... -
Page 24: Connecting To Video Equipment
Connecting to Video Equipment Cable used for connection • Video Cable (BNCx3, BNCx1) • DVI Cable • SDI Cable • HDMI Cable Component Video output equipment (Such as high-definition TV source) Blu-ray Player Digital Output Component Video Output SDI Out HDMI Output (HDCP compatible) (B/Pb... -
Page 25: Trigger Connection
Trigger connection If your projection system includes a projector screen, screen cover or other 12V Trigger equipment, please connect such device/equipment to the projector’s 12V Trigger output as illustrated. After you have done so, your screen will lower automatically whenever you turn on your projector for your convenience. -
Page 26: Rs-232 Connection
RS-232 Connection Connect a PC or home theater control/automation system (if present) to the RS-232 port on the projector. Use a standard, 9-pin serial cable, wired straight-through. HDMI DVI-D B/Pb R/Pr WIRED REMOTE TRIGGER RS-232 LAN Connection HDMI DVI-D B/Pb R/Pr WIRED REMOTE TRIGGER RS-232... -
Page 27: Connecting To Wired Remote Controller
Connecting to wired remote controller If infrared remote signals cannot reach the projector due to obstructions, you can use the remote control as a wired remote control. HDMI DVI-D B/Pb R/Pr WIRED REMOTE TRIGGER RS-232... -
Page 28: Connecting The Ac Power Cord
Connecting the AC Power Cord This projector uses nominal input voltages of 100-240 VAC. It is designed to work with single-phase power systems having a grounded neutral conductor. To reduce the risk of electrical shock, do not plug into any other type of power system. If you are not sure of the type of power being supplied, consult your authorized dealer or service center. -
Page 29: Basic Operation
Basic Operation Turning On the Projector ① Complete peripheral connections (with a computer, VCR, etc.) before turning on the projector. ② Connect the projector’s AC power cord into an AC outlet and turn on the MAIN ON/OFF Switch. ③ Press the "POWER" button on the side controller or On button on the remote control. -
Page 30: Selecting An Input Source
Selecting an Input Source When you turn on the projector, it switches to the last selected input and waits for a valid signal. Press INPUT on the remote control or control panel to switch an input source directly. POWER INPUT AUTO SYNC ASPECT ENTER... -
Page 31: How To Operate The On-Screen Menu
How to Operate the On-Screen Menu The projector has an On-Screen Display (OSD) that allows you to adjust image and change settings. OSD Operation Following steps are a basic way for operating the OSD. 1. Press the MENU button to open the OSD. 2. -
Page 32: Changing The Osd Language
Changing the OSD Language The product can display the menus in English, French, Spanish, German, Portuguese, Simplify Chinese, Traditional Chinese, Japanese, Korean, Italian, Arabic or Russian. Press MENU to open the OSD. Go to CONTROL and select Language then press the Enter. -
Page 33: Osd Tree
OSD Tree Main Menu Submenu Input Selection HDMI Component / BNC 3G-SDI PIP Option Off/On PIP Input HDMI Component / BNC 3G-SDI PIP Swap Execute Position Top Left Top Right Bottom Left Bottom Right Split L-R Test Pattern Color Bar Crosshatch Burst Green... - Page 34 Picture Mode High Bright Presentation PICTURE Video Contrast 0-200 Brightness 0-200 Adaptive Contrast Gamma Film Graphics Video Linear Color Color Temperature 5000K 6500K 7800K 9300K Native Trim Red Lift Green Lift Blue Lift Red Gain Green Gain Blue Gain Sharpness 0-200 PICTURE Noise Reduction...
- Page 35 Projection Mode Front Rear Ceiling + Front ALIGMENT Ceiling + Rear Fan Mode Normal Lens Control Down Lens Memory Load Memory Memory set 1-10 Save Memory Memory set 1-10 Clear Memory Memory set 1-10 Center Lens Execute Warp Keystone Rotation Pincushion Barrel Top Left Corner...
- Page 36 Trigger 1.88 2.35 Letterbox Control Native Unscaled Auto Auto Search Dynamic Black Language English Français Español Deutsch Control Português 简体中文 繁體中文 日本語 한국어 Italiano ةيزيلجنإلا русский Model Serial Number Software Version Active/PIP Source Pixel Clock Signal Format SERVICE H/V Refresh Rate Lamp 1 Time x HRS Lamp 2 Time...
-
Page 37: Osd Operation-Input
SMPTE 424M 3Gbps YCbCr 4:02:02 128m 1080P 59.94Hz 3G Level B SMPTE 424M 3Gbps YCbCr 4:02:02 128m 1080P 60Hz 3G Level B SMPTE 424M 3Gbps YCbCr 4:02:02 128m note: Signals are not supported for EIP-UHS100/XHS100, if it is not in the table. - Page 38 Use this function to display multiple windows each containing an image. PIP Option Use this to enable or disable the Picture In Picture function. PIP Input Press ENTER to display available sources for the sub picture then select a source.Note that unavailable input source of submenu are gray out and can not be selected.
- Page 39 Auto: The default setting is Auto. HDMI: If the Auxiliary Video Information (AVI) contains color space and/or range data, the EIP-UHS100/XHS100 uses that information to switch to corresponding color space. RGB: If Hsync or Vsync signals are present, the projector will switch to RGB-PC color space.
-
Page 40: Osd Introduction - Picture
OSD Introduction – PICTURE Picture Mode Use ◄ or ►to select the High Bright, Presentation and Video mode. Contrast Use ◄ or ► to adjust the contrast of the projected image. Note: Brightness and Contrast controls are interactive. The screen change to one may require a subtle change to the other in order to achieve the optimum setting Brightness Use ◄... -
Page 41: Noise Reduction
Sharpness The adjustment of sharpness primarily changes the value of high frequency detail. Use ◄ or ►to adjust it. Noise Reduction Use◄ or ►to adjust the noise of the projected image. This function is suitable for the elimination of image noise from interleaving SD input. Generally speaking, reducing image noise will lower the value of high frequency detail and make the image appear more mellow. - Page 42 Overscan Some programs may display the edges of the image. Use this function to hide the edge by choosing one of the following three options. Crop Zoom 16:10 Narrow Source image area Normal (720p) Noise edge Screen (16:10) VGA Setup Use this function to set up H-Total, H-Start, V-Phase and V-Start of VGA input.
-
Page 43: Osd Introduction - Lamps
OSD Introduction – LAMPS Mode Use ◄ or ►function to select single or dual lamp mode. Power Use ◄ or ►function to select Eco, Normal, or Custom Power Level. High Altitude Use this function to switch the projector’s cooling fan for high-altitude circumstances. You can set it to Off or On. -
Page 44: Osd Introduction - Alignment
OSD Introduction - ALIGNMENT Projection Mode Use◄ or ►function to select the projection mode (Front, Rear, Ceiling + Front, Ceiling + Rear). Fan Mode Use◄ or ► to set the fan mode to Normal, Up or Down. Normal: Normal fan speed. : Increase the fan speed. - Page 45 Center Lens Execute to center the lens. Warp Use this function to correct image distortion. Keystone Use ◄ or ► to correct horizontal distortion. Press▲ or ▼to correct vertical distortion. Rotation Press◄ or ►to rotate the projected image. The adjustable value is from -20 to 20 steps. Pincushion / Barrel Use this function to correct pincushion or barrel distortion.
- Page 46 Top Left Corner Press ◄►to correct top left corner image PICTURE PICTURE distortion. Top Right Corner Press ◄►to correct top left corner image PICTURE PICTURE distortion. Bottom RightCorner Press ◄►to bottom right corner image PICTURE PICTURE distortion. Bottom Left Corner Press ◄►to bottom left corner image PICTURE PICTURE...
- Page 47 Reset Reset all the blanking functions to the default settings. Edge Blend Edge blend function allows multiple projector images to be seamlessly overlapped. To use this function, Edge Blend must be enabled on both projectors. Blend Width Press Enter to display Blend Width window, use◄► to adjust white level for, bottom, left and right blending zone.
-
Page 48: Osd Introduction - Control
Reset This function resets Edge Blend to the factory default settings. Align Pattern Set to ON to Enable this function to use a test pattern to align and adjust multiple images, the alignment line is moved according to Blend Width setting. OSD Introduction –... -
Page 49: Osd Introduction - Service
Trigger The projector comes with one set of Trigger output. You can configure one devices connected to the projector via the trigger port to be automatically turned on when the projector is on. There will be a 2-3 second delay prior to activation to prevent operation of this function when the user is choosing an aspect ratio. - Page 50 Model The designated model number of the projector. Serial Number The designated serial number of the projector. Software Version The version of software installed on the projector. Active/PIP Source Displays the current Active/PIP sources. Pixel Clock Displays the pixel clock of the current input signal. Signal Format Displays the format of the current input signal.
Need help?
Do you have a question about the EIP-UHS100 and is the answer not in the manual?
Questions and answers