Table of Contents
Advertisement
Quick Links
Download this manual
See also:
User Manual
Advertisement
Table of Contents
Troubleshooting

Subscribe to Our Youtube Channel
Related Manuals for Digital Watchdog MEGApix DWC-MV421D


Summary of Contents for Digital Watchdog MEGApix DWC-MV421D
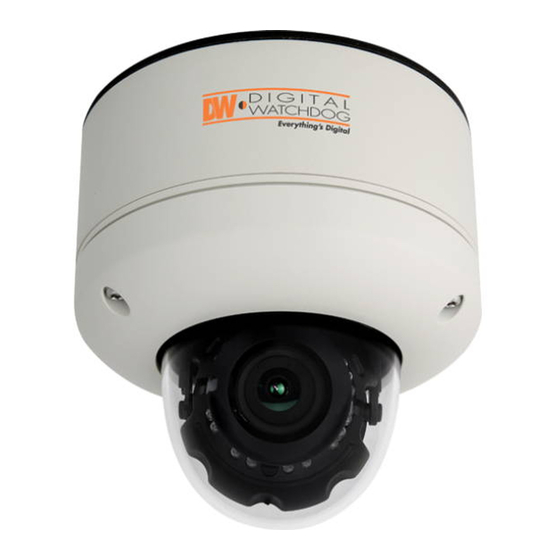
- Page 1 IP 2.1MP Vandal Dome Camera DWC-MV421D/ DWC-MV421TIR Before installing and using the MEGAPIX Camera, please read this manual carefully. Be sure to keep it handy for future reference. 07262012...
- Page 2 PRECAUTIONS Do not open or modify. Do not open the case except during maintenance and installation, for it may be dangerous and can cause damages. Do not put objects into the unit. Keep metal objects and flammable substances from entering the camera. It can cause fire, short-circuits, or other damages.
-
Page 3: Table Of Contents
TABLE OF CONTENTS* Introduction...............................4 Features................................4 Inside the Box...............................5 Parts................................6 Camera Control Board..........................7 Dimensions..............................8 Installation.................................9 Network Connection..........................9-10 Mounting the Camera...........................11-16 Storage Device Installation........................17 Adjusting the 3-Axis Gimbal........................18 MEGAPIX Camera Setup..........................19 Installing the IP Finder..........................19 Using IP Finder Software........................20-21 Network Options............................22 Camera Reboot............................23 MEGAPIX Camera Web Viewer........................24 Accessing the Web Viewer via Internet Explorer..................24 Accessing the Web Viewer via Google Chrome, Mozilla Firefox and Safari..........25... -
Page 4: Introduction
FEATURES* ONVIF Support (V1.02) Local SDHC Card Backup Sony ½.8” CMOS Sensor Highest Resolution 2.1 Megapixels 1080P (1920x1080) at 30fps 4x Auto-Focus 3.5~16mm Lens Triple Codec H.264, MPEG4, MJPEG Double Shutter WDR(Wide Dynamic Range) at 15fps Settings ... -
Page 5: Inside The Box
INSIDE THE BOX* The following items are included with the MEGAPIXEL Camera: 1. Quick Start Guide 2. 4 Screws & 4 Dry Wall Anchors 3. Secondary Video- BNC Cable 4. TROX-T20 5. Mounting Template 6. CD (Manual + Software) 7. DC Plug Camera Module 8. -
Page 6: Parts
PARTS & DESCRIPTIONS* SENSOR+ (Green) SENSOR- (Yellow) RELAY- (Orange) RELAY+ (Red) UART+ (Brown) UART- (Black) 1. Lens 2. Camera Control Board 3. Bubble 4. Cover Dome 5. Flush Mount Base 6. Surface Mount Plate 7. Assembly Screws a) T20 M4 X16 8. -
Page 7: Camera Control Board
CAMERA CONTROL BOARD*... -
Page 8: Dimensions
DIMENSIONS*... -
Page 9: Installation
NETWORK CONNECTION* Two Options Use a PoE-enabled switch to connect data and power through a single cable and begin viewing and recording images instantly. A non-PoE switch will require an adaptor for power transmission. Using a PoE-Enabled Switch The MEGAPIX Camera is PoE-Compliant, allowing transmission of power and data via a single Ethernet cable. PoE eliminates the need for the different cables used to power, record, or control the camera. - Page 10 NETWORK CONNECTION* Using a Non-PoE Switch If a PoE-enabled switch is not used, use a power adaptor for power transmission and non-PoE switch for data transmission. Follow the illustrations below to connect the camera without a PoE-Enabled Switch.
-
Page 11: Mounting The Camera
INSTALLATION* Snapit Easy Installation The Snapit easy installation is a unique Digital Watchdog technology that allows you to install the camera in four easy steps. - Page 12 INSTALLATION* Use the camera’s mounting template or Drill holes into the drywall and insert the your camera to mark the holes as drywall mounts into the holes. required. Pull wires through and make Connect the RJ45 to a CAT5 cable or a power adaptor.
- Page 13 INSTALLATION* Mount the camera Surface Mount Base to the wall. Snap the camera module onto the base by aligning the red and black markings on the base and the camera module. Secure the three (3) Assembly Screws.
- Page 14 INSTALLATION* Adjust the camera’s position by using the 3-Axis Gimbal. Check the LED light. Green light flickers for booting. Red light turns on when booting is complete. 10. Tighten the three locking screws in with the L-wrench to secure the cover dome over the camera.
- Page 15 INSTALLATION* Wall Mount for V4 Housing Verify all parts are in Run cables into the Use the mounting template to the box. mount. make pilot holes. Use the dry wall anchors and wood screws to attach the assembly to the wall.
- Page 16 INSTALLATION* Ceiling Mount for V4 Housing Verify all parts are in Attach the top shield to Run all necessary the box. the pendant mount. cables from the ceiling to the mount. Attach the camera Use the mounting Connect all cables and to the ceiling mount template to make pilot verify camera is...
-
Page 17: Storage Device Installation
INSTALLATION* S t o r a g e D e v i c e T h e M V 4 2 1 M e g a p i x e l C a m e r a s o f f e r t h e o p t i o n o f l o c a l e m e r g e n c y b a c k u p i n c a s e o f n e t w o r k l o s s . -
Page 18: Adjusting The 3-Axis Gimbal
ADJUSTING THE 3-AXIS GIMBAL* The Gimbal mechanism yields maximum rotation and placement as shown below. Do not over rotate the lens. Doing so will damage the camera lens module. -
Page 19: Megapix Camera Setup
User Manual CD. Run IP Finder and install onto your PC. When setup is complete, launch IP Finder . To find your MEGAPIX camera, click Search button. Your MEGAPIX camera will appear as ”DWC-MV421D.” Select the desired device and click Web Connect to access the camera directly via Internet Explorer. -
Page 20: Using Ip Finder Software
IP FINDER SOFTWARE* U s i n g I P F i n d e r S o f t w a r e Use IP Finder to change the basic settings of your MEGAPIX camera or to connect to your MEGAPIX camera. Configuration: Change the device’s connection type and/or IP address information. - Page 21 IP FINDER SOFTWARE* U s i n g I P F i n d e r S o f t w a r e Use IP Finder to set the connection type and the IP address information for your MEGAPIX camera. DHCP: Select DHCP to access the camera within the same internal network.
-
Page 22: Network Options
IP FINDER SOFTWARE* D H C P The Dynamic Host Configuration Protocol (DHCP) is a network configuration protocol that allows a device to configure automatically according to the network it is connected to. If your network supports DHCP, and your MEGAPIX camera is setup as DHCP; then once you search for your camera using IP Finder, the search results will display your MEGAPIX camera with already set network settings that correspond to your network requirements. -
Page 23: Camera Reboot
CAMERA REBOOT* R e s e t t i n g t h e C a m e r a Pressing the reset button on the camera’s control board for five (5) seconds will initialize all environmental variables to factory default. Previous setup for IP default, time, etc. will be deleted. If a system’s IP address is lost, reset the camera back to factory default. -
Page 24: Megapix Camera Web Viewer
WEBVIEWER* R e m o t e V i d e o M o n i t o r i n g V i a I n t e r n e t E x p l o r e r Monitor and configure the MEGAPIX camera through a built-in Webviewer. -
Page 25: Accessing The Web Viewer Via Google Chrome, Mozilla Firefox And Safari
WEBVIEWER* R e m o t e V i d e o M o n i t o r i n g V i a C h r o m e , F i r e f o x , o r S a f a r i You can view your MEGAPIX camera using web browsers other than Internet Explorer. -
Page 26: First & Second Stream
WEBVIEWER* D i s p l a y S c r e e n > F i r s t S t r e a m & S e c o n d S t r e a m Configure two stream settings for monitoring and recording. On the main monitoring page, user can view the camera with the First Stream settings or the Second Stream settings. -
Page 27: Export Image
WEBVIEWER* D i s p l a y S c r e e n > E x p o r t I m a g e E x p o r t a s c r e e n s h o t o f c u r r e n t l i v e v i d e o t o y o u r c o m p u t e r . Select the Export Image button. -
Page 28: Print Image
WEBVIEWER* D i s p l a y S c r e e n > P r i n t I m a g e P r i n t a s c r e e n s h o t o f t h e c u r r e n t l i v e v i d e o . Select the Print button. -
Page 29: Panic Recording
WEBVIEWER* D i s p l a y S c r e e n > R e c o r d I n s t a n t l y r e c o r d l i v e v i d e o t o y o u r l o c a l d r i v e . To Setup Instant Recording Select the Record button. - Page 30 WEBVIEWER* D i s p l a y S c r e e n > R e c o r d I n s t a n t l y r e c o r d l i v e v i d e o t o y o u r l o c a l d r i v e . To Start and Stop Instant Recording ...
-
Page 31: Megapix Camera Setup
WEBVIEWER* D i s p l a y S c r e e n > S e t u p > V i d e o & A u d i o > S t r e a m S e t t i n g s The Recommended Stream Settings are indicated on the image to the left. - Page 32 WEBVIEWER* D i s p l a y S c r e e n > S e t u p > V i d e o & A u d i o > C o l o r S e t t i n g s Initially, the factory default settings will appear;...
- Page 33 WEBVIEWER* D i s p l a y S c r e e n > S e t u p > V i d e o & A u d i o > C o l o r S e t t i n g s Initially, the factory default settings will appear;...
- Page 34 WEBVIEWER* D i s p l a y S c r e e n > S e t u p > V i d e o & A u d i o > A u d i o • Connect speaker/microphone wires (not included) to your camera and to a monitoring device (ex.: PC computer).
-
Page 35: Video
WEBVIEWER* D i s p l a y S c r e e n > S e t u p > V i d e o & A u d i o > P r i v a c y Z o n e The MV421 MEGAPIX camera offers up to 30 privacy zone settings. - Page 36 WEBVIEWER* D i s p l a y S c r e e n > S e t u p > E v e n t > M o t i o n D e t e c t i o n The Motion detection feature allows the MEGAPIX camera to detect motion and trigger an alarm.
- Page 37 WEBVIEWER* D i s p l a y S c r e e n > S e t u p > E v e n t > M o t i o n A r e a The Motion detection feature allows the MEGAPIX camera to detect motion and trigger an alarm. To set the camera to send e-mail notifications for every motion triggered alarms, see page 50.
- Page 38 WEBVIEWER* D i s p l a y S c r e e n > S e t u p > E v e n t > S e n s o r S e t t i n g s To Use Sensor 1.
-
Page 39: Event
WEBVIEWER* D i s p l a y S c r e e n > S e t u p > E v e n t > E m e r g e n c y A l a r m Send alarm triggered information to predefined destination (i.e. -
Page 40: Network
WEBVIEWER* D i s p l a y S c r e e n > S e t u p > N e t w o r k > N e t w o r k S e t t i n g s IP Mode: Select the type of IP address for the camera. - Page 41 WEBVIEWER* D i s p l a y S c r e e n > S e t u p > N e t w o r k > D y n a m i c D N S If you do not use a public IP address, DDNS provides you to connect on WAN. DDNS allows you to connect to the MEGAPIX camera with a URL address instead of an IP address.
- Page 42 WEBVIEWER* D i s p l a y S c r e e n > S e t u p > N e t w o r k > C o m m u n i c a t i o n P r o t o c o l Current Protocol displays the current selected protocol.
- Page 43 WEBVIEWER* D i s p l a y S c r e e n > S e t u p > N e t w o r k > A c c e s s P e r m i s s i o n Use the Access Permission page to allow or block specific IP addresses to connect to the camera.
-
Page 44: Network
WEBVIEWER* D i s p l a y S c r e e n > S e t u p > N e t w o r k > O n V I F OnVIF is the Open Network Video Interface Forum. To use OnVIF, check Enable. -
Page 45: Record & Remote Backup
WEBVIEWER* D i s p l a y S c r e e n > S e t u p > R e c o r d > S t o r a g e D e v i c e Device Information Click the icon Load Device Information to find the SD card connected to the camera. - Page 46 WEBVIEWER* D i s p l a y S c r e e n > S e t u p > R e c o r d > S c h e d u l e The recording schedule applies to the SD card local recording. When the camera detects a network loss, it will start recording backup video to the SD card based on the schedule setup.
- Page 47 WEBVIEWER* WEBVIEWER* D i s p l a y S c r e e n > S e t u p > R e c o r d > S c h e d u l e The recording schedule applies to the SD card local recording. When the camera detects a network loss, it will start recording backup video to the SD card based on the schedule setup.
- Page 48 WEBVIEWER* D i s p l a y S c r e e n > S e t u p > R e m o t e B a c k u p T a b The MD421 MEGAPIX Series allows you to backup your SD card locally to your computer without the need to remove it from the camera.
- Page 49 WEBVIEWER* D i s p l a y S c r e e n > S e t u p > S y s t e m > U p g r a d e Upgrade the MEGAPIX camera with an upgrade file. System Version: Shows the current version of the camera.
- Page 50 WEBVIEWER* D i s p l a y S c r e e n > S e t u p > S y s t e m > D a t e & T i m e Set date and time information. Insert the Date and Time.
- Page 51 WEBVIEWER* D i s p l a y S c r e e n > S e t u p > S y s t e m > E - m a i l N o t i f i c a t i o n Send an e-mail notification when an event is triggered.
- Page 52 WEBVIEWER* D i s p l a y S c r e e n > S e t u p > S y s t e m > U s e r A c c e s s C o n t r o l To add a new user: 1.
- Page 53 WEBVIEWER* D i s p l a y S c r e e n > S e t u p > S y s t e m > S y s t e m I n f o r m a t i o n System Information will display all the current camera settings: System Version, Time Information, Network Information, and Stream Information.
- Page 54 WEBVIEWER* D i s p l a y S c r e e n > S e t u p > S y s t e m > L o g s V i e w User can view detailed logs for system and/or events triggered and recorded in the camera. To view, select the type of report you want to view: System, Event, or System &...
- Page 55 WEBVIEWER* D i s p l a y S c r e e n > S e t u p > S y s t e m > F a c t o r y D e f a u l t When you select Factory Default, a dialogue box will appear.
-
Page 56: Specifications
SPECIFICATIONS* IMAGE ½.8” CMOS Sensor Image Sensor Total Pixels 2010 (H) X 1109 (V) F1.2 (30IRE): 0.5 Lux (Color) Minimum Scene Illumination F1.2 (30IRE): 0.01 Lux (B/W) LENS Focal Length 3.5~16mm Lens Type Auto Focus IR Distance 70ft (MV421TIR Only) OPERATIONAL Brightness 0~19... -
Page 57: Specifications
SPECIFICATIONS* NETWORK 802.3 Compliance 10/100 LAN Video Compression Type H.264, MPEG4, MJPEG (Super Fine ~ Low) Resolution 1920X1080 (16:9) ~ 320X240 (4:3) Frame Rate Up to 30fps at All Resolutions Stream Capability Dual-Stream at Different Rates and Resolutions IPv4, IPv6 Protocol TCP/IP, HTTP, DHCP, PPPoE, ICMP, ARP, RARP, RTSP, NTP, UDP, Multicast Maximum User Access... -
Page 58: Troubleshooting
TROUBLESHOOTING Before sending your camera for repair, check the following or contact your technical specialist. I c a n ’ t f i n d m y M E G A P I X c a m e r a o n t h e I P F i n d e r s o f t w a r e . ... - Page 59 TROUBLESHOOTING Before sending your camera for repair, check the following or contact your technical specialist. I c a n ’ t c o n n e c t t o m y M E G A P I X c a m e r a t h r o u g h t h e W e b B r o w s e r ...
- Page 60 TROUBLESHOOTING Before sending your camera for repair, check the following or contact your technical specialist. I c a n ’ t s e e t h e l i v e v i d e o o f m y M E G A P I X c a m e r a . ...
-
Page 61: Troubleshooting
TROUBLESHOOTING Before sending your camera for repair, check the following or contact your technical specialist. S e t t i n g t h e I P A d d r e s s f o r y o u r P C Dynamic Host Configuration Protocol (DHCP) is the default setting for the camera. -
Page 62: Warranty
WARRANTY INFORMATION* Digital Watchdog (referred to as “the Warrantor”) warrants the Camera against defects in materials or workmanships as follows: Labor: For the initial two (2) years, one (1) year for IR LED, from the date of original purchase if the camera is determined to be defective, the Warrantor will repair or replace the unit with new or refurbished product at its option, at no charge. -
Page 63: Limits & Exclusions
If the problem is not handled to your satisfaction, then write to the following address: Digital Watchdog, Inc. ATTN: RMA Department 5436 W Crenshaw St... - Page 64 5436 W Crenshaw St, Tampa, FL 33634 PH: 866-446-3595 | FAX: 813-888-9262 www.Digital-Watchdog.com technicalsupport@dwcc.tv Technical Support Hours: Monday-Friday 8:30am to 8:00pm Eastern Standard Time...
Need help?
Do you have a question about the MEGApix DWC-MV421D and is the answer not in the manual?
Questions and answers