
Related Manuals for Digital Watchdog MegaPix DWC-MVT4WiA


Summary of Contents for Digital Watchdog MegaPix DWC-MVT4WiA
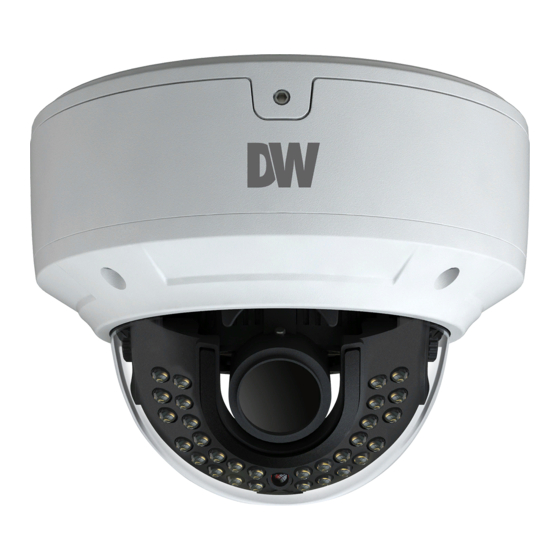
- Page 1 MEGApix 4MP outdoor vandal dome ® IP camera with analytics DWC-MVT4WiA User’s Manual 4/18...
-
Page 4: Table Of Contents
Table of Contents Product & Accessories ..................6 Parts and Description ..................7 Installation ......................8 Cabling ....................... 9 TF Card ......................10 Live View ......................11 Camera Configuration..................14 System Configuration ..................... 14 Basic Information.................... 14 7.1.1 Date and Time ....................14 7.1.2 Local Config .................... - Page 5 Table of Contents (Continue) 7.6 Network Configuration ......................45 7.6.1 CTP/IP ..........................45 7.6.2 Port ..........................46 7.6.3 Server Configuration ......................46 7.6.4 DDNS ..........................47 7.6.5 SNMP ..........................48 7.6.6 802.1x ..........................49 7.6.7 RTSP ..........................50 7.6.8 UPnP ..........................51 7.6.9 E-mail ..........................51 7.6.10 FTP ..........................53 7.6.11 HTTPS .........................53 7.6.12 P2P (Optional) ......................55 7.6.13 QoS ..........................55 7.7 Security Configuration ......................55...
-
Page 6: Product & Accessories
1 Product & Accessories... -
Page 7: Parts And Description
2 Parts and Description... -
Page 8: Installation
3 Installation Before installing the camera, make sure the mounting surface can bear three times the weight of your camera. Do not let the cables get caught in improper places or the electric line cover to be damaged. This may cause a breakdown or fire. -
Page 9: Cabling
4 Cabling NETWORK CONNECTIONS – If you are using a PoE Switch, connect the camera using an Ethernet cable for both data and power. NETWORK CONNECTIONS – If you are using a non-PoE switch, connect the camera to the switch using an Ethernet cable for data transmission and use a power adapter to power the camera. -
Page 10: Tf Card
5 TF Card To install the camera’s TF Card, locate the TF / micro SD card slot in the camera’s board by removing the camera’s bubble dome. See image below. Insert a TF card into the TF card slot by pressing the TF card. To remove the TF Card, press the card inward to release from the card slot. -
Page 11: Live View
6 Live View To log in to the camera, open an Internet Explorer page and input the camera’s IP address. If you are connecting to the camera for the first time, be sure to download the ActiveX control. After downloading, a login window will pop up as shown below. Input the username and password to log in. - Page 12 The following table is the instructions of the icons on the live view interface. Icon Description Icon Description Original size SD card recording indicator Fit correct scale Color abnormal indicator Auto (fill the window) Abnormal clarity indicator Full screen Scene change indicator Start/stop live view Line crossing indicator Start/stop two-way audio...
- Page 13 The camera can be installed in a compatible external PTZ enclosure through RS485. Click the PTZ icon to reveal the PTZ control panel. (This function is only available for the model with RS485 interface). The descriptions of the control panel are as follows: Icon Description Icon...
-
Page 14: Camera Configuration
7 Camera Configuration In the DW web client, choose “Config” to go to the configuration interface. Note: Wherever applicable, click the “Save” button to save the settings. 7.1 System Configuration 7.1.1 Basic Information In the “Basic Information” interface, the system information of the device is listed. Some versions may support device ID and QR code. -
Page 15: Local Config
7.1.3 Local Config Go to Config→System→Local Config to set up the storage path of captured pictures and recorded videos on the local PC. There is also an option to enable or disable the bitrate display in the recorded files. If the camera support face detection, local face information storage can be set up here. (Face detection function is only available for some specified versions). - Page 16 ⚫ SD Card Management Click the “Format” button to format the SD card. All data will be cleared by clicking this button. Click the “Eject” button to stop writing data to SD card. Then the SD card can be ejected safely.
- Page 17 Weekly schedule Set the alarm time from Monday to Sunday for a single week. Each day is divided in one hour increments. Green means scheduled. Blank means unscheduled. Note that if a specific time period is not scheduled for motion, the camera will not generate a motion alarm even if motion is enabled.
-
Page 18: Image Configuration
Timing Snapshot: Enable timing snapshot first and then set the snapshot interval and schedule. The setup steps of schedule are the same as the schedule recording (See Schedule Recording). 7.2 Image Configuration Image Configuration includes Display, Video/Audio, OSD, Video Mask and ROI Config. 7.2.1 Display Configuration Go to Image→Display interface as shown below. - Page 19 resolution. Defog: Activating this function and setting an appropriate value as needed in foggy, dusty, smoggy or rainy environment to get clear images. Backlight Compensation (BLC): Off: disables the backlight compensation function. It is the default mode. ⚫ HWDR ⚫ WDR can adjust the camera provide a better image when there are both very bright ◆...
-
Page 20: Video / Audio Configuration
Set full time schedule for common, day, night mode and specified time schedule for day and night. Choose “Schedule” in the drop-down box of schedule as shown below. Drag “ ” icons to set the time of day and night. Blue means day time and blank means night time. -
Page 21: Osd Configuration
Frame rate: The higher the frame rate, the video is smoother. Bitrate type: CBR and VBR are optional. Bitrate is related to image quality. CBR means that no matter how much change is seen in the video scene, the compression bitrate will be kept constant. -
Page 22: Video Mask
Set time stamp, device name, OSD content and picture overlap here. After enabling the corresponding display and entering the content, drag them to change their position. Then Click the “Save” button to save the settings. Picture Overlap Settings: Check “OSD Content1”, choose “Picture Overlay” and click “Browse” to select the overlap picture. -
Page 23: Roi Configuration
To clear the video mask: Click the “Clear” button to delete the current video mask area. 7.2.5 ROI Configuration Go to Image→ROI Config interface as shown below. An area in the image can be set as a region of interest. This area will have a higher bitrate than the rest of the image, resulting in better image quality for the identified area. -
Page 24: Lens Control
7.2.6 Lens Control This function is only available for the model with motorized zoom lens. Within this section, zoom and focus can be controlled. If the image is out of focus after a manual adjustment, one key focus can be used to set the focus automatically. -
Page 25: Ptz Configuration
7.3 PTZ Configuration This function is only available for the models with RS485 interface. It can be used with a compatible external PTZ enclosure. Go to PTZ→Protocol interface as shown below. Set the protocol, address and baud rate according to the PTZ. 7.4 Alarm Configuration 7.4.1 Motion Detection Go to Alarm→Motion Detection to set motion detection alarm. -
Page 26: Other Alarms
detection (this function is only available for the models with SD card slot). Trigger Email: If “Trigger Email” and “Attach Picture” are checked (email address must be set first in the Email configuration interface), the captured pictures and triggered event will be sent into those addresses. Trigger FTP: If “Trigger FTP”... - Page 27 2. Click “Enable alarm” and set the alarm holding time. 3. Set alarm trigger options. The setup steps are the same as motion detection. Please refer to motion detection chapter for details. ⚫ SD Card Error When there are some errors in writing SD card, the corresponding alarms will be triggered.
-
Page 28: Alarm In
2. Click “Enable alarm” and set the alarm holding time. 3. Trigger alarm out. When the camera is disconnected, the system will trigger the alarm out. 7.4.3 Alarm In This function is only available for some models. To set sensor alarm (alarm in): Go to Config→Alarm→Alarm In interface as shown below. -
Page 29: Alarm Out
7.4.4 Alarm Out This function is only available for some models. Go to Config→Alarm→Alarm Out. Alarm Out Mode: Alarm linkage, manual operation, day/night switch linkage and schedule are optional. Alarm Linkage: Having selected this mode, select alarm out name and alarm holding time at the “Alarm Holding Time”... -
Page 30: Video Analytics Configuration
7.5 Video Analytics Configuration (Optional) (Only some specified versions support the following functions). For more accuracy, here are some recommendations for installation. Cameras should be installed on stable surfaces, as vibrations can affect the ⚫ accuracy of detection. Avoid pointing the camera at the reflective surfaces (like shiny floors, mirrors, ⚫... - Page 31 1. Enable object removal detection and then select the detection type. Enable Left Detection: Alarms will be triggered if there are items left in the pre- defined area. Enable Item Missing Detection: Alarms will be triggered if there are items missing in the pre-defined area.
-
Page 32: Exception
7. Try not to enable object removal detection if there are complex and dynamic environments in the scene. 8. Adequate light and clear scenery are very important to object removal detection. 9. Please contact us for more detailed application scenarios. Here we take some improper application scenarios for instance. -
Page 33: Line Crossing
Video Cast Detection: Alarms will be triggered if the video becomes obscured. 2. Set the alarm holding time and alarm trigger options. The setup steps are the same as motion detection. Please refer to motion detection chapter for details. 3. Click “Save” button to save the settings. 4. - Page 34 1. Enable line crossing alarm and set the alarm holding time. 2. Set alarm trigger options. The setup steps are the same as motion detection. Please refer to motion detection chapter for details. 3. Click “Save” button to save the settings. 4.
- Page 35 A<-B: The alarm will be triggered when the intruder crosses over the alarm line from B to A. Click the “Draw” button and then drag the mouse to draw a cordon in the image. Click the “Stop” button to stop drawing. Click the “Clear” button to delete the cordons. Click the “Save”...
-
Page 36: Intrusion
The ground is covered with vegetation; at the right of the fence is a gym where people pass by frequently. The above mentioned environment is too complex to detect the crossing objects. 7.5.4 Intrusion Intrusion: Alarms will be triggered if someone or something intrudes into the pre- defined areas. - Page 37 Set the alarm area number on the right side. Up to 4 alarm areas can be added. Click the “Draw Area” button and then click around the area where you want to set as the alarm area in the image on the left side (the alarm area should be a closed area). Click the “Stop Draw”...
-
Page 38: Crowd Density Detection
The camera’s angle of depression is not wide enough; there are so many trees in the scene. The above mentioned environment is too complex to detect the intrusion. The camera’s angle of depression is not wide enough; the street lamps at night lead to light interference;... - Page 39 Enable the crowd density detection. Set “Refresh Frequency”, “Density Alarm Threshold” and “Alarm Holding Time”. Refresh Frequency: It refers to the period of a detection result report. Density Alarm Threshold: The camera will trigger an alarm once the percentage of the crowd density in a specified area exceeds the pre-defined threshold value.
-
Page 40: People Intrusion
Set the schedule of the crowd density detection. The setup steps of the schedule are the same as schedule recording setup (See Schedule Recording). ※Configuration of camera and surrounding area 1. The lens direction of the camera shall be the same as people flow, allowed a little bit incline. -
Page 41: People Counting
※ Configuration requirements of camera and surrounding area The detection area should have stable and adequate light. In order to detect the moving people or objects in the whole detection area, camera shall be mounted at a height of 1~3 meter(s). To make sure the camera shoots all the indoor scenes, the camera lens should be to the detected direction and the camera had better be installed in the corner. - Page 42 Any pre-defined threshold value surpassed (the default value is 500; the maximum value is 655350), the alarm of the camera will be triggered. When people pass the detected area along with the flow, it will take 1 ~5 seconds to complete the detection of people counting according to different scenes.
- Page 43 Click “Draw Area” and drag the mouse to draw a rectangle area. Drag the four boundary lines of the rectangle to modify its size and move the rectangle to change its position. Click “Stop Draw” to stop drawing the area. Click “Clear” to clear the area. Click and drag the arrow or the other end of the arrow line to change the people entrancing direction.
- Page 44 2. The background color (like floor color) of the installation shall be light color. 3. The lens of the camera shall be adjusted straight down, allowed a little bit incline but the whole head must be captured. 4. The installation height of the camera depends on the actual focal length of the lens. The hallway shall take up over a half of the width of the entire image and the head of the people shall be about 1/5 of the height of the entire image.
-
Page 45: Network Configuration
7.6 Network Configuration 7.6.1 TCP/IP Go to Config→Network→TCP/IP interface as shown below. There are two ways for network connection. Use IP address (take IPv4 for example)-There are two options for IP setup: obtain an IP address automatically by DHCP and use the following IP address. Please choose one of the options as needed. -
Page 46: Port
Trigger Email: when the IP address of the device is changed, the new IP address will be sent to the email address that has been set up. Trigger FTP: when the IP address of the device is changed, the new IP address will be sent to FTP server that has been set up. -
Page 47: Ddns
7.6.4 DDNS If the camera is set up with a DHCP connection, DDNS should be set for the internet. 1. Go to Config→Network→ DDNS. 2. Apply for a domain name. Take www.dvrdyndns.com for example. Enter www.dvrdydns.com in the IE address bar to visit its website. Then Click the “Registration”... -
Page 48: Snmp
After the domain name is successfully applied for, the domain name will be listed as below. 3. Enter the username, password, domain you apply for in the DDNS configuration interface. 4. Click the “Save” button to save the settings. 7.6.5 SNMP To get camera status, parameters and alarm information and remotely manage the camera, the SNMP function can be used. -
Page 49: 802.1X
7.6.6 802.1x IEEE802.X which is an access control protocol manages the device in connection with the local network by authentication. The setup steps are as follows:... -
Page 50: Rtsp
To use this function, the camera shall be connected to a switch supporting 802.1x protocol. The switch can be reckoned as an authentication system to identify the device in a local network. If the camera connected to the network interface of the switch has passed the authentication of the switch, it can be accessed via the local network. -
Page 51: Upnp
Select “Enable” to enable the RTSP function. Port: Access port of the streaming media. The default number is 554. RTSP Address: The RTSP address (unicast) format that can be used to play the stream in a media player. Multicast Address Main stream: The address format is “rtsp://IP address: rtsp port/profile1?transportmode=mcast”. - Page 52 Sender Address: sender’s e-mail address. User name and password: sender’s user name and password. Server Address: The SMTP IP address or host name. Select the secure connection type at the “Secure Connection” pull-down list according to what’s required. SMTP Port: The SMTP port. Send Interval(S): The time interval of sending email.
-
Page 53: Ftp
7.6.10 After an FTP server is set up, captured pictures from events will be uploaded to the FTP server. Go to Config→Network →FTP. Server Name: The name of the FTP server. Server Address: The IP address or domain name of the FTP. Upload Path: The directory where files will be uploaded to. - Page 54 There is a certificate installed by default as shown above. Enable this function and save it. Then the camera can be accessed by entering https://IP: https port via the web browser (eg. https://192.168.226.201:443). A private certificate can be created if users don’t want to use the default one. Click “Delete”...
-
Page 55: P2P (Optional)
7.6.12 P2P (Optional) If this function is enabled, the network camera can be quickly accessed by adding the device ID in mobile surveillance client or CMS/NVMS client via WAN. Enable this function by going to Config→Network→P2P interface. 7.6.13 QoS (Quality of Service) function is used to provide different quality of services for different network applications. - Page 56 Add user: 1. Click the “Add” button to pop up the following textbox. 2. Enter user name in “User Name” textbox. 3. Enter letters or numbers in “Password” and “Confirm Password” textbox. 4. Choose the use type. Administrator has all permissions. Normal user can only view the live video.
-
Page 57: Online Users
6. Click the “OK” button to save the settings. Note: To change the access level of a user, the user must be deleted and added again with the new access level. Delete user: 1. Select the user to be deleted in the user configuration list box. 2. -
Page 58: Maintenance Configuration
function can be enabled here. If this function is enabled, login failure after trying six times will make the login interface locked. The camera can be logged in again after a half hour or after the camera reboots. For some specified versions, anonymous login with a private protocol can be enabled here. -
Page 59: Reboot
settings. 7.8.2 Reboot Go to Config→Maintenance→Reboot. Click the “Reboot” button to reboot the device. Timed Reboot Setting: If necessary, the camera can be set up to reboot on a time interval. Enable “Time Settings”, set the date and time and then click the “Save” button to save the settings. 7.8.3 Upgrade Go to Config→Maintenance→Upgrade. - Page 60 2. Select the main type, sub type, start and end time. 3. Click “Search” to view the operation log. 4. Click “Export” to export the operation log.
-
Page 61: Search
8 Search 8.1 Image Search Click Search to go to the interface as shown below. Images that are saved on the SD card can be found here. Note: If there is no SD card installed in the camera or the SD card is not compatible with the camera, a pop-up message will show stating that there is no card. - Page 62 Click to return to the previous interface. ⚫ SD Card Image Search Choose “Picture”—“SD Card”. Set time: Select date and choose the start and end time. Choose the alarm events at the bottom of the interface. Click to search the images. Double click a file name in the list to view the captured photos.
-
Page 63: Video Search
Icon Description Icon Description Close: Select an image and Close all: Click this button to click this button to close the close all images. image. Save: Click this button to Save all: Click this button to select the path for saving the select the path for saving all image on the PC. -
Page 64: Sd Card Video Search
Icon Description Icon Description Play button. After pausing the video, click Pause button this button to continue playing. Stop button Speed down Speed up Watermark display Enable / disable audio; drag the slider to adjust the volume after enabling audio. 8.2.2 SD Card Video Search Click Search to go to the interface as shown below. - Page 65 Select the alarm events at the bottom of the interface. Select mix stream (video and audio stream) or video stream as needed. Double click on a file name in the list to start playback. The time table can be shown in 24H/12H/2H/1H format by clicking the corresponding buttons.
- Page 66 Click to download the video file in the PC. Click “Set up” to set the storage directory of the video files. Click “Open” to play the video. Click “Clear List” to clear the downloading list. Click “Close” to close the downloading window.
-
Page 67: Appendix
9 Appendix Appendix 1 Troubleshooting How to find the password? A:Reset the device to the default factory settings. Default IP: 192.168.226.201; User name: admin; Password: 123456 Fail to connect devices through IE browser. A: Network is not well connected. Check the connection and make sure it is connected well. - Page 68 No sound can be heard. A:Audio input device is not connected. Please connect and try again. B: Audio function is not enabled at the corresponding channel. Please enable this function.
-
Page 69: Dimensions
10 Dimensions... -
Page 70: Warranty Information
11 Warranty Information... -
Page 71: Limits And Exclusions
12 Limits and Exclusions...
Need help?
Do you have a question about the MegaPix DWC-MVT4WiA and is the answer not in the manual?
Questions and answers