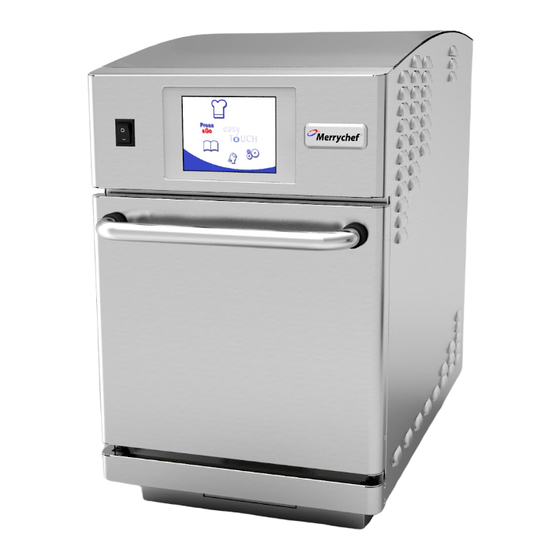
Merrychef eikon e2 Per Oven Quick Start Manual
Per oven & twin
Hide thumbs
Also See for eikon e2 Per Oven:
- Service & parts manual (64 pages) ,
- Installation and user manual (28 pages)

Related Manuals for Merrychef eikon e2 Per Oven


Summary of Contents for Merrychef eikon e2 Per Oven
-
Page 1: Quick Start Guide
Quick Start Guide IMPORTANT INFORMATION - READ BEFORE USE - FULL GUIDE AVAILABLE FROM THE MERRYCHEF WEBSITE w w w.m e r r yc he f. co m... - Page 2 The oven should not be adjusted or repaired by anyone except properly qualified service personnel. The instructions outlined in this guide are intended to ensure the safety and long life of your Merrychef oven. PLEASE READ THE FOLLOWING SAFETY INSTRUCTIONS CAREFULLY Quick Start Guide original instructions.
-
Page 3: Table Of Contents
PRECAUTIONS TO BE OBSERVED Users are cautioned that maintenance and repairs should SUITABLE COOKING UTENSILS be performed by a Merrychef authorized service agent using genuine Merrychef replacement parts. Merrychef PRODUCT DETAILS will have no obligation with respect to any product that... -
Page 4: Important Safety Instructions
IMPORTANT SAFETY INSTRUCTIONS When using electrical appliances basic safety precautions should be 11 Do not store this appliance outdoors. Do not use this product near followed, including the following: water —– for example, near a kitchen sink, in a wet basement, or near a swimming pool, and the like. - Page 5 19. NEVER remove the exterior of the oven. 32. Children should be supervised to ensure that they do not play with the appliance. 20. NEVER remove any fixed internal parts of the oven. 33. Oven must not be operated without the air filter in place. 21.
-
Page 6: Precautions To Be Observed
PRECAUTIONS TO BE OBSERVED 1. Read this manual before using your oven. 8. Items should be unwrapped when using convection and combination functions. 2. As with all electrical appliances, it is wise to have the electrical connections inspected at least once a year. 9. -
Page 7: Suitable Cooking Utensils
SUITABLE COOKING UTENSILS Manufacturer’s instructions should be checked to determine the suitability of individual containers or utensils using each of the cooking functions. The following chart provides general guidelines: Heat resistant containers Toughened glass Vitreous ceramics Do not use items with metallic decoration. Earthenware (porcelain/crockery/china etc.) Metallic &... -
Page 8: Main Features
MenuConnect™ cavity sides must be kept clean and free of debris. Great care should A USB socket located under the Merrychef logo allows changes to be taken when cleaning this area of the oven noting the different oven programs stored on the oven (See USB MenuConnect™ User Manual, requirements shown under ‘Cleaning &... - Page 9 Quick Start Guide original instructions. Part Number 32Z3829 GB Issue 3...
-
Page 10: Technical Specifications
TECHNICAL SPECIFICATIONS Specifications Description unit e2 Per Oven e2P (TWIN) Touch screen controls programs 1024 Ambient operating temperature °C/°F <40/104 External HxWxD 635x375x775 633x866x785 External HxWxD inches 25x15x31 25x34x31 Internal HxWxD 244x244x305 Internal HxWxD inches 9.6x9.6x12 Cooking chamber Ltr (cu.ins) 19.4 (1175) Power output microwave Watts... -
Page 11: Compliances
Serial Number example EC Declaration of Conformity (Rating Plate): Manufacturer 1) Brand Headquarters 2) Factory Serial number: YY MM SITE SERIAL Manitowoc Foodservice UK Ltd. Manitowoc Foodservice UK Ltd. i.e. 10 06 2130 12345 Ashbourne House, Provincial Park, The Guildway, Nether Lane, (1006213012345) Old Portsmouth Road,... -
Page 12: Installation
INSTALLATION DANGER! OVEN LOCATION AND POSITIONING THIS APPLIANCE MUST BE EARTHED. FAILURE Choose a site away from major heat sources. TO DO SO MAY RESULT IN ELECTRIC SHOCK AND DEATH. DO NOT position so that hot air is drawn in from fryers, grills, griddles, The oven must be connected to a separate electrical supply etc. -
Page 13: Quick Start Guide: Quick Service Oven
QUICK START GUIDE: QUICK SERVICE OVEN START UP 1. Switch the oven on; Make all the relevant safety checks and ensure the oven is clean and empty before pressing the oven switch down to activate the oven. 2. The easyToUCH screen illuminates with the display briefly showing the serial number and oven data.If required, to keep the data on the screen, Lightly tap the screen once to freeze the display, tap again to continue. -
Page 14: Using A Cooking Program
USING A COOKING PROGRAM Taking all the necessary precautions to ensure you do not burn yourself, open the oven door to place the food into the hot oven and close the door. 1. Select a program group, for example, ‘BURGERS’ to display the individual cooking programs. -
Page 15: Operating Guide: Full Service Oven
OPERATING GUIDE: FULL SERVICE OVEN easyToUCH MAIN MENU & KEYBOARD SCREEN MAIN MENU SCREEN: 1. DEVELOPMENT MODE enables multistage cooking programs to be developed, then stored under a name and symbol for reuse. 2. PRESS & GO allows quick access to use the cooking programs that are already stored. -
Page 16: Press & Go
PRESS & GO Running a cooking program from the Press & Go menu. 1. Select ‘PRESS & GO’ from the main menu screen. 2. Select the item required to cook. 3. The display shows the cooking time count down. The timer bar turns red to indicate the cooking cycle has finished. -
Page 17: Using A Cookbook Program
USING A COOKBOOK PROGRAM WARNING: ENSURE THERE IS FOOD PRODUCT IN THE OVEN BEFORE STARTING A COOKING PROGRAM. To find the required Program in the cookbook. 1. Select ‘COOKBOOK’ from the main menu screen. 2. Select the ALL MENUS symbol. 3. -
Page 18: Screen Saver
Once the cooking program has finished, opening the oven door to remove the food returns the display to the ‘COOKBOOK’ screen. Note; opening the oven door during cooking stops the cooking program and displays a warning. Closing the door allows the user to continue or cancel the cooking program. -
Page 19: Cooling The Oven Down Before Cleaning
COOLING THE OVEN DOWN BEFORE CLEANING Oven cool down IMPORTANT: the oven must be cooled down before the cleaning processes are carried out. 1. In Full Serve mode, select the CLEANING symbol from the main menu. 2. In Full or Quick Serve mode, select the blue thermometer symbol to disable heating and start the cooling cycle. -
Page 20: Cold Oven Cleaning Instructions E2
Cold oven CLEANING Equipment required (not supplied): INSTRUCTIONS e2 Non-caustic proprietary branded oven cleaner, heat proof gloves, protective rubber gloves, non–abrasive nylon scrub pad, cleaning towel and cloths, eye protection and dust mask (optional). REMOVE & CLEAN Oven Parts: 1. Remove the air filter at the rear of the oven by sliding upwards. 2. - Page 21 Quick Start Guide original instructions. Part Number 32Z3829 GB Issue 3...
- Page 22 CLEAN THE OVEN: 1. Remove any spillages with disposable paper wipes. Use a dry clean brush to remove any food particles from between the oven floor and the inside of the front door. 2. Wear protective rubber gloves and protective glasses, carefully spray a non-caustic proprietary branded Oven Cleaner onto all the internal surfaces of the oven except the door seal (A).
- Page 23 APPLY OVEN PROTECTOR: 1. Only apply to a clean oven. Spray proprietary branded Oven Protector onto a sponge. 2. Spread Oven Protector lightly onto the internal surfaces of the oven avoiding crumb filters and cooking plates. 3. Spread Oven Protector lightly onto the internal surface of the oven door avoiding the door seal.
-
Page 24: Fault Finding Chart
FAULT FINDING CHART Although every effort PROBLEM POSSIBLE CAUSE REMEDY is made to ensure your oven will continue Check if there is a power cut. to perform to a high The oven does not work and the display Check the isolator switch is ON or the oven standard, please check The oven has no power screen is blank... - Page 25 Fa x : + 4 4( 0) 14 8 3 4 6 49 0 5 w w w.mani towo c fo o dser v ice.com Merrychef reserves the right to change product specifications without notice and accepts no liability for any inaccuracies, errors or ommissions contained herein.
Need help?
Do you have a question about the eikon e2 Per Oven and is the answer not in the manual?
Questions and answers