Table of Contents
Advertisement
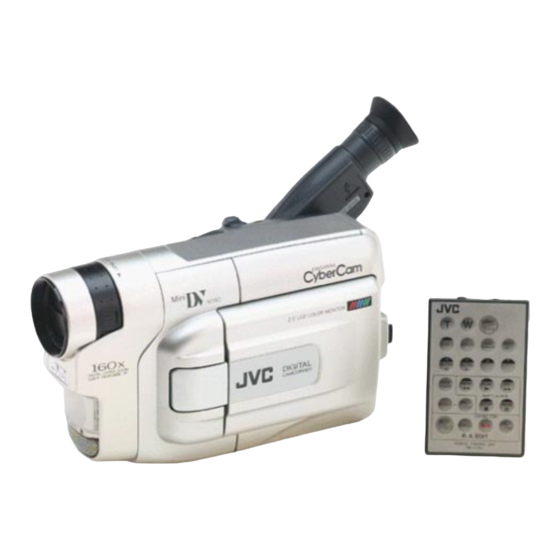
DIGITAL CAMCORDER
GR-DVF10
Please visit our CyberCam Homepage on
the World Wide Web and answer our
Consumer Survey (in English only):
http://www.jvc-victor.co.jp/index-e.html
INSTRUCTIONS
CONTENTS
Power............................................. 6
Date/Time Settings ............................. 9
Loading/Unloading A Cassette .............. 10
Recording Mode Setting ...................... 11
Grip Adjustment ............................... 12
Viewfinder Adjustment ....................... 12
Shoulder Strap Attachment .................. 13
Tripod Mounting ............................... 13
Basic Recording ................................ 14
Advanced Features ............................ 21
Basic Playback ................................. 38
Advanced Features ............................ 40
Connections .................................... 42
Random Assemble Editing .................... 50
For More Accurate Editing .................... 54
Audio Dubbing ................................. 56
Controls, Connectors And Indicators ........ 64
Indications ...................................... 66
Terms ........................................... 68
4
5
6 - 13
14 - 37
38 - 43
44
45 - 57
58 - 62
63
64 - 68
69 - 70
71
LYT0246-001A
Advertisement
Table of Contents

Subscribe to Our Youtube Channel
Related Manuals for JVC GR-DVF10U


Summary of Contents for JVC GR-DVF10U
-
Page 1: Table Of Contents
DIGITAL CAMCORDER GR-DVF10 Please visit our CyberCam Homepage on the World Wide Web and answer our Consumer Survey (in English only): http://www.jvc-victor.co.jp/index-e.html INSTRUCTIONS CONTENTS PROVIDED ACCESSORIES ABOUT DV GETTING STARTED Power... 6 Clock (Lithium) Battery Insertion/Removal ... 8 Date/Time Settings ... 9 Loading/Unloading A Cassette ... -
Page 2: Safety Precautions
Dear Customer, Thank you for purchasing this digital camcorder. Before use, please read the safety information and precautions contained in the following pages to ensure safe use of this product. Using This Instruction Manual • All major sections and subsections are listed in the Table Of Contents ( •... -
Page 3: Some Do's And Don'ts On The Safe Use Of Equipment
The rating plate (serial number plate) of the AC Power Adapter/Charger is on its bottom. This camcorder is designed to be used with PAL- type colour television signals. It cannot be used for playback with a television of a different standard. -
Page 4: About Batteries
... remember that this camcorder is not compatible with other digital video formats..remember that this camcorder is intended for private consumer use only. Any commercial use without proper permission is prohibited. (Even if you record an event such as a show, performance or exhibition for personal enjoyment, it is strongly recommended that you obtain permission beforehand.) -
Page 5: About Dv
Signal (R-Y/B-Y) Chromatic Chrominance (C) Analysis AUDIO This camcorder separates the data into blocks, writing one block of each data type on each track of the tape. Head tracking direction Sub-Code Area The Time Code and Date/Time data are written here, separate from the video data. -
Page 6: Getting Started
Failure to do so can result in a camcorder malfunction. Power This camcorder’s 3-way power supply system lets you To AC outlet choose the most appropriate source of power. NOTES: No function is available without power supply. -
Page 7: Using Ac Power
The CHARGE indicator may not light properly with a brand new battery pack, or with one that has been stored for an extended period. In this case, remove and reattach the battery pack and recharge it. The CHARGE indicator should blink during recharging. If not, contact your nearest JVC dealer. To DC IN jack... -
Page 8: Clock (Lithium) Battery Insertion/Removal
See “SAFETY PRECAUTIONS” ( on safe handling of lithium batteries. To avoid losing the battery and/or battery holder, place the camcorder with the grip side up as shown in the illustration when inserting/removing the battery. (cont.) pg. 2) for information... -
Page 9: Date/Time Settings
It is your choice to display it or not during playback ( pg. 41). SELECT OPERATION MODE Set the Power Switch to “PRO.”. •The power lamp comes on and the camcorder is turned on. ACCESS RECORDING MENU Press MENU. The Recording Menu appears. ACCESS DATE/TIME MENU Move the highlight bar to “TO DATE/TIME MENU”... -
Page 10: Loading/Unloading A Cassette
If you wait a few seconds and the cassette holder does not open, close the cassette cover and try again. If the cassette holder still does not open, turn the camcorder off then on again. When the camcorder is suddenly moved from a cold place to a warm environment, wait a short time before opening the cover. -
Page 11: Recording Mode Setting
It is recommended that tapes recorded in the LP mode on this camcorder be played back on this camcorder. During playback of a tape recorded on another camcorder, blocks of noise may appear or there may be momentary pauses in the sound. -
Page 12: Grip Adjustment
Power Zoom Lever Recording Start/Stop Button Set “POWER” to “CAMERA” (“AUTO” or “PRO.”) PAUSE GETTING STARTED Grip Adjustment EXPAND LOOP Separate the Velcro strip. INSERT HAND Pass your right hand through the loop and grasp the grip. ADJUST STRAP LENGTH Adjust so that your thumb and fingers can easily operate the Recording Start/Stop Button and Power Zoom Lever. -
Page 13: Shoulder Strap Attachment
Then tighten the screw. CAUTION: When using a tripod, be sure to open and extend its legs fully to stabilize the camcorder. To prevent damage to the unit caused by falling over, do not use a small-sized tripod. , then fold it back and... -
Page 14: Power Switch Position
Turn the LENS COVER Open/Close Ring to open the lens cover, then set the Power Switch to “CAMERA” (“AUTO” or “PRO.”). •The power lamp lights and the camcorder enters the Record-Standby mode. •The scene you are aimed at appears on the viewfinder screen, with the word “PAUSE”... -
Page 15: Lcd Monitor/Viewfinder Indications
“Recording from the middle of a tape” ( The LENS COVER warning blinks for about 5 seconds when the camcorder is turned on with the cover closed. While shooting, sound is not heard from the speaker. LCD Monitor/Viewfinder Indications You can make the LCD monitor/Viewfinder indications appear/disappear. -
Page 16: Shooting While Watching The Lcd Monitor
LENS COVER Open/Close Ring to open the lens cover, then set the Power Switch to “CAMERA” (“AUTO” or “PRO.”). •The power lamp lights and the camcorder enters the Record-Standby mode. •The scene you are aimed at appears in the LCD monitor, with the word “PAUSE”... -
Page 17: Journalistic Shooting
Journalistic Shooting In some situations different angles of shooting may be required for more dramatic results. Interface Shooting A person you shoot can view himself/herself in the LCD monitor, and you can even shoot yourself while viewing your own image in the LCD monitor. NOTE: The monitored image can be viewed on the LCD monitor Self-recording... -
Page 18: Picture Stabilizer
• When shooting subjects with excessive backlighting. • When shooting scenes with movement in various directions. • When shooting scenes with low-contrast backgrounds. Switch off the Picture Stabilizer when recording with the camcorder on a tripod. The “ cannot be used. Basic Recording (cont.) Zooming pg. -
Page 19: Video Light
30 cm. between the video light and people or objects. Do not use near flammable or explosive materials. It is recommended that you consult your nearest JVC dealer for replacing the video light. Video Light FEATURE: PURPOSE: To brighten the scene when natural lighting is too dim. - Page 20 When recording is resumed, the time code starts counting up again from “00:00:00”. This means the camcorder may record the same time codes as those existing in a previously recorded scene. To prevent leaving a blank portion on a tape, perform the procedure in “Recording From The Middle of A Tape”...
-
Page 21: Advanced Features
Press the Select Dial twice. Selection is complete and the menu disappears. NOTES: Connect the camcorder to a TV and set “ON SCREEN” to “ON” in the Date/Time Menu. The display appears on the connected TV . The Indicator/Display function overrides these settings. -
Page 22: Recording 14
DEMO. MODE RETURN During snapshot PHOTO RECORDING Snapshot Use your camcorder like a regular camera and take a snapshot, or several of them in succession. SNAPSHOT MODE SELECTION SELECT OPERATION MODE Set the Power Switch to “PRO.”. ACCESS RECORDING MENU Press MENU. -
Page 23: Motor Drive Mode
FULL* (Snapshot mode with no frame) FRAME* (Snapshot mode with frame) PIN-UP (Pin-Up mode) MULTI 4 (Multi-Analyzer 4) MULTI 9 (Multi Analyzer 9) * : There is a momentary camera shutter-type blackout together with the sound effect of a shutter closing, which is recorded together with the image. - Page 24 Normal Screen RECORDING Using Menu For Detailed Adjustment Power Switch This camcorder is equipped with an easy-to-use, on-screen menu system that simplifies many of the more detailed camcorder settings. ACCESS RECORDING MENU Set the Power Switch to “PRO.”, then press MENU.
- Page 25 Recording Menu Explanations REC MODE Allows you to set the recording mode (SP or LP) depending on your preference pg. 11). WIDE MODE SQUEEZE CINEMA ZOOM 160X GAIN UP AUTO TELE MACRO TO DATE/TIME MENU TO SYSTEM MENU : Factory-preset Select “OFF”...
- Page 26 SOUND MODE 32 kHz 48 kHz ID NUMBER This number is necessary when connecting the camcorder to a device such as a computer using the J terminal (JLIP). The numbers range from 01 to 99. Factory setting is 06. DEMO. MODE...
- Page 27 Select Dial Recording Start/ Stop Button Display Manual Mode Item FOCUS AUTO EXPOSURE AUTO Menu W. BALANCE AUTO FADER / WIPE P. AE / EFFECT RETURN FADER / WIPE WIPE – SHUTTER Fader/Wipe Menu RANDOM SEL. FADER – WHITE FADER – BLACK FADER –...
-
Page 28: Start Recording
START RECORDING If you start recording a new scene within 5 minutes of the end of the previous recording (without having turned the camcorder’s power off), the previous scene wipes out, revealing the new scene. NOTES: You can extend the length of a Fade or Wipe by pressing and holding the Recording Start/Stop Button. - Page 29 The new scene wipes in over the previous one from the centre towards the top and bottom of the screen. When this function is activated, the camcorder randomly selects the effect used in scene transition (from ). The Picture Wipe/Dissolve function is not available.
-
Page 30: Programme Ae With Special Effects
Select Dial Display Manual Mode Item FOCUS AUTO EXPOSURE AUTO Menu W. BALANCE AUTO FADER / WIPE P. AE / EFFECT RETURN P. AE / EFFECT P.AE/EFFECT Menu TWILIGHT SEPIA MONOTONE SEL. 4 CLASSIC FILM STROBE SLOW 4X SLOW 10X PAUSE The indicator for the selected mode appears, and the selected mode is engaged. -
Page 31: Classic Film
White Balance ( pg. 36) is initially set to can be changed to your desired setting. When Twilight is chosen, the camcorder automatically adjusts the focus from approx. 10 m to infinity. From less than 10 m, adjust the focus manually. -
Page 32: Auto Focus
Advanced Features (cont.) Focusing AUTO FOCUS The camcorder’s Full Range AF system offers continuous shooting ability from close-up (as close as approx. 1.5 cm to the subject) to infinity. However, correct focus may not be obtainable in the situations listed below (in these cases use manual focusing): •When two subjects overlap in the same scene. -
Page 33: Manual Focus
Select Dial Power Switch Display Manual Mode Item FOCUS MANUAL EXPOSURE AUTO Menu W. BALANCE AUTO FADER / WIPE P. AE / EFFECT RETURN FOCUS FOCUS MANUAL FOCUS NOTE: You should already have made the necessary viewfinder adjustments ( pg. 12). If you have not, do so before continuing. -
Page 34: Exposure Control
Select Dial Display Manual Mode Item FOCUS AUTO Menu EXPOSURE MANUAL W. BALANCE AUTO FADER / WIPE P. AE / EFFECT RETURN EXP. To darken the image EXP. EXP. To brighten the image Exposure control indicator RECORDING Exposure Control This feature automatically adjusts the iris for the best available picture quality, but you can override and make the adjustment manually. -
Page 35: Iris Lock
Select Dial Power Switch Display Manual Mode Item FOCUS AUTO EXPOSURE MANUAL Menu W. BALANCE AUTO FADER / WIPE P. AE / EFFECT RETURN EXP. Iris lock indicator Iris Lock Use this function when shooting a moving subject, when zooming, when the subject changes its distance (thus its size in the LCD monitor or the viewfinder), or when you want to lock the brightness level. -
Page 36: White Balance Adjustment
If the white balance is correct, all other colours will be accurately reproduced. The white balance is usually adjusted automatically. However, the more advanced camcorder operator would prefer to control this function manually and achieve a more professional colour/tint reproduction. -
Page 37: Manual White Balance Operation
White paper Select Dial Power Switch Display Manual Mode Item FOCUS AUTO Menu EXPOSURE AUTO W. BALANCE AUTO FADER / WIPE P. AE / EFFECT RETURN PRO. Manual White Balance Adjustment Manual White Balance Operation If the camera is operating in PRO. mode, perform a Manual White Balance when shooting under various types of lighting. -
Page 38: Playback Basic Playback
Press REW (2) to rewind, or FF (3) to fast-forward the tape during Stop mode. NOTES: The camcorder shuts off automatically after about 5 minutes in Stop mode. To turn on again, set the Power Switch to “POWER OFF”, then to “PLAY”. -
Page 39: Operation
2) To resume normal playback, press PLAY/PAUSE (4/6) again. NOTE: If still playback continues for more than about 3 minutes, the camcorder’s Stop mode is automatically engaged. After 5 minutes in the Stop mode, the camcorder’s power is automatically turned off. Shuttle Search... -
Page 40: Playback Menu
MENU Button Select Dial Display 48kHz MODE FULL SOUND 32kHz MODE SOUND1 SYNCHRO 0 . 0 DISPLAY TIMECODE Playback Menu 48kHz MODE FULL SOUND 32kHz MODE SOUND1 SYNCHRO 0 . 0 DISPLAY TIMECODE Playback Menu The Playback Menu allows you to set the following functions: Playback Sound (32 kHz, 48 kHz), Synchro Comp, Display and Time Code. -
Page 41: Playback Sound
Playback Sound During playback, the camcorder detects the sound mode in which the recording was made, and plays the sound back. Select the type of sound to accompany your playback picture. (32 kHz is preset to “SOUND 1” and 48 kHz is preset to “FULL SOUND”.) -
Page 42: Connections
These are some basic types of connections. When making the connections, refer also to your VCR and TV instruction manuals. A. Connection to a TV or VCR equipped with a SCART connector compatible only with regular video signal Use the provided Audio/Video (A/V) cable. White to Audio Output L Connector cover* B. - Page 43 CONNECT VCR OUTPUT TO TV INPUT Refer to your VCR’s instruction manual. SUPPLY POWER Turn on the camcorder, the VCR and the TV. SELECT MODE Set the VCR to its AUX input mode, and set the TV to its VIDEO mode.
-
Page 44: Tape Dubbing
Tape Dubbing CONNECT EQUIPMENT Following the illustration at left, connect the camcorder and the VCR. Also refer to pg. 42 and 43. PREPARE FOR DUBBING Set the camcorder’s Power Switch to “PLAY”, turn on the VCR’s power, and insert the appropriate cassettes in the camcorder and the VCR. -
Page 45: Installing The Battery
Remote sensor The Full-Function Remote Control Unit can operate this camcorder from a distance as well as the basic operations (Playback, Stop, Pause, Fast-Forward and Rewind) of your VCR. This remote control unit makes additional playback functions possible. - Page 46 — Zoom in/out ( pg. 18) — — — — — — — — Transmits the beam signal. Functions same as the Recording Start/Stop button on the camcorder. — — — — — — — — — — (cont.) &...
- Page 47 This is not a malfunction. There may be a small margin between the slow- motion playback start point you chose and the start point at which the camcorder actually begins playback in slow motion. During Slow-motion playback, there will be RM-V712U disturbances in video.
- Page 48 Press the Zoom Buttons (T/W) on the remote control. SHIFT held down Make sure the remote control is pointed at the camcorder's remote sensor. •Pressing T zooms in. END ZOOM Press and hold W until magnification returns to normal.
-
Page 49: Playback Special Effects
START PLAYBACK Press PLAY (4). ACCESS PLAYBACK EFFECT SELECT MENU Point the remote control at the camcorder’s remote sensor and press EFFECT. The PLAYBACK EFFECT Select Menu appears. SELECT PLAYBACK EFFECT Move the highlight bar to the desired effect by pressing EFFECT. -
Page 50: Random Assemble Editing
( A ) ( B ) You are now ready to try Random Assemble Editing. IMPORTANT Although the MBR is compatible with JVC VCRs and those of many other makers, it may not work with yours or may offer limited functions. -
Page 51: Make Connections
40) to show or hide the Date/Time and the Time Code on the recording. To show or hide all indications except for the Random Assemble Editing Menu, press DISPLAY on the camcorder for longer than 1 second. When Random Assemble Editing starts, its indications disappear and are not recorded on the new tape. - Page 52 Since time codes register time only as accurately as seconds, the time code total time may not match the total programme time exactly. Turning off the camcorder’s power erases all registered Edit-In and Edit-Out points. If you select Sepia or Monotone mode from Programme AE with special effects, you cannot use the Dissolve or Black &...
-
Page 53: Start Editing
VCR REC STBY AUTOMATIC EDITING TO VCR PREPARE SOURCE TAPE Rewind the tape in the camcorder to the beginning of the scene you want to edit and press PAUSE (6). ENGAGE VCR'S RECORD-PAUSE MODE Point the remote control towards the VCR’s remote sensor and press VCR REC STBY (q6), or manually engage the VCR’s Record-Pause mode. -
Page 54: For More Accurate Editing
Some VCRs make the transition from Record-Standby to Record mode faster than others. Even if you begin editing for the camcorder and the VCR at exactly the same time, you may lose scenes you wanted, or find that you have recorded scenes you did not want. -
Page 55: Select Function
(Recording deck) ADJUSTMENT OF VCR’S AGAINST CAMCORDER TIMING ACCESS PLAYBACK MENU Point the remote control at the camcorder’s remote sensor and press R.A. EDIT ON/OFF to make the Random Assemble Editing menu disappear, then press MENU. The Playback Menu appears. -
Page 56: Audio Dubbing
USING THE REMOTE CONTROL UNIT Display Audio Dub Standby Mode Speaker Power Switch Remote sensor External stereo microphone input connector (Connector is under the cover.) DISPLAY PLAY RM-V712U (provided) Audio Dubbing The audio track can be customized only when recorded on the 32 kHz mode ( NOTES: Audio Dubbing is not possible on a tape recorded at 48... - Page 57 If you dub onto a blank space on the tape, the sound may be disrupted. Make sure you only edit recorded areas. If feedback or howling occurs during TV Playback, move the camcorder’s microphone away from the TV, or turn down the TV’s volume.
-
Page 58: Troubleshooting
If, after following the steps in the chart below, the problem still exists, please consult your nearest JVC dealer. The camcorder is a microcomputer-controlled device. External noise and interference (from a TV, a radio, etc.) might prevent it from functioning properly. In such cases, first disconnect its power supply unit (battery pack, AC Power Adapter/Battery Charger, etc.) and remove the clock battery;... -
Page 59: Continued On Next Page
Edit-In and Edit-Out points, as they will all be erased ( pg. 28). • The camcorder automati- cally shuts off after 5 minutes have elapsed in the Record-Standby mode. Make sure you continue operations within 5 minutes... - Page 60 •When the LCD monitor’s fluorescent light reaches the end of its service life, images on the LCD monitor become dark. Consult your nearest JVC dealer. (cont.) CORRECTIVE ACTION 18. • Make sure the Squeeze mode, Cinema mode, or Slow Shutter mode is not...
- Page 61 When it does, you can resume using the camcorder. If the indication remains even though you repeat the above two or three times, please consult your nearest JVC dealer. CONTINUED ON NEXT PAGE...
- Page 62 105 degrees, Interface Shooting will not be possible. 41. •This is not a malfunction. 42. •The camcorder was turned on when the battery power was almost gone. 43. •If Audio Dubbing has been performed...
-
Page 63: User Maintenance
Close and lock the LCD monitor. Slide BATTERY RELEASE to remove the battery pack. Turn the LENS COVER Open/Close Ring to close the lens cover. Cleaning The Camcorder CLEAN EXTERIOR Wipe gently with a soft cloth. Remove. •Put cloth in diluted mild soap and wring it well to wipe off heavy dirt. -
Page 64: Index
INDEX 3 4 5 6 Controls, Connectors And Indicators &... -
Page 65: Other Parts
38 • It is used to connect the camcorder to a device pg. 9, 24 such as a personal computer. For further details consult your nearest JVC pg. 17 dealer. pg. 15, 24 • JLIP-controlled editing from camcorder to VCR pg. -
Page 66: Lcd Monitor/Viewfinder Indications During Recording
Appears when the wind cut mode is engaged to cut down on noise created by wind. ( Displays the date/time. Displays the sound mode for approx. 5 seconds after turning on the camcorder. Appears when the iris is locked. Appears when the focus is adjusted manually. -
Page 67: Warning Indications
E01 — E06 supply (battery, etc.), clock battery and wait a few minutes for the indication to clear. When it does, you can resume using the camcorder. If the indication remains, consult your nearest JVC dealer. Appears when Audio Dubbing is unavailable. -
Page 68: Terms
Brighten The LCD Monitor ... Car Battery ... Charge Marker ... Charge The Battery Pack ... Cinema ... Classic Film ... Clean The Camcorder ... Clock (Lithium) Battery ... Connections ... Darken The LCD Monitor ... Date/Time Display ... Date/Time Settings ... -
Page 69: Main Unit
• Do not use near flammable or explosive materials. • It is recommended that you consult your nearest JVC dealer for replacing the video light. Battery Packs The battery packs are nickel-cadmium or nickel metal-hydride batteries. -
Page 70: Lcd Monitor
20 seconds, it stops automatically. Also refer to the Cleaning Cassette’s instructions. If, after using the Cleaning Cassette, the problems still exist, consult your nearest JVC dealer. Mechanical moving parts used to move the video heads and video tape tend to become dirty and worn out over time. -
Page 71: Specifications
SPECIFICATIONS Camcorder General Power supply Power consumption LCD monitor off, viewfinder on LCD monitor on, viewfinder off LCD monitor on, viewfinder on Video light Format Signal format Video signal recording format Cassette Tape Speed Maximum recording time Pickup Lens Filter diameter... - Page 72 VICTOR COMPANY OF JAPAN, LIMITED Printed in Japan COPYRIGHT© 1998 VICTOR COMPANY OF JAPAN, LTD. 1198AYV...
Need help?
Do you have a question about the GR-DVF10U and is the answer not in the manual?
Questions and answers