Table of Contents
Advertisement
Quick Links
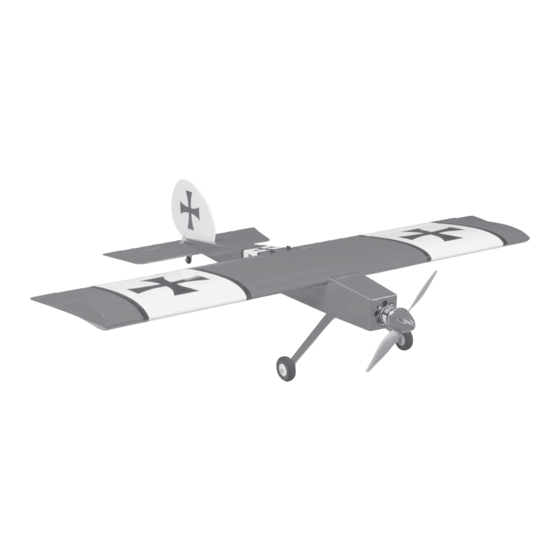
Wingspan: 52.75 in [1340mm]
2
2
Wing Area: 589 in
[38dm
]
Weight: 3 – 3.5 lb [1360 – 1587g]
Wing Loading: 11.7 – 13.6 oz/ft
2
Length: 45.5 in [1155mm]
Radio:
4-channel radio system with three micro servos
(minimum 30 oz.-in. [2.5kg-cm of torque]
™
Motor:
RimFire
42-40-1000 or 42-50-800
®
Great Planes
Model Manufacturing Co. guarantees this kit to be free from defects in both material and workmanship at the date of purchase.
This warranty does not cover any component parts damaged by use or modifi cation. In no case shall Great Planes' liability exceed the
original cost of the purchased kit. Further, Great Planes reserves the right to change or modify this warranty without notice.
In that Great Planes has no control over the fi nal assembly or material used for fi nal assembly, no liability shall be assumed nor accepted
for any damage resulting from the use by the user of the fi nal user-assembled product. By the act of using the user-assembled product,
the user accepts all resulting liability.
If the buyer is not prepared to accept the liability associated with the use of this product, the buyer is advised to return this kit
immediately in new and unused condition to the place of purchase.
To make a warranty claim send the defective part or item to Hobby Services at the address below:
Include a letter stating your name, return shipping address, as much contact information as possible (daytime telephone number, fax
number, e-mail address), a detailed description of the problem and a photocopy of the purchase receipt. Upon receipt of the package
the problem will be evaluated as quickly as possible.
READ THROUGH THIS MANUAL BEFORE
STARTING CONSTRUCTION. IT CONTAINS
IMPORTANT INSTRUCTIONS AND WARNINGS
CONCERNING THE ASSEMBLY AND USE OF
THIS MODEL.
Entire Contents © Copyright 2008
INSTRUCTION MANUAL
[36 – 42g/dm
2
]
3002 N. Apollo Dr., Suite 1
Champaign, IL 61822 USA
WARRANTY
Hobby Services
™
Champaign, Illinois
(217) 398-8970, Ext 5
airsupport@greatplanes.com
GPMZ1574 for GPMA1574 V1.0
Advertisement
Table of Contents

Related Manuals for GREAT PLANES ElectroStik ARF


Summary of Contents for GREAT PLANES ElectroStik ARF
-
Page 1: Instruction Manual
If the buyer is not prepared to accept the liability associated with the use of this product, the buyer is advised to return this kit immediately in new and unused condition to the place of purchase. To make a warranty claim send the defective part or item to Hobby Services at the address below: Hobby Services 3002 N. -
Page 2: Table Of Contents
TABLE OF CONTENTS INTRODUCTION ................. 2 If you are not already a member of the AMA, please join! AMA .................... 2 The AMA is the governing body of model aviation and SAFETY PRECAUTIONS ............2 membership provides liability insurance coverage, protects DECISIONS YOU MUST MAKE .......... -
Page 3: Decisions You Must Make
(GPMM3015). The Great Planes Triton2 charger will only We, as the kit manufacturer, provide you with a top quality, charge one pack at a time, but is capable of charging NiCd, thoroughly tested kit and instructions, but ultimately the NiMH, LiPo, and lead acid batteries. Order numbers for the quality and fl... -
Page 4: Important Building Notes
Follow the instructions provided Sun block on the page to locate a U.S., Canadian or International dealer. Parts may also be ordered directly from Hobby Services by calling (217) 398-0007, or via facsimile at (217) 398-7721, but IMPORTANT BUILDING NOTES full retail prices and shipping and handling charges will apply. -
Page 5: Kit Inspection
KIT INSPECTION KIT INSPECTION Before starting to build, take an inventory of this kit to make sure it is complete and inspect the parts to make sure they are of acceptable quality. If any parts are missing or are not of acceptable quality, or if you need assistance with assembly, contact Great Planes Product Support. -
Page 6: Preparations
PREPARATIONS Use a covering iron with a covering sock on medium/high heat to tighten any loose covering if necessary. Apply pressure over sheeted areas to thoroughly bond the covering to the wood. ASSEMBLY Assemble the Wing ❏ 4. Install the rubber grommets and eyelets that were included with the servo and place it in the aileron servo tray as shown. -
Page 7: Optional - Dual Aileron Servos
8. Use your radio system to center the servo. Install the servo arm perpendicular to the servo case. Optional - Dual Aileron Servos The Great Planes ElectroStik ARF comes equipped with dual aileron servo trays for dual aileron servos. To install the dual aileron servos, follow these instructions: For this section you will need: ❏... -
Page 8: Assemble The Fuselage
❏ 5. Connect both servos to the “Y” harness. Make sure ❏ 7. Cut the servo arms as shown above. Use a 6" [152mm] the “Y” harness exits through the hole in the center of the pushrod, a clevis, clevis retainer and FasLink to make each wing. - Page 9 ❏ ❏ 3. Slide a 3/32" [2.4mm] wheel collar between the nylon 7. Slide the axles through the landing gear brace as tail gear bearing and the tail wheel bracket as shown. Thread shown. Secure each axle with a #8 washer and 3/16" [5mm] the steering wire between the horizontal stabilizer and the nut.
-
Page 10: Install The Elevator & Rudder Pushrods & Servos
Install the Elevator & Rudder Pushrods & Servos ❏ 1. Using the mounting grommets and eyelets supplied with the servos, install the elevator and rudder servo into the fuse with the servo output shafts toward the front of the fuselage as shown. -
Page 11: Out-Runner Motor, Battery & Radio Installation
❏ 3. Attach the brushless motor to the fi rewall using four 4-40 x 5/8" [15.9mm] hex head screws, four #4 fl at washers and threadlocking compound. If you haven’t done so already, install the prop adapter using the hardware included with the motor. ❏... - Page 12 ❏ 9. Secure the wing by inserting the two 10-24 nylon wing bolts into the wing and tightening them down as shown. ❏ 6. Locate the included segments of hook and loop material ❏ and feed the ends through the slots as shown. These will 10.
-
Page 13: Get The Model Ready To Fly
GET THE MODEL READY TO FLY Set the Control Throws Install & Connect the Motor Battery To ensure a successful fi rst fl ight, fl y your ElectroStik EP RXR set up only according to the C.G. and control surface throws specifi... -
Page 14: Balance The Model (C.g.)
Balance the Model (C.G.) Balance the Model Laterally ❏ At this stage the model should be in ready-to-fl y condition 1. With the wing level, have an assistant help you lift the with all of the systems in place including the motor, landing model by the motor propeller shaft and the bottom of the gear, covering, motor battery, and the radio system. -
Page 15: Balance Propellers
Stay away from the propeller when the motor batteries are Balance Propellers plugged in. NEVER have the motor batteries plugged in with the radio system “OFF”. Run the motor outside only and never run the motor in an area of loose gravel or sand; the propeller may throw such material in your face or eyes. -
Page 16: Lithium Battery Handling & Usage
• NEVER discharge below 2.5V per cell. the aircraft are allowed at or in the front of the fl ight line. Intentional fl ying behind the fl ight line is prohibited. • NEVER place on combustible materials or leave unattended 4) I will operate my model using only radio control frequencies during charge or discharge. -
Page 17: Flying
FLYING Flight The Great Planes ElectroStik EP ARF is a great-fl ying model For reassurance and to keep an eye on other traffi c, it is a that fl ies smoothly and predictably. The ElectroStik EP ARF good idea to have an assistant on the fl ight line with you. Tell does not, however, possess the self-recovery characteristics him to remind you to throttle back once the plane gets to a of a primary R/C trainer and should be fl... - Page 18 are on the desired rates (high/low rates). A fl ight plan greatly reduces the chances of crashing your model just because of poor planning and impulsive moves. Remember to think. Have a ball! But always stay in control and fl y in a safe manner. GOOD LUCK AND GREAT FLYING! ElectriFly Silver Series 45A Brushless ESC With Silver Series brushless ESCs, the only way their...
- Page 19 ® ™ ™ Futaba R607FS 7-Channel FASST 2.4GHz Receiver ElectriFly Equinox LiPo Cell Balancer Outfi t your whole fl eet of planes with their own FASST By regulating the voltage levels from 2 to 5 LiPo cells to within R607FS receiver, and you can pilot them all with one Futaba a very tight tolerance of each other, the Equinox ensures the FASST transmitter.
- Page 20 BUILDING NOTES Kit Purchased Date: ___________________________ Date Construction Finished: _______________________ Where Purchased: ____________________________ Finished Weight: _______________________________ Date Construction Started: _____________________ Date of First Flight: ______________________________ FLIGHT LOG...
Need help?
Do you have a question about the ElectroStik ARF and is the answer not in the manual?
Questions and answers