Table of Contents
Advertisement
Quick Links
Download this manual
See also:
Instruction Manual
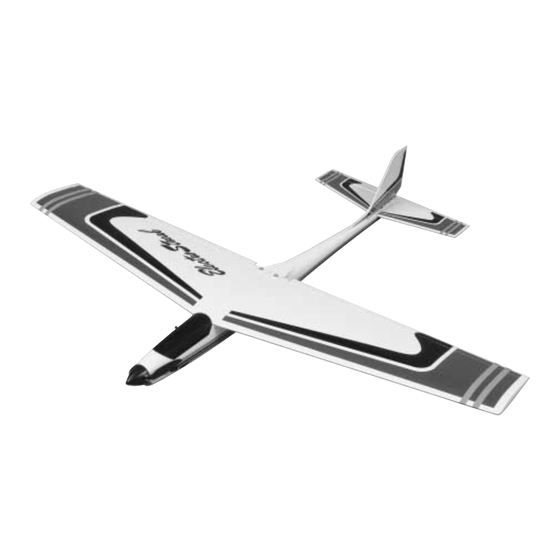
Wingspan: 44.5 in [1130mm]
Wing Area: 342 sq in [22.03 dm
Weight: 43 oz. [1218g]
Wing Loading: 18.1 oz/sq ft [55.1 g/dm
Length: 39.5 in [1003mm]
Radio: 4-ch with 3 sub micro servos
Motor: 600 size
Motor Battery: 8.4 volt 2000mAh – 3000mAh
Great Planes
®
Model Manufacturing Co. guarantees this kit to be free from defects in both material and workmanship at the date of
purchase. This warranty does not cover any component parts damaged by use or modification. In no case shall Great Planes' liability
exceed the original cost of the purchased kit. Further, Great Planes reserves the right to change or modify this warranty without notice.
In that Great Planes has no control over the final assembly or material used for final assembly, no liability shall be assumed nor accepted
for any damage resulting from the use by the user of the final user-assembled product. By the act of using the user-assembled product,
the user accepts all resulting liability.
If the buyer is not prepared to accept the liability associated with the use of this product, the buyer is advised to return this kit
immediately in new and unused condition to the place of purchase.
READ THROUGH THIS MANUAL BEFORE STARTING
CONSTRUCTION.
INSTRUCTIONS AND WARNINGS CONCERNING
THE ASSEMBLY AND USE OF THIS MODEL.
GPMZ0236 for GPMA1055 V1.0
INSTRUCTION MANUAL
2
]
2
]
IT
CONTAINS
WARRANTY
IMPORTANT
™
1610 Interstate Drive Champaign, IL 61822
(217) 398-8970, Ext. 2
airsupport@greatplanes.com
Entire Contents © Copyright 2001
Advertisement
Table of Contents

Related Manuals for GREAT PLANES Electro Streak


Summary of Contents for GREAT PLANES Electro Streak
-
Page 1: Instruction Manual
Further, Great Planes reserves the right to change or modify this warranty without notice. In that Great Planes has no control over the final assembly or material used for final assembly, no liability shall be assumed nor accepted for any damage resulting from the use by the user of the final user-assembled product. -
Page 2: Table Of Contents
Radio Equipment ..............3 the ElectroStreak ARF, visit the web site listed below and Battery Selection ..............3 select the Great Planes ElectroStreak ARF. A “tech notice” Chargers..................3 box will appear in the upper left corner of the page if there ADDITIONAL ITEMS REQUIRED ..........4 is new technical information or changes to this kit. -
Page 3: Decisions You Must Make
Panasonic ® cells. These cells have a low internal resistance, We, as the kit manufacturer, provide you with a top quality kit which translates into more power and less heat. and instructions, but ultimately the quality and flyability of your finished model depends on how you build it; therefore, we If you are new to electric airplanes, here is a short cannot in any way guarantee the performance of your completed explanation of rechargeable NiCd (Nickel Cadmium) and... -
Page 4: Additional Items Required
Frequently you can study photos in following steps 6-Piece standard ballwrench set (GPMR8008) to get another view of the same parts. Masking tape (TOPR8018) Denatured alcohol (for epoxy clean up) • The Great Planes ElectroStreak ARF is factory-covered with Top Flite ® MonoKote ®... -
Page 5: Ordering Replacement Parts
ORDERING REPLACEMENT PARTS To order replacement parts for the Great Planes ElectroStreak ARF, use the order numbers in the Replacement Parts List that follows. Replacement parts are available only as listed. Not all parts are available separately (an aileron cannot be purchased separately, but is only available with the wing kit). -
Page 6: Kit Contents
If any parts are missing or are not of acceptable quality, or if you need assistance with assembly, contact Great Planes Product Support. When reporting defective or missing parts, use the part names exactly as they are written in the Kit Contents list on this page. -
Page 7: Preparations
PREPARATIONS 1. If you have not done so already, remove the major parts of the kit from the box (wing halves, fuselage, tail parts, etc.) and inspect them for damage. If any parts are damaged or missing, contact Product Support at the address or telephone number listed on the front cover. -
Page 8: Join The Wing
6. Apply six drops of thin CA to the top and bottom of 2. Test fit the wing halves together with the wing joiner. each hinge. Do not use CA accelerator. After the CA and Make sure the wing joiner is installed correctly. If it is not, the epoxy have fully hardened, test the hinges by pulling on the root of the wings will not fit together correctly. -
Page 9: Assemble The Fuselage
2. Remove the covering from over the two bolt holes at the trailing edge of the wing. 3. Test fit the wing to the fuselage and bolt it into position with two 6-32 x 3/4" machine screws and two #6 washers. If necessary, enlarge or adjust the wing bolt holes in the wing so the wing bolts will align with the blind nuts. - Page 10 3. Fold a piece of masking tape over the other end of the string and draw an arrow on it. Slide the tape along the string and align the arrow with one end of the stab. Swing the string over the same position on the other end of the stab.
-
Page 11: Install Servo & Battery Tray
wing. If it is not, the following Expert Tip can be used to slightly twist the fuselage. 12. Fit the fin into the stab. From the aft end of the plane, Straightening a twisted fiberglass fuselage sight down the fin, checking that it is aligned with the Use a heat gun to heat the fuselage between the stab centerline of the fuselage. -
Page 12: Install The Motor & Speed Control
torque rods. When satisfied with the fit, use 6-minute epoxy to glue the servo tray to the fuselage sides. 3. Use a servo arm that has a pushrod mounting hole approximately 7/16" [11mm] out from the center of the arm for the elevator servo. -
Page 13: Install The Elevator
fuselage. Attach the motor to the fuselage using two 3mm x from the motor and the black into the black. Check that the 10mm machine screws and 3mm washers. insulation covers the metal connectors on both plugs. If it does not, use electrical tape to insulate the plugs to prevent them from shorting. -
Page 14: Install The Rudder
5. Temporarily attach the rudder to the fin. Do not glue the hinges. Attach the left side clevis in the second hole from the bottom of a small control horn. 3. Remove the elevator from the stab. Drill 3/32" holes through the elevator, at the marks. -
Page 15: Radio Set-Up
RADIO SET-UP 1. We recommend that the receiver be installed behind the servo tray. This will allow the motor battery to be moved forward and aft to adjust the balance point (C.G.) later. Plug the rudder and elevator servos, and the electronic speed control into the receiver, with a 12"... -
Page 16: Assemble & Install The Folding Propeller
10. Thread the two nylon torque rod horns onto the 2. Attach the propeller blades to the hub with two 5/64" x aileron torque rods. The bottom of the horn should be 3/8" [1.9mm x 9.5mm] pins. Check that the blades move approximately 1/2"... -
Page 17: Get The Model Ready To Fly
GET THE MODEL READY TO FLY Use a Great Planes AccuThrow (or a ruler) to accurately measure and set the control throw of each control surface as indicated in the chart that follows. If your radio does not... -
Page 18: Balance The Model (C.g.)
Great Planes CG Machine, or lift it right side up at Balance the Model (C.G.) the balance point you marked. 3. When the ElectroStreak ARF is properly balanced, the More than any other factor, the C.G. (balance point) can stab will be level. -
Page 19: Charge The Batteries
Charge the Batteries Ground Check Follow the battery charging instructions that came with your After you break-in the motor on the model, inspect the radio control system to charge the transmitter. You should model closely to make sure all screws remained tight, the always charge your transmitter batteries the night before hinges are secure, the prop is secure and all pushrods and you go flying, and at other times as recommended by the... -
Page 20: Check List
9. I will not operate models with pyrotechnics (any device 11. Use an incidence meter to check the wing for twists that explodes, burns, or propels a projectile of any kind). and attempt to correct before flying. 12. Tighten the set screws in the propeller hub. RADIO CONTROL 13. -
Page 21: Landing
Great Planes ElectriCub ™ Have a ball! But always stay in control and fly in a safe Great Planes combines the looks of one of aviation’s most manner. popular aircraft with quiet, powerful electric performance! This 58.75" span kit features precisely interlocking wood GOOD LUCK AND GREAT FLYING! parts for easy assembly. - Page 22 There’s also a built-in trainer system, compatible with all Futaba FM systems, plus full NiCds and a charger for modeler convenience. The 4VF includes an R127DF receiver and three S3003 standard servos. 72 MHz. FUTJ61** Great Planes ElectriFly ™ Sanyo 1900SCR Thrust 7-Cell Battery The perfect pack for high-performance electric flight –...
-
Page 23: Flight Log
BUILDING NOTES Kit Purchased Date: _______________________ Date Construction Finished: _________________ Where Purchased:_________________________ Finished Weight: __________________________ Date Construction Started: __________________ Date of First Flight: ________________________ FLIGHT LOG...
Need help?
Do you have a question about the Electro Streak and is the answer not in the manual?
Questions and answers