Table of Contents

Subscribe to Our Youtube Channel
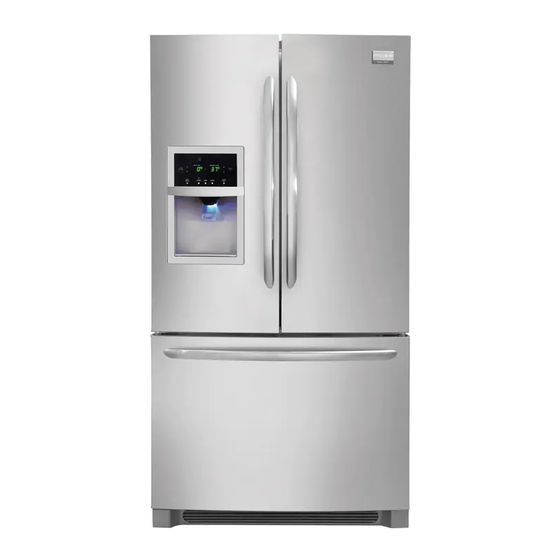
Related Manuals for Frigidaire LGUB2642LF2


Summary of Contents for Frigidaire LGUB2642LF2
-
Page 1: Bottom Freezer
All About Appliance 911 Servicing Bottom Freezer Refrigerator Frigidaire Refrigerator Model LGUB2642LF2 Parts ™ Electrolux Major Appliances, North America 10200 David Taylor Drive Charlotte, NC 28262 Publication #5995556437 February 2011... -
Page 3: Safe Servicing Practices For All Appliances
Basic Information Safe Servicing Practices For All Appliances Avoid personal injury and/or property damage by observing important Safe Servicing Practices. Following are some limited examples of safe practices: 1. DO NOT attempt a product repair if you have any doubts as to your ability to complete the repair in a safe and satisfactory manner. -
Page 4: Table Of Contents
Basic Information Table of Contents Freezer Recovery Mode ..........4-12 Section 1 Basic Information ......... Error Codes .............. 4-12 Safe Servicing Practices For All Appliances ..... Diagnostic Service Mode ..........4-12 Table of Contents ............Diagnostic Service Mode Test Sequence ..... 4-13 Important Safety Instructions ........ - Page 5 Basic Information Evaporator Cover ............6-16 Freezer Heat Exchanger Replacement (Finger IM Evap.) .. 7-13 Evaporator Fan Motor ..........6-16 Ice Maker Evaporator Replacement (Finger IM Evap.) ..7-13 Evaporator Defrost Thermostat ........6-17 Ice Maker Heat Exchanger Rep. (Finger IM Evap.) ... 7-14 Defrost Heater ............
-
Page 6: Important Safety Instructions
Basic Information Important Safety Instructions Child Safety Packing Materials: Safety Precautions • Packing cartons covered with rugs, bedspreads, Do not attempt to install, operate or service the unit until plastic sheets, or stretch wrap may become airtight you have read the safety precautions in this manual. chambers and can quickly cause suffocation. -
Page 7: Model Number Matrix
FEATURE YEAR OF COLOR CATEGORY LEVEL INTRODUCTION Brand FG – Frigidaire Gallery FP – Frigidaire Professional LG – Lowe’s Gallery Product HB – High Efficiency Bottom Freezer Category HN – High Efficiency Non-Dispensing Bottom Freezer HF – High Efficiency Bottom Freezer Counter Depth HG –... -
Page 8: Basic Information
Basic Information Models with Fresh Food Ice Maker NOTE: Features may vary according to model Incandescent Light (select models) Water Flipper Guide LED Light (select models) Filter Maker Dairy Compartment Air Filter Rack SpillSafe (select models) Shelves SpillSafe Flipper Shelves Mullion Crisper Crisper... - Page 9 Basic Information Models with Fresh Food and Freezer Ice Makers NOTE: Features may vary according to model...
- Page 10 Basic Information Models with Freezer Ice Maker NOTE: Features may vary according to model...
- Page 11 Basic Information Models With Dispenser and Fresh Food Compartment Ice Maker PERFORMANCE DATA NO LOAD & NO DOOR OPENINGS AT 37°/0° CONTROL SETTING Type A with Run/Start Capacitor 65°F (18°C) Ambient 90°F (32°C) Ambient Operating Time 74 to 84% 100% Freezer Temperature -5°...
- Page 12 Basic Information Models With Freezer Compartment Ice Maker And Without Dispenser PERFORMANCE DATA NO LOAD & NO DOOR OPENINGS AT 37°/0° CONTROL SETTING Variable Speed Compressor 65°F (18°C) Ambient 90°F (32°C) Ambient Operating Time 32 to 40% 100% -6° to 6° F -6°...
-
Page 13: Section 2 Installation
Installation Information Required Tools You will need the following tools: This Use & Care Guide provides general installation and operating instructions for your model. We recommend using a service or kitchen contracting professional to install your refrigerator. Use the refrigerator only as Installation instructed in this Use &... -
Page 14: Leveling Freezer Drawer
Installation Information Leveling Freezer Drawer Level Refrigerator & Adjust (if necessary) Doors (if necessary) NOTE Guidelines for fi nal positioning of your refrigerator: DO NOT remove center screw from freezer drawer. This is a factory adjustment. • All four corners of the cabinet must rest fi rmly on To level the cabinet using the front rollers (select the fl... - Page 15 Installation Information To adjust the door stop: 5 Re-tighten screw. Door stop is adjustable between 85 to 145 degrees. NOTE View shown is looking up at the bottom of the refrigerator door. Re-tighten Screw 6 Ensure door stops in desired location before resuming normal use.
- Page 16 Installation Information 4 Lift the door while adjusting the washer. To raise To adjust the fl ipper mullion: the door, rotate washer clockwise (when viewed 1 Loosen the screw located on the fl ipper mullion from the bottom). To lower door, rotate washer hinge.
-
Page 17: Getting Through Narrow Spaces
Installation Information Getting through narrow spaces To remove the refrigerator doors: 1 Trace lightly around the door’s top hinges with a If your refrigerator will not fi t through an entrance area, pencil. This makes reinstallation easier. you can remove the doors. Check fi rst by measuring the entrance. - Page 18 Installation Information Installing Freezer Drawer NOTE 1 With lower slides pulled out, hang drawer onto slide brackets ensuring pins on each side are fully You will be pulling approximately three (3) feet of inserted into slots on each side. water tube from the back of the refrigerator. 4 Unscrew the three (3) lower hinge screws and hinge if necessary.
- Page 19 Installation Information Door Handle Mounting Instructions for Frigidaire Gallery ® 1 Remove handles from carton and any other protective packaging. 2 Position fresh food handle end over upper and lower pre-installed shoulder bolts (A) that are fastened into door, ensuring the holes for the set screws are facing towards the opposite door.
- Page 20 Installation Information Door Handle Mounting Instructions for Frigidaire Professional ® 1 Remove handles from carton and any other protective packaging. 2 Position fresh food handle end over upper and lower pre-installed shoulder bolts (A) that are fastened into door, ensuring the holes for the set screws are facing towards the opposite door.
- Page 21 After connecting the water supply, refer to “How to Prime Depending on your local/state building codes, Frigidaire the Water Supply System” for important information about recommends for homes with existing valves its Smart priming an empty water supply system.
- Page 22 Installation Information 2-10...
-
Page 23: Section 3 Electronic Control
Electronic Control The purpose of this section is to familiarize the service technician with operation of the user interface and proper function of the electronic control system. This section explains all electronic controls and diagnostics for the unit with the exception of ice maker controls. Ice maker controls operation is detailed in the “Ice Maker” section. There are two standard user interface controls available with dispenser equipped models: Express-Select and Pro- ™... -
Page 24: Electronic Control
Electronic Control Pro-Select User Interface Display Operation ™ (Dispenser Models) options Figure 3-4. Pro-Select™ User Interface for Dispenser Models Touch an icon (Water/Cube/Crush) to activate the desired power on-off Press and hold for three (3) seconds to turn off the cooling system to dispenser mode. - Page 25 Electronic Control Express-Select User Interface Display Operation ™ (Dispenser Models) Figure 3-5. Express-Select™ User Interface for Dispenser Models ice off Press and hold for three (3) seconds air fi lter Touch to display fi lter status. Press to turn the ice maker “ON” or “OFF”. and hold for three (3) seconds to reset (Fresh Food Turning the ice maker “OFF”...
-
Page 26: Setting Cooling Temperatures
Electronic Control Express-Select User Interface Display Operation ™ (Non-Dispenser Models) A red indicator light will be illuminated above most active features. Touch the icon to activate the options below. quick ice Increases the production of ice water fi lter Press and hold for three (3) seconds to reset after fi lter change. Touch to toggle display from Fahrenheit to Celsius. -
Page 27: Sabbath Mode
Electronic Control Showroom Mode Sabbath Mode Express-Select ™ The Sabbath Mode is a feature that disables portions To enter, press and hold freezer temperature up (∧) of the refrigerator and its controls in accordance with while pressing the fresh food temperature down (∨) observance of the weekly Sabbath and religious holidays indicator 3 times within five (5) seconds. -
Page 28: Alarms
Electronic Control Alarms Door Ajar If the door has been left open for an extended period of time an alarm will sound and the door ajar indicator will display on the right side of the display. The alarm is turned off by closing the door. The mute sounds key or alarm off key will blink to prompt the resetting of any pending alarms. -
Page 29: Entering Service Mode
Electronic Control Entering System Service Mode Test 8: Water valve (water dispenser test only) NOTE: Place a cup in the dispenser prior to starting this Note: Fresh Food Ice Maker service mode is discussed test to collect the water as both primary and dispenser in section 4 of this manual. - Page 30 Electronic Control Test 23: Fresh food door Temperature Resistance Chart Freezer Display will show “OP” open when doors are For Negative Temperature open and “CL” when door is closed. Test 24: Freezer door (See Flow Chart 5) Coefficient Thermistors Freezer Display will show “OP” open when door is open and “CL”...
-
Page 31: Ice And Water Troubleshooting Guide
Electronic Control Ice and Water Dispense Troubleshooting Guide General Information Diagnosing Ice and Water Dispense Issues 1. During normal operation, certain components can fail via System Service Mode independently with no cascading effect to other ice and Enter service mode water related components. - Page 32 Electronic Control Ice and Water Flow Chart 1 Are light bulbs Replace bulbs Burned out And retest Does light switch Have continuity Replace switch When opened and And retest No continuity When closed Is 120 VAC present Is 120VAC persent Relpace ERF On yellow /gray on yel./greywire...
- Page 33 Electronic Control Ice and Water Flow Chart 2 Are outputs Correct on the Replace valve waterharness at water And retest Valve connector? (120VAC) Is 120VAC present At main board J3 - Repair/replace Pin 7 (tan wire) Harness and retest Connector when Paddle depressed And water Selected?
- Page 34 Electronic Control Ice and Water Flow Chart 3 Are outputs correct on the Replace auger harness at auger motor and retest motor connector? (120V) Is 120V present at main board J3- Are fresh food - pin 3 (purple/ machine Connect and black wire) compartment retest...
- Page 35 Electronic Control Ice and Water Flow Chart 4 Are outputs correct on the Replace cube/ harness at cube/ crush solenoid crush solenoid and retest connector? (120V) Is 120V present at main board J3- Are fresh food - pin 4 (blue/white machine Connect and wire) connector...
- Page 36 Electronic Control Ice and Water Flow Chart 5 Are light bulbs Replace bulbs Burned out And retest Does light switch Have continuity Replace switch When opened and And retest No continuity When closed Is 120 VAC present Is 120VAC persent Relpace ERF On yellow /gray on yel./greywire...
- Page 37 Electronic Control Ice and Water Flow Chart 7 Ice and Water Flow Chart 6 Are paddle Flappe r Are paddle Re pair/replace Re pair/replace micros witch micros witch connection and connection and conne ctions at conne ctions at retest. retest. sw itch intact? sw itch intact? Ye s...
- Page 38 Electronic Control Ice and Water Flow Chart 8 Is 120V present between black Are left and right Correct and and light blue door hinge connector to ice connections retest and water relay intact? board Is 120V present Are fresh food - Is there continuity between pins 1 machine...
- Page 39 Electronic Control Ice and Water Flow Chart 9 Is 6 wire R epa ir/replace connection to UI harness and driver board retest intact? Ye s Re plac e ice and water module. Is problem correc ted? Re place UI and retest Ice and Water Flow Chart 10 Is J3 connec tor at...
-
Page 40: Variable Capacity Compressor Electrical Components
Electronic Control Variable Capacity Compressor 2. Remove the lower power board from under the front of the product. (See Section 6 for detailed Electrical Components procedure). You will use connection J2 terminal 3 (RED/BLK) and terminal 4 (BLK/WHT) on the lower The new series of very high efficiency compressors are control board to test the voltage. -
Page 41: Testing The Compressor
Electronic Control 3. If the voltage checks good, remove the inverter Testing the Compressor from the compressor by removing one screw at the The compressor has a 3 phase, 4 pole brushless DC bottom of the inverter that goes through the bracket motor. - Page 42 Compartment Figure 3-18. LED Lighting in Fresh Food Compartment Only Fresh Food Lighting Frigidaire bottom freezer models can have LED or incandescent lighting in the fresh food compartment depending on the model number. On dispenser models, the light switches are located at the top outer corners on the face of the cabinet.
- Page 43 Electronic Control J1 - Neutral J3 - Lower control board Figure 3-19. Non-Dispenser Models Diagnosing LED Fresh Food Lighting Diagnosing Incandescent Fresh Food Lighting (Non-Dispenser Models) Incandescent fresh food lighting is powered directly from On Non-Dispenser models the light switch is part of the main control borad.
-
Page 44: Voltage Flow Chart
Electronic Control Voltage Flow Chart Figure 3-20. 3-22... -
Page 45: Section 4 Ice Maker
Ice Maker The ice maker has a drive motor and gear box assembly in the front section of the ice maker. A bail arm mounted Depending on the Engineering Digit at the end of to the side of the gear box and the flex ice tray are the model number, the product may be equipped with driven off the back of the gear box. -
Page 46: Defrost Water Drain
Ice Maker (Flex Tray Fresh Food Compartment) Ice maker, bail arm, bail arm switch, gear box, are mounted in the front of the ice maker in a snap out housing. The bail arm drops down to check the amount of ice in the bucket and uses the switch to prevent ice harvest when the ice maker bucket is full. -
Page 47: About Ice Cube Production
Ice Maker (Flex Tray Fresh Food Compartment) About Ice Cube Production There is a thermistor located inside a foam insulation cover under the ice maker flex tray that senses the temperature of the water and the ice tray. The signal from the thermistor is sent to the lower control board of the refrigerator. The thermistor looks for the water in the tray to drop to a point that the water is changing from a liquid to a solid in the freezing process. -
Page 48: Diagnostic Service Mode
Ice Maker (Flex Tray Fresh Food Compartment) After pushing ‘power on-off’ to start automatic test or turn on the load, the ice maker control will display the test result on the freezer two digit display. When The Ice Maker must be turned on before entering the waiting for the test to be automatically performed and Service Mode. -
Page 49: Chart For Negative Temperature Coefficient Thermistors
Ice Maker (Flex Tray Fresh Food Compartment) Temperature Resistance Chart For Test 57C: Evaporator Fan Test Negative Temperature Coefficient Thermistors To start this interactive test, touch ‘power on-off’ to activate the fan. Touching ‘power on-off’ again will turn the fan off. The Freezer display shows current state of the fan “on”... - Page 50 Ice Maker (Flex Tray Fresh Food Compartment) Flow Chart # 1 No Ice...
- Page 51 Ice Maker (Flex Tray Fresh Food Compartment) Flow Chart # 2 No water to ice maker No water to ice maker Advise customer to repair house connections Will water dispense out the Is water door? present at inlet of valve on back of product? Proceed to Testing Water Fill System...
- Page 52 Ice Maker (Flex Tray Fresh Food Compartment) Flow Chart # 3 Hollow Ice Cubes in Bucket Hollow Ice Cubes in Bucket Is the insulation Replace insulation block and retainer in block and retainer place on the bottom of the ice tray? Is the outer housing over the ice maker correctly...
-
Page 53: Operation
Ice Maker (Finger Evaporator Fresh Food Compartment) The ice maker has a drive motor, two position switches for the ice mold, and a bail arm switch mounted in the top front. In the center section is the ice mold, which Depending on the Engineering Digit at the end of will move from the fill position on the right to the freeze the model number, the product may be equipped with... -
Page 54: Defrost Water Drain
Ice Maker (Finger Evaporator Fresh Food Compartment) The top center section contains the finger section of the Ice maker bail arm, bail arm switch, gear box, and fill evaporator. The water will freeze around the finger and freeze switches are mounted in the front of the ice evaporator that will have a tube attached for the finger maker. -
Page 55: About Ice Cube Production
Ice Maker (Finger Evaporator Fresh Food Compartment) About Ice Cube Production When the temperature of the ice mold goes below 28°F and the bail arm is in the down position, the ice mold heater will turn on and the EEV will close as long as the unit is not in Freezer Recovery or Sabbath modes, or the 20 minute delay after defrost or POR. -
Page 56: Freezer Recovery Mode
Ice Maker (Finger Evaporator Fresh Food Compartment) Diagnostic Service Mode Freezer Recovery Mode There is a program on the main control system for the product to limit or stop the flow of refrigerant to the ice maker. This allows the freezer evaporator to get The ice maker must be turned ON before entering the as much refrigerant as is needed to maintain product Service Mode. - Page 57 Ice Maker (Finger Evaporator Fresh Food Compartment) After pushing ‘power on-off’ to start automatic test or Temperature Resistance Chart turn on the load, the ice maker control will display the test result on the freezer two digit display. When waiting For Negative Temperature for the test to be automatically performed and the result Coefficient Thermistors...
- Page 58 Ice Maker (Finger Evaporator Fresh Food Compartment) displays “on”. Pushing the ON/OFF key again will close Test 44C: HV Motor Stuck in Freeze Error the valve. Fresh food display will flash the test ID while (See Flow Chart Test # 63 C) the EEV is driven back to the closed position and freezer display shows “OFF”.
- Page 59 Ice Maker (Finger Evaporator Fresh Food Compartment) Test 55C: Water Valve Test (continued) Test 59C: “Fill” Limit Switch Test (See Flow Chart Test #59C) After ice mold arrival to “Freeze” position, or if the mold Interactive test with audio was already in the “ Freeze” position, the Test ID stops Upon entering the test, the ice mold position is checked.
-
Page 60: No Ice Conditions
Ice Maker (Finger Evaporator Fresh Food Compartment) No Ice Conditions Test 63C: Harvest Motor System Test (See Flow Chart Test #63C) To diagnosis a no ice condition, follow the steps in Interactive section 6 “Ice Bin Housing Removal”. This will allow This test has the requirement that the ice bucket be access to the determine the condition of the ice mold, removed from the ice maker chamber prior to entering... - Page 61 Ice Maker (Finger Evaporator Fresh Food Compartment) Flow Chart No Ice #1 4-17...
- Page 62 Ice Maker (Finger Evaporator Fresh Food Compartment) Flow Chart No Ice #2 4-18...
- Page 63 Ice Maker (Finger Evaporator Fresh Food Compartment) Flow Chart No Ice #3 4-19...
- Page 64 Ice Maker (Finger Evaporator Fresh Food Compartment) Flow Chart No Ice #4 4-20...
- Page 65 Ice Maker (Finger Evaporator Fresh Food Compartment) Flow Chart No Ice #5 4-21...
- Page 66 Ice Maker (Finger Evaporator Fresh Food Compartment) Flow Chart No Ice #6 4-22...
- Page 67 Ice Maker (Finger Evaporator Fresh Food Compartment) Flow Chart Test #48C 4-23...
- Page 68 Ice Maker (Finger Evaporator Fresh Food Compartment) Flow Chart Test #49C 4-24...
- Page 69 Ice Maker (Finger Evaporator Fresh Food Compartment) Flow Chart Test #50C 4-25...
- Page 70 Ice Maker (Finger Evaporator Fresh Food Compartment) Flow Chart #51C 4-26...
- Page 71 Ice Maker (Finger Evaporator Fresh Food Compartment) Flow Chart #52C 4-27...
- Page 72 Ice Maker (Finger Evaporator Fresh Food Compartment) Flow Chart #54C 4-28...
- Page 73 Ice Maker (Finger Evaporator Fresh Food Compartment) Flow Chart #55C 4-29...
- Page 74 Ice Maker (Finger Evaporator Fresh Food Compartment) Flow Chart #56C 4-30...
- Page 75 Ice Maker (Finger Evaporator Fresh Food Compartment) Flow Chart #57C 4-31...
- Page 76 Ice Maker (Finger Evaporator Fresh Food Compartment) Flow Chart #58C 4-32...
- Page 77 Ice Maker (Finger Evaporator Fresh Food Compartment) Flow Chart #59C 4-33...
- Page 78 Ice Maker (Finger Evaporator Fresh Food Compartment) Flow Chart #60C 4-34...
- Page 79 Ice Maker (Finger Evaporator Fresh Food Compartment) Flow Chart #61C 4-35...
- Page 80 Ice Maker (Finger Evaporator Fresh Food Compartment) Flow Chart #62C 4-36...
- Page 81 Ice Maker (Finger Evaporator Fresh Food Compartment) Flow Chart #63C 4-37...
- Page 82 Ice Maker (Finger Evaporator Fresh Food Compartment) Flow Chart ICE-t3 Error 4-38...
- Page 83 Ice Maker (Finger Evaporator Fresh Food Compartment) Ice Maker Body and Switches For Component Teardown Procedures See Section 6 Figure 4-12 4-39...
- Page 84 Ice Maker (Finger Evaporator Fresh Food Compartment) Ice Maker Frame and Auger Motor Components For Component Teardown Procedures See Section 6 Figure 4-13 4-40...
- Page 85 Ice Maker (Finger Evaporator Fresh Food Compartment) Ice Maker Evaporator Components For Component Teardown Procedures See Section 6 Attach Heater to Refrigerant Tube with Three Cable Ties Positionrd Approximately as shown Figure 4-14 4-41 4-41...
-
Page 86: Ice Maker Components
Ice Maker (Freezer Compartment) Ice Maker Mounted In The Freezer Ice Maker Components Compartment Ice Mold (available on select models) The ice mold is die-cast aluminum with the ice maker thermostat bonded to its front surface and has a semi- The Ice Maker is designed to produce ice automatically. - Page 87 Ice Maker (Freezer Compartment) Thermostat Thermal Cut-Out (TCO) The thermostat is a single-pole, single throw (SPST), The thermal cut-out is a one-time limit fuse used as a bimetallic, disk-type, thermal switch. It automatically safety device. It is located under the mounting plate, in starts the harvest cycle when the ice is frozen.
-
Page 88: Installing Water Supply Line To Ice Maker
Ice Maker (Freezer Compartment) Installing Water Supply Line to Test Cycling Ice Maker Ice Maker Operation of the ice maker, water refilling, and controlled ice storage, require proper functioning and timing of all Supply line installation must comply with all applicable components. -
Page 89: Fault Diagnosis
Ice Maker (Freezer Compartment) Fault Diagnosis Complaint-Ice Maker Fail to Stop at End of Cycle With the ejector blades in the starting position, check Complaint - Ice Maker Fails to Start the hold switch terminals”C” and “NO” for continuity. Check to see if ice maker control arm is locked in Replace the switch if the continuity readings are raised position. - Page 90 Ice Maker (Freezer Compartment) Freezer Compartment Ice Maker Electrical System The Ice Maker mounted in the freezer compartment is NOT a Mid-South Ice Maker. Use the schematic below for servic- ing the Ice Maker. YELLOW YELLOW YELLOW 4-46 4-46...
-
Page 91: Operating Cycle Illustrations - Electrical
Illustrations - Electrical The following wiring diagrams illustrate the electrical operation of an ice maker. This procedure is on the Internet at http://www.frigidaire.com/tip/ • Ice Maker connected to electricity. • Mold temperature above 15°F. • Thermostat open. • Motor not rotating. - Page 92 Ice Maker (Freezer Compartment) • Ice Maker connected to electricity. • Mold temperature below 15°F. • Thermostat closed. • Motor rotating. • Power on heater. • Control Arm swinging up. • Shut-off Switch closed C to NO. • Hold Switch closed C to NC. •...
- Page 93 Ice Maker (Freezer Compartment) • Ice Maker connected to electricity. • Mold temperature below 15°F. • Thermostat closed. • Motor rotating. • Power on heater. • Control Arm is down. • Shut-off Switch closed C to NO. • Hold Switch closed C to NC. •...
- Page 94 Ice Maker (Freezer Compartment) 10. • Ice Maker connected to electricity. • Mold temperature above 15°F. • Thermostat opens. • Motor is rotating. • Mold heater off. • Control Arm swinging up. • Shut-off Switch closed C to NC. • Hold Switch closed C to NO. •...
- Page 95 Ice Maker (Freezer Compartment) 13. • Ice Maker connected to electricity. • Mold temperature above 15°F. • Thermostat opens. • Motor is rotating. • Mold heater off. • Control Arm swinging down. • Shut-off Switch closed C to NC. • Hold Switch closed C to NO. •...
-
Page 96: Operating Cycle Illustrations - Mechanical
Ice Maker (Freezer Compartment) Operating Cycle Illustrations - Mechanical The following diagrams illustrate the mechanical operation of an ice maker. Step 2 Step 1 Step 3 Step 5 Step 6 Step 4 4-52... - Page 97 Ice Maker (Freezer Compartment) Step 7 Step 8 Step 9 Step 10 4-53...
-
Page 98: Ice Maker Exploded View
Ice Maker (Freezer Compartment) Ice Maker Exploded View For Component Teardown Procedures See Section 6 Figure 4-34 4-54... - Page 99 Ice Maker Notes 4-55 4-55...
- Page 100 4-56...
-
Page 101: Section 5 Water System
Water System Water System Operation Green Coil Fresh Food Blue Coil Water for both ice makers and the water dispenser is Ice Maker Freezer controlled by a triple coil valve and a single coil valve Ice maker joined together as one, mounted just to the right of the Yellow Coil condenser on the cabinet. -
Page 102: Water Tank
Water System Pure Source Ultra Water Filters Locating the Filters The water fi lter system fi lters all dispensed drinking water, as well as the water used to produce ice. The water fi lter is located at the top right side of the fresh food compartment (See Figure 5-3) In general, the water fi... -
Page 103: Water System
Water System Dispensing Models Water Schematic ICE MAKER ICE MAKER WATER FILL WATER FILL TUBE ASSEMBLY TUBE ASSEMBLY FOOD CLEAR TUBE FROM COMPARTMENT WATER FILTER BADGE WATER LINE BROWN WATER LINE ICE MAKER FROM INLET TO WAETR TANK FROM INLET VALVE GREEN TUBE TO FOOD FILTER BASE... -
Page 104: Testing Water Fill System
Water System Testing Water Fill System Voltage Readings Are Different Between Primary And Secondary Valve Coils The wiring harness has three diodes in the line between If you are getting 10V or less at the primary valve, but the fill switch on the ice maker and the green coil of the you are getting 85V to 100V at the secondary, you have secondary water valve, as well as between the water a bad diode. - Page 105 Water System Low/No Voltage At Coil(s) One common problem is that the connector on the water valve coil is pushed on with the valve terminal over the There are a number of connections in the wiring harness top of the terminal in the plug. of a refrigerator.
- Page 106 Water System...
-
Page 107: Section 6 Component Teardown
Component Teardown COMPONENT TEARDOWN This section explains how to access and remove components from an Electrolux French Door Bottom Freezer Refrigerator, and has been arranged in such order as to simulate the sequence in which components would need to be removed in order to gain access to other components. -
Page 108: Dispenser Frame
Component Teardown Dispenser Frame Removal Dispenser Models To service the control board you must remove options the frame around the dispenser housing by pulling straight out at a corner and working your way around the frame, pulling it out of the Dispenser groove in the door. -
Page 109: Ice Chute Extension
Component Teardown Ice Chute Extension Dispenser Models The extension on the ice chute is used to better direct crushed and cube ice into a glass or container. To replace the chute: Turn water off to refrigerator. Push straight back on the extension to release the rear tabs. - Page 110 Component Teardown Door Handle Removal Refer to ‘Installation’ section of this manual for instructions on removal and reassembly of the door handles. Storage Bin Removal To change the position of an adjustable door bin: 1. Before adjusting a bin, remove all food. 2.
-
Page 111: Door Mullion
Component Teardown Door Mullion and Heater Removal There is a mullion attached to the right hand food door Press Latch that fill the gap between the doors when the right door is closed. This mullion contains a heater that is used to control condensation on the mullion. - Page 112 Component Teardown Door Hinges and Door Removal Front Cover Rear Screw 1. Disconnect power from unit. Cover Screw 2. Trace lightly around the door’s top hinges with a Top Hinge Cover pencil. This will make reinstallation easier. 3. Disconnect the harness by grasping both sides of the connector firmly, depress the latch, and pull Ground apart.
- Page 113 Component Teardown Freezer Upper Basket Removal 1. Remove all items from baskets. 2. Remove basket by pulling basket out to the full extension and lift out. To reinstall upper baskets: Freezer Top Basket Position basket onto the retainer clips making sure the front of the basket rests in the retainer clips on the stabilizer bar.
-
Page 114: Toe Grille
Component Teardown Toe Grille Removal Toe Grille To remove the toe grille, press the locking tabs on the Must Fit In Slot On bottom of toe grille then lift straight up until the three Anti-tip Bracket clips are free of the spacer screws. Spacer Screws To reassemble: 1. -
Page 115: Humidity Sensor
Component Teardown Fresh Food and Freezer Light Switch Remova Dispenser Models Retaining The food compartment light switches (one for each Latch door) are installed in the eyebrow trim across the top of the cabinet. To remove the switch: 1. Disconnect power from unit. 2. -
Page 116: Interior Components
Ordering Replacement Filters Figure 6-31. To order your replacement fi lters, please visit our online store at www.frigidaire.com/store, by calling toll-free at 877- 808-4195, or by visiting the dealer where you purchased your refrigerator. Frigidaire recommends that you order extra fi lters when you fi rst install your refrigerator, and that you replace your fi... -
Page 117: Air Filter
Component Teardown Air Filter Removal The air filter is located under the utility bin. To ensure optimal filtering of refrigerator odors, the air filter should be changed every six (6) months (the filter status light on the Touch Panel prompts to replace the filter after six (6) months). -
Page 118: Fresh Food Thermistor
Component Teardown Light Shield Removal To remove the light shield, remove any adjustable shelves and then simply grab the light shield along one side and flex out at the center until retaining tabs are Light Shield clear of the liner sidewall. (See Figure 6-34) Air Duct Removal Non-Dispenser Models Figure 6-34. - Page 119 Component Teardown Freezer Compartment Thermistor Removal The freezer compartment temperature sensor is located on the lower left side of the freezer liner behind a cover beside the lower basket. (See Figure 6-38) To replace the sensor: Freezer Compartment Thermistor Cover 1.
-
Page 120: Led Assembly
Component Teardown LED Assembly Removal Before accessing any of the LED assemblies, disconnect power from the unit. The LED’s are held in place by Electrical Connection snap clips on the cover. The LED and cover will come as one part and can be removed by pulling straight out on the cover. -
Page 121: Ice Maker Air Duct
Component Teardown Ice Maker Air Duct Non-Dispenser Models Screw Screw There is an air duct that mounts to the evaporator cover and directs air onto the ice maker mold. The air duct also serves as a cover for the ice maker wire harness connector. -
Page 122: Evaporator Fan Motor
Component Teardown Evaporator Cover Removal To remove the evaporator fan motor: 1. Disconnect refrigerator from electrical supply. 2. Remove the freezer door. 3. Remove freezer section baskets. NOTE: On some models you will need to remove the Screws front trim for the top two baskets. Remove one screw from each side of the basket rail going into the trim and pull the trim straight out. -
Page 123: Evaporator Defrost Thermostat
Component Teardown Evaporator Defrost Thermostat Removal Evaporator Defrost The evaporator defrost limit switch mounts on the Thermostat copper tube leading to the evaporator inlet. To remove the evaporator defrost limit switch: 1. Disconnect refrigerator from electrical supply. 2. Remove the freezer door. Disconnect 3. -
Page 124: Fresh Food Compartment Ice Maker (Flex Tray)
Component Teardown Fresh Food Compartment Refrigerated Ice Maker Flex-Tray IMPORTANT NOTE ABOUT ICE MAKER GASKETS: All gasket seals in the ice maker housing assembly are critical to ensure proper management of air flow, moisture and defrost water. Anytime a gasket seal is broken, the affected gasket must be inspected for signs of wear or deformation and must be replaced if necessary. -
Page 125: Ice Maker Housing
Component Teardown Ice Maker Housing Removal Disconnect power from the unit before performing this procedure. 1. After completing the Ice Maker Removal Procedure, remove the screws at the front of the Housing. Figure 6-56. NOTE: One or both of the side screws may not be used. remove two (2) screws 2. -
Page 126: Air Handler
Component Teardown 4. To replace the tube, insert the green end into the opening of the conduit inside the fresh food compart- ment. 5. Push the tube through the conduit and out the back of the unit. remove 3 screws IMPORTANT: Be sure the black portion of the tube is oriented as shown in figure 6-59, otherwise, the black portion may kink when inserted into the conduit. -
Page 127: Auger Motor, Crusher Solenoid, And Fan
Component Teardown Auger Motor, Crusher Solenoid, and Fan Disconnect power from the unit before performing this procedure. The Auger Motor is attached with 3 screws driven in from the front of the Air Handler. Note that the top screw is covered by a foam gasket. - Page 128 Component Teardown Evaporator Housing Removal - continued The liner has a tab that extends down to the drain tube to conduct heat during defrosts to melt any ice accumulation in the drain tube. There is also a piece of aluminum tape that wraps onto the front wall of the Housing.
-
Page 129: Evaporator Housing
Component Teardown Evaporator Housing Replacement The “U” shaped gasket on the back of the Disconnect power from the unit before performing this evaporator housing procedure. must be replaced when IMPORTANT: When the Evaporator Housing is re- the evaporator housing moved, (and when the Air Handler is removed), the rear is loosened or removed. -
Page 130: Ice Maker Replacement
Component Teardown Air Handler Replacement Disconnect power from the unit before performing this align notch with hole in liner procedure. 1. Replace any foam gaskets on the Air Handler that have been damaged. 2. Align the notch in the Evaporator Housing with the top, left screw hole for the Air Handler as shown. - Page 131 Component Teardown Ice Maker Replacement - continued. proper routing of the harness in the channel and under the tab 3. As you slide the ice maker onto the shoulder screws, you cannot see the two rear screws. Therefore, after installing the ice maker, you must pull down on the two back corners to be sure it is attached to the two rear screws.
-
Page 132: Fresh Food Compartment Ice Maker (Finger Evaporator)
Component Teardown Fresh Food Compartment Refrigerated Ice Maker Finger Evaporator Ice Maker Control Cover Removal To service the ice maker control board, unplug unit Electrical Screw from wall outlet. Remove the two screws securing the Connections Holes cover to the rear of the unit. (See Figure 6-76) With the screws removed, the cover containing the board can now be removed to gain access to the ice maker electronic control. -
Page 133: Ice Maker Left And Right Mold Switch
Component Teardown Ice Maker Left and Right Mold Switch Removal Freeze Switch Fill Switch To replace the left freeze, and right fill mold switches: Unplug unit from wall outlet. Remove the ice bin housing. Disconnect the wire leads from the switch terminals. Extract the single mounting screw. -
Page 134: Ice Maker Side Plate
Component Teardown Ice Maker Side Plate Removal EEV Assembly To replace the ice maker side plate, remove the seven (7) screws shown in Figure 6-81. Carefully slide the cover out, paying special attention to the back portion aroung the EEV assembly and the copper tubing. Removal of Ice Mold, Heater and Defrost Remove Screws Limiter for Finger Evaporator... -
Page 135: Ice Maker Defrost Heater
Component Teardown Ice Maker Defrost Heater Removal Retaining Clip To replace the defrost heater on the fin and tube evaporator: Cover 1. Unplug unit from wall outlet. Remove the ice bin housing. Remove Screws 2. Remove the cover by pushing down on the retaining clip at the top. -
Page 136: Dispenser Auger Motor & Solenoid Assembly
Component Teardown Dispenser Auger Motor & Solenoid Assembly Removal The dispenser auger motor and solenoid assembly are Auger Drive mounted in the back of the fresh food compartment ice Remove maker behind the ice bucket. The motor and solenoid Screws Remove mounting screws are located on the front of the auger Screws... -
Page 137: Ice Maker Evaporator Fan Motor & Defrost Limit Thermostat
Component Teardown Ice Maker Evaporator Fan Motor & Defrost Limit Thermostat Removal Back Retaining To replace the evaporator fan motor or the defrost limit Wall of Latch thermostat for the ice maker fin and tube evaporator: Cabinet 1. Unplug unit from wall outlet. Remove the ice bin housing and side plate. -
Page 138: Ice Auger And Crusher Assembly
Component Teardown Ice Auger and Crusher Assembly Removal Remove Screws To remove the ice auger & crusher assembly: 1. Extract the four screws securing the ice container front to ice container. (See Figure 6-91) 2. Remove E-ring and washer on front of crusher housing. - Page 139 Component Teardown Freezer Compartment Ice Maker Ice Maker and Mounting Plate To remove the ice maker: Disconnect refrigerator from electrical supply. Remove the freezer door. Remove freezer section baskets. Screws Remove ice maker air duct. Disconnect ice maker from wire harness connection. Figure 6-95.
- Page 140 Component Teardown Ice Stripper Removal Motor Removal To remove the ice stripper: To remove the motor: Disconnect refrigerator from electrical supply. Disconnect refrigerator from electrical supply. Remove the ice maker from freezer compartment. Remove the ice maker from freezer compartment. Remove mounting bracket.
- Page 141 Component Teardown Figure 6-99. Ice Maker Thermostat Removal Thermal Cut-Out (TCO) Removal To remove the thermal cut-out (TCO): To remove the ice maker thermostat: Disconnect refrigerator from electrical supply. Disconnect refrigerator from electrical supply. Remove the ice maker from freezer compartment. Remove the ice maker from freezer compartment.
-
Page 142: Freezer Ice Maker
Component Teardown Mold Heater Removal Compressor Area Components To remove the mold heater: Water Valve Removal Disconnect refrigerator from electrical supply. The water valve is secured to the rear of the unit with Remove the ice maker from freezer compartment. two bolts to the lower right cabinet frame. - Page 143 Component Teardown Compressor Area Mounting Tray To access the compressor and inverter, condenser Ground and fan assembly, or to service the sealed system, it Screws Power Cord may require that the compressor area mounting tray be Inverter removed from the bottom of the unit. The mounting tray Screw is secured with four #2 square bit screws to the bottom of the unit and two screws to the lower rear corners of...
- Page 144 Component Teardown 6-38...
-
Page 145: Section 7 Sealed System
Sealed System The purpose of this section is to give the service technician an understanding of the changes in refriger- ants and sealed system service. Persons attempting to use this service manual to make repairs to sealed system refrigeration systems should have electrical training as well as training in sealed system repairs. The person making the repairs must know and understand all laws (Local and International) governing handling of all refrigerants. -
Page 146: Safe Servicing Practices For All Appliances
Sealed System Safe Servicing Practices For All Appliances Avoid personal injury and/or property damage by observing important Safe Servicing Practices. Following are some limited examples of safe practices: 1. DO NOT attempt a product repair if you have any doubts as to your ability to complete the repair in a safe and satisfactory manner. -
Page 147: Introduction
Sealed System Introduction Products using R-134a refrigerant will have a different heat exchanger than a R-12 product. The difference is This Service manual is intended as a guide for in the capillary tub, it will be longer to maintain a similar introducing the service technician to R-134a refrigerant, flow rate. -
Page 148: Definitions
Sealed System Definitions Recovery: To remove refrigerant in any condition from a system and store it in an external container without necessarily testing or processing it in any way. Recycling: To clean refrigerant for reuse by oil separation and sin- gle or multiple passes through devices, such as replace- able core filter-driers, which reduce moisture, acidity and particulate matter. -
Page 149: Charging Sealed Systems
Sealed System Charging Sealed Systems Overcharging a refrigeration system with refrigerant can WEAR APPROVED SAFETY GLASSES WHEN be dangerous. If the overcharge is sufficient to immerse WORKING WITH OR ON ANY PRESSURIZED the major parts of the motor and compressor in liquid SYSTEM OR EQUIPMENT. -
Page 150: Basic Components
Sealed System Basic Components The basic components of a refrigerator are a compressor, condenser, evaporator, heat exchanger (capillary tube and suction line), drier and perimeter hot tube. Perimeter Hot Tube To reduce the possibility of condensation forming on the exterior of the cabinet in high humidity areas, a perimeter hot tube (refrigerant tube) has been installed in the unit. -
Page 151: Recovering Refrigerant
Sealed System To recover the refrigerant: Recovering Refrigerant Recovering refrigerant is the first step in preventive maintenance or repair of equipment. Simply put, Before entering the sealed system of a French recovery means transferring the system’s refrigerant into Door Bottom Freezer Refrigerator, the service a refillable refrigerant cylinder. -
Page 152: Low/High Side Leak Or Undercharge
Sealed System Low/High Side Leak or Testing for Refrigerant Leaks Undercharge A loss of refrigerant can result in any of the The line piercing valve (clamp-on type) should be following: used for test purposes only. It must be removed Excessive or continuous compressor operation. from system after it has served its purpose. -
Page 153: Compressor Replacement
Sealed System NEVER PRESSURIZE WITH OXYGEN. NEVER Use extreme care when using Dry Nitrogen to flush OPEN A HIGH PRESSURE TANK UNLESS IT IS systems. Pressure in nitrogen cylinder could be EQUIPPED WITH A PRESSURE REGULATOR. as high as 2000 psi. Nitrogen cylinder must be NEVER PUT HIGH PRESSURE ON THE DOME OF equipped with approved pressure regulator and THE COMPRESSOR - IT MIGHT EXPLODE. -
Page 154: Installing A New Compressor
Sealed System Installing a New Compressor DO NOT OPERATE RECIPROCATING COMPRES- SORS WHEN CHARGING LIQUID REFRIGERANT Entirely new compressors have been developed INTO SYSTEM THROUGH ITS PROCESS TUBE. for use with R-134a and Ester oil refrigeration systems. Both compressor and electric motor To replace the compressor: have been modified. -
Page 155: Freezer Evaporator And Suction Line Replacement
Sealed System Release holding charge (release slowly to avoid oil of the freezer and is secured to the liner by screws discharge) on new compressor to ensure there is through the end plate on each side. Foam seals are no leak in seam or tubing. Reinstall rubber plug. located on each end plate to ensure proper air flow through the evaporator. - Page 156 Sealed System 9. Cut a small “X” in heat shield, then slide cap tube Cut Cap Tube Here and suction line through hole. Pack heat shield in back corner of liner. (See Figure 7-8 ) NOTE: You may need to use a small pair of vise-grips on the suction line to help hold the heat shield in place.
-
Page 157: Freezer Heat Exchanger Replacement (Finger Im Evap.)
Sealed System Freezer Heat Exchanger Replacement Cut Cap Tube At Liner Finger Evaporator Ice Maker Models. Recover refrigerant from sealed system. Disconnect wiring harness at liner plug. Remove defrost limiter and disconnect defrost heater. Remove fan motor and wiring. Cut Suction Tube At Liner Cut heat exchanger off flush with liner. - Page 158 Sealed System 15. Allow product to run and make sure refrigerant is circulating. Reinstall evaporator cover and machine Electrical compartment cover. Connection Ice Maker Heat Exchanger Replacement Finger Evaporator Ice Maker Models Cut Apart Here Figure 7-10. Always use the TORCH GUARD heat shield part number 5304418872, behind evaporator before To remove the icemaker evaporator assembly: attempting to solder.
- Page 159 Sealed System Using a 1/2” drill bit, open hole drilled in Step 8 to Freezer Heat Exchanger 1/2” from back of product. Replacement Flex Tray Ice Maker 10. Remove stubs of old heat exchanger from evaporator and install new heat exchanger into Models.
- Page 160 Sealed System 16. Seal both the hole on the suction line and the cap Ice Maker Evaporator Assembly tube on the inside and outside of cabinet using per- Replacement magum. 17. Roll the excess heat exchanger up in the machine Flex Tray Ice Maker Models compartment behind the compressor.
- Page 161 Sealed System 10. Remove stubs of old Jumper tube from Ice Maker Jumper Tube Replacement evaporator and install new heat exchanger into evaporator. Flex Tray Ice Maker Models 11. Push jumper tube through hole in cabinet. and connect jumper tube to ice maker evaporator. 12.
-
Page 162: Condenser Replacement
Sealed System Condenser Replacement Filter-Drier Replacement The filter-drier is located in the compressor area on the To replace the compressor: left side of the compressor. (See Figure 7-14) Pull unit from its installation position and unplug When the sealed system is opened and the refrigerant from wall outlet. -
Page 163: Filter-Drier Installation
Sealed System Liquid Line Here DO NOT unbraze old filter-drier from system. This To Freezer will vaporize and drive moisture from desiccant back into system. The old filter-drier should be cut out of system. 4. Using a 3 cornered file, score a groove around capillary tubes as close to old filter-drier as possible. -
Page 164: Perimeter Hot Tube Repair Kit
Sealed System Perimeter Hot Tube Repair Kit Step 2 - Installing the Heater Wire Attach Vacuum Pump and Gauge Set to one end Effective July 1, 1992, Section 608 of the Clean Air Act of perimeter hot tube with the adapter and plastic prohibits individuals from knowingly venting ozone sleeve. -
Page 165: Installing Evacuation And Recharging Equipment
Sealed System Step 3 - Heater Wire Electrical Connection Low Voltage Black For PTC or Solid State Compressors: Low Voltage Remove wires (with terminals) from compressor starter/overload. On some models you will need to depress locking tabs located in relay housing. Install harness adapter into refrigerator circuit as shown in Figure 7-19. -
Page 166: Evacuating The System
Sealed System Operate vacuum pump for 30 minutes to a minimum Evacuating the System of 29.5 inches of vacuum or until a vacuum of 600 To achieve the required levels of evacuation, a properly microns is obtained. maintained two stage vacuum pump in good condition Close the manifold valve connected to the vacuum is required. - Page 167 Sealed System Jumper Tube Outlet Ice Maker Evaporator to Inlet Freezer Evaporator Ev aporator Ice Ma ker Compound Pressure Gaug e Gaug e Hot Tube Gaug e Cap Tube Mani fold T-Fitting Ice Ma ke r Hand Shutof f Ev aporator Va lve Fr eez er Ev aporator...
-
Page 168: Charging The System
Sealed System When satisfied unit is operating correctly, clamp Charging The System the process tube with pinch-off tool with the unit still running. Using a tubing cutter, cut the process tube about 2 inches from the pinch-off tool. Use Check the serial plate for the correct refrigerant Sil-fos solder and solder process tube closed. -
Page 169: Vacuum Pump Maintenance
Sealed System Vacuum Pump Maintenance VA CUUM CHA RT It is absolutely essential to maintain your vacuum pump Vacuum Bo iling Po int Microns Inches Hg. of Wa ter ˚F according to the manufacturer’s instructions, includ- ing required oil changes at the recommended intervals. 28. -
Page 170: Service Diagnostic Tips
Sealed System Service Diagnostic Tips Refrigerator and Freezer Air Temperatures Temperatures are affected by improper door seal, frost A prime requisite on the initial contact is: Always allow accumulation on the evaporator, service load, ambient the customer to explain the problem. Many times the temperature, percent of relative humidity, thermostat trouble can be diagnosed more quickly, based on the calibration (cut-in and cut-out), location of evaporator fan... -
Page 171: Hfc 134A Comparison With Cfc 12
Sealed System HFC 134a COMPARISON WITH CFC 12 HFC 134a (1,1,1,2-tetrafluoroethane) is being studied as part of the PAFT I programme sector, which began in December 1987. It is a prime candidate for the replacement of CFC 12 (dichlorodifluoromethane) in refrigeration and air conditioning systems, medical aerosols, and in certain foam blowing applications. -
Page 172: Refrigerant Leaks
Sealed System Refrigerant Leaks Spills or Leaks A system with R-134a and Ester oil will become If a large release of vapor occurs, such as from a large saturated with moisture much faster than a system with spill or leak, the vapors may concentrate near the floor R-12 and mineral oil. -
Page 173: Combustibility Of Hfc-134A
Sealed System Combustibility of HFC-134a Filling and Charging Operations HFC-134a is nonflammable at ambient temperatures • Before evacuating cylinders or refrigeration and atmospheric pressure. However, tests have shown equipment, any remaining refrigerant should be HFC-134a to be combustible at pressures as low as 5.5 removed by recovery system. -
Page 174: R-134A Physical Properties
Sealed System R-134a Physical Properties: R-134a - Tetrafluoroethane Refrigerant of choice in automotive industry. Genetron134a replaces CFC12 for air conditioning and refrigeration systems in commercial residential and industrial applications. R-12 - Dichlorodifluoromethane A versatile and widely used refrigerant. Common in reciprocating and rotary type equipment. For all types of appli- cations, household to industrial. -
Page 175: Hfc-134A, Cfc-12 Pressure Temperature Chart
Sealed System HFC-134a, CFC-12 Pressure Temperature Chart ˚F ˚C HF C- 134a CF C- 12 ˚F ˚C HF C- 134a CF C- 12 -51. 1 21. 8* 19. 0* 12. 8 51. 1 52. 0 -48. 3 20. 4* 17. 3* 15. - Page 176 Sealed System CFCs Chlorofluorocarbons (CFCs) are compounds consisting of chlorine, fluorine, and carbon atoms which are very stable in the troposphere. They are degraded only in the stratosphere by the sun’s radiation where released chlorine may contribute to ozone depletion. They can persist in the troposphere for a hundred years or longer. Fluorocarbons These chemical compounds include CFCs, hydrochlorofluorocarbons (HCFCs), and hydrofluorocarbons (HFCs).
- Page 177 Sealed System HCFCs Hydrochlorofluorocarbons (HCFCs) are compounds comprised of hydrogen, chlorine, fluorine, and carbon atoms. These compounds have many of the useful properties of CFCs, but are destroyed naturally in the lower atmosphere and do not persist to the same extent as CFCs. Only a fraction of HCFCs emitted can be transported to the ozone layer in the stratosphere where their chlorine could deplete ozone.
- Page 178 Sealed System 7-34...
-
Page 179: Section 8 Air Circulation
Air Circulation Principles Of Automatic Defrost The air circulating fan is a 12 V DC fan motor that operates any time the food compartment or the freezer Operation compartment calls for cooling. During the defrost period, the compressor and circulating fan do not operate. The Automatic defrost refrigerators operate on the principle power board, located under the freezer behind the grill, that moisture or frost transfers or migrates to the coldest... - Page 180 Air Circulation...
-
Page 181: Section 9 Wiring Schematics
Wiring Schematics Dispenser Models with Flex Tray Fresh Food Ice Maker... - Page 182 Wiring Schematics Dispenser Models with Finger Evaporator Fresh Food Ice Maker...
- Page 183 Wiring Schematics Non-Dispenser Models...
- Page 184 Wiring Schematics...
- Page 185 Wiring Schematics Dispenser Model with Flex Tray Fresh Food Compartment Ice Maker 242121001...
- Page 186 Wiring Schematics Dispenser Model with Finger Evaporator Fresh Food Ice Maker 242058901...
- Page 187 Wiring Schematics Non-Dispenser Model See page 9-3 for ERF 2500++ Control Schematic 242107201...
Need help?
Do you have a question about the LGUB2642LF2 and is the answer not in the manual?
Questions and answers