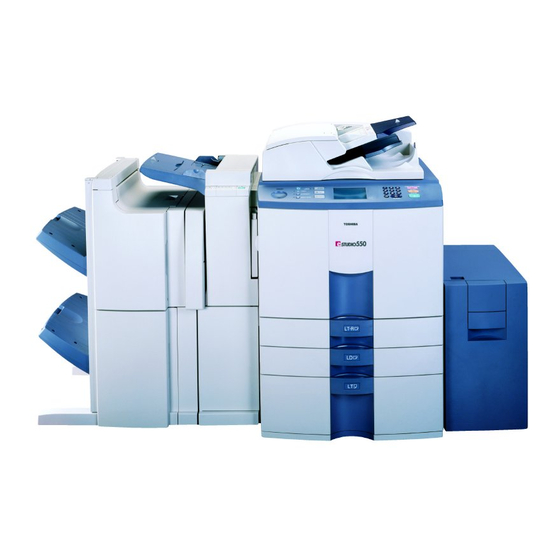
Toshiba e-studio550 Operator's Manual
Digital plain paper copier copying functions
Hide thumbs
Also See for e-studio550:
- Service manual (346 pages) ,
- Service handbook (314 pages) ,
- Operator's manual (148 pages)
Table of Contents
Advertisement
Quick Links
Advertisement
Table of Contents

Related Manuals for Toshiba e-studio550


Summary of Contents for Toshiba e-studio550
- Page 2 WARNING: Changes or modification made to this equipment, not expressly approved by Toshiba TEC or parties authorized by Toshiba TEC, could void the user’s authority to operate the equipment.
- Page 3 'Off Mode' Default Time- The default time for the 'Off Mode' is 90 minutes. 'Automatic Energy Save'- The copier consumes less than 216 watts (e-STUDIO550)/ 255 watts (e-STUDIO650)/ 316 watts (e- STUDIO810) while in Energy Save Mode. 'Automatic Energy Save' Default Time- The default time before switching to 'Automatic Energy Save Mode' is 15 minutes.
-
Page 4: Toshiba Quality Is Second To None
From the beginning Toshiba supplies and machines were made for each other. Whenever Toshiba designs a new machine, it also designs a new toner that is made just for that machine. By using Genuine Toshiba supplies with Toshiba copiers you guarantee optimum performance. - Page 5 Cost Advantage Genuine Toshiba toner is mean value. They are designed to use only the proper amount of toner enabling the machine to continue to operate until all the toner has been used. In this way you get the full value of the toner.
-
Page 6: Preface
Operator’s Manual should be readily available for future reference. To ensure correct and safe use of the Toshiba Digital Copier e-STUDIO550/650/810, this Operator’s Manual describes safety precautions according to the following three levels of warning: Before reading this Operator’s Manual, you should fully understand the meaning and importance of these... -
Page 7: Features Of The E-Studio550/650/810
The e-STUDIO550/650/810 also has the following convenient features, functions and options. The copying speed is 55 copies (A4) per minute for the e-STUDIO550, 65 copies (A4) per minute for the e-STUDIO650 and 81 copies (A4) per minute for the e-STUDIO810. -
Page 8: Table Of Contents
TABLE OF CONTENTS Toshiba quality is second to none ......................1 Preface ..............................3 Features of the e-STUDIO550/650/810 ....................4 Table of contents ..........................5 Disclaimer notice ..........................8 Precautions ............................9 1. Installation ............................9 2. General precautions ........................10 1. -
Page 9: Table Of Contents
TABLE OF CONTENTS (Cont.) 4.Using the editing functions ......................4-1 1. Image shift ............................. 4-2 2. Edge erase ............................ 4-4 3. Dual-page ............................4-5 4. X-Y zoom ............................4-7 5. Image editing ..........................4-8 - Trimming/Masking ........................4-8 - Mirror image ..........................4-10 - Negative/Positive reversal ...................... - Page 10 8. Call service symbol/Periodic maintenance message ..............7-28 8.Maintenance ............................. 8-1 1. Daily inspection ..........................8-2 2. Simple troubleshooting ........................8-3 9.Specifications & Options ........................ 9-1 1. e-STUDIO550/650/810 specifications ................... 9-2 2. Specifications of options ....................... 9-4 3. Packing list ........................... 9-6 4. Index ............................9-7...
-
Page 11: Disclaimer Notice
2. All warranties, conditions and other terms implied by law are, to the fullest extent permitted by law, excluded and no such implied warranties are given or apply in relation to the Products. 3. TOSHIBA TEC CORPORATION shall not be liable for any loss, cost, expense, claim or damage whatsoever caused by any of the following: (a) use or handling of the Product otherwise than in accordance with the manuals, including but not limited to Operator's Manual, Users' Guide, and/or incorrect or careless handling or use of the Product;... -
Page 12: Precautions
Never ground it to a gas pipe, a water pipe, or any other object not suitable for grounding. After a suitable place has been selected for installation of the e-STUDIO550/650/810, please do not change it. Avoid excessive heat, dust, vibration and direct sunlight. -
Page 13: General Precautions
• If any part of this copier is damaged, or if it has been dropped. • If the copier has been exposed to rain or liquid. It is recommended that only supplies made or designated by Toshiba be used for the e-STUDIO550/650/810 in order to optimize copy quality. All supplies should be stored in a cool, dry area. - Page 14 Explanatory Label > < CLASS 1 LASER PRODUCT APPAREIL A LASER DE CLASSE 1 LASER KLASSE 1 PRODUCTO DE LASER DE CLASE 1 Warning Label > < Warning for high temperature areas...
- Page 15 PRECAUTIONS (Cont.) 2. General Precautions (Cont.) Fixing the adjusters (stoppers) There are four adjusters (stoppers) located in front and rear bottom (two adjusters each) of the copier. After moving/ installing the copier, be sure to turn the adjusters clockwise to fix them firmly on the ground. *To unlock the adjusters when moving the copier, turn them anticlockwise.
-
Page 16: Before Making Copies
1. BEFORE MAKING COPIES 1. Description of the digital copier and the optional equipment ...... - Main components ..................1-2 - Optional equipment ..................1-3 - Control panel ....................1-4 - Touch panel ....................1-6 2. Turning ON the power switch ............. - Turning ON the Power Switch/Auto Job Start .......... -
Page 17: Description Of The Digital Copier And The Optional Equipment
1. DESCRIPTION OF THE DIGITAL COPIER AND THE OPTIONAL EQUIPMENT Main Components Original scales Original glass Control panel Bypass Cover Key copy counter slot Bypass guide Drawers Feed side cover Paper size indicator Tandem LCF (Large Capacity Feeder) Reversing automatic document feeder Operator’s manual pocket Touch Panel Contrast Adjustment Volume (Back side) -
Page 18: Optional Equipment
Key copy counter Records (or accumulates) the number of copies made by each person or group separately. External LCF ( Large Capacity Feeder) Feeds up to 3750 sheets of A4-sized paper (80g/m )(recommended by Toshiba) continuously. Optional Equipment Configuration Finisher Inserter... -
Page 19: Control Panel
1. DESCRIPTION OF THE DIGITAL COPIER AND THE OPTIONAL EQUIPMENT (Cont.) Control Panel Total Counter Shows the total of copied paper since the set up of the copier. HELP key When this key is pressed, the appropriate operation procedures are displayed. PRINTER/NETWORK key Press this key to switch between the printer and the network (optional) functions. - Page 20 FUNCTION CLEAR key When this key is pressed, all selected copy modes are cleared to default settings. Page 2-2 * Automatic Function Clear Right bottom of this page STOP key Use this key to stop an ongoing scan and copy operation. Page 2-15 START key Press this key to start copying.
-
Page 21: Touch Panel
1. DESCRIPTION OF THE DIGITAL COPIER AND THE OPTIONAL EQUIPMENT (Cont.) Touch Panel When the power is turned on, and ‘READY ’ is displayed, the following basic screen is shown on the touch panel. On the screen, currently set functions, selected functions and the copier status are shown using messages and illustrations. - Page 22 - SETTINGS (set functions confirmation) key This key allows you to confirm the functions that have been set. (The display shown on the right is an example.) The icons displayed on the screen are as follows(some icons may not appear on the screen): Clearing the Functions Selected If you press any key that is half-tone shaded, the function selected is cleared.
-
Page 23: Turning On The Power Switch
- This message appears on the message panel of the Basic Screen: Wait Warming Up - Time of warming up e-STUDIO550/650/810: Approx. 160 seconds When “READY” appears, the copier is ready for copying. Auto Job Start While the copier is warming up, place the original on the glass, select the desired copy modes and press the START key. -
Page 24: Controlling The Use Of The Copier With Department Codes
Controlling the Use of the Copier with Department Codes With the use of department codes, you can restrict copier users as well as manage copy volumes made by individual groups or departments of your company. * Registering, changing and deleting a department code Page 5-21 * The department codes and the key copy counters ( Page 1-10) cannot be used together. -
Page 25: Controlling The Use Of The Copier With The Optional Key Copy Counters
2. TURNING ON THE POWER SWITCH (Cont.) Controlling the Use of the Copier with the Optional Key Copy Counters When the optional key copy counter is available, you can only make copies by inserting your key copy counter. When you make copies with your key copy counter inserted, the number of copies made is recorded (or added up) in your counter. -
Page 26: How To Make Copies
2. HOW TO MAKE COPIES 1. General copying procedures ............. 2. Setting copy paper..............- Acceptable copy paper types and sizes ............. 2-4 - Handling and sorting paper ................. 2-5 - Changing the paper size of the drawer / Setting the drawer for special uses ....2-6 3. -
Page 27: General Copying Procedures
1. GENERAL COPYING PROCEDURES After placing, or confirming that there is, paper in the drawers, place the originals. When the START key is pressed with any settings unchanged, copies are made in the initial (default) settings * . You can make copies as desired by setting different copy modes. - Page 28 Once the final original has been scanned, press the FINISHED key. - When the reversing automatic document feeder is used, and the single-feed mode is selected, the procedure is slightly different from the above. Procedure of using the single-feed mode Page 5-3 - After starting copying, press the JOB STATUS key on the control panel, then press the STATUS key on the touch panel to indicate which drawer is in use.
-
Page 29: Setting Copy Paper
- The available paper sizes are specified for hole punch. Ask your service technician for details. - “Maximum capacity” refers to the number of sheets when the paper recommended by Toshiba is set. HOW TO MAKE COPIES... -
Page 30: Handling And Storing Paper
Handling and Storing Paper Pay attention to the following points: - Avoid using paper that is specially treated or paper that was printed on another machine, and also avoid performing double copying on the same side of paper; this may cause a malfunction. - Do not use paper with creases, wrinkles, curled paper, paper prone to curling, smooth paper, or tough paper;... -
Page 31: Changing The Paper Size Of The Drawer/Setting The Drawer For Special Uses
2. SETTING COPY PAPER (Cont.) Changing the Paper Size of the Drawer/Setting the Drawer for Special Uses The paper size of the drawers of the copier can be changed to desired size. The drawers can also be set for cover sheet, insertion, tab paper, thick paper and special sheets. Changing the Paper Size of the Drawer Pull out the drawer toward you. - Page 32 Press the JOB STATUS key on the control panel, then the CASSETTE key on the touch panel. Press the drawer key corresponding to that in which the paper size has been changed, then press the key of the paper size newly set. - Chinese paper sizes (16K, 8K and 16K-R) can be selected on the screen which appears when the Next key is pressed once.
- Page 33 2. SETTING COPY PAPER (Cont.) Changing the Paper Size of the Drawer/Setting the Drawer for Special Uses(Cont.) Press the drawer key corresponding to that in which the paper has been set, then press the key of the paper type newly set. - If you want to select the COVER , INSERT , or TAB PAPER , make sure that paper with the same size as that for the COVER, INSERT, or TAB PAPER is set in the other drawer including the...
-
Page 34: Setting Originals
3. SETTING ORIGINALS Acceptable Original Types and Sizes Sizes capable of Setting place Types of originals Maximum size automatic detection Glass Sheets Width:297mm (Standard size) Three-dimensional objects Length:432mm A/B format: A3, A4, A4-R, Books A5-R, B4, B5, B5-R, LT format: LD (11” x 17”) LG (8½”... -
Page 35: When Placing An Original On The Glass
3. SETTING ORIGINALS (Cont.) When Placing an Original on the Glass Sheet Originals When using the non sorting and non staple mode, the paper exits face up. Raising the reversing automatic document feeder, place the original face down on the glass. Align the original against the left inner corner of Original the glass. -
Page 36: When Using The Reversing Automatic Document Feeder
When Using the Reversing Automatic Document Feeder Precautions for Using the Reversing Automatic Document Feeder Do not use the following types of originals as they tend to misfeed or become damaged: (1) Badly wrinkled or folded originals; (2) Originals with carbon paper in particular, originals whose leading edge is curled may fail to be correctly fed. - Page 37 3. SETTING ORIGINALS (Cont.) When Using the Reversing Automatic Document Feeder (Cont.) In the Continuous Feed Mode Page 5-2 - Be sure to set only originals with the same width. Mixed-sized originals Page 5-4 After aligning the edges of originals well, place them face up and align the slides to the width of the originals.
-
Page 38: Auto Job Start (Job Preset)
4. AUTO JOB START (JOB PRESET) While multi-copying is in process, you can reserve the next copy. Place the original(s). Page 2-9 Select copy modes as required. Press the START key. - Up to 5 jobs including the current printing job can be stored in the memory. -
Page 39: Interrupt Copying
5. INTERRUPT COPYING While multicopying is in progress, you can interrupt it and make copies from different originals. * The following modes cannot be used with interrupt copying. - Cover sheet copying - Sheet insertion copying - Document storage - Overlay Press the INTERRUPT key. -
Page 40: Stopping The Copy Operation
6. STOPPING THE COPY OPERATION If you want to stop the operation during scanning or multicopying, use the STOP key. Stopping the Scanning of the Original Press the control panel STOP key on the operational panel during the scanning. If the screen on the right appears, press the MEMORY CLEAR key. -
Page 41: Deleting Or Changing Order Of Pending Jobs
7. DELETING OR CHANGING ORDER OF PENDING JOBS If data is waiting to be printed, you can delete them or change the printing order. Deleting the Job In the following procedure, you can delete the a multicopying operation as well. Press the JOB STATUS key on the control panel, then the JOB LIST key on the touch panel. - Page 42 Changing the Printing Order Press the JOB STATUS key on the control panel, then the JOB LIST key on the touch panel. Select the job you want to move. Press the MOVE key, then press the position where the selected job is to move to. - The job to be moved will be shifted next to new proiority.
- Page 43 2-18 HOW TO MAKE COPIES...
-
Page 44: Setting Of Basic Copy Modes
3. SETTING OF BASIC COPY MODES 1. Paper selection ................- Automatic paper selection (APS) ..............3-2 - Manual paper selection ................. 3-3 2. Reduction and enlargement copying ......... 3. Duplex copying (1-sided, 2-sided, book-type)......4. Copy density adjustment ............3-11 5. -
Page 45: Paper Selection
1. PAPER SELECTION Automatic Paper Selection (APS) When you place regular-sized originals on the glass or in the reversing automatic document feeder, the built-in sensors automatically work to detect the size of the originals, helping the copier select and copy on paper that is the same size as the original. -
Page 46: Manual Paper Selection
Manual Paper Selection It may not be possible for the device to perform Automatic Paper Selection with highly transparent originals such as OHP films and tracing paper, wholly dark originals or originals with dark borders, or irregular sized originals such as newspapers and magazines. For these types of originals, use manual paper selection. * When the desired size of paper is not set in any of the drawers, you can change the paper size of the drawer ( Page 2-6) or use the sheet bypass copying (... -
Page 47: Reduction And Enlargement Copying
2. REDUCTION AND ENLARGEMENT COPYING When placing originals on the glass, you can copy them at the reducing and enlarging rate of 25 to 400%. For the reversing automatic document feeder, you can make copy at the reducing and enlarging rate of 25 to 200%. - Page 48 Specifying both Original Size and Copy Size Place paper in the drawer(s). Page 2-4 Place the original(s). Page 2-9 Press the desired drawer, then the ZOOM··· key. - The copy paper size is selectable on the screen in step 4 as well.
- Page 49 2. REDUCTION AND ENLARGEMENT COPYING (Cont.) Using the Reduction/Enlargement Zoom Keys or One-touch Zoom Keys Place paper in the drawer(s). Page 2-4 Place the original(s). Page 2-9 Press the drawer icon representing the desired copy paper size, then press the ZOOM···· key. - The copy paper size is selectable on the screen in step 4 as well.
-
Page 50: Duplex Copying (1-Sided, 2-Sided, Book-Type)
3. DUPLEX COPYING (1-SIDED, 2-SIDED, BOOK-TYPE) This function allows you to set the type of originals (1-sided, 2-sided or book-type) and the desired type of copying (1-sided or 2-sided). Original Copy -12- -15- -12- -13- -13- -15- can not be used by OHP film. - Page 51 3. DUPLEX COPYING (1-SIDED, 2-SIDED, BOOK-TYPE) (Cont.) Place paper in the drawer(s). Page 2-4 - When using the mode of 1-Sided Originals to 2-Sided Copies and 2-Sided Originals to 2-Sided Copies in bypass copying, be sure to specify the paper size. Page 5-10, 5-11 Place the original(s).
- Page 52 Press the BOOK 2 key. Select the book copying type. - Press the RIGHT RIGHT key if copying should start at a right-hand page and end at a right-hand page. By the same token, you can choose from among the RIGHT LEFT , LEFT LEFT and LEFT...
- Page 53 3. DUPLEX COPYING (1-SIDED, 2-SIDED, BOOK-TYPE) (Cont.) Turn to the next page, set the book again and press START key. - Repeat the procedure above until all your originals have been scanned. After all your originals have been scanned, press the FINISHED key.
-
Page 54: Copy Density Adjustment
4. COPY DENSITY ADJUSTMENT There are two types of image density adjustments: automatic mode (default setting) and manual mode. In the automatic mode, the sensors automatically detect the density of each original and select the optimum image density. In the manual mode, you can select the desired level of image density. It is recommended that lighter-density original be coped in the manual copy density mode. - Page 55 4. COPY DENSITY ADJUSTMENT (Cont.) Manual Copy Density Mode Place paper in the drawer(s). Page 2-4 Place the original(s). Page 2-9 Press AUTO on the basic screen. Press either key to adjust the copy density to the desired level. - Each time you press the key, your copies will become lighter or darker, respectively.
-
Page 56: Selecting Original Mode
5. SELECTING ORIGINAL MODE According to the type of your originals, you can choose among the three image types: Photo, Text or Text/ Photo (default setting). The Photo mode is suitable for copying photo originals whereas the Text mode is preferable for copying originals containing text only (or text and line artwork only). -
Page 57: Quick Access Menu
6. QUICK ACCESS MENU Finishing copy and duplex modes can be performed at the same time on one display by pressing the QUICK button. The character and button sizes are enlarged, and the white characters are displayed on the black background in order that you can easily operate the copier. Place paper in the drawer(s). -
Page 58: Using The Editing Functions
4. USING THE EDITING FUNCTIONS 1. Image shift ................2. Edge erase ................3. Dual-page ................. 4. X-Y zoom ................. 5. Image editing ................- Trimming/Masking ..................4-8 - Mirror image .................... 4-10 - Negative/Positive reversal ............... 4-11 6. 2 IN 1 / 4 IN 1................4-12 7. -
Page 59: Image Shift
1. IMAGE SHIFT A margin for binding is created by shifting the original image to either the right or left side. You can also create binding margins in the centre (inner margin) when using Book-Type Originals to 2-sided copies( Page 3-8). Providing Right or Left Margin Place paper in the drawer(s). - Page 60 Adjust the width of the binding margin, then press the SET key. - The default width of the margin is 7 mm. - To adjust the width, press the 0mm or 30mm key to select the desired number, then press the SET key. - In duplex copying, margins on the back are created on the other side of those in the front.
-
Page 61: Edge Erase
2. EDGE ERASE If your original has a dirty or torn edge, it may be reproduced as a black mark on the copy. In that case, use Edge Erase Copying. A white border is created along the edges of the copy, eliminating those black marks. * This function is available in only case of the standard-size original. -
Page 62: Dual-Page
3. DUAL-PAGE Utilizing this feature allows the facing pages of a book or magazine to be copied page by page onto two separate sheets of paper or duplex-copied on one sheet. There is no need to move the original on the glass. You can also place a pair of A4 (or B5, LT) sized originals side by side and copy them on separate sheets of paper. - Page 63 Place the first page(s) to be copied on the glass, and press the START key. - If you do not copy your originals from the first page, the copies will not be arranged in the same order as the original. - Centre the book on the yellow indicator line with the bottom toward you.
-
Page 64: X-Y Zoom
4. X-Y ZOOM You can make copies with different reproduction ratios set for the X (horizontal) and Y (vertical) directions, respectively. 100% 200% 100% 200% Place paper in the drawer(s). Page2-4 Place the original(s). Page2-9 Press the EDIT key to enter the edit menu, and press the XY ZOOM key. -
Page 65: Image Editing
5. IMAGE EDITING Trimming/Masking You can select an area on an original and copy it with the area trimmed (only the inside of the area copied) or masked (only the outside of the area copied). Four rectangular areas can be specified on an original. * Image editing is only possible with standard sized originals. - Page 66 Place an original on the glass to specify the area. - Set the original face up with the bottom toward you, fit its top left corner against the top left corner of the glass, and align it with the original scale. Using the original scale on the left and the inner (top) scale, read the position of the desired area as follows:...
-
Page 67: Mirror Image
5. IMAGE EDITING (Cont.) Mirror Image Copies are made with images completely reversed in terms of right and left. Place paper in the drawer(s). Page 2-4 - When using this mode in bypass copying, be sure to specify the paper size. Page 5-10, 5-11 Place the original(s). -
Page 68: Negative/Positive Reversal
Negative/Positive Reversal The white area of originals copying black, and the black area of originals copying white. Place paper in the drawer(s). Page 2-4 Place the original(s). Page 2-9 Press the EDIT key to enter the edit menu, and press the EDITING key. Press the NEG/POS key. -
Page 69: In 1 /4 In 1
6. 2 IN 1 / 4 IN 1 This feature allows multiple originals to be reduced and copied onto a single sheet of which size is the same as the original. There are two modes: 2 IN 1 copying, where two originals are reduced and copied onto a single sheet, and 4 IN 1 copying, where four originals are reduced and copied onto a single sheet. - Page 70 Place paper in the drawer(s). Page 2-4 - When using this mode in bypass copying, be sure to specify the paper size. Page 5-10, 5-11 To make copies onto paper which is not the same size as originals, press the ZOOM... key to enter the right menu, and press the size you desire and the AMS key.
-
Page 71: Copying With The Annotation
7. COPYING WITH ANNOTATION Copies are made with the current date and time, at which they are made, printed on the copy. 15.11. 2002 14:54 15.11. 2002 14:54 Date and time printed at the Date and time printed at the top bottom of the portrait copy of the landscape copy Place paper in the drawer(s). -
Page 72: Page Numbering Copying
8. PAGE NUMBERING COPYING This feature allows numbers to be added at specified position to copies. Page number printed at the Page number printed at the bottom centre on the portrait copy. top right on the landscape copy. Place paper in the drawer(s). Page 2-4 Place the original(s). -
Page 73: Magazine Sort (From The Editing Menu)
9. MAGAZINE SORT (FROM THE EDITING MENU) The magazine sort mode allows 1-sided originals to be copied and sorted so that they can be folded and bound along a centre line like typical magazines or booklets. Example of copying a 12-page document •... - Page 74 Adjust the binding margin and press the SET key. - The default width of the margin is 2 mm. - To adjust the width, press the 2mm or 30mm key to select the desired number, then press the SET key. - If the optional saddle stitch finisher (MJ-1018) is installed, copies can be automatically stapled along their centre line.
-
Page 75: Cover Copying
10. COVER COPYING A top cover and/or back cover (special sheets, e.g. coloured paper) can be added to each set of copies. - Adding a blank cover - Adding a copied cover - Adding a blank cover and a blank back cover - Adding a copied cover and blank back cover Example of adding a blank cover Example of adding a copied cover... - Page 76 Press the EDIT key to enter the edit menu, and press the COVER SHEET key. - If the desired function keys are not displayed, press the Next or Pre key to change the menu screen. Select the desired cover sheet key: To add a blank top cover: TOP BLANK To add a copied top cover: TOP COPIED To add blank top and back covers: BOTH BLANK...
-
Page 77: Sheet Insertion Copying
11. SHEET INSERTION COPYING Special sheets of paper (such as coloured paper) are inserted into a set of copies at specified pages. There are two sheet Insertion modes available: - Inserting blank sheets before specified pages - Inserting copied sheets at specified pages Example of inserting a blank before the specified page Example of inserting a copied sheet... - Page 78 Press COPIED or BLANK key: To insert copied sheets at specified pages: COPIED To insert blank sheets before specified papers: BLANK Key in the desired page number (no more than 3 digits) for insertion and press the upper SET key. - On the display, the page where the first sheet will be inserted is shown.
-
Page 79: Tab Paper Mode
12. TAB PAPER MODE Tab paper copy and insertion are available. Tab Paper Copy: Copying on tab paper Tab Paper Insertion: Inserting blank tab paper prior to a selected page Tab Paper Insertion and Copy: Combination of copying on tab paper and inserting tab paper - To copy on tab paper, adjust the tab width. - Page 80 Setting Tab Paper in the Bypass Guide Align the tab paper with the original. Sheets of tab paper Originals front side 1st 2nd Place the tab paper with face up on the bypass guide. Perform step 3 and 4 on page 5-9. - Be sure to select ‘Tab Paper’...
- Page 81 12. TAB PAPER MODE(Cont.) Press the TAB EXTENSION key. Press the CASSETTE key (or the BYPASS FEED key), then adjust the tab extension (tab width) and the shift width then press the SET key. - Adjust the tab width and the shift width by means of the 0mm key and the 30mm key.
- Page 82 Tab Paper Copying Copying on tab paper at the value in the tab width set mode ( Page 4-23). Place tab paper in the drawer or the bypass guide. - For placing it in the drawer Page 4-22 - For placing it in the bypass guide Page 4-23 Place the original(s).
- Page 83 12. TAB PAPER MODE(Cont.) Tab Paper Insertion Tab paper (blank) is inserted prior to selected pages. Up to 15 sheets of tab paper can be inserted. Place tab paper in the drawer or the bypass guide. - For placing it in the drawer Page 4-22 - For placing it in the bypass guide Page 4-23...
- Page 84 Tab Paper Insertion and Copying - Copied tab paper is inserted prior to the selected pages. Up to 15 sheets of tab paper can be inserted. Place tab paper in the drawer or the bypass guide. - For placing it in the drawer Page 4-22 - For placing it in the bypass guide Page 4-23...
-
Page 85: Document Storage
13. DOCUMENT STORAGE This feature allows images of the originals to be stored on the hard disk of the copier, and copies can be made from the hard disk later. This copying method consists of the following two modes: MEMORIZE mode: Stores original images at the specified location of the hard disk. PRINT mode: Prints the originals stored in the Memorize Mode in * Originals can be stored in up to 24 locations. - Page 86 Press the START key. - The memorization process starts automatically. - To change the file name, select the ID you want to change in the list on the display, press the file name column, delete the file name already entered with the B Space key in the letter entry screen, then enter a new file name, and press the SET key.
-
Page 87: Overlay
14. OVERLAY This function stores the images that you frequently use and makes copies by overlaying on to the copied originals. - 24 different images can be stored. * The original can be overlaid with the stored image of the same size and in the same orientation. (It cannot be adjusted with reduction and enlargement.) Storing image Overlay... - Page 88 Input the file name with the screen for entering letters and press the SET key. - Entering letters Page 5-28 Press the START key. - The original starts scanning to memorize the image. The image will be stored as shown on the right. Confirming Stored Image (Test Print) Perform steps 2 and 3.
- Page 89 14. OVERLAY (Cont.) Overlaying Originals with Stored Image Place paper in the drawer(s). Page 2-4 Place the original(s). Page 2-9 Press the EDIT key to enter the edit menu, and press the OVERLAY key. - If the desired function keys are not displayed, press the Next key to change the menu screen.
-
Page 90: Sharpness Adjustment
15. SHARPNESS ADJUSTMENT This function allows you to emphasize the letters and edges of images. Place paper in the drawer(s). Page 2-4 Place the original(s). Page 2-9 Press the EDIT key to enter the edit menu,and press the SHARPNESS key. - If the desired function keys are not displayed, press the Next key to change the menu screen. -
Page 91: Direction Of Duplex Images (Rotation)
16. DIRECTION OF DUPLEX COPY IMAGES (Rotation) When lengthwise A3, A5, B4 or LD paper is copied under the mode of 1-Sided Originals to 2-Sided Copies, 2-Sided Originals to 1-Sided Copies, this function allows you to adjust the direction for ‘side-by-side’ opening. * This function is not necessary for copying in the direction of ‘vertical’... - Page 92 5. USING THE SPECIAL FUNCTIONS 1. Continuous original feeding / Single original feeding....2. Mixed-sized originals ..............3. JOB memory ................4. Bypass copying ................ - Bypass copying on standard size paper ..........5-10 - Bypass copying on non-standard size paper ........... 5-11 5.
-
Page 93: Using The Special Functions
1. CONTINUOUS ORIGINAL FEEDING / SINGLE ORIGINAL FEEDING When using the reversing automatic document feeder, you can select the continuous feed mode (default setting) where multiple (or single) originals are continuously fed in one by one, or the single-feed mode where if you insert an original, it is automatically pulled in and starts being copied. - Page 94 Single-feed Mode Place paper in the drawer(s). Page 2-4 Press the PROGRAM key to enter the programme menu, and press the ADF key. Press the SADF key. Select other copy modes as required. Place an original. Page 2-9 - The original is automatically pulled in and the screen changes as shown on the right.
-
Page 95: Mixed-Sized Originals
2. MIXED-SIZED ORIGINALS When placing the different-sized originals in the reversing automatic document feeder, you can make copies by setting MIXED-SIZED ORIGINALS. The available combination of mixed-sized originals are as follows: - A3, A4, A4-R, B4, B5 - LD, LG, LT, LT-R * The image may be copied out of position depending on the combination. -
Page 96: Job Memory
3. JOB MEMORY You can store and recall a combination of frequently used copy jobs at anytime. Up to four such combinations of job can be stored. * You cannot delete the copy modes that have already been stored in the memory, but you can rewrite new jobs on the memory key in which some copy modes have already been stored. - Page 97 3. JOB MEMORY (Cont.) Recalling a Stored Combination of Copy Job Settings to Make Copies Place paper in the drawer(s). Page 2-4 Place the original(s). Page 2-9 Press the PROGRAM key to enter the programme menu, and press the JOB MEMORY key. Press the RECALL key.
- Page 98 Confirming Stored Copy Modes To confirm the copy modes stored in the Memory Number key, perform steps 3 to 5 on the previous page, then press the SETTINGS key. - The screen on the right is an example of jobs that have been stored in “MEMORY 2”.
-
Page 99: Bypass Copying
4. BYPASS COPYING When you want to make copies on thick paper, OHP film, tab paper, tracing paper, sticker labels, use the sheet bypass. (Only thick and tab papers can be set in the drawer. Page 2-7) If the desired size of paper (standard size) is not set in any of the drawers, or if you want to make copies on non-standard size, make bypass copies. - Page 100 Place the original(s). Page 2-9 If the paper other than standard type has been set, press the PROGRAM key to enter the programme menu, and press BYPASS FEED key. - If the standard size paper has been set, you do not have to perform steps 3 to 4.
-
Page 101: Bypass Copying On Standard Size Paper
4. BYPASS COPYING(cont.) Bypass Copying on Standard Size Paper perform steps 1 to 2 on pages 5-8, 5-9. -Set the "OTHER" size key as necessary. Page 5-14 If the paper that has been set is a standard size other than A3, A4, B4, B5, you will select the OTHER key in step 2. -
Page 102: Bypass Copying On Non-Standard Size Paper
Bypass Copying on Non-Standard Size Paper The size of non-standard paper is within the following ranges: Length: 100 - 297mm Width: 148 - 432mm Perform steps 1 to 3 on page 5-10. Press the NON-STANDARD key. Key in each dimension (length and width), or recall the data stored in the MEMORY. - Page 103 4. BYPASS COPYING(cont.) Bypass Copying on Non-Standard Size Paper(cont.) Storing a Non-Standard Size in the MEMORY It is convenient if a frequently used non-standard size of paper is stored in the memory. Perform steps 1 to 3 on page 5-10. Press the NON-STANDARD key.
-
Page 104: Weekly Timer
5. WEEKLY TIMER Using the built-in weekly timer, you can have the copier automatically turned ON and OFF at specified times. For instance, you can set the timer for the starting time and closing time of your office so that the copier will automatically turn itself ON and OFF at those specified times. -
Page 105: Setting The "Other" Size Key
6. SETTING THE “OTHER” SIZE KEY When original or paper size is required to be specified and you need to specify it to ‘OTHER’ size (except for non-standard size), this function should be used. - This function allows the OTHER key on the screen on the right to recognize the size that will be used. -
Page 106: Setting The Date And Time
7. SETTING THE DATE AND TIME The clock built in to the copier can be set by entering the date, day of the week and time using the digital keys. Also, you can easily change the clock to and from the daylight saving time system at the touch of a key. -
Page 107: Setting The Automatic Energy Save Mode
8. SETTING THE AUTOMATIC ENERGY SAVE MODE This function allows the copier automatically to go into the energy saving mode (unnecessary electricity is cut off at standby) if it is left inactive for a specified period of time. ENERGY SAVER key Page 1-5 * Ask your service technician to have this function worked. -
Page 108: Setting The Automatic Off-Mode
9. SETTING THE AUTOMATIC OFF-MODE When the power of the optional printer controller is ON, the copier goes into the sleep mode which stands by with the minimum power consumption. *Ask your service technician to have this function worked. Press the PROGRAM key to enter the programme menu, and press the AUTO SHUT OFF key. -
Page 109: Switching Languages
10. SWITCHING LANGUAGES The language used on the touch panel can be changed to a different one. Press the PROGRAM key to enter the programme menu, and press the CHANGE LANGUAGES key. - If the desired function keys are not displayed, press the Next key to change the menu screen. -
Page 110: Department Codes
11. DEPARTMENT CODES You can administer the copy quantity of each group by setting a department code for each purpose (copier and printer ). Up to 150 codes can be set. *You need a master code to be registered when you use this function for the first time. Master code registration Press the PROGRAM key to enter the programme menu, and press the DEPARTMENT CODE key. - Page 111 11. DEPARTMENT CODES (Cont.) Input the master code name, and press the SET key. - Entering letters Page 5-28 Key in the desired master code (the same number) both for “NEW CODE” and for “RETYPE NEW CODE” , and press the SET key. - The master code is 5 digits (“00000”...
-
Page 112: Department Code
Key in the master code or the department code (5 digits), then press the SET key. - Registration of Department Code As shown below Input the master code for using “SET DEPARTMENT CODES ” and “RESET ALL COUNTERS”. The department code menu is displayed. - The screen when the master code is entered - The screen when the department code is entered Registration / Change / Deletion of Department Code... - Page 113 11. DEPARTMENT CODES (Cont.) Press the ENABLE key, then the SET key. Press the department number where you want to register the department code, and press the CHANGE key. Input the department name and press the SET key. - Entering letters Page 5-28 Key in the desired department code (the same number) both for “NEW CODE”...
- Page 114 Changing a Specific Department Code Press the SET DEPARTMENT CODES key in the department menu. Press the ENABLE key, then the SET key. Press the department number where you want to change the department code, and press the CHANGE key. Press the SET key.
- Page 115 11. DEPARTMENT CODES (Cont.) Input the department name you want to register, and press the SET key. - Entering letters Page 5-28 Key in the former department code for “CURRENT CODE”and the new department code both for “NEW CODE”and “RETYPE NEW CODE”, and press the lower SET key.
- Page 116 Press the department number where you want to delete the department code, and press the DELETE key. Press the YES key. - Deleting of the selected department code is completed. Clearing a Specific Department Counter Press the SET DEPARTMENT CODES key in the department code menu.
- Page 117 11. DEPARTMENT CODES (Cont.) Press the department number you want to clear the counter, and press the RESET COUNTERS key. Press the YES key. - The counter reset is completed. Disabling a Department Code Press the SET DEPARTMENT CODES key in the department code menu.
- Page 118 Print out department code *This function prints out the number of copies output for each department. Press the PRINT OUT DEPARTMENT CODES key in the department code menu. - Printing starts. Clearing All Counters This function clears all counters to “000000”. *Available only when the master code is entered.
-
Page 119: Entering Letters
12. ENTERING LETTERS The following screen is provided for entering letters. * To enter numbers, use the digital keys on the control panel. The following keys are used to enter letters. - CapsLock ....Press this key to switch capital letters and small letters. - B Space .... - Page 120 Press the E , T , I , N and G keys. Press the SET key to fix the entered letters. Correcting Entered Letters Example: Correct “Meeting” to “MEETING”. Press the B Space key to delete “eeting”. Press the CapsLock key to enter the capital letters. 5-29...
- Page 121 12. ENTERING LETTERS (cont.) Press the E , E , T , I , M and G keys. Press the key to move the cursor to (under) “G”. Press the B Space key to delete “M”. Press the N key to enter “N”, then the SET key to fix the entered characters.
- Page 122 6. SELECTING FINISHING MODES (USING THE OPTIONAL FINISHERS AND THE INSERTER) 1. Finishing modes and finishers (optional) ........2. Sort/group copying ..............3. Staple sorting (optional) ............4. Magazine sort & saddle stitch mode (booklet mode) (optional) ..5. Hole punch mode (optional) ............6.
-
Page 123: Selecting Finishing Modes (Using The Optional Finishers And The Inserter)
1. FINISHING MODES AND FINISHERS (OPTIONAL) There are 2 types of optional finishers (MJ-1017 and MJ-1018). Functions available differ depending on whether a finisher is installed and which type of finisher it is. - Press the key on the basic screen on the right (shaded), and confirm the finishing modes on the panel. -
Page 124: Sort/Group Copying
2. SORT/GROUP COPYING To make multiple copies, you can select the sort mode or group mode as necessary. The paper sizes available for sort/group copying are A3, A4, A4-R, B4, B5, FOLIO, LD, LG, LT, LT-R and COMP. Example of making 5 sets of copies from 5-page originals - Sort copying - Group copying Place paper in the drawer(s). -
Page 125: Staple Sorting (Optional)
3. STAPLE SORTING (OPTIONAL) When the optional finisher is installed, you can use the function that performs automatic stapling at one of the following three positions. * The paper weight should be in the range of 60g/m - 105g/m Special paper such as OHP films or labels is excluded. * Stapling cannot be worked when the papers with different width are mixed. - Page 126 Press the key on the basic screen as shown on the right (shaded). Press the SINGLE STAPLE-1 (or DOUBLE STAPLE , SINGLE STAPLE-2 ) key. Select other copy modes as required. Press the START key. - If the paper quantity exceeds the maximum number of sheets that can be stapled, the finisher automatically enters the sort mode.
-
Page 127: Magazine Sort & Saddle Stitch Mode (Booklet Mode) (Optional)
4. MAGAZINE SORT & SADDLE STITCH MODE (BOOKLET MODE) When the Magazine Sort mode is selected, 1-sided originals can be copied and bound like magazines or booklets. When a finisher with a saddle stitch (optional, MJ-1018) is installed, you can select the saddle stitch mode which will automatically staple in the centre of the document. - Page 128 Press the key on the basic screen as shown on the right (shaded). Press the MAGAZINE SORT ( or MAGAZINE SORT & SADDLE STITCH or SADDLE STITCH ) key. -If the desired function keys are not displayed press the Next key to change the menu screen.
-
Page 129: Hole Punch Mode (Optional)
5. HOLE PUNCH MODE (OPTIONAL) With the optional hole punch unit attached to the optional finisher (MJ-1017, MJ-1018), you can have your copies punched with holes. * The paper weight should be in the range of 64 - 256 g/m . -
Page 130: Inserter Mode (Optional)
), Thick paper (more than 80 - 256g/m ), Recycled paper, Special paper (OHP film, Color paper, Hole punch paper, etc.) (Ask your authorized Toshiba dealer for the details of acceptable special papers.) Maximum 60 - 80g/m : 100 sheets... -
Page 131: Setting The Inserter
6. INSERTER MODE (OPTIONAL)(Cont.) Setting the Inserter Blank paper placed in the optional inserter can be inserted into the pages you desire (including the front and back cover). - When placing the paper for the initial (default) setting (A3 and plain paper for the initial setting of the copier at the time of installation), the procedures from step 5 to 8 are not necessary. - Page 132 Press the key of the paper size placed in the inserter. Press the MEDIA TYPE key. - For plain paper, skip step 7 and step 8 because these procedures are not necessary. Press the key of the paper size placed in the inserter, then press the RETURN key.
- Page 133 6. INSERTER MODE (OPTIONAL)(Cont.) Setting the Inserter (Cont.) Sheet Insertion Insertion of a blank sheet prior to the selected page Press the SHEET INSERT key. Key in the page number where you wish to insert the sheet, and press the upper SET key. - When two or more sheets are inserted, repeat this procedure.
-
Page 134: Using Only Staple And Hole Punch
Using only Staple and Hole Punch When installing the optional inserter, you can use only the finishing mode (staple and hole punch). In that case, set it with the control panel on the inserter side. Place paper in the inserter (optional) . Page 6-9 - In this condition, the start lamp lights in green. - Page 135 6-14 SELECTING FINISHING MODES...
- Page 136 7. WHEN THE GRAPHIC SYMBOLS FLASH ON THE TOUCH PANEL 1. Description of the flashing graphic symbols ......2. Add paper symbol ..............- Adding paper to the drawers ..............7-3 - Adding paper to the Tandem LCF (Large Capacity Feeder) ....... 7-4 - Adding paper to the External LCF (Large Capacity Feeder)(optional) ..
-
Page 137: Description Of The Flashing Graphic Symbols
1. DESCRIPTION OF THE FLASHING GRAPHIC SYMBOLS The graphic display on the touch panel shows the status of the copier. When one of the graphic symbols flashes, take the appropriate action referring to the page shown. When one of the graphic symbols flashes, press the HELP key to display the guidance. -
Page 138: Add Paper Symbol
2. ADD PAPER SYMBOL Adding Paper to the Drawers When the paper supply in the selected drawer or Tandem LCF (Large Capacity Feeder) runs out, the drawer or External LCF (Large Capacity Feeder)(optional) shown on the display flashes, and the following message appears: Add paper Add paper as follows. -
Page 139: Adding Paper To The Tandem Lcf (Large Capacity Feeder)
2. ADD PAPER SYMBOL (Cont.) Adding Paper to the Tandem LCF (Large Capacity Feeder) Pull the tandem LCF out carefully until it comes to a stop. - Be careful not to touch the drawer slide rail. Open some packages of paper, take out entire reams of paper and set them aligned in tray and tray - When setting the paper, set the paper for... -
Page 140: Adding Paper To The External Lcf (Large Capacity Feeder)(Optional)
Adding Paper to the External LCF (Large Capacity Feeder)(optional) Pull the external LCF out carefully until it comes to a stop. - Be careful not to touch the drawer slide rail. Slide rail Place the paper on the elevator tray. - Place the paper face up. - Page 141 This message will appear on the sceen. Here at Toshiba dependable high quality image output is what we do. By using genuine Toshiba toner you can ensure that you are not only receiving quality output but also output that is friendly to mother earth and human beings.
- Page 142 Rotate the left end of the holder, then pull out the empty toner cartridge with both hands as shown on the right. Holder Return used toner cartridges to your service technician. Shake the new toner cartridge well to loosen the toner inside.
-
Page 143: Replace Toner Cartridge Symbol
3. REPLACE TONER CARTRIDGE SYMBOL (Cont.) Additional Explanation The life of the toner cartridge (number of copies) varies depending on the following conditions. Coverage of originals (printing ration of copies) varies depending on the following conditions : 1. Size and density of originals 2. -
Page 144: Clear Paper Symbol
4. CLEAR PAPER SYMBOL When a paper misfeed occurs in the copier,the symbol flashes in the positions where the paper is misfed. In that case, remove the misfed paper using the following procedure referring to the illustration below. Reversing Automatic Document Feeder Inside of the Copier Bypass Guide External LCF (optional) - Page 145 4. CLEAR PAPER SYMBOL (Cont.) Paper Misfeed in the Reversing Automatic Document Feeder Push the button on the reversing automatic document feeder to open the cover. Rotate the blue knob to remove any misfed originals. Lift the blue handle (first) as shown on the right. - If there are any misfed originals, remove them.
- Page 146 Lift the blue handle (second) as shown on the right. - If there are any misfed originals, remove them. Lift the original feeding tray and remove any misfed originals. Open the original exit tray and remove any misfed originals. Lifting the handle in the direction of the arrow, pull it toward you.
- Page 147 4. CLEAR PAPER SYMBOL (Cont.) Paper Misfeed inside of the Copier Open the paper feed cover. - When installing the external LCF (optional), open the paper cover after doing step 1 of page 7-15. Remove any misfed paper. Open the bypass cover. Remove any misfed paper.
- Page 148 Open the exit cover. - For how to connect or separate the optional finisher. Page 7-9 Remove any misfed paper. Metal area of - If any paper is misfed in the cover, pull it out. guide plate Caution Do not touch the metal area of guide plate in the automatic duplexer. You might burn yourself.
- Page 149 4. CLEAR PAPER SYMBOL (Cont.) Pull the transfer unit out until it comes to a stop. - If a sheet of paper is misfed on the transfer belt, remove it. - Do not put some objects on the transfer belt or do not touch it. - When a sheet of paper is caught in fuser unit, do not pull out directly but remove based on step 9.
- Page 150 Paper Misfeed on the Bypass Guide Pull up the misfed paper slowly on the bypass guide. Paper Misfeed in the External LCF (Large Capacity Feeder) (optional) Pull the external LCF away from the copier slowly while pressing the release lever. Remove any misfed paper by turning the blue knob Blue knob in the direction of the arrow.
- Page 151 4. CLEAR PAPER SYMBOL (Cont.) Open the cover of the external LCF and remove any misfed paper. - Be careful not to touch the drawer slide rail. Be careful not to let your fingers be caught when closing the drawer. Return the external LCF to its original position.
- Page 152 Pull down the grip. Remove any misfed paper. Jammed paper might not be able to be removed while the hole punch unit is used. In this case, perform the steps in Paper Misfeed in the Hole Punch Unit Open the tray of the inserter to remove any misfed paper.
- Page 153 4. CLEAR PAPER SYMBOL (Cont.) Rotate the blue knob to locate the arrow within the area on the label. - Under this condition, the punchers are up, allowing the paper shown in the figure to be removed. Paper Misfeed in the Finisher (optional) Open the upper cover of the finisher.
- Page 154 Lift knob and then remove any misfed paper. is indicated in the illustration of step 2 on page 7-18.) Remove any misfed paper from the paper exit area. Paper Misfeed in the Saddle Stitch Unit (optional) * Only when the saddle stitch finisher (MJ-1018) is installed. When installing the optional inserter, open the lower cover of the inserter.
-
Page 155: Saddle Stitch Unit (Optional)
4. CLEAR PAPER SYMBOL (Cont.) Remove any misfed paper. Open the lower cover of the finisher. Turn the right-hand knob counter clockwise. Then, push the left-hand knob and turn it clockwise. Remove any paper misfed on the exit side of the saddle stitch unit. -
Page 156: Adding Staples (Optional)
5. ADDING STAPLES (OPTIONAL) When the staple cartridge runs out of staples, if the optional finisher is installed, the following message appears: Set staple cartridge Add staples to the cartridge according to the procedure below. Finisher Open the front cover of the finisher. Lower the blue lever in the stapler and slide out the staple cartridge. - Page 157 5. ADDING STAPLES (OPTIONAL) (Cont.) Pull out the seal holding the staples straight upward. Return the staple cartridge to its original position. - Insert the cartridge until it is caught by the claw and fixed with a click sound. Close the front cover of the finisher. If the following message remains displayed, repeat the above procedure from Set staple cartridge...
- Page 158 Pull out the grip of the saddle staple holder toward you and turn it clockwise in the direction of the arrow. Remove the empty staple case and set a new one. - Replace both staple cases with new ones. - Do not remove the seal holding the staples before the staple case is set in the cartridge.
-
Page 159: Removing Jammed Staples (Optional)
6. REMOVING JAMMED STAPLES (OPTIONAL) When copies have not been stapled in the staple mode, the following message may be shown on the display: Examine stapler This means that staples have become jammed. Remove them as described below. Finisher Perform steps 1 to 2 of the procedure for “ 5. ADDING STAPLES Finisher ”... - Page 160 Return the staple case to its original position. - Insert the cartridge until it is caught by the claw and fixed with a click sound. Close the front cover of the finisher. Saddle Stitch Unit Perform steps 1 to 3 of the procedure for “ 5. ADDING STAPLES Saddle Stitch Unit”...
- Page 161 6. REMOVING JAMMED STAPLES (OPTIONAL) (cont.) Return the staple case to its original position. 7-26 WHEN THE GRAPHIC SYMBOLS FLASH ON THE TOUCH PANEL...
-
Page 162: Disposing Of Accumulated Punched Paper Bits (Optional)
7. DISPOSING OF ACCUMULATED PUNCHED PAPER BITS (OPTIONAL) When paper bits punched from copies have accumulated to a certain level, the following message appears. Please Dispose of Hole Punch Dust Dispose of the paper bits as described below. Open the cover of the hole punch unit. Holding the black handle, slide out the case containing the paper bits, and dispose of them properly. -
Page 163: Call Service Symbol/Periodic Maintenance Message
8. CALL SERVICE SYMBOL / PERIODIC MAINTENANCE MESSAGE CALL SERVICE SYMBOL When the CALL SERVICE symbol flashes, the following message appears and copying is no longer possible. Call your service technician. Call for service When the CALL SERVICE or CLEAR PAPER symbol is flashing, if you press the Clear key and the digital key 8 together before you turn off the power, the corresponding error code will appear on the... -
Page 164: Maintenance
8. MAINTENANCE 1. Daily inspection................2. Simple troubleshooting .............. -
Page 165: Daily Inspection
1. DAILY INSPECTION Items for Daily Check Power switch ON/OFF status We recommend turning the power switch ON at the startup everyday so that copies can be made whenever you want. Also, be sure to turn the power switch OFF when you leave the office. In the following cases, do not turn the power switch OFF. -
Page 166: Simple Troubleshooting
2. SIMPLE TROUBLESHOOTING Check the following items, and if the problem still occurs, call service for assistance. Copier does not start Items to be checked Countermeasure Reference page Is the power cord plug firmly Insert the power cord plug firmly. inserted in the outlet? Page 1-2 Is the front cover, the side cover... - Page 167 2. SIMPLE TROUBLESHOOTING (Cont.) Copy density is too high Is the copy density adjustment Use the manual density keys to set the copy Page 3-11 set darker than is standard? density properly. Copies are stained Is the reversing automatic Close the reversing automatic document feeder Page 2-10 document feeder firmly closed? firmly to shut out any outer light.
- Page 168 9. SPECIFICATIONS & OPTIONS 1. e-STUDIO550/650/810 specifications ........2. Specifications of options ............3. Packing list ................. 4. Index ..................
-
Page 169: Specifications & Options
Approx. 210kg (copier only), Approx. 337kg (full options) Space Occupied 1401mm(W) x 777mm(D) (Paper exit tray + Bypass guide) ’ Storage Capacity Max. 1000 images (1 job) (Toshiba s own chart) *1 When using the reversing automatic document feeder. SPECIFICATIONS & OPTIONS... - Page 170 Continuous Copying Speed sheets/min. e-STUDIO550 e-STUDIO650 e-STUDIO810 Paper Type Paper Size Feeder Face up Face down Face up Face down Face up Face down Plain Paper A4, A5-R, B5, Drawer/Tandem LCF (64 - 80g/m LT, ST-R, 8.5” SQ Bypass Drawer/Tandem LCF...
- Page 171 2. SPECIFICATONS OF OPTIONS Finishers Model Name MJ-1017 MJ-1018 Type Floor type Floor type Acceptable Paper Size A3, A4, A4-R, B4, B5, FOLIO, LD, LG, LT, LT-R, COMP Acceptable Paper Weight 256g/m Number of Copies 80g/m 90g/m 105g/m Stapled at a Time A4, B5, LT 50 sheets 30 sheets 30 sheets (MJ-1017, MJ-1018)
- Page 172 Supplied from the copie Dimensions 326mm(W) x 599mm(D) x 617mm(H) Weight Approx. 40kg Power Consumption 1.5kW max. (with the copier) * The paper mentioned above is Toshiba-recommended paper. Specifications and appearance are subject to change without notice in the interest of product improvement.
-
Page 173: Specifications Of Options
3. PACKING LIST Packing List Set-up Instructions Set-up Report Photoconductive Drum Photoconductive Drum Cover Operator’s manual Pocket Tray Spacer of Reversing Automatic Document Feeder Back guide for tab paper SPECIFICATIONS & OPTIONS... -
Page 174: Index
4. INDEX Numbers Confirming and Canceling Auto Job Start ..2-13 2 IN 1 ............... 4-12 Confirming Stored Copy Modes ......5-7 2 IN 1 DUPLEX ..........4-12 Confirming Stored Image (Test Print) ....4-31 2 IN 1/4 IN 1 ............ 4-12 Continuous Copying Speed (Specification) .. - Page 175 Edge Erase ............4-4 ENERGY SAVER key ........1-5 Entering Letters ..........5-28 Key copy counter ..........1-3 e-STUDIO550/650/810 Specifications ....9-2 Key copy counter slot ........1-2 Exit cover ............1-2 Exiting Copy Papers .......... 2-3 Exiting Originals ..........2-11 Large Capacity Feeder ........
- Page 176 Paper Misfeed in the Inserter ......7-16 Setting the Drawer for Special Uses ....2-7 Paper Misfeed in the Reversing Automatic Document Setting the Inserter .......... 6-10 Feeder ............. 7-10 Sharpness Adjustment ........4-33 Paper Misfeed in the Saddle Stitch Unit MJ-1018 ..7-19 Sheet Insertion ..........
- Page 177 4. INDEX (Cont.) When Placing an Original on the Glass .... 2-10 When this message appears: "Wait" ....2-3 When Using the Reversing Automatic Document Feeder ............. 2-11 X-Y Zoom ............4-7 9-10 SPECIFICATIONS & OPTIONS...
-
Page 178: Periodic Maintenance
To ensure that the above quality standards are maintained, we strongly recommend that only Original Toshiba supplies and parts be used in your copier. - Page 179 Recycled paper is used for the inside pages of this book. This Operator's Manual is printed with ink containing soya bean oil. 1-1, KANDA NISHIKI-CHO, CHIYODA-KU, TOKYO, 101-8442, JAPAN 6LA06722001 R02032011601-TTEC 2002 © TOSHIBA TEC CORPORATION All rights reserved Ver.01 2002-05 SO...
Need help?
Do you have a question about the e-studio550 and is the answer not in the manual?
Questions and answers