Table of Contents
Advertisement
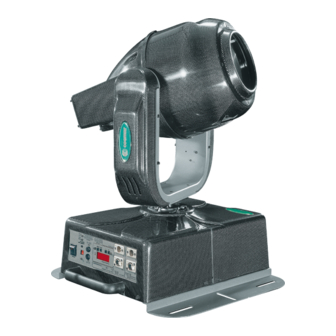
CF 1200 Spot
serial number
date of purchase
retailer
address
suburb
capital city
state
tel./fax/
Please note in the space provided above the relative service information of the model and the retailer from
whom you purchased your CF 1200 Spot : This information will assist us in providing spare parts, repairs or in
answering any technical enquiries with the utmost speed and accuracy.
WARNING: the security of the fixture is granted only if these instructions are strictly followed; therefore it is
absolutely necessary to keep this manual.
592 mm
514 mm
3
546 mm
306 mm
Advertisement
Table of Contents

Subscribe to Our Youtube Channel
Related Manuals for Coemar CF 1200 Spot


Summary of Contents for Coemar CF 1200 Spot
- Page 1 Please note in the space provided above the relative service information of the model and the retailer from whom you purchased your CF 1200 Spot : This information will assist us in providing spare parts, repairs or in answering any technical enquiries with the utmost speed and accuracy.
- Page 2 12. Control channel functions from a DMX 512 controller 13. Aligning the lamp in the optical system 14. Interchanging dichroic colours on the colour wheel 15. Automatic internal functions 16. Maintenance 17. Electronic alignment of the motors 18. Spare parts Authorised coemar service centres...
- Page 3 Congratulations on having purchased a new coemar product; you have assured yourself of a fixture of the highest quality, both in the components used and in the technology. We renew our request to you to complete the service information on the preceding page, to expedite any request for information, or for service (in case of problems encountered either during, or sub- sequent to, installation).
-
Page 4: Important Safety Information
Fire prevention information 1. CF 1200 Spot uses a Philips MSR 1200 SA lamp; the use of any alternative lamp is not recommended and will null and void the fixture’s warranty. 2. Never locate the fixture on any flammable surface 3. -
Page 5: Lamp: Installation And Replacement
4. Lamp: Installation CF 1200 Spot utilises a 1200 W Philips MSR 1200 SA lamp. and replacement with a GY 22.lamp base The lamp is available from your authorised coemar sales agents: coemar cod. 105090/1 wattage 1200 w luminous flux 96.000 lm... - Page 6 4) Insert the lamp (D). The lamp used is manufactured from quartz glass and should be handled with care; always adhere to the instructions supplied in the lamp’s packaging. Do not touch the glass directly, the the tissue provided in the lamp packaging.
-
Page 7: Operating Voltage And Frequency
Incorrect voltage selection will detrimentally affect the operation of the projector. Under no circumstances should cable 23 be moved. CF 1200 Spot is fitted with an electronic ballast which automatically adjusts the output voltage to the projector when the input voltage is in the range of 180 to 260V;... -
Page 8: Mounting The Unit
The mouting holes in the base of the unit allow it to be mounted at various angles to the mounting truss, and to trusses of various dimensions. The following is a diagram of the base of the CF 1200 Spot. 455mm... - Page 9 The use of a safety chain (cod. 069) - fixed to the CF 1200 Spot and to the primary suspension point, is highly recommended to protect against accidental failure, however unlikely, of the primary suspension point.
-
Page 10: Mains Connection
300/500V, tested to 2KV, operating temperature -40° +180°, coemar cod. CV5309). mains connection CF 1200 Spot can operate at voltages from 208V-230V-240V at 50 or 60Hz (ope- rating voltage and frequency can be selected as described in section 5 of this manual). - Page 11 ATTENTION!, DANGER! The electronic ballast with which the CF 1200 Spot is fitted, as with other electro- nic devices, requires a correct dimension for the neutral conductor, since the current in the neutral conductor is equal to the sum of the current in all the active conduc- tors.
-
Page 12: Signal Connection
Control signal is digital and is transmitted via two pair screened ø 0,5mm cable. Connection is serial, using the XLR 3 or XLR5 male and female sockets set on the rear part of the CF 1200 Spot, labelled DMX 512 and DMX 512 standard (see dia- gram). - Page 13 Standard DMX 512 3 pin XLR 3/F 3 pin XLR 3/M Ad altri CF 1200 Spot Connect to other CF 1200 Spot Ensure that all data conductors are isolated from one another and the metal housing of the connector Make sure that the XLR 3 or 5 pins are isolated form the metal hou-...
- Page 14 After having followed the preceding steps, turn on the DMX 512 controller which will be used to control the CF 1200 Spot. Then turn on the power to the projector and turn on the power switch. The projector will perform a reset function on all the internal and external motors.
-
Page 15: Dmx Addressing
500; in this case, you will need to either adjust your controller to ensure the DMX address is being communi- cated to, or you may need to readjust the DMX addrss of the CF 1200 Spot. -
Page 16: Display Panel Functions
11. Display panel The display panel at the rear of the CF 1200 Spot is used to display and set functions function information and various parameters. Altering the coemar factory settings may vary the functioning of the projector, cau- sing it to not respond to external DMX 512 signal. Please read and familiarise your- self with the following information very carefully before altering any selections. - Page 17 4) Press the + or - buttons until LIFE (for lamp life) is displayed. function display menu enter 5) Press the enter button to confirm your selection. The display will show 0000, confirming that the lamp life counter is reset. dirp This function inverts the movement for horizontal (pan) movements.
- Page 18 3) Press the enter button to confirm your selection; the display will show Strd (per standard) which corresponds to the automatic centring of the colours on the colour wheel (a change in DMX 512 signal corresponds to a colour change by the CF 1200 Spot. function display menu...
- Page 19 4) Press the + or - buttons; the display will show SPEc (for special) which corre- sponds to the proportional selection of colours on the colour wheel (split colours are possible) function display menu enter 5) Press the enter button after either step 3 or step 4 to confirm your choice of colour selection.
- Page 20 If all procedures have been correctly carried out to this point, the 13 channels functions from a of your DMX 512 controller will have full control over all the effects available from DMX 512 controller the CF 1200 Spot as described in the following table: channel function type of control...
-
Page 21: Aligning The Lamp
13. Aligning the lamp Aligning the lamp in the optical system is achieved via the three adjusters at the rear in the optical system of the projector. This procedure should be undertaken to properly align the lamp in the optical system and to avoid the possible overheating of internal components due to the incorrect focusing of the beam onto components not intended to be exposed to this. - Page 22 14. Interchanging Dichroic filters can be replaced with any colour you require; note that the dichroic colours on filter should be sized Ø 45mm, thickness 1 mm , and the glass should be tempered (heat- the colour wheel resistant). Prior to effecting any internal procedure, mains power should be disconnected from the unit.
- Page 23 7) Insert a new dichroic filter by sliding the filter gently under the spring clip; lightly press it under the clip and the slide it back under the opposite clip. 8) Replace and re-latch the cover of the CF 1200 Spot.
- Page 24 Two thermal sensors, located in the head and the base of the CF 1200 Spot pro- tect the unit from overheating. The sensors will cause power to the lamp to be switched off if the temperature...
-
Page 25: Maintenance
16. Maintenance Whilst every possible precaution has been taken to ensure the trouble free operation of your CF 1200 Spot, the following periodic maintenance is highly recommen- ded. Before attempting any of the following, ensure that the mains supply to the unit is disconnected. - Page 26 Periodically check all mechanical devices for wear and tear; gears, guides, belts, etc., replacing them if necessary. Periodically check the lubrication of all components, particularly the parts subject to high temperatures. If necessary, lubricate with suitable lubricant (coemar cod. MV 6173/1) Electical components Check all electrical components for correct earthing and proper attachment of all connectors, refastening if necessary.
-
Page 27: Electronic Alignment Of Motors
17. Electronic alignment The display panel at the rear of the CF 1200 Spot allows for the electronic of motors alignment of the projector’s motors. This procedure is performed by coemar at the factory. It may be useful to perform this procedure in the case of internal compo- nents being replaced. - Page 28 2) Press the enter button to confirm your selection. The display will show a numeri- cal value which corresponds with the factory setting. 3) Press the + or - buttons until the displayed number corresponds with the correct alignment of the black-out shutter in the optical path of the projector (note that with each press of + or - the black-out shutter will move).
- Page 29 diMM 1) Press the + or - buttons until diMM (for dimmer alignment). function display menu enter 2) Press the enter button to confirm your selection. The display will show a numeri- cal value which corresponds with the factory setting. 3) Press the + or - buttons until the displayed number corresponds with the correct closure of all the dimmers of the CF 1200 Spots in your installation.
-
Page 30: Spare Parts
18. Spare parts All the components of the CF 1200 Spot are available as replacement spares from your authorised coemar service centre. Accurate description of the fixture, model number, and type will assist us in provi- ding for your requirements, in an efficient and effective manner.
Need help?
Do you have a question about the CF 1200 Spot and is the answer not in the manual?
Questions and answers