Table of Contents
Advertisement
Quick Links
Advertisement
Table of Contents

Related Manuals for Coemar pilota 1200


Summary of Contents for Coemar pilota 1200
- Page 1 instruction manual edition, june 2000...
- Page 2 Index 1. Packaging Pag. 3 2. Transportation Pag. 3 3. Important safety information Pag. 3 4. Lamp: installation and replacement Pag. 4 5. Operating voltage and frequency Pag. 5 6. Installation Pag. 6 7. Mains connection Pag. 7 8. Powering up Pag.
-
Page 3: Important Safety Information
3. Important safety information Fire prevention: 1. Pilota 1200 utilises a Philips MSR 1200 SA. The use of any other lamps is not recommended and will null and void the fixture’s warranty. 2. Never locate the fixture on any flammable surface. -
Page 4: Installing The Lamp
4. Lamp: installation and replacement Pilota 1200 utilses a Philips MSR 1200 SA lamp rated at 1200W with a GY 22 lamp base. The lamp is available from your authorised coemar sales agent: coemar cod. 105090/1 power 1200 w luminous flux 96.000 lm... -
Page 5: Operating Voltage And Frequency
5. Operating voltage and frequency Pilota 1200 is fitted with an electronic ballast which stabilises the output voltage to the lamp for any input voltage from 200 to 260V; it therefore requires no modifications to operate within this range of input voltages. -
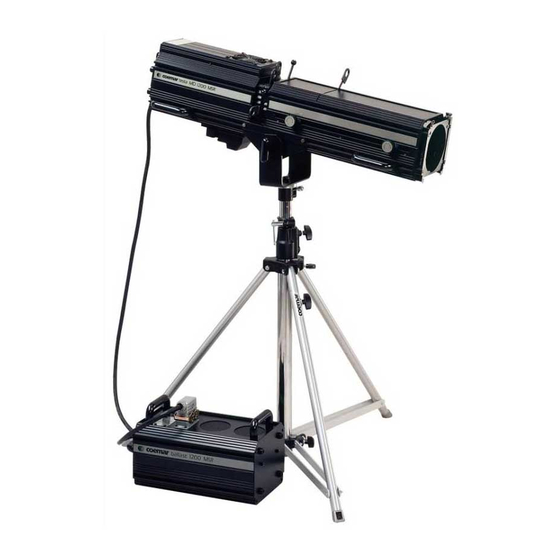
Page 6: Installation
The centre of balance of the pilota 1200 may vary when a colour change device is mounted to the front of the unit. To rebalance... -
Page 7: Cable Preparation
3x1,5 ø external 10 mm, rated 300/500V, tested to 2KV, operating temperature -40° +180°). mains connection Pilota 1200 is fitted with an electronic ballast which stabilises the output voltage to the lamp for any input voltage from 180 to 260V; it therefore requires no modifications to operate within this range of input voltages. - Page 8 (if installed) and set the switch to standby. Set the switch to full on just prior to re-using the followspot in your show. The pilota 1200 will silently power up to maximum output immediately. The cooling fan is powered directly from the ballast, and so will operate from the moment the ballast is powered up.
- Page 9 1200 utilises high definition lenses which allow zoom adjustment and focusing. These two functions are operated simply by sliding the two adjusters located on the right of the followspot body longitudinaly along the body until the requi- red zoom angle and focus is achieved.
- Page 10 If required, an external colour filter frame or an external colour change unit may be utilised. These accessories are fitted to the front of the pilota 1200. When installing either of these accessories, make sure that it is correctly installed and held in place by the retaining spring.
-
Page 11: Aligning The Lamp In The Optical System
10. Aligning the lamp in the optical system Aligning the lamp in the optical system is achieved via the 3 adjusters at the rear of the projector. This procedure should be undertaken to properly align the lamp in the optical system and to avoid the possible overheating of the internal compo- nents due to the incorrect focusing of the beam onto components not intended to be exposed to this. -
Page 12: Maintenance
11. Maintenance Whilst every possible precaution has been taken to ensure the trouble-free operation of your Pilota 1200, the following periodic maintenance is highly recommended. Attention Disconnect mains power prior to removing the projector housing. Opening the lamp housing It is possible to open the rear of the followspot in the area which houses the lamp assembly using a Philips head screwdriver and undoing the screw at the rear of the housing. -
Page 13: Spare Parts
12. Spare Parts All the components of the Pilota 1200 are available as replacement spares from your authorised coemar sales agent. Accurate description of the fixture, model number, and type will assist us in providing for your requirements in an efficient...
Need help?
Do you have a question about the pilota 1200 and is the answer not in the manual?
Questions and answers