Table of Contents
Advertisement
Quick Links
Advertisement
Table of Contents

Related Manuals for Coemar LEDko EXT M


Summary of Contents for Coemar LEDko EXT M
- Page 1 EXT M USER MANUAL vrs. 2.6 - 19.07.2023...
- Page 2 Coemar ®. If you are downloading files from our web pages for your personal use, make sure to check for updated versions. Coemar ® cannot take any liability whatsoever for downloaded files, as technical data are subject to change without notice.
-
Page 3: Table Of Contents
Index 1. Packaging and transportation ..................Pag. 5 1.1 Packaging ........................Pag. 5 1.2 Transportation ......................Pag. 5 2. General information ....................... Pag. 5 2.1 Safety informations ....................Pag. 5 2.2 Warranty conditions ....................Pag. 6 2.3 EC norms ........................Pag. 6 3. Product specifications ....................Pag. 7 3.1 Technical characteristics ...................Pag. - Page 4 8.2 DMX Chart ....................... Pag. 18 8.3 RDM Error Chart ...................... Pag. 19 9. DMX chart Fixed White Version ..................Pag. 20 9.1 DMX modes ......................Pag. 20 9.2 DMX Chart 5 and 1 channels .................. Pag. 21 10. DMX chart VariWhite Version ...................Pag. 22 10.1 DMX modes ......................
-
Page 5: Packaging And Transportation
Ensure the packaging contains: 1 LEDko EXT M 1 Power Box 1 Instruction manual Transportation The LEDko EXT M should be transported in either its original packaging or in an appropriate flight case. . General information Safety informations Fire prevention: 1. -
Page 6: Warranty Conditions
3. The level of technology of LEDko EXT M requires the use of specialised per- sonnel for all service applications; refer all work to your authorised Coemar service centre. 4. A good earth connection is essential for the proper functioning of the projec- tor. -
Page 7: Product Specifications
Product specifications Technical characteristics Power supply 85-264 V, auto-sensing, 47/63 Hz Maximum current 0.28 A @ 230 V, 0.56 A @ 115 V Power factor Cosϕ = 0.9 Power consumption 58 W Tungsten version: fixed white temperature at 3.200 K Color temperature Daylight version: fixed white temperature at 5.600 K VariWhite version: variable white from 2.800 K to 6.000 K... -
Page 8: Dimensions (On/Off Version)
Dimensions (ON/OFF version) Ø 10.5 mm 0.41 in Ø 45 mm 1.77 in 151 mm 351 mm 5.94 in 13.82 in 500 mm 19.69 in 63 mm 132 mm 2.48 in 5.19 in Dimensions (DMX version) Ø 10.5 mm 0.41 in Ø... -
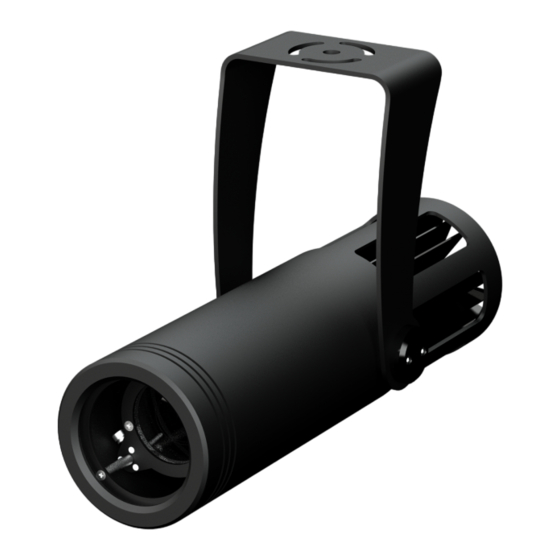
Page 9: Unit's Main Components
Unit’s main components Components description A Front glass Cooling unit C Power Box Yoke with mounting holes... -
Page 10: Installation
. Installation Mechanical installation LEDko EXT M may be hung from an appropriate structure in any position or on tripode. If hanging the fixture from a lighting truss or similar, we recommend the use of an appropriate clamp “A”, as shown in the following diagram. -
Page 11: Adjusting Unit's Tilt
Adjusting unit’s tilt In order to adjust the tilt of the unit simply loose the screws “B” on the both sides of the yoke, adjust the tilt and lock the yoke by tightening the screws again. Open the projector and zoom adjustment In order to adjust the zoom open the projector. -
Page 12: Four Blade Framing System Adjustment
Four blade framing system adjustment 1. In order to shape your light beam use the four blade "G" 2. Thanks to them you can give to your light beam the shape desired "H". -
Page 13: How To Insert A Gobo
How to insert a gobo 1. Take your gobo holder, pull away the metal plate (indispensable to prevent the gobo from falling). 2. Insert the gobo and place back the metal plate. 3. In order to prevent the fallen of the gobo apply a force on the back locking tab "I" by using a screwdriver. - Page 14 4. Once the closing tube for optical unit is removed and the gobo is inserted, mount the gobo holder into the LEDko EXT M slot. 5. Once the gobo holder is inserted, pay attention that the gobo slot "J" is facing upward. If not loosen the knob "K"...
-
Page 15: Close The Projector
Close the projector 1. Once the framing system and the gobo are settled remember to close the LEDko EXT M by putting back the lens tube holder and tighten the screws loosen at the beginning. -
Page 16: Powering Up
The unit may operates at voltages ranges from 85 to 264 VaC at a frequency of 47 or 63 Hz. It is not needed to effect any setup procedures: LEDko EXT M will automatically adjust its opera- tion to suit any frequency or voltage within this range. -
Page 17: Control Signal Connections (Dmx Version)
The digital control signal is transmitted to the projector via a two pole cable screened as per International standards for the transmission of DMX 512 data. The connection must be serial, using connectors XLR5 male and female located on the back of LEDko EXT M Series labelled DMX512 IN e OUT (see diagram). -
Page 18: Turning The Projector On
Setup via RDM (DMX version) Quick guide to menu The LEDko EXT M required RDM (Remote Device Management) to set up fixtures. Using an RDM compliant DMX controller, you can communicate with all the fixtures on a data link without needing to connect to each fixture individually. -
Page 19: Rdm Error Chart
ERROR DESCRIPTION SOLUTION MEMORY Memory Reading Error Perform A “Factory Reset” HW MEMORY Memory Hardware Error Contact Coemar DMX ADDR DMX Addressing Error The Personality Dimension Exceeds 512 Channels NTC ERROR Temperature Sensor Disconnected Check Wiring NTC Led SHORT NTC... -
Page 20: Dmx Chart Fixed White Version
. DMX chart Fixed White Version DMX modes channels channels channels ↓ Master Dimmer Master Dimmer Spare Channel Dimmer Fine Strobe Special Function... -
Page 21: Dmx Chart 5 And 1 Channels
DMX Chart 5 and 1 channels channel type of function effect decimal percentage control adjust luminous output 1 master dimmer proportional 0 - 255 0% - 100% intensity from 0 to 100% spare channel step no effect 0 - 255 0% - 100% dimmer fine proportional... -
Page 22: Dmx Chart Variwhite Version
. DMX chart VariWhite Version 10.1 DMX modes Sunrise channels channels channels channel mode mode ↓ Master Master Master Master Warm Dimmer Dimmer Dimmer Dimmer White Led Dimmer White Dimmer Warm White Fine Tone Fine Led Fine White Proportional Cold Tone White Tone White Led... -
Page 23: Dmx Chart 5 Channels
10.1 DMX Chart 5 channels type of channel function effect decimal percentage control master adjust luminous output intensity proportional 0 - 255 0% - 100% dimmer from 0 to 100% dimmer fine proportional fine dimmer control 16 bit 0 - 255 0% - 100% step 2.800 K... -
Page 24: Dmx Chart 2/1 Channels
10.2 DMX Chart 2/1 channels channel type of function effect decimal percentage control master adjust luminous output intensity proportional 0 - 255 0% - 100% dimmer from 0 to 100% white tone proportional proportional value from 2.800 K to 6.000 K 0 - 255 0% - 100% 10.3... -
Page 25: Dmx Chart Raw Mode
10.4 DMX Chart Raw mode type of channel function effect decimal percentage control warm white adjust luminous output intensity of warm white proportional 0 - 255 0% - 100% led from 0 to 100% warm white proportional warm white led fine control 16 bit 0 - 255 0% - 100% led fine... -
Page 26: Accessories And Spare Parts
. Accessories and Spare parts All the components of LEDko EXT M are available as spare parts from your Coemar dealer or Service. Accurate description of the fixture, model number and type will assist us in providing for your requirements in an efficient and effective manner. -
Page 27: And Answers
Help from Coemar Technical Services If you are having difficulties and your problem is not addressed by this document, contact Coemar Technical Services directly at one of this email address: info@coemar.com / service@coemar.com Or call the number +39 0376 1514412 When calling for help, take these steps first: •... - Page 28 User notes ..............................................................................................................................................................................................................................................................................................................................................................................
- Page 29 Information on disposal of the equipment The equipment at the end of its useful life must be disposed of at an appropriate recycling center for waste electrical and electronic equipment. The treatment and disposal of environmentally friendly, helps prevent potential negative environmental and health and promote the reuse and / or recycling of materials making up the equipment.
- Page 30 Coemar Lighting s.r.l. Via Carpenedolo 90 46043 Castiglione delle Stiviere, Mantova, Italia tel. +39 0376/1514412 - fax +39 0376/1514380 info@coemar.com Coemar reserves the right to change specifications without prior notice...
Need help?
Do you have a question about the LEDko EXT M and is the answer not in the manual?
Questions and answers