Table of Contents
Advertisement
Advertisement
Table of Contents

Related Manuals for Wideye SABRE I

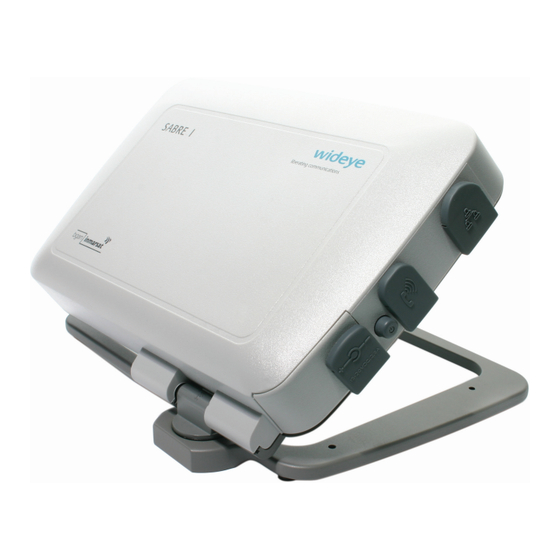
Summary of Contents for Wideye SABRE I
-
Page 2: Table Of Contents
Table of Contents Prefixs............................1-3 Chapter 1 Product Overview Key Features........................5 Unpacking........................5-6 Contents of Product CD....................7 System Requirement....................7-8 Chapter 2 Getting To Know The SABRE The SABRE™ I........................8 Icons Used On The Display...................9-10 Input Methods......................11 Chapter 3 Setting Up The SABRE Inserting The SIM Card................,,..12 Installing The Battery..................12 Charging The Battery..................12... - Page 3 Table of Contents Appendix 1 Technical Specifications............49-50 Appendix 2 The BGAN System.................52 Appendix 3 SABRE™ I LCD Menu Tree Flow Chart........53-60 LCD display DNS setting Dynamic “Settings saved” Primary Static DNS IP Appendix 4 Accessories................61-62 Appendix 5 Accessory User Guide.............63-68 Appendix 6 Voice Mail Access................69 Appendix 7...
-
Page 4: Prefixs
FCC CAUTION: Any Changes or modifications not expressly approved by the manufacturer could void the user's authority, which is granted by FCC , to operate this satellite terminal Wideye SABRE I Industry Canada Statement: IC Identifier : 5023A-SABRE1WE This device complies with Radio standard specification RSS –210 &... -
Page 5: Declaration Of Conformity
Addvalue Communications Pte Ltd, 190 Changi Road , #02-02 MDIS Building ,Singapore-419974 declares under our sole responsibility that the Product, brand name as Wideye and model : SABRE I (Satellite Broadband Communicator) a GMPCS Terminal to which this declaration relates, is in conformity with the following standards and/or other... - Page 6 1 milliwatt per square centimeterat the frequencies used in the Addvalue’s Wideye SABRE I terminal. Accordingly ,the operator of the terminal should ensure that the area extending 1meter from the Front of the antenna be kept clear of personnel when the terminal is transmitting.
-
Page 7: Product Overview
RJ11 Corded Analog Handset With the support for external analog phone, the user can easily connect the prescribed Wideye Corded Analog Handset (with Complex Impedance – ETSI EG201 188) to SABRE™ I for making a voice call. It is simple... -
Page 8: Key Features
1.1 Key Features Simultaneous voice & data communications Data rate of up to 384 kbps III. Built-in Ethernet, Bluetooth and RJ11 interfaces Supports voice, email, messaging, VPN, FTP, VoIP, FoIP and video media streaming Designed for the non-technical user Swiveled antenna mount which facilitates easy pointing VII. -
Page 9: Contents Of Product Cd
. w i d e y e . c o m . s g Addvalue. Addvalue Enabled logo, Wideye and Wideye logo are trademarks or registered trademarks of Addvalue Communications Pte Ltd in Singapore and other countries. Inmarsat and Via Inmarsat logos are registered trademarks of Inmarsat Global Limited in United Kingdom and other countries, and are used by Addvalue Communications Pte Ltd under license. - Page 10 b) Your computer must be installed with one of the following web browsers: i. JAVA-enabled Internet Explorer 6.0 or above. ii. JAVA-enabled Netscape Navigator 6.0 or above. III. The following interfaces could be used for making a voice call: a) A Corded Analog Handset, or b) Bluetooth Handset supporting cordless telephone profile (CTP), or c) Bluetooth Headset.
-
Page 12: Icons Used On The Display
2.2 Icons Used On The Display Icon/Text Object Description [Service Provider Name] A text showing the name of the BGAN service provider. A Soft Menu icon to allow for user to browse the SABRE™ I Menu Tree. A Soft Menu icon to allow for user to browse the SABRE™... - Page 13 An icon to show Ethernet service is currently enabled. An icon to show that the Ethernet physical connection is disconnected with the SABRE™ I. An icon to show that a call is initiated or still in progress on the SABRE™ I. An icon to show that the SABRE™...
-
Page 14: Input Methods
2.3 Input Methods Set of Numbers and Special Letters that could be used by the on-board built-in user interface. 0 to 9 Number from 0 to 9 Full Stop Confirm Back space TABLE 2.3-1: Table showing the available characters that could be used by the on board built in user interface. -
Page 15: Chapter 3 Setting Up The Sabre
Setting Up The SABRE 3.1 Inserting The SIM Card Insert the SIM card (gold-contacts facing the left as shown in Figure 3.1-1) into the SIM slot. Ensure the SIM card is inserted in the position as shown. SIM Card (To remove SIM card, press on the SIM card and remove from the slot.) FIGURE 3.1-1: Figure showing the location of the SIM Card in SABRE™... -
Page 16: Powering Up And Registering To Network
3.4 Powering Up and Registering to Network 3.4.1 Powering Up Press and hold the On/Off switch for 3 seconds The LCD display will show the “wideye” Logo. FIGURE 3.4.1-1: LCD display showing the “wideye” logo 3.4.2 Terminal and SIM PINs (4 to 8 digits) Enter the Terminal PIN number. - Page 17 For subsequent use, the SABRE™ I will not acquire a new GPS, it will prompt the user if the previously stored GPS coordinates should be used. To use the stored GPS coordinates, use the Up/Down buttons to select Yes and press ENTER. indicator will indicate the use of the stored FIGURE 3.4.3-4: LCD display indicating the system’s query to user if user would like to use the stored...
-
Page 18: Connection Diagram
3.4.5 Emergency Call Location of the menu Icon FIGURE 3.4.5-1: Figure showing the location of the “Menu” icon on the LCD display. Figure 3.4.4-3 shows the “Ready State” of the LCD display. Use the navigator buttons to access the “Menu” icon. The location of the “Menu” icon is shown in Figure 3.4.5-1. The Emergency call feature on SABRE™... - Page 19 Configuration Utility) (refer to Section 3.6.2) 3.6.1 Install Software 3.6.1.1 Installation of the SABRE I BGAN LaunchPad and/or Ethernet Serial Device Driver From the SABRE™ I “Main Setup Menu”, Select Install Software option as shown below and follow instructions accordingly.
- Page 20 There are three installation options available for users to choose from. It is recommended to use "Express Installation" option unless your PC/Laptop is built-in with "Dual Core CPU”. For PC/Laptops with "Dual Core CPU", please select "Router Mode Installation" option. If you are an advanced user, you may select "Custom Installation" option. 3.6.1.1.1 Express Installation Express Installation will first configure the Terminal and then install BGAN LaunchPad and its associated device...
- Page 21 3.6.1.1.1.1 Configure Terminal The installer will configure the Terminal automatically. However, if it encounters any problem during the configuration, it will prompt the user with appropriate message to take remedial action. The installer will first detect the Terminal. If the Terminal is switched off, it will prompt a message, asking user to turn it ON.
- Page 22 After successful GPS fix, reboot the Terminal (Switch OFF and then Switch it ON) when prompted to do so. This is to save the newly acquired GPS fix. VII. The installer will then take you to install LaunchPad. Please unplug the Ethernet cable from the Terminal before proceeding to install the BGAN LaunchPad.
- Page 23 3.6.1.1.1.3 Installing Device Drivers After successful completion of LaunchPad installation, the installer will take you to the next step to install the SABRE™ I Ethernet Serial Device Driver. This driver is required for the Terminal to operate in “Bridge” mode. If your PC/Laptop is built-in with Dual Core CPU, then you MUST NOT install the Device Driver and click on the “Cancel”...
- Page 24 After successful installation of the Device Driver, the installer will prompt you to restart your computer. Select “Yes, restart the computer now” option to restart the computer. After PC is restarted, connect the Terminal and PC with Ethernet Cable. Start the LaunchPad. Now you are ready to use the Terminal!
-
Page 25: Sabre™ I Software Utilities
3.7 SABRE™ I Software Utilities 3.7.1 Bluetooth (Data Dongle) Setup Recommended Bluetooth Dongle: - 0BT-01UD1 from Planex Communications (Range: 100m) - SMC-BT1 from SMC Networks 3.7.1.1 Installation of Bluetooth Data Dongle Driver Following guide is for the above Bluetooth Dongle Place the Bluetooth Data Dongle Driver CD (the driver could be found in the CD that is packaged together with the Bluetooth Data Dongle) into the CD ROM Drive of the PC. - Page 26 Click I accept the terms in the license agreement and click Next. After selecting the desired settings, click on the Next. VII. Click Next.
- Page 27 VIII. Click Install IX. Click Finish to complete the application installation. Select Yes to Restart the PC. The drivers for the USB Bluetooth dongle and connection application are installed onto the PC.
- Page 28 After restart, the IVT application will open (as per below figure). Insert the Bluetooth dongle in a USB port. The PC will detect the dongle automatically. (Please refer to the Bluetooth Dongle Accessory user guide for more information.) 3.7.2 Installation of the SABRE I Bluetooth Modem This procedure is to install modem drivers that will bind to the Bluetooth Serial Ports in order to use the Bluetooth Interface for data connection.
- Page 29 Select Bluetooth Modem and click on Run to connect to the modem using a Bluetooth adaptor. Select AUTO INSTALL (default) to install one modem driver each to every Bluetooth Serial COM ports. This is the recommended option. This will uninstall all previously installed Bluetooth Modem Drivers (if any) before installing new Bluetooth Modem Drivers.
- Page 30 DUN Client Installation (Optional if using Launchpad) - Win XP From Win XP Desktop, click Start, select All Programs > Accessories > Communications > New Connection Wizard. From New Connection Wizard, click Next. III. Select Connect to the network of my workplace and click Next.
- Page 31 Select Dial-up connection and click Next. Check on the modem that was created earlier in section 3.6.1.2 (Windows XP installation instructions still needs to be updated) and click Next. Enter a Company Name (for example Any Name) and click Next.
- Page 32 VII. Enter *98*1# and click Next. VIII. Select Anyone’s use and click Next. IX. Check Add a shortcut to this connection to my desktop and click Finish.
-
Page 33: Dun Client Installation
The DUN Client shortcut icon will be created on the Desktop. DUN Client Installation (Optional if using Launchpad) - Win 2000 From Win 2000 Desktop, click Start, select Programs > Accessories > Communications > Network and Dial-up Connections. From the Network and Dial-up Connections Folder, select “Make New Connection”. III. - Page 34 Select either “wideye SABRE Ethernet Modem port 1” or “wideye SABRE Ethernet Modem port 2” and click Next. Type “*98*1#” under the “Phone number” field and Click Next. VII. Type in “SABRE 1 Network Connection (or any name)” in the “Type the name you want to use for this...
- Page 35 VIII. The Any Name shortcut icon will be created on the Desktop. No user name or password are required for this connection.
-
Page 36: Chapter 4 Using The Sabre
Using The SABRE 4.1 Call Functions 4.1.1 Making a phone call using the Corded Analog Handset Connect the Corded Analog Handset to SABRE™ I via the Corded Analog Handset (RJ11 phone) port. Making phone calls directly – RJ11 FIGURE 4.1.1-1: Figure showing the connection of the Corded Analog Handset to the RJ-11 Interface of SABRE™... -
Page 37: Call Register
4.1.2 Ending a Call I. From the Calling screen, select End Call. 4.1.3 Answering an incoming call The ringer will sound when there is an incoming call. II. Press the button on the Corded Analog Handset or Bluetooth headset to accept the call. 4.1.4 Making an Emergency Call (See also Chapter 3. -
Page 38: Bluetooth Settings On Sabre™ I
Enter the Bluetooth device PIN. (Wideye Bluetooth Headset default PIN is 0000.) The LCD will display “Pairing…”. FIGURE 4.3.2-2: LCD Display of SABRE™ I showing When successfully paired, the LCD will display the “Pairing”... - Page 39 4.3.3 Connecting to a paired Bluetooth Device From the LCD, use the Up/Down buttons to select Paired list. From the list, use the Up/Down buttons to select the paired device to be connected and press ENTER. FIGURE 4.3.3-1: LCD Display of SABRE™ I showing the selection of the “SPP0”...
-
Page 40: Using Wireless Devices With Sabre™ I
4.4 Using Wireless Devices with SABRE™ I 4.4.1 Using the Bluetooth Headset Perform the pairing and connection procedures before proceeding with the following. (Enabling Bluetooth on SABRE™ I, Bluetooth device pairing and connection procedures are found in Section 4.3 Bluetooth Settings on SABRE™ I.) Making phone calls via Phonebook –... -
Page 41: Configuring The Sabre™ I For Network Access
4.4.2 Using the Bluetooth Headset Perform the pairing and connection procedures before proceeding with this section. (Enabling Bluetooth on SABRE™ I, Bluetooth device pairing and connection procedures are found in Section 4.3 Bluetooth Settings on SABRE™ I.) Making phone calls directly – FIGURE 4.4.2-1: Figure showing the wireless connectivity of the Bluetooth Handset with SABRE™... - Page 42 4.5.2 Ethernet settings on SABRE™ I - Router (IP) Mode: 4.5.2.1 Configure mode: I. From the LCD, use the Up/Down buttons to select Menu > Settings > Interfaces > Ethernet > Connectivity > Router Connection and Press ENTER. Mode II. Use the Up/Down buttons to select Enable and press ENTER. 4.5.2.2 Setup your PC to get IP address dynamically I.
- Page 43 Select Properties. III. Select and check Internet Protocol (TCP/IP) and click Properties.
- Page 44 Select Obtain an IP address automatically and Obtain DNS server address automatically and click OK. Close all the windows. 4.5.2.3 Proceed with the following steps to active a Data connection: I.From the LCD, use the Up/Down buttons to select Menu > Settings > Interfaces > Ethernet > Connectivity >...
-
Page 45: Settings
4.6 Settings 4.6.1 Security Settings To enable or disable - Terminal PIN/ SIM PIN/SIM PIN 2/ SIM Personalization/ Service Provide PIN/ Corporate PIN, from Security, select Terminal PIN/ SIM PIN/ SIM PIN 2/ SIM Lock/ Service Provider/ Corporate PIN > Enable PIN or Disable PIN > enter PIN >... - Page 46 For Manual, the LCD will show Manual selected! (When Manual is selected, Voice will not be activated.) To configure Ciphering mode, from Network, select Ciphering mode > Enable or Disable. The LCD will show Setting saved! Press Return button until LCD goes back to Ready State, if Ciphering mode is enabled, the icon will be shown.
- Page 47 d)For Static, user may edit the primary and secondary DNS IP addresses. e) To edit the Primary and Secondary DNS IP addresses, select Static > Primary or Secondary DNS IP addresses. Select Edit to make changes to the addresses. After editing, select Save to save the new Primary or Secondary DNS IP addresses.
- Page 48 Status a) From Interfaces , select Ethernet >Status. The LCD display will show the connectivity mode and Local IP address status. XII. Telephony Settings a) From the Ready State screen, select Menu > Settings > Interfaces > Telephony. Continue with the following: i.
- Page 49 c) To select the volume level, select Volume and adjust the volume from Soft to Loud with the Up/Down button and press ENTER to save the new volume setting. d) To turn off all tones, from Tone, select All Tones off. e) To re-enable all tones, select All Tone on.
-
Page 50: Firmware Upgrade
4.7 Firmware Upgrade Insert SABRE™ I product CD and from the SABRE™ I Main Setup Menu, select Software Utilities option and follow instructions accordingly. Please download the new firmware at the recommended web-site and save it in your PC/Laptop’s hard drive. - Page 51 Warning!!!: DO NOT abort the firmware upgrade process half way through or unplug the power of the Terminal during the firmware upgrade. Doing so will corrupt the exiting firmware loaded onto the Terminal.
-
Page 52: Appendix 1
Appendix 1 Technical Specifications Air Interface Inmarsat-4 Air Interface Frequency Band Receive: 1525MHz – 1559MHz Transmit: 1626.5MHz – 1660.5MHz Channel Modulation Receive: QPSK and 16QAM Transmit: pi/4 QPSK Antenna Built-in Patch Antenna, 8.5dBic GPS Air Interface Integrated GPS receiver & antenna Bluetooth Air Interface Frequency Band 2400MHz –... - Page 53 - Tone Configuration for the SABRE I Terminal - Language selection for the SABRE I Terminal. CTP Handset (optional) Wideye Bluetooth Handset (optional) Support instructions over the Bluetooth air interface to perform configuration and functions via the optional wideye Bluetooth Handset.
-
Page 54: Appendix 1
Appendix 1 Technical Specifications Operating System Support Serial/Ethernet Device Driver Microsoft Windows 2000, XP Mac OS 10.1 & above Inmarsat LaunchPad Microsoft Windows 2000, XP Mac OS 10.1 & above Application Support VPN Client Based on PPTP, L2TP and IPSec VoIP H.323 and SIP FoIP... -
Page 55: The Bgan System
Appendix 2 The BGAN Systems Inmarsat’s Broadband Global Area Network (BGAN) is the world’s first mobile communications service of any kind to provide both voice and broadband data simultaneously through a single, truly portable device on a global basis. It is also the first mobile communication service to offer guaranteed data rates on demand. Delivered via the world’s most sophisticated commercial communication satellites, BGAN provides affordable, mobile broadband services at speeds up to half a megabit in a highly portable, easy to use form. - Page 56 Appendix 3 SABRE I LCD Menu Tree Flow Chart The SABRE I LCD Menu Tree Flow Chart shows the user the various displays, features and options that the built in user Interface of the SABRE I offers. Menu Emergency call Phone book Call register Settings...
- Page 57 Call register Note: *LCD display “Empty list!” if no record. Call(softkey) Missed calls List of missed calls Select missed calls Calling State LCD display name or Received calls List of Received calls Select Received calls number follow LCD dislay by softkeys Delete(softkey) Dialled calls List of Dialled calls...
- Page 58 Security Note: *Change PIN only can be done by enable PIN first. Else, LCD display (If PIN was enabled) “Enable PIN LCD display first!”. Back to menu “PIN enabled!” (If PIN was disabled) Terminal PIN Enable LCD display Enter PIN Back to menu “PIN enabled!”...
-
Page 59: Dns Setting
Interface Note: Any configuration only can be done by enable ethernet first. LCD display “Enable Ethernet first!”. To configure settings in router connection, must set the connectivity to “router connection”. Else, LCD display “Enable router connection first!”. LCD display Enable Back to menu “Ethernet enabled!”... - Page 60 Interface LCD display DHCP config Start Back to menu “DHCP server started!” Ethernet LCD display Back to menu Stop “DHCP server stopped!” LCD display current IP address Back to menu Start and End IP address If edit both start IP address & End IP address Edit (softkey) was successfully, display “settings saved!”...
- Page 61 LCD display “Bluetooth enabled!” Back to menu LCD display “Bluetooth disabled!” LCD display “Settings saved!” if successfully. Else, display “Fail to save settings!” Interface Level 1 LCD display “Settings saved!” Level 2 if successfully. Else, display Back to menu “Fail to save settings!” Level 3 Bluetooth Non-Discovery...
-
Page 62: Lcd Display
Interface LCD display Telephone Back to menu Enable “Settings saved!” LCD display Disable Back to menu “Settings saved!” LCD display CallerID USA standard “ Setting saved!” Back to menu standard Europe standard LCD display Back to menu “ Setting saved!” Figure 10: Interfaces-Telephony LCD display GPS latitude and My terminal... - Page 63 Level 0 - level 12 Contrast Level 0 - level 5 Brightness On time 0 secs - Display LCD display “Settings saved!” on time 60 secs if successfully, else display Backlight Back to menu (incremental 5 “Fail to save settings!” secs in each step) Dim time Dim time 0 secs-...
-
Page 64: Appendix 4 Accessories
Appendix 4 Accessories Accessories (Standard and Optional) These are the accessories available to be used with SABRE™ I. Accessories in are optional. Purchase and ordering of all accessories can be made from the SABRE™ I distributors. Description Order Quote Specifications Bluetooth SB1/BCP1000 Bluetooth v1.2 compliant... - Page 65 Appendix 4 Accessories Description Order Quote Specifications Cable Pack SB1/CABLEPK 6P4C RJ11 Telephone Cord (1.8m) 8P4C RJ45 Cat.5 Network Cable (1.5m) AC/DC Power SB1/SPA Input: 100V- 240V, 50/60Hz, Adapter 1.2A Output: 15V, 2.8V 3 Power Cords SB1/PCPK 2-pin Euro-type (Euro, US, UK) 2-pin US-type 3-pin UK type In-vehicle...
-
Page 66: Appendix 5 Accessory User Guide
Appendix 5 Accessory User Guide The following accessories are covered in Appendix 6: 1. Bluetooth Handset (SB1/BCP1000). 2. Corded Analog Handset (SB1/AH100). 3. Primary Battery Pack (SB1/PBATT). 4. Secondary Battery Pack (SB1/SBATT). 5. In-vehicle charger (SB1/AMC10). 5.1 SB1/BCP1000 Bluetooth Handset I. - Page 67 5.2 SB1/AH100 Corded Analog Handset I. Features Volume Control Off Hook On Hook Button Button Redial Redial a. General Features b. Technical Specifications: Stylish design Standard: Complex Impedance – ETSI EG201 188 Inuse LED Connector: RJ11 Last Number Redial Dimension of Handset: L* W * H = 122*45*24 mm Handset volume setting Weight Of Handset: Approximately 150 grams DTMF dialing...
- Page 68 5.3 SB1/PBATT Primary Battery Pack FIGURE 6.4-1: Primary Battery Pack for SABRE™ I Battery Battery Door FIGURE 5.4-2: Insertion of Primary Battery Pack into SABRE™ I I. Features 10.8V, 2050mAH 208 x 26 x 25 mm Approximately 180g 5.4 SB1/SBATT Secondary Battery Pack I.
- Page 69 II. Operation a) Charging the Secondary Battery Pack: Charging port of the battery pack with the power tip of the AC adaptor plug into it. AC adapter FIGURE 5.5-2: Setup for charging the Secondary Battery Pack i. Connect up the external battery and cable accessories as shown in the above setup. 1) Attach the power tip of the AC adapter to the charging port of the battery pack.
- Page 70 1) Connect the Secondary Battery Pack to the output cable according to the above setup. 2) Connect the Converter Tip with the output cable. 3) Plug the DC OUT end of the cable into the DC OUT jack of the battery pack. 4) Plug the Converter Tip into the DC Input of SABRE™...
- Page 71 g. Warning i. Do not place the battery into the microwave oven or heating container. ii. Do not use the battery pack in event that it sends out peculiar smell, generates heat, goes out of shape, changes color or other unusual phenomena. iii.
-
Page 72: Appendix 6 Voice Mail Access
Appendix 6 Voice Mail Access When someone leaves a Voice Mail in the user Voice Mail account, the network will send the user a SMS message informing the user of the presence of a Voice Mail in his/her account. For users that are accessing the mailbox for the 1 time please kindly see below. -
Page 73: Troubleshooting Guide
Appendix 7 Troubleshooting Guide This section provides a list of commonly encountered problems, their possible causes and solutions. Problem Possible Cause Solution Turn on SABRE™ I using the power from the mains via the power adapter. Proceed on with the following steps only i f S A B R E ™... - Page 74 towards the direction of the Satellite. Adjust the antenna to point in the d i r e c t i o n o f m a x i m u m signal strength. Unable to start firmware Presence of other LAN Disable the rest of the LAN upgrade with SABRE ( E t h e r n e t / w i r e l e s s )
Need help?
Do you have a question about the SABRE I and is the answer not in the manual?
Questions and answers