Table of Contents
Advertisement
Quick Links
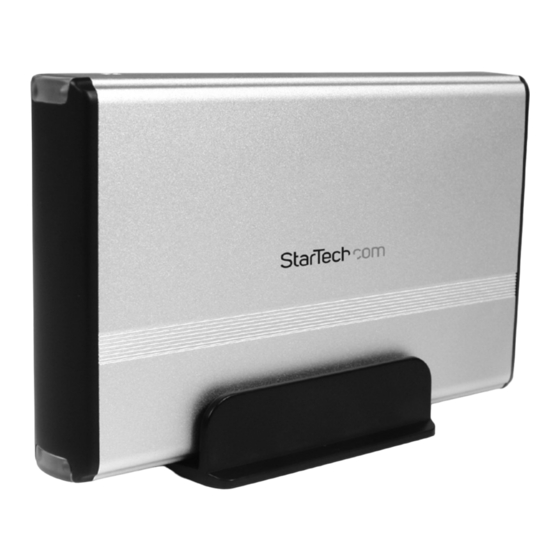
3.5in SuperSpeed USB 3.0 SATA Hard Drive
Enclosure
SAT3510U3V
SAT3510U3VGB
DE: Bedienungsanleitung - de.startech.com
FR: Guide de l'utilisateur - fr.startech.com
ES: Guía del usuario - es.startech.com
IT: Guida per l'uso - it.startech.com
NL: Gebruiksaanwijzing - nl.startech.com
PT: Guia do usuário - pt.startech.com
For the most up-to-date information, please visit: www.startech.com
Manual Revision: 08/10/2012
*actual product may vary from photos
Advertisement
Table of Contents

Summary of Contents for StarTech.com SAT3510U3V
- Page 1 DE: Bedienungsanleitung - de.startech.com FR: Guide de l'utilisateur - fr.startech.com ES: Guía del usuario - es.startech.com IT: Guida per l'uso - it.startech.com NL: Gebruiksaanwijzing - nl.startech.com PT: Guia do usuário - pt.startech.com For the most up-to-date information, please visit: www.startech.com Manual Revision: 08/10/2012...
-
Page 2: Fcc Compliance Statement
StarTech.com. Where they occur these references are for illustrative purposes only and do not represent an endorsement of a product or service by StarTech.com, or an endorsement of the product(s) to which this manual applies by the third-party company in question. Regardless of any direct acknowledgement elsewhere in the body of this document, StarTech.com hereby... -
Page 3: Table Of Contents
Table of Contents Introduction ....................1 Packaging Contents ..........................1 System Requirements ..........................1 Installation ....................2 Hardware Installation ..........................2 Driver Installation ............................4 Using the Enclosure ................5 Specifications ..................7 Technical Support ..................8 Warranty Information ................8 Instruction Manual... -
Page 4: Introduction
Introduction The StarTech.com USB 3.0 to SATA external hard drive enclosure allows almost any standard 3.5-inch internal SATA Hard Disk Drive (HDD) to be made into a cost-effective external SuperSpeed USB 3.0 hard drive. With data transfer rates up to 5 Gbps (10 times faster than USB 2.0), speed is no longer compromised for convenience, ease of use or... -
Page 5: Installation
Installation WARNING! Hard drives require careful handling, especially when being transported. If you are not careful with your hard disk, lost data may result. Always handle your hard drive and storage device with caution. Hardware Installation 1. Gently pull the rear panel away from the enclosure casing, to expose the internal SATA connections: 2. - Page 6 4. Carefully slide the rear panel assembly (with drive attached) into the body of the Enclosure; be cautious that the rear panel assembly is properly aligned with the body of the Enclosure to prevent damage to the LEDs. 5. At the front end of the enclosure, fasten both sides of the case to lock the hard drive in place: Instruction Manual...
-
Page 7: Driver Installation
6. Fasten the rear panel to the enclosure casing on both sides using the screws (2) provided. 7. Once the drive has been secured within the Enclosure, connect the DC power adapter to the DC power port. Connect the remaining end of the power adapter to an available electrical outlet. -
Page 8: Using The Enclosure
Using the Enclosure Windows 2000/XP/Vista/7/8 If you are using a brand new hard drive that does not contain any data, then you will first need to prepare the hard drive for use. From the main desktop, right-click on “My Computer” (“Computer” in Vista/7), then select Manage. In the new Computer Management window, select Disk Management from the left window panel. - Page 9 The New Partition Wizard will appear. Follow the instructions in the wizard to complete setting up the drive. Once complete, the Disk should show up as “Healthy” with a drive letter assigned (i.e. E:). This drive letter should now appear within My Computer.
-
Page 10: Specifications
Specifications Bus Interface USB 3.0 Chipset ID JMicron JMS539 1 x USB 3.0 type B female External Connectors 1 x DC Power LEDs 1 x Power/Activity Maximum Data Transfer Rate USB 3.0: 5 Gbps 3.5” SATA 1.5/3.0/6.0 Gbps compatible hard Compatible Hard Drives drives Power Adapter... -
Page 11: Technical Support
Limitation of Liability In no event shall the liability of StarTech.com Ltd. and StarTech.com USA LLP (or their officers, directors, employees or agents) for any damages (whether direct or indirect, special, punitive, incidental, consequential, or otherwise), loss of profits, loss of business, or any pecuniary loss, arising out of or related to the use of the product exceed the actual price paid for the product. - Page 12 StarTech.com is an ISO 9001 Registered manufacturer of connectivity and technology parts. StarTech.com was founded in 1985 and has operations in the United States, Canada, the United Kingdom and Taiwan servicing a worldwide market.


Need help?
Do you have a question about the SAT3510U3V and is the answer not in the manual?
Questions and answers