
Related Manuals for Motorola CD111


Summary of Contents for Motorola CD111
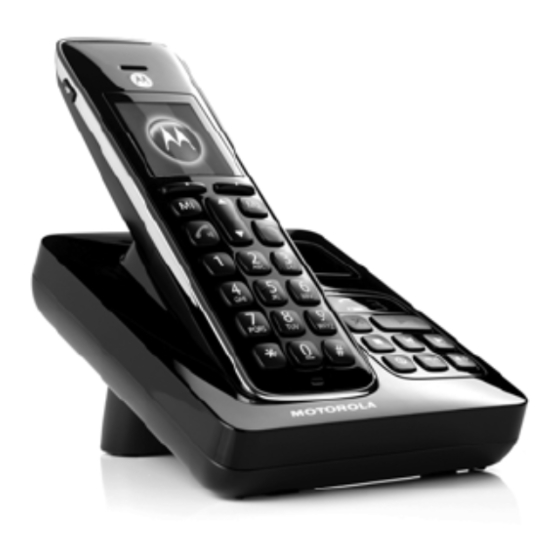
- Page 1 Motorola CD1 Digital Cordless Telephone with Answering Machine For CD111, CD112, CD113 and CD114 Warning Charge the handset for 24 hours before use.
- Page 2 Welcome... to your new Motorola CD1 Digital Cordless Phone! • All handsets are fully cordless with freedom to roam, within range of the base. • 250 Name and number phonebook. • Copy phonebook entries between handsets. • Screensaver clock display.
- Page 3 This User Guide provides you with all the necessary information you need to get the most from your phone. Before you make your first call you will need to set up your phone. Follow the simple instructions in 'Getting Started', on the next few pages.
-
Page 4: Table Of Contents
1. Getting started ..........7 4. Phonebook ............ 20 To view and dial phonebook entries ....20 2. Getting to know your phone ......11 To store an entry ..........20 Entering names ..........20 3. Using the phone..........16 Character map..........21 To switch handset on/off......... 16 To enter a pause ..........22 To make a call .......... - Page 5 To delete entire calls list........27 To set the screensaver........32 To redial the last number......... 27 To set light timeout.......... 33 To view and dial a number in the redial list ..27 8.10 To change display contrast ......33 To copy a redial number to the phonebook ..
- Page 6 12. The Answering machine ......40 12.1 Base control keys ........... 40 12.2 To switch the answering machine on / off..41 12.3 To change answer delay......... 41 12.4 To switch message alert tone on / off ..... 42 12.5 New messages alert ........42 12.6 Outgoing messages........
-
Page 7: Getting Started
1. Getting started SIGNAL STRENGTH icon on your handset indicates when you are in WARNING range. When out of range of the base, the screen shows Searching ... Do not place the CD1 in the bathroom or other humid areas. and the icon flashes. -
Page 8: Connecting The Base
Connecting the base Installing and charging the handset 1. Remove the battery cover from the back of the handset and insert the 2 x AAA NiMH rechargeble batteries supplied. Please note the ‘+’ and ‘-’ markings inside the battery compartment and insert the batteries in the correct direction. - Page 9 Connecting the handset and charger (for 4. If you are charging the batteries for the first time, place multipacks) the handset on the charger to charge for at least 24 hours continuously. 5. When the handset is fully charged, icon will appear steadily on the display.
-
Page 10: Date And Time
Save The charge capacity of rechargeable batteries will reduce 4. Enter the time (HH:MM) and press with time as they wear out, giving the handset less talk/ If the current time format setting is 12 hour, select standby time. Eventually they will need to be replaced. To change Time Format, see page 30. -
Page 11: Getting To Know Your Phone
2. Getting to know your phone Ringer Indicator LED Illuminates red when the phone is in use. Flashes when there is an incoming call. Overview of your handset Earpiece Phonebook menu / Clear / Back / Right softkey In standby mode, press to open the phonebook menu. Clear incorrect input during text editing. -
Page 12: Handset Lcd Display
Direct Memory keys Displays when ECO mode is on. Press to call pre-stored number directly. Menu / Left softkey Handset ringer volume is Off. In standby mode, press to open the Menu. Amplification (Handset receiver) Displays when in handsfree mode. Press to increase the receiving volume through the earpiece when on a call. -
Page 13: Overview Of The Base
Overview of the base Paging/Find handset This function allows you to page for the handset user or locate a missing handset. Paging calls cannot be answered by a handset. 1. Press on the base. All handsets registered to the Paging Call base will ring and display 2. - Page 14 NOTE If you do not press any button on the handset for 30 seconds the display will automatically return to standby mode. It will also return to standby mode when the handset is placed on the base or charger. Getting to know your phone...
-
Page 15: Menu Map
Menu map Names Answer Machine Calls Lists Agenda Clock & Alarm Settings Registration Extra Search Play Missed Calls If there is an Date & Time Set Handset Register Room Monitor event, the Handset Add Entry Play All Received Calls Alarm ¬... -
Page 16: Using The Phone
3. Using the phone To make a handsfree call 1. Press twice. To switch handset on/off 2. Dial the telephone number. 1. Press and hold until the handset switches off. 2. Press to switch the handset back on. During a handsfree call, press to adjust the volume. -
Page 17: To Answer A Call
Missed Calls 2. Scroll to highlight the calls list ( WARNING When the phone is ringing, avoid holding the earpiece too Received Calls Dialled Calls Delete Calls ) you want. close to your ear as it may damage your hearing. Handsfree Select 3. -
Page 18: To Mute The Microphone
To switch the amplification feature Off: 3. Press NOTE 1. After the AMP feature is switched ON in talking mode, While the keypad is locked, you can answer incoming calls then, press again, the will switch OFF and the as normal. earpiece receiving volume step will return to normal. -
Page 19: To Switch Between An Internal And External Call
3. When the other handset answers, announce the caller 3. When the other handset answers, announce the call Join then press to transfer the call. If the other handset then press to connect both calls. If the other does not answer, press and hold to talk to your handset does not answer, press and hold to talk to... -
Page 20: Phonebook
4. Phonebook Save 4. Enter a number and press 5. Scroll to the ringtone you want and press The CD1 handset phonebook can store up to 250 names Select . The entry is stored. and numbers. 6. Press to return to standby mode. NOTE NOTE Numbers can be up to 24 digits long and names up to 12... -
Page 21: Character Map
Character map p q r s 7 ß Case Assigned characters and symbols P Q R S 7 L/U* . , - ? ! ¡ ¿ ' @ : ; / 1 t u v 8 ù ü a b c 2 ä æ å à ç T U V 8 Ü... -
Page 22: To Enter A Pause
To enter a pause To edit an entry If the CD1 is connected to a switchboard, you may need to 1. In standby mode, press . The first entry is highlighted enter a pause in a stored number. This gives the on the display. -
Page 23: To Assign A Ringtone
Copy Phonebook? 5. When the message “ ” appears on the 2. Enter the first letter of the name to search alphabetically Options destination handset, press on the handset to start then scroll to the exact entry. Press the copy process. Delete Entry Select 3. -
Page 24: To Access The Phonebook During A Call
Copy Phonebook? 2. Enter the first letter of the name to search alphabetically 4. When the message “ ” appears on the Options then scroll to the exact entry. Press destination handset, press on the handset to start the copy process. Fast Call Select 3. -
Page 25: Calls List
5. Calls list When the list is full, and a new call is received, the oldest entry will be deleted automatically. If you have subscribed to Call Display service, and provided The received and missed calls list holds details of up to 30 calls. the identity of the caller is not withheld, the number of the If you receive more than one call from the same number, caller will be displayed together with the date and time of the... -
Page 26: To View Details Of The Call
To view details of the call 6. Enter a name and press Menu Calls Lists Select 1. Press , scroll and press 7. Display shows the number of the call. Edit the number if Save necessary and press Missed Calls 2. -
Page 27: To Delete Entire Calls List
To delete entire calls list To copy a redial number to the phonebook Menu Calls Lists Select 1. Press , scroll and press 1. Press . The last number dialled is highlighted. Delete Calls Select 2. Scroll and press Options 2. -
Page 28: Agenda
6. Agenda 6. Press to return to standby mode. NOTES To add a new event If you select a silent reminder, the event subject is displayed Use the CD1 to remind you of details of up to five events on screen but no alarm will sound. such as birthdays, anniversaries or appointments. -
Page 29: To Edit An Agenda
Show Details Select Annually 3. Scroll and press . The description, • If is selected, then the alarm will sound at the event’s time. date and time of the agenda are displayed. Back 7. Press to return to standby mode. 4. -
Page 30: Clock & Alarm
7. Clock & Alarm Select 3. Scroll and press Alarm is set to If you have subscribed to your network’s caller display Once Mon - Fri On Daily Scroll then press service, the base automatically sets the date and time of all Select handsets when you receive the first call. -
Page 31: Handset Settings
8. Handset settings Menu Settings Select 1. Press , scroll and press Set Handset Select is highlighted. Press To set the handset ringtone Ringer Volume Select 3. Scroll and press You can set different ringtones for external calls and internal Volume Select is highlighted. -
Page 32: To Change The Handset Name
To change the handset name Wallpaper Select 3. Scroll and press If you are using more than one handset with the CD1 base, 4. Scroll to the wallpaper you want and press you can give each handset a personalised name to easily View . -
Page 33: To Set Light Timeout
Menu Settings Select Display Contrast Select 1. Press , scroll and press 3. Scroll and press Set Handset Select Medium High Select is highlighted. Press 4. Scroll then press Screensaver Select 3. Scroll and press 5. Press to return to standby mode. Clock Select 4. -
Page 34: To Set Pbx Access Code
9. Base settings Key Beep Select 3. Scroll and press Select 4. Scroll then press To set the base ringtone 5. Press to return to standby mode. Select from 5 base ringtones. 8.13 To set PBX access code You will hear a sample ring as you scroll to each ringtone. If the CD1 is connected to a switchboard, you may need to Menu Settings... -
Page 35: To Change The Dialling Mode
All Handsets Select Handset 5. Press to return to standby mode. 4. Scroll then press Select To change the dialling mode Select Handset If you choose , all available handsets are The CD1 is preset to Tone dialling. It is unlikely that you need displayed. -
Page 36: To Switch First Ring On / Off
Set Base Select 5. Press to return to standby mode. 2. Scroll and press System PIN Select 3. Scroll and press To switch first ring on / off 4. Enter the old PIN (Default setting = 0000) and press If you have subscribed to your network’s Caller Display service, the CD1 will not ring until the caller information has 5. -
Page 37: To Switch Eco Mode On / Off
10. Registration To switch ECO mode on / off You can switch on ECO mode to reduce the level of power Up to 5 handsets can be registered to one base station. emissions and save battery power. Additional handsets must be registered to the base before Menu Settings Select... -
Page 38: To Select A Base
Register Handset Select Menu Registration Select is highlighted. Press 1. Press , scroll and press Select Base Select 3. Bases are displayed. If necessary, scroll to a 2. Scroll and press new base you wish to register the CD1 handset to and 3. -
Page 39: Room Monitor
11. Room Monitor Menu Level Select 1. Press , scroll , press and scroll High to select setting. You can use your CD1 handset to monitor the sounds in 11.3 To set the dial out number another room. If the sounds reach a certain level the handset will automatically dial out to a preset external number or to Menu Call to... -
Page 40: The Answering Machine
12. The Answering machine register additional handsets before the handsets will be displayed and make Internal calls. The CD1 answering machine records unanswered calls NOTE when it is activated. It can store up to 59 messages within the If the Room Monitor is triggered to call a handset or number maximum recording time of 30 minutes. -
Page 41: To Switch The Answering Machine On / Off
Replay current message. Alternatively, press on the base to switch on the Press twice to skip back to previous message. answering machine. Answer & Record OGM Select during OGM selection mode. 12.3 To change answer delay Delete current message during message playback. Answer delay sets the number of times the CD1 will ring Press to delete personal OGM during OGM before the answering machine picks up your call and starts... -
Page 42: To Switch Message Alert Tone On / Off
12.4 To switch message alert tone on / off 12.7 To record a personalised outgoing message When you have new messages, with the audible message alert switched on, you will hear an audible alert once at the You can record personalised outgoing messages up to 3 handset and the answering machine base will beep every 10 minutes long for your callers. -
Page 43: To Play Or Delete Your Personalised Outgoing Message
12.8 To play or delete your personalised Menu Answer Machine Select 1. Press , scroll and press outgoing message Answer Settings Select 2. Scroll and press Deleting a personalised outgoing message automatically Answer Mode Select 3. Scroll and press reinstates the pre-recorded outgoing message, if you have Answer &... -
Page 44: Call Screening
12.12 Message playback 5. Your memo is played back. If you want to delete it, press Delete Save during playback. If you press or wait for the Each message is played back with day and time of the call announced. The caller’s number is displayed (if stored in the message to play back, it will be saved. -
Page 45: Delete All Old Messages
12.14 Remote access To delete current message To play next message Remote access allows you to operate your answering machine and listen to your messages by calling the CD1 12.13 Delete all old messages from another phone. Answering machine messages that are not deleted are The default setting is On. -
Page 46: To Switch Remote Access On / Off
Select 4. Scroll then press To delete during To delete during messages messages 5. Press to return to standby mode. To skip forward during To skip forward during 12.16 To change the remote access PIN messages messages The default remote access PIN is 0000. To set answer mode No action Menu... -
Page 47: Help
13. Help Poor audio quality • The base is too close to electrical appliances, reinforced The handset is not charging when the handset is concrete walls or metal door frames - move the base at placed on the base least one metre away from any electrical appliances. •... - Page 48 Unable to register another handset Cannot record outgoing message • You can register up to 5 handsets to the CD1 base and • The memory may be full. If so, you will need to delete you can register the CD1 handset with up to 4 bases. some messages.
-
Page 49: General Information
14. General information 6. Unplug this product from the wall outlet before cleaning. Do not use liquid cleaners or aerosol cleaners. Use a IMPORTANT damp cloth for cleaning. This equipment is not designed to make emergency 7. Do not disassemble this product. If service or repair telephone calls when the power fails. -
Page 50: Installation Guidelines
Installation Guidelines 10. To avoid interference to nearby appliances, do not place the base of the phone on or near a TV, microwave oven, 1. Read and understand all instructions and save them for or VCR. future reference. 2. Follow all warnings and instructions marked on the Battery Safety Instructions product. -
Page 51: Product Disposal Instructions
• Do not place your product on carpets or other surfaces Warranty which generate fibres, or place it in locations preventing Thank you for purchasing this Motorola branded product the free flow of air over its surfaces. manufactured under license by Suncorp Technologies •... - Page 52 OTHER WARRANTIES, EXPRESS OF IMPLIED. IN NO purchaser of the product. EVENT SHALL MOTOROLA OR SUNCORP Consumer Products and The balance of the original TECHNOLOGIES LTD BE LIABLE, WHETHER IN Accessories that are...
- Page 53 80% of their rated capacity and batteries that leak are tampering; (c) mismatched board serial numbers; or (d) covered by this limited warranty. nonconforming or non-Motorola branded housings, or parts, are excluded from coverage. Abuse & Misuse. Defects or damage that result from: (a) improper operation, storage, misuse or abuse, accident or Communication Services.
-
Page 54: Technical Information
Technical Information Inserting a pause With some switchboards, after dialling the access code you How many telephones can I have? may have to wait for a moment while the switchboard picks All items of telephone equipment have a Ringer Equivalence up an outside line. - Page 55 General information...
- Page 56 Manufactured, distributed or sold by Suncorp Technologies Ltd. official licensee for this product. MOTOROLA and the Stylized M Logo, and other Motorola trademarks and trade dress are owned by Motorola, Inc. and are used under license from Motorola, Inc. MOTOROLA and the Stylized M Logo are registered in the US Patent &...
Need help?
Do you have a question about the CD111 and is the answer not in the manual?
Questions and answers