
Related Manuals for Motorola CD5 Series


Summary of Contents for Motorola CD5 Series
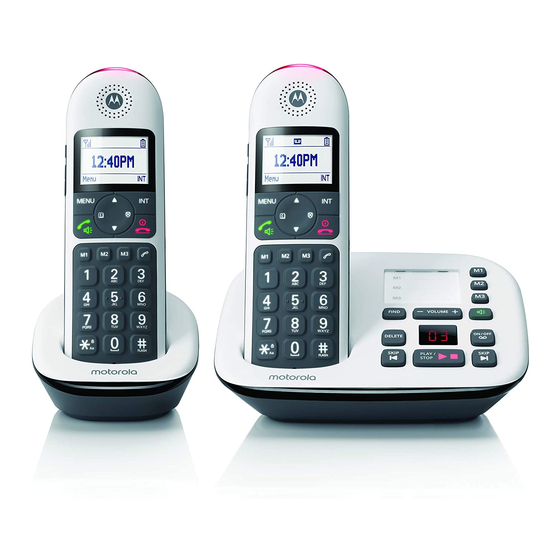
- Page 1 Motorola CD5 Series Digital Cordless Telephone with Answering Machine For: CD5011, CD5012, CD5013 and CD5014 Warning: Charge the handset for 16 hours before use.
- Page 2 Safety information Important This equipment is not designed to make emergency telephone calls when the power fails. Alternative arrangements should be made for access to emergency services. This product is intended for connection to analogue public switched telephone networks and private switchboards in the US. Important safety instructions Follow these safety precautions when using your phone to reduce the risk of fire, electric shock, and injury to persons or property:...
- Page 3 • The product has been dropped or the cabinet has been damaged. • The product exhibits a distinct change in performance. Installation Guidelines • Read and understand all instructions and save them for future reference. • Follow all warnings and instructions marked on the product. •...
- Page 4 Welcome... to your new Motorola CD5 Digital Cordless Telephone with Answering Machine! • Block up to 50 numbers. • Block calls by call type. • Answering machine with up to 40 minutes recording time. • Night mode function. • 150 name and number contacts list.
- Page 5 This User Guide provides you with all the information you need to get the most from your phone. Before you make your first call you will need to set up your phone. Follow the simple instructions in ‘Getting Started’, on the next few pages. Important Only use the telephone line cord supplied.
-
Page 6: Table Of Contents
Getting started ..............10 Getting to know your phone ........14 Using the phone ............... 19 Using the handset................19 3.1.1 Make a call ..................19 3.1.2 Pre-dial ....................19 3.1.3 Fast call numbers ................19 3.1.4 Adjust volume ...................19 3.1.5 Answer a call ..................19 3.1.6 Mute ..................... - Page 7 4.11 Edit a fast call number ..............26 4.12 Delete a fast call number ............26 Clock and alarm ...............27 Set time and date ................27 Set alarm ...................27 Set the time format ...............27 Night mode ..................28 5.4.1 Set night mode on / off ..............28 5.4.2 Set Start &...
- Page 8 Handset settings ............. 36 Handset tones ................36 8.1.1 Ring tone ....................36 8.1.2 Ring volume ..................36 8.1.3 Switch auto volume control on/off ..........37 8.1.4 Auto volume control level ............37 8.1.5 Key tones on/off ................37 8.1.6 Confirmation tones on/off ............38 8.1.7 Docking tones on/off..............38 Handset name ................
- Page 9 12.3 Adjust the speaker volume ............47 12.4 Delete messages ..................47 12.4.1 Via the base ..................47 12.4.2 Via the handset ................47 12.4.3 Delete individual messages via the handset ....... 48 12.5 Announcement ................48 12.5.1 Answer & record ................48 12.5.2 Answer only..................
-
Page 10: Getting Started
Getting started Location Important Do not place your CD5 in the bathroom or other humid areas. Place your CD5 base within reach of the AC power outlet and telephone wall jack. The equipment should be installed near the AC power outlet and should be easily accessible. - Page 11 Connecting the base LINE Plug the telephone line cord into the socket marked on the rear of the base. Plug the other end of the telephone line cord into the telephone wall jack. 2. Plug the AC power jack into the socket marked on the rear of the base and the AC power adaptor into the AC power outlet.
- Page 12 Connecting the handset and charger (for multi-pack only) If you have purchased a multiple pack, you will need to carry out this process for all the handsets and charger cradles. Plug the AC power jack into the socket marked on the rear of the charger cradle and the AC power adaptor into the AC power outlet.
- Page 13 Battery performance In ideal conditions, fully charged batteries should give up to 18 hours talk time or up to 300 hours standby time on a single charge. Note that new batteries do not reach their full capacity until they have been put to normal use for several days.
-
Page 14: Getting To Know Your Phone
Getting to know your phone Overview of your handset A Handset LED Flashes when there is an incoming call. B Amplified volume During a call, press to amplify the ear piece volume. C Earpiece volume up During a call, press to increase the earpiece volume. Getting to know your phone... - Page 15 D Earpiece volume down During a call, press to decrease the earpiece volume. Scroll Up / Ringer volume up Scroll up through lists and settings. In standby mode, press to increase the ringer volume. Menu / OK Enter the main menu. Select the option displayed on screen.
- Page 16 # / Flash / CID format Dial a #. Use with switchboard / PABX services and some network services. In calls lists: Press to toggle the Caller ID display format among 7, 10 and 11 digits when returning calls from Caller ID list. Space / Pause Press to inset a space in text / number editing.
- Page 17 H Speakerphone Lights up when on a speakerphone call. Press to answer a call using the speakerphone. Press to end a speakerphone call. Message counter Shows the number of messages when the answering machine is on. Answering machine On/Off Switches the answering machine on/off. K Skip forward Press to skip forward through the answering machine messages during playback.
- Page 18 Menu map Answer system Settings Messages (X new) Handset settings Play all messages • Sounds Delete old messages – Ringing Outgoing message • Ringtone Record memo • Ringing volume Answer on/off • Auto vol. control Answer mode – Tones Answer settings •...
-
Page 19: Using The Phone
Using the phone Using the handset 3.1.1 Make a call Press t. 2. Dial the telephone number. 3.1.2 Pre-dial Enter the phone number (maximum 24 digits). If you make a mistake press Clear. 2. Press t to dial the phone number entered. 3. -
Page 20: Mute
3.1.6 Mute Mute the microphone so that you can talk to someone else in the room without your caller hearing you. During a call, press Mute. The microphone is muted and Call muted displayed. Unmute 2. Press to turn the microphone back on. 3.1.7 End a call Press e or replace the handset on the base to end the call. -
Page 21: Switch Handset On/Off
Switch handset on/off Press and hold e to switch the handset off. 2. Press e to switch the handset on. Intercom If more than one handset is registered to the base, internal calls can be made Internal call between two handsets. The screen displays and the handset number you are calling. -
Page 22: 3-Way Conference Call
3.5.4 3-way conference call You can hold a 3-way conference call between 2 internal callers and 1 external caller. During an external call, press Options. Your caller is put on hold. 2. The display shows Conference, press OK, • If you only have two handsets, the other handset is called automatically. •... -
Page 23: Contacts
Contacts The CD5 can store up to 150 names and numbers in the contacts list. Numbers can be up to 24 digits long and names up to 16 characters long. Entries are stored in alphabetical order. View entries in the contacts list 4.1.1 View and dial an entry Press... -
Page 24: Entering Names
Entering names Use the alphanumeric keypad to enter names in the contacts list. For instance to enter the name Paul. Press once Press once Press twice Press three times To enter a space press Press Clear to delete a character or press and hold Clear to delete all characters. -
Page 25: Enter A Pause
Enter a pause If your CD5 is connected to a switchboard, you may need to enter a pause in a stored number. This gives the switchboard time to get an outside line. A pause is normally stored after the switchboard access code (e.g. 9). You can also add a pause when dialing a number manually. -
Page 26: Store A Fast Call Number
4.10 Store a fast call number £ Your phone can store 3 phone numbers to fast call keys, on the handset and the base. Press Menu, scroll Fast call and press OK. 2. Scroll to select Handset settings Base settings and press OK. -
Page 27: Clock And Alarm
Clock and alarm If you subscribe to your network’s Caller ID service and auto clock is set to on, the time on your CD5 will be set automatically each time you receive a call, depending on your network provider. Clock/Alarm You can also set or adjust the time using the menu. -
Page 28: Night Mode
Night mode Your phone can be set so that when you receive an incoming call the phone does not light up or ring. The Night mode is on shows on the display. 5.4.1 Set night mode on / off Press Menu, scroll to Clock/Alarm and press OK. -
Page 29: Call Control
Call control Call barring Prevent certain numbers from being dialled from your phone. Store up to four specific numbers, each up to 4 digits – for example, international or local prefixes. Bypass Call barring by switching the setting to Off. Note If Call barring is switched on, when you make a call using a barred prefix the screen will display... -
Page 30: Block All Private Calls
6.2.2 Block all private calls Press 2. Enter the master PIN (default setting 0000) and press OK. 3. The display shows calltype, press OK. to Private, press OK. 4. Scroll 5. Press to select or Off. Back 6. Press to confirm or to return to the previous menu. -
Page 31: Add A Number To The Call Block List
6.2.6 Add a number to the call block list You can store up to 50 phone numbers in the call block list. Press 2. Enter the master PIN (default setting 0000) and press OK. 3. Scroll By number and press OK. 4. -
Page 32: Delete The Blocked List
6.2.9 Delete the blocked list Press 2. Enter the master PIN (default setting 0000) and press OK. 3. Scroll By number and press OK. 4. Scroll Block number and press OK. 5. Scroll Delete All, press OK. Are you sure?. 6. -
Page 33: Caller Id And Calls List
Caller ID and calls list If you have subscribed to Caller ID and provided the identity of the caller is not withheld, when you receive an incoming call the number of the caller will be displayed. If the caller’s number is stored in the contacts list and a number match is found the name will be displayed instead. -
Page 34: Block A Calls List Entry
7.1.4 Block a calls list entry Press twice to enter the calls list. 2. Scroll to the entry you want. 3. If the number is stored, Block number is displayed, press OK 4. Press Options, if the number is stored in the contacts list Block number displayed, press OK, if it is not stored, scroll Block number... -
Page 35: Copy A Redial Number To The Contacts List
7.2.3 Copy a redial number to the contacts list Press . The last number dialled is displayed. 2. Scroll to display the number you want. 3. Press Options. The display shows Save number. Press OK. 4. Enter the name and press OK. 5. -
Page 36: Handset Settings
Handset settings Handset tones Important When the phone is ringing, avoid holding the earpiece too close to your ear as it may damage your hearing. 8.1.1 Ring tone You can set different ringer melodies for your internal and external calls. Choose from 20 different ringer melodies. -
Page 37: Switch Auto Volume Control On/Off
8.1.3 Switch auto volume control on/off Auto volume control function, controls the ringer volume of the handset before the handset rings. You can set the handset to detect the level of sound in the local environment and if it is louder than the level set in the handset the handset will ring at maximum level for that call. -
Page 38: Confirmation Tones On/Off
8.1.6 Confirmation tones on/off When you press a key on the handset you hear a beep. You can switch these beeps on or off. Press Menu, scroll Settings and press OK. Handset settings. Press OK. 2. The display shows Sounds is displayed. -
Page 39: Handset Name
Handset name Personalise your handset, with a name or location for example Peter or Bedroom. Maximum 12 characters. Press Menu, scroll Settings and press OK. 2. The display shows Handset settings. Press OK. Handset name and press OK. 3. Scroll 4. -
Page 40: Advanced Settings
Advanced settings Base ringer volume You can adjust the ringer volume and set different volume levels. Choose from 5 volume levels or Off. Press Menu, scroll Settings and press OK. 2. Scroll Advanced settings. Press OK. Base sounds is displayed. Press OK. 4. -
Page 41: Call Settings
Call settings 9.4.1 Auto answer With auto answer switched on, you can answer a call by simply lifting the handset off the base or charger. If switched off, you will have to press t to answer a call. The default setting is Off. Press Menu, scroll Settings and press OK. -
Page 42: Area Code
Area code The area code must be 3 digits long. Press Menu, scroll Settings and press OK. Advanced settings. Press OK. 2. Scroll 3. Scroll Area code and press OK. 4. Using the keypad enter the area code and press to confirm. -
Page 43: Restore Default Settings
phone. Restore default settings You can restore your phone to its default (original) settings. All the handsets that are registered to the base will be retained. Press Menu, scroll Settings and press OK. 2. Scroll Advanced settings. Press OK. Reset and press OK. -
Page 44: Registration
Registration 10.1 Register a handset Up to 4 handsets can be registered to one base station. Additional handsets must be registered to the base before you can use them. • If the master PIN has been changed the PIN is required before you can register or deregister handsets. -
Page 45: Software Version
Software version Press Menu, scroll Settings and press OK. 2. Scroll Software version. Press OK. 3. The software version of the base and handset will be displayed. 4. Press e to return to standby. Software version... -
Page 46: Using Your Answering Machine
Using your Answering Machine The phone can digitally record up to 40 minutes of messages. As well as recording incoming messages, it can record memos for other users. The answering machine can be operated from: • the base • the handset •... -
Page 47: Listen To All Messages Via The Handset
12.2.2 Listen to all messages via the handset If there is a new message, the display shows X new msg, press Listen and the new message will be played back first followed by old messages. 2. If there is no new message press Menu, the display shows Answer system, press OK. -
Page 48: 12.4.3 Delete Individual Messages Via The Handset
12.4.3 Delete individual messages via the handset If there is no new message press Menu, if there is a new message press and hold Listen, the display shows Answer system, press OK. Messages (X new) is displayed, press and scroll to select a message. -
Page 49: Record A Memo
12.6 Record a memo You can record memo messages for other users which can be played back just like normal messages. Memos can only be recorded using the handset. Press Menu, the display shows Answer system, press OK. 2. Scroll Record memo and press OK. -
Page 50: Remote Access
Press Menu, the display shows Answer system, press OK. 2. Scroll Answer settings and press OK. Answer & record, press OK. 3. The display shows 4. Scroll Message alert and press OK. Off. 5. Scroll to select 6. Press to confirm. 7. -
Page 51: 12.10 Change The Remote Access Pin
12.10 Change the remote access PIN Press Menu, the display shows Answer system, press OK. 2. Scroll Answer settings and press OK. Remote access and press OK. 3. Scroll 4. Scroll Change PIN and press OK. 5. Enter the old code and press OK. 6. -
Page 52: Help
Help icon is not scrolling during charge • Bad battery contact – move the handset slightly. • Dirty contact – Clean the battery contact with a cloth moistened with alcohol. • Battery is full – no need to charge. No dialing tone •... - Page 53 Answering machine does not record messages • Switch the answering machine on. • The memory may be full. If so, you will need to delete some messages. • Answer mode may be set to Answer only. Change the mode to Answer & record. Cannot access messages remotely •...
-
Page 54: Technical Specifications
Technical Specifications RF frequency band 1.92 GHz to 1.93 GHz Channels 5 Duplex Channels Base voltage (AC voltage, AC 100V to 240V, 50/60Hz 50Hz/60Hz) Base voltage (Adaptor output) DC 6V 400mA Handset voltage 2x 1.2VDC AAA size 750mAh Ni-MH rechargeable batteries Charger cradle voltage (Adaptor DC 6V 400mA output) -
Page 55: General Information
Meizhou Guo Wei Electronics Co. Ltd., AD1 section, Economic Development Area, Dongsheng Industrial District, Meizhou, Guangdong, China. (“MZGW”) What Does this Warranty Cover? Subject to the exclusions contained below, MZGW warrants that this Motorola branded product (“Product”) or certified accessory (“Accessory”) sold for use General information... - Page 56 PROVIDED UNDER THIS EXPRESS LIMITED WARRANTY IS THE EXCLUSIVE REMEDY OF THE CONSUMER, AND IS PROVIDED IN LIEU OF ALL OTHER WARRANTIES, EXPRESS OF IMPLIED. IN NO EVENT SHALL MOTOROLA OR MZGW BE LIABLE, WHETHER IN CONTRACT OR TORT (INCLUDING...
- Page 57 (c) use of the Products or Accessories for commercial purposes or subjecting the Product or Accessory to abnormal usage or conditions; or (d) other acts which are not the fault of Motorola or MZGW are excluded from coverage.
- Page 58 FCC, ACTA and IC regulations FCC Part 15 This equipment has been tested and found to comply with the requirements for a Class B digital device under Part 15 of the Federal Communications Commission (FCC) rules. These requirements are intended to provide reasonable protection against harmful interference in a residential installation.
- Page 59 FCC Part 68 and ACTA This equipment complies with Part 68 of the FCC rules and with technical requirements adopted by the Administrative Council for Terminal Attachments (ACTA). This Product Complies With 47CFR PART 68. The plug and jack used to connect this equipment to premises wiring and the telephone network must comply with applicable Part 68 rules and technical requirements adopted by ACTA.
- Page 60 FCC Exposure to Radio Frequency (RF) Signals For Handset This is a radio transmitter and receiver. It is designed and manufactured not to exceed the emission limits for exposure to radio frequency (RF) energy set by the Federal Communications Commission (FCC) of the U.S. Government. These limits are part of comprehensive guidelines and establish permitted levels of RF energy for the general population.
- Page 61 ISEDC Warning This device complies with Innovation, Science, and Economic Development Canada licence-exempt RSS standard(s). Operation is subject to the following two conditions: (1) this device may not cause interference, and (2) this device must accept any interference, including interference that may cause undesired operation of the device.
- Page 62 <This page has been intentionally left blank>...
- Page 63 <This page has been intentionally left blank>...
- Page 64 Manufactured, distributed or sold by Meizhou Guo Wei Electronics Co. LTD., official licensee for this product. MOTOROLA and the Stylized M Logo are trademarks or registered trademarks of Motorola Trademark Holdings, LLC. and are used under license. All other trademarks are the property of their respective owners.
Need help?
Do you have a question about the CD5 Series and is the answer not in the manual?
Questions and answers
when a message has been left the base unit signals with a bleep, can this be turned off?
why do I have to push the green button to get a dial tone