Sign In
Upload
Download
Table of Contents
Contents
Add to my manuals
Delete from my manuals
Share
URL of this page:
HTML Link:
Bookmark this page
Add
Manual will be automatically added to "My Manuals"
Print this page
×
Bookmark added
×
Added to my manuals
Manuals
Brands
Motorola Manuals
Cordless Telephone
CD5 Series
Manual
Motorola CD5 Series Manual
Hide thumbs
Also See for CD5 Series
:
Quick start manual
(13 pages)
,
User manual
(64 pages)
1
2
3
Table Of Contents
4
5
6
7
8
9
10
11
12
13
14
15
16
17
18
19
20
21
22
23
24
25
26
27
28
29
30
31
32
33
34
35
36
37
38
39
40
41
42
43
44
45
46
47
48
49
50
51
52
page
of
52
Go
/
52
Contents
Table of Contents
Bookmarks
Table of Contents
Table of Contents
Getting Started
Getting to Know Your Phone
Using the Phone
Calls
Make a Call
Pre-Dial
Memory Numbers
Adjust Volume
Answer a Call
Mute
End a Call
Handset Equaliser
Switch Handset on / off
Intercom
Call Another Handset
Receive an Internal Call
Transfer an External Call to Another Handset
3-Way Conference Call
Call Waiting with Caller ID
Keypad Lock
Voicemail
Contacts
View Entries in the Contacts List
View and Dial an Entry
View an Entry During a Call
Store an Entry
Entering Names
Character Map
Enter a Pause
Edit an Entry
Delete an Entry
Memory Status
Delete All Entries
Store a Memory Number
Edit a Memory Number
Delete a Memory Number
Clock and Alarm
Set Time and Date
Set Alarm
Set the Time Format
Night Mode
Set Night Mode on / off
Set Start & End Time
Call Control
Call Barring
Switch Call Barring on / off
Set a Number to be Barred
Call Block
Block All International Calls
Block All Private Calls
Block All Unavailable Calls
Block All Payphone Calls
Turn Call Block on / off
Add a Number to the Call Block List
Edit a Number in the Call Block List
Delete a Number from the Call Block List
Delete the Blocked List
Caller ID and Calls List
Received Calls List
View the Calls List
Dial from the Calls List
Store a Number from the Calls List to the Contacts List
Block a Calls List Entry
Delete a Calls List Entry
Delete Entire Calls List
Redial
Redial the Last Number
View and Dial a Redial Entry
Copy a Redial Number to the Contacts List
Block a Redial Entry
Delete a Redial List Entry
Delete Entire Redial List
Handset Settings
Handset Tones
Ring Tone
Ring Volume
Switch Auto Volume Control on / off
Auto Volume Control Level
Keypad Tone on / off
Confirmation Tone on / off
Docking Tone on / off
Battery Low Tone on / off
Handset Name
Display
Display Contrast
Screensaver on / off
Display Language
Advanced Settings
Dial Mode
Recall Time
Call Settings
Auto Answer
Auto End Call
Auto Join Call
ECO Mode
ECO Plus Mode
Auto Clock on / off
Pin
Restore Default Settings
Default Settings
Registration
Register a Handset
Deregister a Handset
Software Version
Help
General Information
Advertisement
Quick Links
1
Table of Contents
2
Getting Started
3
Voicemail
Download this manual
For: CD5001, CD5002, CD5003 and CD5004
Warning: Charge the handset for 16 hours before use.
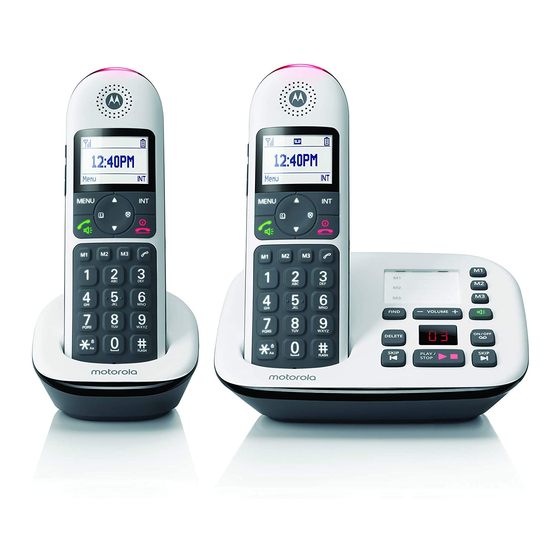
Motorola CD5 Series
Digital Cordless Telephone
Table of
Contents
Previous
Page
Next
Page
1
2
3
4
5
Advertisement
Table of Contents
Need help?
Do you have a question about the CD5 Series and is the answer not in the manual?
Ask a question
Questions and answers
Related Manuals for Motorola CD5 Series
Cordless Telephone Motorola CD5 Series User Manual
With answering machine (64 pages)
Cordless Telephone Motorola CD5011 Quick Start Manual
Digital cordless telephone with answering machine (13 pages)
Cordless Telephone Motorola CD111 Owner's Manual
Motorola cd1 digital cordless telephone with answering machine (56 pages)
Cordless Telephone Motorola CD301 User Manual
(48 pages)
Cordless Telephone Motorola CD501-B Quick Start Manual
Digital cordless telephone with answering machine (13 pages)
Cordless Telephone Motorola CD501-C Quick Start Manual
Digital cordless telephone with answering machine (13 pages)
Cordless Telephone Motorola CD4 Series Quick Start Manual
Digital cordless telephone with answering machine (13 pages)
Cordless Telephone Motorola CD4 Manual
Digital cordless telephone with answering machine (49 pages)
Cordless Telephone Motorola CD4010 Manual
Digital cordless telephone with answering machine (44 pages)
Cordless Telephone Motorola CD4001 User Manual
(40 pages)
Cordless Telephone Motorola CD4000 User Manual
Digital cordless telephone (40 pages)
Cordless Telephone Motorola CD5001 Manual
(52 pages)
Cordless Telephone Motorola Cell Phone User Manual
Gsm wireless phone (35 pages)
Cordless Telephone Motorola C4 Manual
(38 pages)
Cordless Telephone Motorola C1001LA User Manual
(42 pages)
Cordless Telephone Motorola Cordless Telephone User Manual
Motorola cordless telephone user manual (36 pages)
This manual is also suitable for:
Cd5001
Cd5002
Cd5003
Cd5004
Table of Contents
Print
Rename the bookmark
Delete bookmark?
Delete from my manuals?
Login
Sign In
OR
Sign in with Facebook
Sign in with Google
Upload manual
Upload from disk
Upload from URL


Need help?
Do you have a question about the CD5 Series and is the answer not in the manual?
Questions and answers