
Related Manuals for Falcon Elan 90 Ceramic


Summary of Contents for Falcon Elan 90 Ceramic
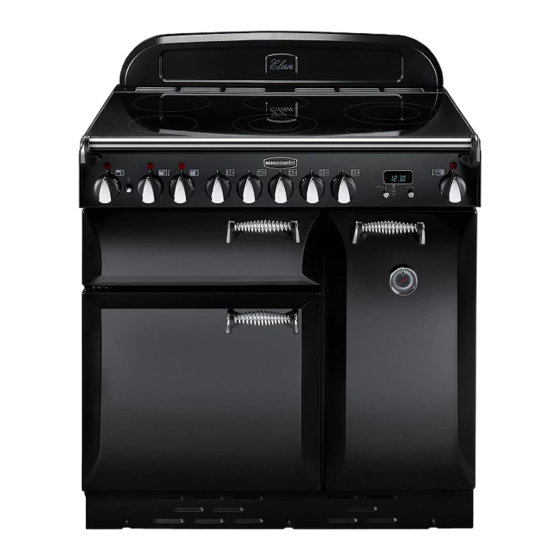
- Page 1 90 Ceramic with Glide-out Grill User Guide for Australia & Installation & Service Instructions U109655 - 02...
-
Page 2: Table Of Contents
Australia Contents Before you start... Cooker Overview Cooking on the Hob The Glide-out Grill The Ovens The Clock Multi-function oven functions Tips on Cooking with the Timer General Oven Tips Oven cooking guide Oven Shelves The Handyrack (Main Oven) Main Oven Light Cleaning your Cooker Troubleshooting Installation... -
Page 3: Before You Start
Australia Before you start... Thank you for buying this Elan cooker. It should give you many years' trouble-free cooking if installed and operated correctly. It is, therefore, important that you read this section before you start, particularly if you have not used a ceramic cooker before. -
Page 4: Hob Care
Australia Care should be taken to avoid touching the heating elements inside the main oven. Whole chickens and large joints of meat should be defrosted thoroughly in the refrigerator. Do not defrost in a warm oven or while the adjoining oven is in operation or still warm. Cooking high moisture content foods can create a ‘steam burst’... -
Page 5: Cooker Care
Australia Do not stand or rest heavy objects on the hob. Although the ceramic surface is very strong, a sharp blow or sharp falling object (e.g. a salt cellar) might cause the surface to crack or break: As soon as any crack in the surface becomes visible, disconnect the appliance immediately from the supply and arrange for its repair. -
Page 6: Cooker Overview
flat on the cooking surface. Make sure that the base of the pan is clean and dry to prevent any residue burning onto the hob panel. This also The Elan 90 Ceramic has the following features: helps prevent scratches and deposits. •... -
Page 7: The Glide-Out Grill
Australia For the best results, you should slide the carriage back into the grill chamber and preheat the appropriate part(s) of the grill for two minutes. The grill trivet can be removed and the food placed on it while you are waiting for the grill to preheat. - Page 8 Australia The Left Hand Oven The Right Hand Tall Oven References to 'left hand' and 'right hand' ovens apply The fan in the right hand oven circulates hot air continuously, which means faster more even cooking. as viewed from the front of the appliance. The recommended cooking temperatures for a fanned The left hand oven is a Multi-function oven.
-
Page 9: The Clock
Australia The Clock To stop the ovens at a specific time of Setting the time of day Turn the Timer knob to the ( ) position. Use the Adjusting knob to set the time at which the oven is to stop. You can set the oven to turn on at any time over the following 24-hour period. -
Page 10: Multi-Function Oven Functions
Australia To turn off the key lock The ‘stop time’ is displayed, followed by 'AUTO' . Set the Turn and hold the Timer knob to the clock symbol ( ) for oven(s) to the cooking temperature you need. Turn the about 8 seconds. -
Page 11: Fan Oven
Australia ideal for grilling in this way, as the circulated air reduces the fierceness of the heat from the grill. The oven door should be kept closed while grilling is in progress, so saving energy. You will also find that the food needs to be watched and turned less than for normal grilling. -
Page 12: Tips On Cooking With The Timer
Australia Tips on Cooking with the Timer The oven control settings and cooking times given in the table opposite are If you want to cook more than one item, choose dishes intended to be used only as a guide. that require approximately the same time. However, Individual tastes may require the dishes can be ‘slowed down’... -
Page 13: Oven Cooking Guide
Australia Oven cooking guide Conventional Oven Fan Oven Setting Shelf Food Temperature Position Temperature Approximate Cooking Time FISH 190°C 180°C Fillets 15-20mins. 190°C 180°C Whole 10mins.per 500g + 10mins. 190°C 180°C Steaks according to thickness. ROAST MEATS Beef with bone 160°C 150°C 20-25mins. -
Page 14: Oven Shelves
Australia Oven Shelves Left Hand (Main) Oven As well as the flat shelf, a drop shelf is supplied, thereby increasing the spacing possibilities: Right Hand (Tall) Oven The tall oven is supplied with four normal cooking shelves: and a plate warming shelf: When using the tall oven, you can cook on all four shelves at the same time;... -
Page 15: Main Oven Light
Australia When the Handyrack is used in its lower position, other We have developed a range of cleaning products that give dishes can be cooked directly on the base of the oven. maximum performance without damaging the enamel and painted surfaces, in particular a Ceramic Hob Cleaner set To fit the Handyrack, locate one side of it on the door with scraper. -
Page 16: Control Panel And Doors
Australia To remove metal rub-off Sliding pans on the hob - especially aluminium or copper pans - can leave marks on the surface. These marks often appear like scratches, but can easily be removed using the procedure described previously for 'Cleaning spills' . If the rub-off... -
Page 17: Troubleshooting
Australia the control panel and knobs (although we do supply a specialist Fascia Cleaner). After cleaning, polish with a dry cloth. The Main Oven The oven door front panel can be taken off so that the glass panels can be cleaned. Firstly, move the cooker forward to gain access to the sides (see ‘Repositioning the Cooker following Connection’... - Page 18 Australia floor of the compartment? Is the grill tray pushed back Is the key symbol ( ) showing in the display to signify fully to the 'back stop' position? that the oven is locked? See the 'Clock' section of the instructions for more information on the key lock feature.
-
Page 19: Installation
Australia INSTALLATION Check that the appliance is electrically safe when you have finished. Installation You will need the following items to complete the cooker installation satisfactorily: • Multimeter (for electrical checks) Dear Installer Before you start your installation, please complete the details below, so that, if your customer has a problem relating to your installation, they will be able to contact you easily. -
Page 20: Positioning The Cooker
Australia INSTALLATION Check that the appliance is electrically safe when you have finished. Positioning the Cooker cleaning and servicing. The cooker should not be placed on a base. The diagrams below show the minimum recommended distance from the cooker to nearby surfaces. Plan view - a clearance of 130mm each side is required to allow for oven door opening. - Page 21 Australia INSTALLATION Check that the appliance is electrically safe when you have finished. Make 10 complete (360º) turns clockwise. (This means Carefully push the cooker backwards off the pack base. turning and removing the levelling tool 20 times.) Remove the pack base tray. Position the cooker close to its final position, leaving just enough space to get behind it.
-
Page 22: Electrical Connection
Australia INSTALLATION Check that the appliance is electrically safe when you have finished. Electrical Connection This appliance must be installed by a qualified electrician to comply with the relevant regulations (in particular AS/NZS 60335.2.6:2002), and also the local electricity supply company requirements. Fitting the Splashback The cooker can be installed with or without the supplied splashback. -
Page 23: Oven Check
Australia INSTALLATION Check that the appliance is electrically safe when you have finished. Replace the electric terminal cover box, making sure that the conduit is clear of the bottom flange. Main Oven Light Press the light switch in the main oven and check that the light is working. -
Page 24: Servicing
Australia WARNING - SERVICING TO BE CARRIED OUT ONLY BY AN AUTHORISED PERSON Disconnect from the electricity before servicing. Check that the appliance is safe once you have finished. Servicing 4. To Remove a Side Panel Remove the control panel - see section 1. Pull the cooker forward. - Page 25 Australia WARNING - SERVICING TO BE CARRIED OUT ONLY BY AN AUTHORISED PERSON Disconnect from electricity before servicing. Check appliance is safe when you have finished. 8. To Replace the Grill Controller 16. To Replace the Main Oven Door Seal Remove the control panel and lift up the hob - see sections 1 Open the oven door.
- Page 26 Australia Fit the new element and reassemble in reverse order. Check the operation of the grill. 20. To Remove an Oven Inner Back Open the oven door and remove the screws and washers securing the inner back to the back of the oven. Carefully lift away the inner back.
-
Page 27: Circuit Diagram
Australia Circuit Diagram 109655... - Page 28 Australia Circuit Diagram Key Connection shown in circuit diagram is for single phase. Ratings are for 230V 50Hz. Right hand end dual circuit hob energy regulator Colour Code Right hand rear hob energy regulator Blue Left rear hob energy regulator Black Left hand front hob energy regulator br Brown...
-
Page 29: Technical Data
Australia Technical Data INSTALLER: Please leave these instructions with the User. DATA BADGE LOCATION : Cooker back. The serial number is repeated on the badge below the main oven door opening. Dimensions Overall height Minimum 893mm Maximum 920mm Overall width 900mm Overall depth 648mm... - Page 30 Australia U109655...
- Page 31 Australia 109655...
- Page 32 �����������...
Need help?
Do you have a question about the Elan 90 Ceramic and is the answer not in the manual?
Questions and answers