
Related Manuals for Rose electronics UltraView Pro


Summary of Contents for Rose electronics UltraView Pro
- Page 1 PROFESSIONAL KVM SWITCH WITH ON-SCREEN DISPLAY INSTALLATION AND OPERATIONS MANUAL 10707 Stancliff Road Houston, Texas 77099 Phone: (281) 933-7673 Internet: WWW.ROSE.COM...
- Page 3 LIMITED WARRANTY Rose Electronics warrants the UltraView Pro™ to be in good working order for one year from the date of purchase from Rose Electronics or an authorized dealer. Should this product fail to be in good working order at any time during this one-year warranty period, Rose Electronics will, at its option, repair or replace the Unit as set forth below.
- Page 4 FCC/IC STATEMENTS, EU DECLARATION OF CONFORMITY FEDERAL COMMUNICATIONS COMMISSION AND INDUSTRY CANADA RADIO-FREQUENCY INTERFERENCE STATEMENTS This equipment generates, uses, and can radiate radio frequency energy and if not installed and used properly, that is, in strict accordance with the manufacturer’s instructions, may cause interference to radio communication.
-
Page 5: Table Of Contents
Organizing the system...............8 Installation – single unit ..............8 Step 1. Connecting the keyboard, video monitor, and mouse..8 Step 2. Apply power to UltraView Pro ...........8 Step 3. Connecting the computers ..........9 Installation - Cascading units ............10 Slave unit installation ..............11 Main configuration menu .............13... - Page 6 Figures Figure 1. UltraView models............. 5 Figure 2. Rear Panel ............... 6 Figure 3. UltraView Pro to CPUs ..........10 Figure 4. Cascading units ............. 11 Figure 5. Main configuration menu ..........13 Figure 6. Configure system menu..........14 Figure 7. Configure computer menu ..........18 Figure 8.
-
Page 7: Disclaimer
The UltraView Pro is the result of Rose Electronics commitment to providing state-of-the-art switching solutions for today’s demanding work place. The UltraView Pro has proven to be a valuable and dependable investment for users that have the need to access multiple computer systems from a single KVM station. -
Page 8: Features
All UltraView Pro models can easily be expanded by chaining the units together and configuring the system using the on-screen configuration menus. Using 4 port units (“M” chassis), you can expand the UltraView Pro to 16 computers. Using 16 port units (“C”... -
Page 9: Compatibility
+ or - buttons, or an on-screen list of computers. If your system demands are greater than a single unit can provide, the UltraView Pro can be easily expanded to connect up to 256 computers. KVM station A KVM station, consisting of a keyboard, video monitor and mouse, connects to the UltraView Pro’s DB25F connector that is labeled... -
Page 10: Cpu Connection
Each CPU connector on the master unit can be connected to the KVM connector on a slave unit. Using a 16 port UltraView Pro as the master and 16 port units for the 16 slaves, expands the capability to 256 computers. A switch-to-switch cable for each slave unit is needed. -
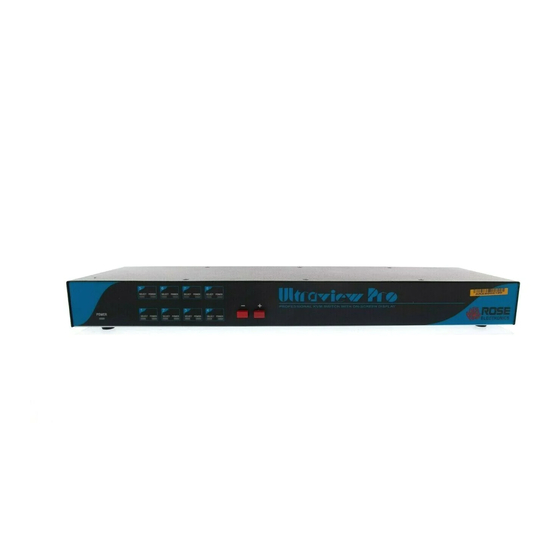
Page 11: Ultraview Pro Models
- Connects to the previous sequential CPU. Table 1. Front panel * The + and – switches are also used when upgrading the firmware, to reset the unit to factory default, and diagnostics. ULTRAVIEW PRO INSTALLATION AND OPERATIONS MANUAL... -
Page 12: Ultraview Pro Models (Rear)
1 – 4 (“M” chassis) DB25F – CPU 1 – 8 (“B” chassis) adapter cable 1 – 16 (“C” chassis) connectors. MONITOR/ DB25F – KVM cable KEYBOARD/ connector. MOUSE RS232 RJ12 6-conductor jack Table 2. Rear panel connectors ULTRAVIEW PRO INSTALLATION AND OPERATIONS MANUAL... -
Page 13: Ultraview Pro Cables
UltraView Pro to KVM station cable The KVM cable connects a keyboard, video monitor, and mouse to the UltraView Pro. The KVM cable is configured with a DB25M connector on one end and a connector for the keyboard, video, and mouse cables on the other end. -
Page 14: Organizing The System
It is recommended that before any UltraView Pro configuration or cable connections be made, plan how the system will be laid out, the placement of the CPUs and the placement of the UltraView Pro. Take into consideration the cable lengths needed to connect to the KVM station and each CPU. -
Page 15: Step 3. Connecting The Computers
UltraView Pro. For ease of installation and configuration, it is recommended that the CPUs be off at this time. When a CPU is booted, the UltraView Pro can automatically determine the keyboard and mouse types of the connected CPU. -
Page 16: Installation - Cascading Units
Figure 3. UltraView Pro to CPUs Installation - Cascading units The UltraView Pro units can be cascaded together to expand the number of computers that can be accessed from the KVM station. When cascading units, one unit becomes the “Master” unit and all others are “Slave”... -
Page 17: Slave Unit Installation
KVM connector on the next sequential Slave unit. 4. Connect the remaining Slave units to the master unit. 5. When all slave units are connected, call up the UltraView Pro’s “Main configuration” menu by pressing and releasing the left control <Ctrl> key, then the F12 key. (See Figure 5). - Page 18 The “Configure security” menu is used to enable a configuration and access passwords. A unique password can be assigned for access to the configuration menus and to restrict computer access. ULTRAVIEW PRO INSTALLATION AND OPERATIONS MANUAL...
-
Page 19: Main Configuration Menu
Figure 5. Main configuration menu The UltraView Pro uses a command to establish communication to the UltraView Pro and not a CPU. This command input is a press and release of the left control <Ctrl> key, then the command. The... -
Page 20: Configure System Menu
Use the up/down arrow keys to select the correct keyboard or mouse and press enter. The select choices are: Keyboard choices Mouse choices 101/102 PS/2 or PS/2 wheel 104/105 Serial 2-button Serial 3-button ULTRAVIEW PRO INSTALLATION AND OPERATIONS MANUAL... -
Page 21: Maximum Computers
The scan mode can be turned on or off and set to automatically scan the computers when the UltraView Pro is powered up. Scan time (seconds) ULTRAVIEW PRO INSTALLATION AND OPERATIONS MANUAL... -
Page 22: Table 3. Typematic Rate
Rate Rate Rate Rate Rate Rate Keys/ Value Keys/ Value Keys/ Value Keys/ Value Sec. Sec. Sec. 30.0 15.0 26.7 13.3 24.0 12.0 21.8 10.9 20.0 10.0 18.5 17.1 16.0 Table 3. Typematic rate ULTRAVIEW PRO INSTALLATION AND OPERATIONS MANUAL... - Page 23 Sun Keyboard language and press enter. The choices are: Spanish US Unix Swed/Finn French SWFrench Danish SWGerman German Italian Korean Neth/Dutch Taiwan Norwegian Japan Portuguese FrCanadian ULTRAVIEW PRO INSTALLATION AND OPERATIONS MANUAL...
-
Page 24: Configure Computer Menu
To change the computer name, select the “Computer name” to change and press enter. An input box will display. Enter the new computer name and press enter. ULTRAVIEW PRO INSTALLATION AND OPERATIONS MANUAL... - Page 25 Save the changes when finished configuring each computer. The keyboard and mouse selections are: Keyboard choices Mouse choices PS/2 PS/2 wheel Serial 2-button USB-PC Serial 3-button USB-Sun Apple* Sun* * Available on multi-platform models only. ULTRAVIEW PRO INSTALLATION AND OPERATIONS MANUAL...
-
Page 26: Configure Overlay
Use the arrow keys to select a scheme and press enter. The choices are: Aquarium - cyan, magenta, white, and blue Tuxedo - black, red, and white Night sky - blue, black, and white Forest - green, black, cyan, and blue ULTRAVIEW PRO INSTALLATION AND OPERATIONS MANUAL... - Page 27 To change the time, select the item and press enter. An input box will display to enter a new value. Valid entries are 0 to 999 seconds. A value of 0 disables the screen saver function. ULTRAVIEW PRO INSTALLATION AND OPERATIONS MANUAL...
-
Page 28: Background Color
The default text color is white. The color choices are the same as the background selections. Computer label The “Computer label” section allows you to customize the display of the computer label. The colors, position, fade out time, font and whether the computer number is displayed. ULTRAVIEW PRO INSTALLATION AND OPERATIONS MANUAL... - Page 29 To change this value, select it and press enter. An input box will display for a new value. Enter the value wanted between 0 and 255 and press enter. (<Ctrl> D, <Enter> will display the label at any time) Font ULTRAVIEW PRO INSTALLATION AND OPERATIONS MANUAL...
-
Page 30: Configure Security
Figure 9. Configure security The “Configure security” menu allows for setting a configuration password and an access password. The configuration password restricts access to the configuration menus and the access password limits access to the connected computers. ULTRAVIEW PRO INSTALLATION AND OPERATIONS MANUAL... - Page 31 Resetting the passwords The passwords can be reset if they are ever forgotten. To reset them, first turn off the UltraView Pro and disconnect the power cord or power adapter. Carefully remove the top chassis cover exposing the PCB. Put a jumper on the two pins labeled “Password reset jumper”...
-
Page 32: Selecting A Computer
OPERATION Selecting a computer To connect to a computer, you can select it from the UltraView Pro’s front panel, select it by keyboard commands, select it through the RS232 serial port, or you can select the computer from a computer select window as shown in Figure 10. -
Page 33: Keyboard Commands
<Ctrl> Pnnn Total ports used (all units) Units <Ctrl> Unn Number of expansion units. Width <Ctrl> Wnn Number of ports on expansion units. Keep <Ctrl> K Saves to flash memory. Table 4. Keyboard commands ULTRAVIEW PRO INSTALLATION AND OPERATIONS MANUAL... -
Page 34: Table 5. Mode Command Values
832 x 624 @ 75Hz Sun1 1152 x 900 @ 66Hz Sun2 1150 x 900 @ 76Hz 640 x 480 @ 66Hz 1152 x 900 @ 66Hz Table 6. Resolution command values * Available on multi-platform model only ULTRAVIEW PRO INSTALLATION AND OPERATIONS MANUAL... -
Page 35: Keyboard Command Usage
Reset to factory defaults To reset the UltraView Pro to the original factory default settings, first, power down the unit, press and hold the – (minus) switch in and turn the power on to the unit. Keep the – (minus) switch held in until the unit switches to the last port on the unit (port 4, 8, or 16). -
Page 36: Serial Port (Rs232)
RS232 PORT Serial Port (RS232) The RS232 serial port on the UltraView Pro’s rear panel is used for sending switching commands from a stand-alone computer or terminal or to load flash firmware upgrades to the unit. A serial cable and an RJ to DB9 adapter are included with the unit. Perform steps 1-3 below to use the serial port. - Page 37 Rose Electronics web site and save it to a stand-alone computer that is not connected to the UltraView Pro. Connect the serial cable from the UltraView Pro to the serial port of the stand- alone computer as described in steps 1-3. There are two methods of loading the downloaded programs to flash memory.
-
Page 38: Figure 11. Power-On Diagnostic Screen
Method 2 – Using the front panel switches with a file copy. 1. Press both the - and + switches on the front panel and power up the UltraView Pro. The UltraView Pro is ready to accept the upgrade file. LED 1 will light indicating the unit is set at 9600 baud. -
Page 39: Troubleshooting
Wrong cable or keyboard and mouse cables reversed. Cable is defective; try using cable from another computer. Port on the UltraView Pro is defective; try using another port on UltraView Pro. If the problem goes away port is defective. Port on computer is defective, try plugging in keyboard or mouse directly if problem remains computer port is defective. - Page 40 Cable is defective; try using cable from another computer if problem goes away cable is defective. Port on UltraView Pro is defective; try using another port on UltraView Pro. If problem goes away port is defective. Lower resolution OK, but can’t enter high resolution mode Video driver has not been setup for this resolution.
-
Page 41: Service Information
This Unit does not contain any internal user-serviceable parts. In the event a Unit needs repair or maintenance, you must first obtain a Return Authorization (RA) number from Rose Electronics or an authorized repair center. This Return Authorization number must appear on the outside of the shipping container. -
Page 42: Safety
SAFETY Safety This UltraView Pro KVM switch has been tested for conformance to safety regulations and requirements, and has been certified for international use. Like all electronic equipment, the UltraView Pro should be used with care. To protect yourself from possible injury and to minimize the risk of damage to this Unit, read and follow these safety instructions. -
Page 43: Safety And Emc Regulatory Statements
Servicing There are no user-serviceable parts inside these products. Only service-trained personnel must perform any servicing, maintenance, or repair. Only items mentioned in this manual may be adjusted by the user. ULTRAVIEW PRO INSTALLATION AND OPERATIONS MANUAL... - Page 44 à la terre ait été réparée. Aucune pièce contenue à l’intérieur de ce produit ne peut être réparée par l’utilisateur. Tout dépannage, réglage, entretien ou réparation devra être confié exclusivement à unpersonnel qualifié. ULTRAVIEW PRO INSTALLATION AND OPERATIONS MANUAL...
-
Page 45: Appendices
Computer select position X=3, Y=3 Computer label background Transparent blue color Computer label text color White Computer label position X=3, Y=90 Show computer number Fade out 5 seconds Font 16 x 24 modern Caps/Numlock/Scroll Numlock On ULTRAVIEW PRO INSTALLATION AND OPERATIONS MANUAL... -
Page 46: Appendix B. Parts And Cables
** Cable lengths in 5, 10, 20, /(Hi Res.) 35, 50, 75, 100 feet Rackmount Kit Chassis size 19 inch 23 inch 24 inch “M” (mini) RM-UM19 RM-UM23 RM-UM24 “B” (low) RM-UB19 RM-UB23 RM-UB24 “C” (high) RM-UC19 RM-UC23 RM-UC24 ULTRAVIEW PRO INSTALLATION AND OPERATIONS MANUAL... -
Page 47: Appendix C. General Specifications
Appendix C. General Specifications The UltraView Pro part number is Uxy-zUB Where x = platform, E = PC, SUN, Apple, Unix (Multi-platform) P = PC and Unix computers (PC) Where y = chassis size, M (mini), B (low), C (high) -
Page 48: Appendix D. Rack Mount Instructions
Appendix D. Rack mount instructions The UltraView Pro can be mounted in a rack using the Rackmount kits from Rose Electronics. The optional rack mount kit includes the following items: Two black anodized mounting brackets. Four 6-32 x 3/8” flat head mounting screws. -
Page 49: Appendix E. Rack Mount Illustration
Left apple / cloverleaf Left alt Left alt Left option Right alt/alt graph Alt graph Left option Right windows Right meta Left Apple / cloverleaf Right windows (app) Power key Power key Right control Compose Left control ULTRAVIEW PRO INSTALLATION AND OPERATIONS MANUAL... -
Page 50: Appendix G. Video Distance Capability
3- Very acceptable; Images clear, small reflections around colored letters 2- Acceptable: Slightly fuzzy images, readable text, acceptable usage for short periods of time, can cause eye fatigue. 1- Unusable; images smeared, text not easily readable. ULTRAVIEW PRO INSTALLATION AND OPERATIONS MANUAL... - Page 52 〒103-0014 東京都中央区日本橋蛎殻町 1-16-11 TEL:03-3668-8089 FAX:03-3668-9872 URL:http://www.cybernetech.co.jp 10707 Stancliff Road Houston, Texas 77099 Phone: (281) 933-7673 WWW.ROSE.COM...
Need help?
Do you have a question about the UltraView Pro and is the answer not in the manual?
Questions and answers