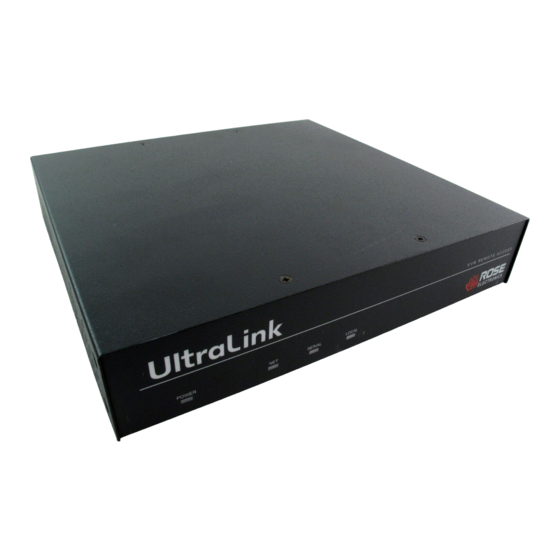
Rose electronics UltraLink UL-V3 Installation And Operation Manual
Kvm remote access
Hide thumbs
Also See for UltraLink UL-V3:
- Installation and operation manual (74 pages) ,
- Specifications (2 pages)

Related Manuals for Rose electronics UltraLink UL-V3


Summary of Contents for Rose electronics UltraLink UL-V3
- Page 1 All manuals and user guides at all-guides.com UltraLink KVM REMOTE ACCESS INSTALLATION AND OPERATIONS MANUAL 10707 Stancliff Road Phone (281) 933-7673 Houston, Texas 77099 Internet: WWW.ROSE.COM...
- Page 2 UltraLink™ to be in good working order for one year from the date of purchase from Rose Electronics or an authorized dealer. Should this product fail to be in good working order at any time during this one-year warranty period, Rose Electronics will, at its option, repair or replace the Unit as set forth below. Repair parts and replacement units will be either reconditioned or new.
- Page 3 All manuals and user guides at all-guides.com FEDERAL COMMUNICATIONS COMMISSION AND INDUSTRY CANADA RADIO-FREQUENCY INTERFERENCE STATEMENTS This equipment generates, uses, and can radiate radio frequency energy and if not installed and used properly, that is, in strict accordance with the manufacturer’s instructions, may cause interference to radio communication.
- Page 4 All manuals and user guides at all-guides.com UltraLink Quick Start Guide All Models The following 12 pages are Quick Start Guides for all UltraLink models Pages A, B, C – Model UL-V3 Pages D, E, F – Model UL-LV3 Pages G, H, I – Model UL-DV3 Pages J, K, L –...
- Page 5 All manuals and user guides at all-guides.com The installation assumes the following: Introduction You have an active Ethernet TCP/IP network. You are connecting the UltraLink to a standalone computer or KVM switch. You have a PC on the network where you will install the Viewer software.
- Page 6 Don’t forget to go to the Settings-Security tab to change the user ID and password for its unsecured default value. Refer to the manual or Viewer help for further exploration. UltraLink Quick Start Guide version 1.2 Copyright Rose Electronics 2002...
- Page 7 All manuals and user guides at all-guides.com UltraLink UL-V3 POWER Connector Label Type/Usage POWER IEC320 / 115-230 VAC, 50-60Hz, Auto-switching Type A / USB keyboard / mouse Serial (2) DB9 (Reserved) VGA-In Video loopback Monitor HD15M / KVM monitor SWITCH/CPU...
- Page 8 TCP port, and Speed/duplex. Hit F10 to save the network information. The UltraLink is now active at this address Hit F1 if you want to read some help. UltraLink Quick Start Guide version 1.2 Copyright Rose Electronics 2002...
- Page 9 Don’t forget to go to the Settings-Security tab to change the user ID and password from its unsecured default value. Refer to the manual or Viewer help for further exploration. UltraLink UL-LV3 Quick Start Guide version 1.2 Copyright Rose Electronics 2002...
- Page 10 POWER IEC320 / 115-230 VAC, 50-60Hz, Auto-switching Rose Electronics 10707 Stancliff Road, Houston, Texas 77099 USA 281-933-7673 800-333-9343 (USA) +44 (0) 1264 850574 (Europe) +65 6324 2322(Far East) W W W . R O S E . C O M...
- Page 11 All manuals and user guides at all-guides.com The installation assumes the following: Introduction The Dual UltraLink consists of two independent modules. Each one must be set-up and configured. You have an active Ethernet TCP/IP network. You are connecting the UltraLink to two standalone computers or a KVM switch.
- Page 12 All manuals and user guides at all-guides.com Install the Viewer on a PC on your network. Viewer installation Two installation diskettes are provided. Insert the setup diskette and run setup. You will be guided through a standard Windows-style installation process. Click through to specify the installation directory and if you want the associated start menu folder, desktop, and quick launch icons.
- Page 13 POWER IEC320 / 115-230 VAC, 50-60Hz, Auto-switching Rose Electronics 10707 Stancliff Road, Houston, Texas 77099 USA 281-933-7673 800-333-9343 (USA) +44 (0) 1264 850574 (Europe) +65 6324 2322(Far East) W W W . R O S E . C O M...
- Page 14 All manuals and user guides at all-guides.com The installation assumes the following: Introduction You have an active Ethernet TCP/IP network. You are connecting the UltraLink to four standalone computers or a KVM switch. You have a PC on the network where you will install the Viewer software.
- Page 15 All manuals and user guides at all-guides.com Install the Viewer on a CP on your network. Viewer installation Two installation diskettes are provided. Insert the setup diskette and run setup. You will be guided through a standard Windows-style installation process. Click through to specify the installation directory and if you want the associated start menu folder, desktop, and quick launch icons.
- Page 16 POWER IEC320 / 115-230 VAC, 50-60Hz, Auto-switching Rose Electronics 10707 Stancliff Road, Houston, Texas 77099 USA 281-933-7673 800-333-9343 (USA) +44 (0) 1264 850574 (Europe) +65 6324 2322(Far East) W W W . R O S E . C O M...
-
Page 17: Table Of Contents
All manuals and user guides at all-guides.com Table of Contents ........................ 1 NTRODUCTION Front Panel ........................5 Back Panel ........................5 ......................6 ETTING TARTED In the Box........................6 You Will Need ......................6 ........................7 ONNECTIONS There are two ways to connect the UltraLink............. 7 ......................... - Page 18 All manuals and user guides at all-guides.com ......................... 43 ODES Scaled / Scrolled ....................... 43 Auto Size........................44 Full Screen / Windowed.................... 45 Color Modes......................46 KVM S ....................47 SING A WITCH KVM Switch Features....................47 Remote Computer Select ..................47 Quad Screen ......................
-
Page 19: Introduction
All manuals and user guides at all-guides.com Introduction Introduction KVM Remote Access Access your servers anywhere in the world from the UltraLink Viewer program Features and Benefits UltraLink is a powerful product that extends the range of access to your computers to anywhere in the world. - Page 20 All manuals and user guides at all-guides.com Introduction Front panel shows power and currently connected input port either net, serial, or local Solid-state embedded unit has no disk drive for maximum reliability Remote client application is simple to use, installs very easily, and requires no licensing Password security prevents unauthorized configuration Made in USA...
- Page 21 All manuals and user guides at all-guides.com Introduction Security The UltraLink is designed with the highest thoughts about security. For maximum security, the connection is encrypted with Blowfish or triple DES. You can also program a timeout that automatically will disconnect the session when no keyboard or mouse activity is detected.
- Page 22 All manuals and user guides at all-guides.com Introduction Specifications UL-V3 UltraLink remote access unit 16.7” W x 9.70” D x 1.75” H (1U) 42.4 W x 24.6 D x 4.4 cm Dimensions Weight 8 lbs. (3.6 kg) Power Auto Switching, 115-230 VAC, 50/60 Hz, 750 ma, 100 watts Connectors Power: IEC 320 standard receptacle Local KVM: Video - HD15F, Keyboard - MD6F, Mouse - MD6F...
-
Page 23: Front Panel
All manuals and user guides at all-guides.com Introduction Front Panel Figure 1 Front panel lamps indicate state of the UltraLink Lamp Indication POWER AC Power is applied TCP/IP user logged in SERIAL Serial device user logged in LOCAL Local user is logged in Table 1 Front panel indicators Back Panel Figure 2 External connections on the back panel... -
Page 24: Getting Started
All manuals and user guides at all-guides.com Getting Started Getting Started In the Box The following items are included with your UltraLink: UltraLink unit Power cord Cable from UltraLink to Rose switch (DB25 male to DB25 male) Cable from UltraLink to standalone computer or other KVM switch (DB25 male to VGA-PS2-PS2 male Video loop cable used when local port is connected (VGA to VGA) UltraLink Viewer software (two diskettes) -
Page 25: Connections
All manuals and user guides at all-guides.com Connections Connections There are two ways to connect the UltraLink The local KVM is a KVM station connected directly to the UltraLink. It can access the Switch/CPU device attached to the UltraLink with the connect login described later. -
Page 26: Start Up
All manuals and user guides at all-guides.com Start Up Start Up Power On Connect the UltraLink to a power source and turn the power switch on. If the green power led on the front panel does not illuminate, turn the power off, check your power source, and wait at least 15 seconds before turning power on again. -
Page 27: About Logins
All manuals and user guides at all-guides.com Start Up About Logins A default administrator account exists for initial configuration when the UltraLink first starts up. The user ID is admin and there is no password. IMPORTANT One of the first steps an administrator should perform is to secure the user ID and password for the default administrator account. -
Page 28: Using Configure Login For The First Time
All manuals and user guides at all-guides.com Start Up Using Configure Login for the First Time Only basic communication settings are required on the UltraLink to make it accessible to a Viewer. An administrator performs other settings, such as user management, security, and switch configuration from the UltraLink Viewer program. -
Page 29: The Configure Screen
All manuals and user guides at all-guides.com Start Up IMPORTANT To exit the connect login screen, press Ctrl, Alt, and the L key simultaneously. The Configure Screen Move between fields on the configure screen by pressing the up and down arrow keys. -
Page 30: Connect Contention
All manuals and user guides at all-guides.com Start Up Saving or Abandoning Changes Press the F10 key to apply network settings immediately and to make the UltraLink available to Viewers on the network. Press F9 to cancel the changes. After saving or canceling your changes, the connect login screen is displayed. -
Page 31: Installing The Ultralink Viewer
All manuals and user guides at all-guides.com Installing the UltraLink Viewer Installing the UltraLink Viewer Requirements The UltraLink Viewer runs on most Windows PC installations. Minimum Hardware • 133 megahertz PC with 32 Mb of system memory and 4 Mb of free disk space •... -
Page 32: Using The Viewer For The First Time
All manuals and user guides at all-guides.com Installing the UltraLink Viewer You may choose the folder in which you install the Viewer. Start the Viewer using one of the items optionally created by the Setup Wizard: Desktop icon, Quick Launch icon, or Windows Start Menu entry. Using the Viewer for the First Time IMPORTANT Pass-through mode takes control of your keyboard and mouse... -
Page 33: The Viewer Screen
All manuals and user guides at all-guides.com The Viewer Screen The Viewer Screen The Viewer screen contains the following functional areas: Title bar • Menu commands • Display area • Toolbar • Status bar • Windows buttons • What’s this help •... -
Page 34: The Display Area
All manuals and user guides at all-guides.com The Viewer Screen Toolbar Icons The toolbar provides quick access to the following functions: Save bitmap Connect Disconnect Full-screen Auto size Quad-screen Ctrl + Alt + Delete Refresh Table 3 Toolbar icons UltraLink Location List When the Viewer is not connected, an UltraLink location list box is visible. -
Page 35: The Status Bar
All manuals and user guides at all-guides.com The Viewer Screen The Viewer may scale images to fit into the display area or display images at the same resolution as the remote computer. View menu commands control the appearance of images in the display area. The Status Bar The status bar, at the bottom of the Viewer window, provides the following items: •... -
Page 36: Question Mark Help
All manuals and user guides at all-guides.com The Viewer Screen Question Mark Help On some dialogs, there will be a small question mark in the upper right hand corner. Click on the question mark, and then click on a field in the dialog to get help on that specific item. -
Page 37: Menu Commands
All manuals and user guides at all-guides.com Menu Commands Menu Commands File The File menu contains the following commands as shown in the figure below: • Flash Update • Save Bitmap • Exit Figure 15 File menu commands Flash Update The Flash Update command, available to administrators, allows the Viewer to update an UltraLink with new firmware. -
Page 38: Connect
All manuals and user guides at all-guides.com Menu Commands Connect The Connect menu contains the Connect and Disconnect commands. See also Connecting and Logging Connect Figure 16 Connect command The connect command displays all UltraLink units configured by the Viewer. You may select any UltraLink on the menu to initiate a connection. - Page 39 All manuals and user guides at all-guides.com Menu Commands Figure 17 View commands Scrolled In scrolled view, the remote computer’s video image displays in its native resolution, providing the sharpest image. If the Viewer display area is not large enough to display the image horizontally or vertically, scroll bars appear to allow viewing any part of the image.
- Page 40 All manuals and user guides at all-guides.com Menu Commands Single Single screen view, as opposed to quad-screen view, is the default display view. The Viewer enters single screen view on logging into the UltraLink. In single screen view, the video image from only one remote computer shows in the display area. If the UltraLink is not connected to a switch, the display area shows the image of the remote computer connected to the UltraLink.
-
Page 41: Shortcuts
All manuals and user guides at all-guides.com Menu Commands Full Screen full-screen mode, the display area takes over the entire screen area of your computer. The title bar, menus, toolbars, and status bar of the Viewer are not displayed – only the video image of the remote computer is visible on the screen. message dialog displays a warning on entering full-screen view. -
Page 42: Settings
All manuals and user guides at all-guides.com Menu Commands Issue Remote Alt+Tab Send the Alt and Tab keys to the remote computer as if they were pressed simultaneously. Issue Remote Ctrl+Alt+Del Send the Ctrl, Alt and Delete keys to the remote computer as if they were pressed simultaneously. - Page 43 All manuals and user guides at all-guides.com Menu Commands Figure 19 Settings commands display a tabbed dialog Connections The Connections tab allows you to maintain a list of UltraLink locations to which the Viewer may connect. Keyboard and Mouse The Keyboard and Mouse tab defines special key sequences and mouse escape movements to exit pass-through mode on the Viewer.
-
Page 44: Help
All manuals and user guides at all-guides.com Menu Commands Help Help is available in various forms. Figure 20 Help menu Help Topics The Help Topics command invokes full online help. UltraLink Web Support The UltraLink Web Support menu option opens a browser and links to the support web site. -
Page 45: Configuration Settings
All manuals and user guides at all-guides.com Configuration Settings Configuration Settings The Settings menu item contains a tabbed dialog to configure the UltraLink and the UltraLink Viewer. Configure the Viewer with the Connections Keyboard and Mouse tabs. Settings are stored on your computer. If you are an administrator, you may configure the UltraLink using the KVM Switch Security... -
Page 46: Connections
All manuals and user guides at all-guides.com Configuration Settings Connections The Connections tab displays and maintains a list of UltraLink locations to which a Viewer may connect. A location is a name of your choosing to identify the UltraLink. UltraLink Locations Three items describe each UltraLink location in the list: location name, connection type, and address. - Page 47 All manuals and user guides at all-guides.com Configuration Settings Figure 22 An UltraLink address UltraLink User Manual...
-
Page 48: Keyboard And Mouse
All manuals and user guides at all-guides.com Configuration Settings Keyboard and Mouse The Keyboard and Mouse tab defines hotkeys and mouse escape movements. Hot Keys Hotkeys use keystrokes to perform the following actions: • Enable or disable pass-through mode • Enable or disable full-screen view •... - Page 49 All manuals and user guides at all-guides.com Configuration Settings Ctrl+Alt+Del The Ctrl + Alt + Del hotkey sends a Ctrl + Alt + Delete key sequence to the remote computer and does not depend on whether the Viewer is in pass-through mode or not.
- Page 50 All manuals and user guides at all-guides.com Configuration Settings Activating the check box also enables a slider control to the right of the checkbox. The slider controls mouse sensitivity for Slow Mouse movement. Moving the slider to the left reduces mouse sensitivity and requires moving the mouse a smaller distance.
-
Page 51: Kvm Switch
All manuals and user guides at all-guides.com Configuration Settings KVM Switch An administrator may use the Switch Settings tab to perform the following functions. See the section Using a KVM Switch. • Activate UltraLink KVM features of any Viewer that logs in to this UltraLink •... - Page 52 All manuals and user guides at all-guides.com Configuration Settings Switch Settings Table The switch settings table displays the port assignments of the attached device and contains three columns – Port, Name and Key Code. Port The Port column displays the port numbers for each port on the device and is not editable.
-
Page 53: Security
All manuals and user guides at all-guides.com Configuration Settings Security Manage UltraLink security settings from the Viewer using an administrator account. If the Viewer is not logged in to an administrator account, the Security tab is unavailable. The Security tab displays a list of user accounts on the UltraLink. The administrator account is the first account, on the top row of the user account list. - Page 54 All manuals and user guides at all-guides.com Configuration Settings the period of time the UltraLink will monitor a Viewer for keyboard and mouse events in pass-through mode. Inactivity timeout is specified in minutes. A value of zero minutes prevents the session from being disconnected.
- Page 55 All manuals and user guides at all-guides.com Configuration Settings Password and Confirm Password As a security measure, these fields do not display what you type. Enter a password for this account twice, once in the Password field and once in the Confirm field.
- Page 56 All manuals and user guides at all-guides.com Configuration Settings Figure 26 User Details UltraLink User Manual...
-
Page 57: Connecting And Logging In
All manuals and user guides at all-guides.com Connecting and Logging In Connecting and Logging In Connecting There are two methods of connecting to an UltraLink, the connect menu and the toolbar. The toolbar button connects to the UltraLink selected in the select list on the toolbar with a single click. -
Page 58: Pass-Through Mode
All manuals and user guides at all-guides.com Connecting and Logging In After a successful login: • The Connect menu changes to Disconnect • The Connect button on the toolbar is disabled • The Viewer display area, which previously displayed the message “Not Connected”, displays video from the remote computer •... - Page 59 All manuals and user guides at all-guides.com Connecting and Logging In Pass-through Warning Dialog The Viewer displays a warning dialog before switching into pass-through mode to remind you of the escape methods. You may disable the warning dialog by checking the suppress checkbox.
-
Page 60: Disconnecting
All manuals and user guides at all-guides.com Connecting and Logging In Ctrl + Alt + Del and Ctrl + Tab To send Ctrl + Alt + Del and Alt + Tab to a remote computer without entering pass- through mode use the reboot toolbar button or key combinations. The default key combinations Ctrl + Alt + T and Ctrl + Alt + A may be modified. -
Page 61: View Modes
All manuals and user guides at all-guides.com View Modes View Modes The viewer has modes to show each computer at its clearest possible size, or to lock the viewer’s size and fit each new image within a selected view size. Select View modes on the View menu. -
Page 62: Auto Size
All manuals and user guides at all-guides.com View Modes Figure 31 Scroll bars allow native resolution in a small window Auto Size This setting determines what happens when there is a change in a remote computer’s resolution. This change may occur when switching between ports on a KVM or it may change several times when a remote computer reboots. -
Page 63: Full Screen / Windowed
All manuals and user guides at all-guides.com View Modes Figure 32 Auto Size fits image exactly into the display area Full-screen In full-screen view, the display area takes over the entire screen of your monitor. The title bar, menus, toolbar and status bar of the Viewer do not display – only the video image of the remote computer is visible on the screen. -
Page 64: Color Modes
All manuals and user guides at all-guides.com View Modes The Viewer automatically enters pass-through mode when going to full-screen view, unless the Viewer is in quad-screen view. In the absence of menus and toolbars in full-screen view, the only way to exit full- screen view is to use hotkeys or mouse escape movements. -
Page 65: Using Akvm Switch
All manuals and user guides at all-guides.com Using a KVM Switch Using a KVM Switch KVM Switch Features Enable KVM switch features by selecting a KVM switch type in the device list of the KVM Switch tab of the Settings menu. Then save the switch settings to the UltraLink by selecting OK at the bottom of the Settings dialog. -
Page 66: Quad Screen
All manuals and user guides at all-guides.com Using a KVM Switch Quad Screen In quad-screen view, the Viewer displays video from up to four remote computers by controlling the KVM switch to change ports. Keystroke events to cause the KVM switch to select a computer port are defined using the KVM Switch tab of the... -
Page 67: Switch File Import And Export
All manuals and user guides at all-guides.com Using a KVM Switch Switch File Import and Export The Key Code column on the KVM Switch tab of the Settings menu defines keyboard events to make a KVM switch select a port. Key Code is automatically defined in for KVM devices defined in the Device list box. - Page 68 All manuals and user guides at all-guides.com Using a KVM Switch Switch File Content Rules Use the Import and Export buttons to save and retrieve switch settings to text files, which you may edit with any text editor. To create a switch file use the example below.
-
Page 69: Safety
All manuals and user guides at all-guides.com Safety This UltraLink Unit has been tested for conformance to safety regulations and requirements, and has been certified for international use. Like all electronic equipment, the UltraLink Unit should be used with care. To protect yourself from possible injury and to minimize the risk of damage to this Unit, read and follow these safety instructions. -
Page 70: Appendix A. Rack Mount
All manuals and user guides at all-guides.com Appendix A. Rack mount Appendix A. Rack mount The rack mount kit includes the following items: Two black anodized mounting brackets. Four 6 - 32 x 3/8” flat head mounting screws. To rack mount your UltraLink unit, attach the two rack mounting brackets to your Unit with the short flange against the Unit using the four screws provided. -
Page 71: Index
All manuals and user guides at all-guides.com Index Administrator Help options, 26 account, 35 Hotkeys, 30 configures KVM switch features, 25 configures security, 25, 35 default account, 9 Inactivity timeout, 35 Auto size, 44 Keystrokes to control KVM switch, how to enter Back panel, 5 them, 49 device, 33... - Page 72 All manuals and user guides at all-guides.com Index Scrolled view, 43 Pass-through, 23 System keys, 24, 41 Status bar, 22 Toolbar, 22 View modes, 43 Auto size, 21, 44 Timeout, 35 Black and white, 22 Toolbar, 15 Color, 22, 46 selecting remote computer from, 47 Don’t enlarge, 21 Full-screen, 45...
- Page 73 All manuals and user guides at all-guides.com...
- Page 74 All manuals and user guides at all-guides.com 10707 Stancliff Road Phone (281) 933-7673 Houston, Texas 77099 Internet: WWW.ROSE.COM...
Need help?
Do you have a question about the UltraLink UL-V3 and is the answer not in the manual?
Questions and answers