Table of Contents
Advertisement
Quick Links
Advertisement
Table of Contents

Related Manuals for Messoa NIC830-HN5


Summary of Contents for Messoa NIC830-HN5
-
Page 1: Instruction Manual
NETWORK CAMERA Instruction Manual 830 A.8_CD... -
Page 2: Table Of Contents
Introduction Table of Contents Introduction 1.1 Introductions…………................ 1.2 Important Safeguards……………............2 1.3 Notes on Use and Installation............1.4 Accessories………………………………………………………………………………………………… 1.5 Precautions for Use…………..............1.6 AC Adapter..................1.7 Overview of the Network Camera............1.8 Features of the Camera..............1.9 Names of Camera Parts..............1.10 Installing the Camera.............. -
Page 3: Introduction
Introduction 1.1 Introduction Thank you for purchasing this Network Camera. Before you start using the camera, read this manual carefully to ensure correct usage. Once you have finished reading this manual, keep it in a convenient place for future reference. The design, specifications, software, and manual contents are subject to change without prior notice. -
Page 4: Important Safeguards
Introduction 1.2 Important Safeguards 1. Read Instructions All the safety and operating instructions should be read before the product is operated. 2. Retain Instructions The safety instructions and instruction manual should be retained for future reference. 3. Heed Warnings All warnings on the product and in the instruction manual should be adhered to. 4. - Page 5 Introduction or pinched by items placed upon or against them, paying particular attention to cords at plugs, screws and the point where they exit from the product. 12. Installation This camera should be installed on a firm and solid part of the ceiling or wall. If installed on a soft and weak place, the camera unit may fall.
- Page 6 Introduction When replacement parts are required, be sure the service technician has used replacement parts specified by the manufacturer with the same characteristics as the original part. Unauthorized substitutions may result in fire, electric shock or other hazards. 19. Safety Check Upon completion of any service or repairs to this camera, ask the service technician to perform safety checks to determine that the camera is in proper operating condition.
-
Page 7: Notes On Use And Installation
Introduction 1.3 Notes on Use and Installation ・ Do not aim the camera at the sun Do not aim the camera at the sun or point it at sun even if you are not shooting. ・ Do not shoot intense light Intense light such as a spotlight may cause a bloom or smear. -
Page 8: Accessories
Introduction 1.4 Accessories Confirm that all of the following accessories have been supplied with the network camera. CD-ROM (x1) The instruction manual and Camera Finder are contained. Quick Guide (x1) 2GB SD card (x1) Screw set: Wood screws (x4), Anchor (x4) ... -
Page 9: Precautions For Use
Introduction 1.5 Precautions for Use SD Memory Card ● There is a limit to the number of rewrites that is possible with the SD memory card. Replacing the SD memory card when performing periodic maintenance of the camera is recommended. ●... -
Page 10: Power Adapter
Introduction 1.6 Power Adapter Be sure to use only the suitable power adapter. Using a wrong power adapter may cause the camera to malfunction, heat up, or catch fire. Before using the power adapter, carefully read and observe the Important Safety Instructions and the notes below. -
Page 11: Overview Of The Network Camera
Introduction 1.7 Overview of the Network Camera The NIC network camera can deliver video images and audio in real time using the Internet or an intranet. The camera is equipped with Ethernet (RJ-45) 10BASE-T/100BASE-TX network interfaces. It can be used in various indoor environments. -
Page 12: Features Of The Camera
Introduction 1.8 Features of the Camera ● 1/3” Sony progressive scan CCD A high-resolution picture element progressive scan CCD (charge coupled device). All lines are captured at the same time. No odd/ even field time lag. ● 1.3 Mega pixels resolution The increased resolution can also be used to provide a significantly larger overview and exceptional image detail. -
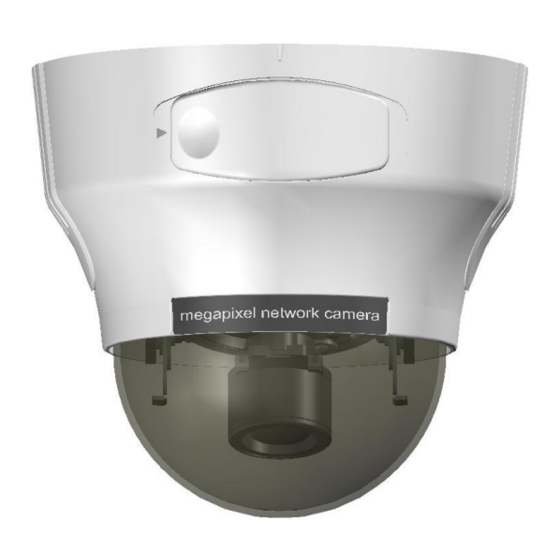
Page 13: Names Of Camera Parts
Introduction 1.9 Names of Camera Parts Default button SD card slot Network Connector... -
Page 14: Installing The Camera
Introduction 1.10 Installing the Camera ● Improper installation may cause the camera to fall. -When installing on ceiling or wall 1 Make a hole in the ceiling/wall where the camera is to be installed to insert the power cable, LAN cable and other cables. 2 Feed the power cable, LAN cable and other cables through the hole. - Page 15 Introduction 5 Adjust the view angle Monitor out 6 Align the notch with position “P”. Rotate the cover clockwise to lock the cover to the base. Tighten the locking screw. Base Notch Cover Locking Screw...
- Page 16 Introduction Important ● Check if the ceiling structure and material have a sufficient strength before installing the camera onto a ceiling. If the amounting strength is inadequate, the camera will fall, potentially causing an injury or a camera failure. The screws supplied as accessories do not provide an adequate strength with some ceiling materials.
-
Page 17: Setting Network Camera Environment
Introduction 1.11 Setting Network Camera Environment Items needed for network camera monitoring system ● Administrator's personal computer The personal computer that is given all authorities for setting, operating, monitoring and other functions with the network camera is called the "administrator's personal computer" in this manual. * The terminal equipment only for viewing monitored images is called the "user's personal computer"... -
Page 18: Connecting The Camera And Personal Computer By Network
Introduction 1.12 Connecting the Camera and Personal Computer by Network IP Address To connect to the network, the administrator needs to set the network camera IP address. There are two options to set the IP address. ・ Obtaining an IP address automatically from the DHCP server ・... - Page 19 Introduction ● The IP address of your camera after purchasing from the store is automatically set to 192.168.0.30 in case DHCP is not used. Set the IP address of your personal computer in the same subnet. (The network segment must be the same segment when directly connecting using a cross cable or connecting through the hub) When connecting more than one camera, connect each camera using IP Address 192.168.0.30 and change the IP addresses of the second and subsequent cameras to other IP addresses, such as 192.168.0.31.
-
Page 20: Using The Camera Search Application "Camera Finder
Introduction 1.13 Using the Camera Search Application "Camera Finder" The "Camera Finder" is an application for searching network cameras that can currently be viewed from the administrator's personal computer or a user's personal computer, and connecting to those cameras. ● Setting up "Camera Finder" 1 Insert the CD in the CD-ROM drive of the personal computer. -
Page 21: Log-In Screen
Introduction 1.14 Log-in Screen This product regards a person who has performed Administrator Log-in as an "administrator" and a person who has performed User Log-in as a "user." Administrator Log-in can perform all functions, while the functions performed by User Log-in are limited. Administrator Log-in 1 Search the camera by "Camera Finder"... -
Page 22: Viewing And Listening
Introduction 1.15 Viewing and Listening Images of the network camera can be viewed through the Internet browser of your personal computer. ● Preparations before displaying ・ Enable cookies ・ Set "Browser setting when proxy server is used" when a proxy server is used. ・... - Page 23 Introduction "Cancel" and quit setting. If the checkbox is checked, click "Detail setting." A proxy setup screen will appear. 6) Enter the IP addresses of the network cameras in the field marked "Do not use the proxy server with addresses started with the following. 7) Click "OK”, when Windows XP SP2 is used: Click "Install"...
-
Page 24: Set Up
Introduction 2.1 Setting Setup screen Click the Setup button in the Camera Image screen. Important Performing user log-in does not display the Administrator Setup menu on the left and displays only setup items that can be used by the user (set by "Administrator Function"... -
Page 25: Camera/Basic Settings
Setting 2.2 Camera/Basic Settings Basic items such as size and quality of delivered images of the camera can be set. 1 Click "Image Settings" on the Setting Menu. ・ A sub menu for Camera Settings will appear. 2 Click "Basic" in the sub menu. ・... - Page 26 Setting increases when Auto Gain Control is near maximum. Lighting is recommended to obtain good image quality. NOTE If sensitivity is still short after setting Auto Gain control, set the high limit value of the slow shutter and Day/Night function, to further increase sensitivity. ...
- Page 27 Setting When the sensitivity is high, the exposure time becomes longer and frame rate becomes smaller. Blurred images sometimes are prominent with moving objects. Gamma correction This feature refers to aligning of monitor’s image brightness by means of correction of video signal range.
-
Page 28: Camera/Compression Settings
Setting 2.3 Camera/Compression Settings ● Compression mode -Operation Mode - Both functions of JPEG and MPEG4 are effective. - In the function of JPEG, resolution of FTP and E-mail becomes resolution same as Monitor. ● JPEG - Following settings are enabled when "Compression Mode" is set to "JPEG". -Resolution Configure resolution. -
Page 29: Camera/Event Settings
Setting 2.4 Camera/Event Settings External alarms and motion sensors can be set. Connecting a sensor or other device to the alarm input terminal notifies an alarm when the sensor detects a trouble. For example, mounting a sensor on a door notifies an alarm each time the door is opened or closed. -
Page 30: Camera/Sd Recording
Setting LOW: It works only when a large change in brightness or motion is detected. NOTE ● Detection sometimes fails if the object is dark. ● Incorrect detection is sometimes made due to noise if the object is dark and AGC gain is high. - Page 31 Setting Images during "Alarm In", images during "Motion Detection", and images of "Continuous Recording" can be stored in an SD memory card inserted in the network camera. When recording alarm images, perform "Event Settings" first and set records in the following sequence.
-
Page 32: Camera/Ftp Recording Settings
Setting ● Recording cycle Set a time interval for alarm recording. -Scheduled Recording ON: Images are recorded in accordance with schedule and recording interval. Setting to ON will set a recording schedule and interval. OFF: Continuous recording is not performed. -Overwrite ON: Records are overwritten beginning with old records when the capacity of the SD memory card becomes full during recording. - Page 33 Setting You can save image files via FTP. Setting your FTP recording condition first, and then identity your FTP sever 1 and 2 1. FTP Record Conditions You can store your image files base on your schedule recording setting, or alarm in recording setting.
-
Page 34: Camera/E-Mail Recording Settings
Setting You can choose to save your image files to either FTP server 1, 2, or automatically switching servers. SD Card Back Up if FTP Fail You can still perform SD Card back up…… The network camera automatically store images in the SD card when images cannot be recorded in the server due to a network failure, or other trouble. - Page 35 Setting E-Mail Recording You can receive images by setting your e-mail account. Authentication setting No Authentication- no restrict rule POP before SMPT- the mail server restrict sending e-mail before receiving SMTP Auth. - Authorize plain, login, and Cram-MD5 E-mail Server (SMTP) - input your outgoing mail server (SMTP) E-mail Server (POP) –...
-
Page 36: Camera/Audio Settings
Setting Subject - input your subject title for your sending e-mail Message – input the alarm message as a notification Send URL – You can send images to URL when you select ON to active the function. Attach Image – you can attach images to your e-mail E-mail Address List You can send e-mails to multiple users when either alarm in, motion detection, or both have occurred. -
Page 37: Network Settings
Setting Audio Setting You can setup your audio setting by enable audio input and output. Audio Input: ON- The camera receives audio; OFF- The camera does not receive audio. Set to "ON" when inputting audio from a microphone connected to the camera. Audio Input Level: HIGH- Increases the audio input level. - Page 38 Setting Network settings You can setup your camera basic setting, DDNS, and FTP server by clicking on network setting on setting menu. Basic Setting Camera Name: Input your camera name here. The default name is “IP DOME”. DHCP: The IP address is automatically obtained when you select ON; otherwise, select OFF to manually setup the network setting.
- Page 39 Setting This function is available when registering with DDNS provider. Select ON to enable the DDNS function; input your DDNS server, User ID, password and password (confirm), and then presses save to save your setting. FTP Server If you wish to enable FTP function, select ON to activate FTP function. Input your Login ID, Password, Password (confirm), and number of maximum connection in Max Simultaneous Connections.
-
Page 40: Administrator Functions
Setting 2.10 Administrator Functions Administrator Functions Press the Administrator functions on setting menu. You can setup system password, date and time, upgrading firmware, and import and export configuration setting. Password The default setting for system Admin ID and password is: Admin: ID: admin Password: 1234 You can adjust your own Admin ID and password up to 16 characters. - Page 41 Setting Update Setting You can update system firmware once the update file is available. It is the customer's responsibility to update firmware. All camera motions will shut down during firmware update. Close any other screens before starting a firmware update. Never disconnect power and LAN cable during the firmware update process.
-
Page 42: Event Log
Setting 2.11 Event Log Event Log Click Event Log on the setting menu. You can setup a condition for log view. Select "Set Condition" in "Display” filter setting. Select appropriate option in "Display Condition Settings". Click the "save" button to apply new condition. 2.12 Information Information Click on Information on setting menu.
Need help?
Do you have a question about the NIC830-HN5 and is the answer not in the manual?
Questions and answers