Table of Contents
Advertisement
Quick Links
Advertisement
Table of Contents

Related Manuals for Messoa NDF821


Summary of Contents for Messoa NDF821
- Page 1 Indoor Dome Network Camera NDF821/NDF821E User Manual 2012-10 A2...
-
Page 2: Safety Notice
Extremely humid, dusty, hot/cold environments where the operating temperature is outside the recommended range of -10°C to +55°C. • Close to sources of powerful radio or TV transmitters. • Close to fluorescent lamps or objects reflecting light. • Under unstable light sources (may cause flickering). NDF821/NDF821E User Manual... -
Page 3: Table Of Contents
4.1.2 Setup Menu......................21 4.1.3 Applying Settings ....................21 4.2 Image Settings ..................... 21 4.2.1 Codec ......................21 4.2.2 Exposure ......................24 4.2.3 White Balance ....................27 4.2.4 Basic Settings ....................28 4.2.5 Smart Encoding ....................29 4.2.6 Smart Focus .......................30 4.2.7 Privacy Zone ......................31 NDF821/NDF821E User Manual... - Page 4 4.6 Recording ..................... 49 4.6.1 Settings – Video File ....................49 4.6.2 Settings – FTP ....................49 4.6.3 Settings – SMTP ....................50 4.6.4 SD Card Storage Format Selection .................51 4.6.5 Period Setting.....................52 5. VLC Player for RTSP Streaming Access ..........54 NDF821/NDF821E User Manual...
-
Page 5: Overview
Quick Start Guide „ Guide Pattern Sticker „ RJ-45 Female / Female Coupler „ Accessories „ • Machine Type Flat Head Screw (#1) • Tapping Type Flat Head Screw (#2) • Plastic Anchor (#3) • Rubber Foot (#4) NDF821/NDF821E User Manual... -
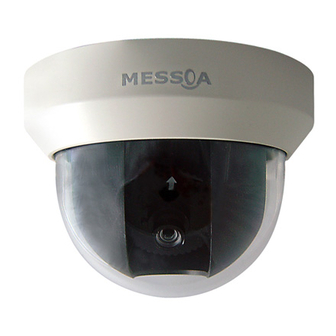
Page 6: Hardware Overview
6. Alarm Out (Orange): alarm signal output port Reserved (Green): reserved contact RS-485 (Yellow): RS-485 interface 7. GND: ground (electricity) in electrical circuits Alarm In 1 (Red): alarm signal input port Alarm In 2 (Brown): alarm signal input port NDF821/NDF821E User Manual... -
Page 7: Controls
Reset: Use an appropriate tool to press the button for few seconds to reset or load default „ settings of the camera. Press and hold the button for within five seconds to reboot camera. Hold longer than 5 seconds to load default settings. NDF821/NDF821E User Manual... -
Page 8: Specifications
Video Network 1 x RJ-45 Sensor Type 1/2.7” image sensor optimized for low-light performance Audio In/Out 3.5mm phone jack 1-in / 1-out NDF821 1920x1080 (HxV) Active Analog Video 1 x BNC, 1.0Vp-p, 75 ohm / 1 x RCA Pixels NDF821E... -
Page 9: Camera Installation
2. Aiming the circles (the figure below marked with “+“ ) on the sticker, drill four screw holes and one cable entry hole in the ceiling/wall. Lens Direction Note: Mounting surface material determines screw type. Refer to manual. GUIDE PATTERN NDF821/NDF821E User Manual... -
Page 10: Mounting The Camera
(Red+/White–) are correctly wired. • PoE: Attach the RJ-45 connector to a PoE compliant network device. Power will be supplied through the Ethernet cable. 2. Attach the BNC connector to a monitor for composite video output. NDF821/NDF821E User Manual... -
Page 11: Adjusting Camera Angle
Tilt Angle = 90 degrees Horizontal rotation: Rotate the dome base to adjust the horizontal position. Do not turn the base more than 355° as this may cause the internal cables to twist and disconnect or break. NDF821/NDF821E User Manual... -
Page 12: Assembling The Camera
2.6 Assembling the Camera Follow the steps below when all the camera adjustments and cabling tasks are finished. 1. Assemble the inner liner. 2. Assemble the dome cover. 3. Secure the dome cover with the accompanying screw. NDF821/NDF821E User Manual... -
Page 13: Network Deployment
If you want to provide the camera power via the Ethernet connection, a PoE compliant hub/ switch is required. Caution Note The LAN port of the camera supports auto MDI/MDIX (Medium dependent interface crossover) so there is no need for an uplink port or the use of a cross-over cable. NDF821/NDF821E User Manual... - Page 14 RTSP port to enable access to video/audio streams from the camera. If your camera is configured to use a non-standard HTTP port, then you have to forward that port accordingly. NDF821/NDF821E User Manual...
-
Page 15: Accessing The Camera For The First Time
Command Prompt. 2. At the prompt window, type ping x.x.x.x , where x.x.x.x is the IP address of the camera (the default is 192.168.1.30). If the message of “Reply from…” reponds, it means the connection is established. NDF821/NDF821E User Manual... - Page 16 Open the IE browser and enter the IP address of the camera in the URL field. The default is 192.168.1.30. When prompted for login, enter the user name and the password (The defaults: admin, 1234). Note that the user name and password are case-sensitive. NDF821/NDF821E User Manual...
-
Page 17: Using "Ip Finder" To Manage Cameras
3. Network Deployment Upon successful login, you will see the live view screen shown below, which is taken from NDF821 for series introduction. 3.3 Using “IP Finder” to Manage Cameras IP Finder is a management tool included on the product CD. It is designed to manage your network cameras on the LAN. - Page 18 For an individual camera, right-click the camera and a menu will provide these options: Go to Presentation URL: Launch IE browser to access the web-based utility of the camera. „ Set Device ID and Password: Set the login ID and password for managing the camera with IP „ Finder. NDF821/NDF821E User Manual...
- Page 19 3. Network Deployment Network Information: Allows you to configure the camera’s network settings. „ NDF821/NDF821E User Manual...
-
Page 20: Web-Based Interface
4.1 Overview 4.1.1 Main Screen After you log in to the camera’s web-based control utility, you will first see the live view screen of the camera. The screen below is taken from NDF821 for series introduction. Live view video Camera name... -
Page 21: Setup Menu
* The figure above is taken from NDF821 for web interface introduction purposes. Options within each item may differ slightly among series products. - Page 22 1. Live View uses the MJPEG codec. If no streaming is using MJPEG, it will result in no video for Live View. 2. If MJPEG is selected for both the primary stream and the third stream, Live View will always display video using the third stream codec settings. NDF821/NDF821E User Manual...
- Page 23 4. Web-based Interface Refer to the tables below for selectable codec types for each streaming: NDF821 Streaming Combination Primary Secondary Third Codec Resolution Codec Resolution Codec Resolution 1080P H264 MPEG4 2CIF MJPEG SXVGA MJPEG 720P SVGA H264 MPEG4 2CIF MJPEG...
-
Page 24: Exposure
Exposure Mode Choose among Auto Exposure, Manual Exposure, or Auto IRIS Mode to configure the exposure settings. When one is selected, the other two will not be configurable. NDF821/NDF821E User Manual... - Page 25 Auto IRIS Mode Select Auto IRIS Mode to configure the exposure settings with the auto iris control enabled. Method: Select which area of the image will be used to measure the amount of light to achieve „ best exposure. NDF821/NDF821E User Manual...
- Page 26 Alarm: Set alarm input as 1 or 2 according your actual connection. • Active: Select (electricity) current status as high or low to define active status. BLC (Backlight Compensation) The Backlight Compensation function allows you to provide the optimal exposure of subjects under back light circumstances. NDF821/NDF821E User Manual...
- Page 27 Level: Depending on the contrast/dynamic range of a scene, you can select different level of „ WDR. Higher level of WDR suits for higher contrast/dynamic scene. If you select Auto mode, the camera will automatically adjust the WDR level by itself depending on the scene. NDF821/NDF821E User Manual...
-
Page 28: White Balance
For example, if red color is too bright, then you should lower the R Gain value. When finished, click Save to have the configuration take effect. „ NDF821/NDF821E User Manual... -
Page 29: Basic Settings
Saturation: Adjust the image saturation level. „ Sharpness: Adjust the image sharpness level. „ Default All Image Parameters: Click this button to restore all the image settings to the „ defaults. When finished, click Save to have the configuration take effect. „ NDF821/NDF821E User Manual... -
Page 30: Smart Encoding
Save Window to save the region. Click anywhere on the image to cancel the current defined area. Mode: Select Fixed ROI to enable smart encoding function. „ Priority: Select a priority level for the ROI. „ NDF821/NDF821E User Manual... -
Page 31: Smart Focus
1. Click on the subject that you want to focus on and then click Save Window. 2. Check the Smart Focus Enabled box. This will turn the smart focus indicator to red. 3. Use the focal length and focus controls to optimize the focus. When focus is achieved, the indicator turns green. NDF821/NDF821E User Manual... -
Page 32: Privacy Zone
To turn on the privacy zone function: 1. Click and drag your mouse on the image to define the region to be masked and then click Save Window. 2. Select ON to enable Privacy Zone. This will turn the masked area to black. NDF821/NDF821E User Manual... -
Page 33: Eptz
To tilt up/down: Click the up/down indicator to tilt the viewing area. The tilt function does not work if the video is not zoomed-in (no zoom status). • To preset to home: Click the home indicator and the image will return to the original view. NDF821/NDF821E User Manual... -
Page 34: Network
It helps you to identify which camera is currently accessed, particularly when multiple cameras are connected to your network. When finished, click Save to have the configuration take effect. „ NDF821/NDF821E User Manual... -
Page 35: Ftp
Password: Enter the password to logon to the FTP server. „ File Upload Path: Specify the folder which has been created under FTP server root directory. „ When finished, click Save to have the configuration take effect. „ NDF821/NDF821E User Manual... -
Page 36: Smtp
NTP server settings here. NTP Server: Enter the IP address or the domain name of the NTP server to synchronize with. „ Time Zone: Select a time zone in which the camera is located. „ NDF821/NDF821E User Manual... -
Page 37: Rtsp
Refer to the table below for RTSP URLs: Stream MJPEG Primary rtsp://192.168.1.30:8555/mjpeg MJPEG Third rtsp://192.168.1.30:8558/mjpeg H.264 Primary rtsp://192.168.1.30:8557/h264 H.264 Secondary rtsp://192.168.1.30:8556/h264 MPEG4 Primary rtsp://192.168.1.30:554/mpeg4 MPEG4 Secondary rtsp://192.168.1.30:8554/mpeg4 *Replace the IP address and the port number with the camera’s settings if otherwise configured. NDF821/NDF821E User Manual... -
Page 38: Onvif
ONVIF compliant device thus changing the camera’s functionality. User Authentication: If an ONVIF compliant device needs authentication for communication, „ enable this option. When finished, click Save to have the configuration take effect. „ NDF821/NDF821E User Manual... -
Page 39: System
„ an NTP (Network Time Protocol) server, which can be configured under Network > NTP. Date Format: Allows you to specify a desired date format. „ When finished, click Save to have the configuration take effect. „ NDF821/NDF821E User Manual... -
Page 40: Time Stamp
Keep the network connected during the update process. „ DO NOT turn off or restart the camera during the firmware update process. „ To update the firmware: 1. Click the Browse button to locate the firmware file. NDF821/NDF821E User Manual... - Page 41 When completed, you will return to the live view page. Hardware Factory Default: Reset all of the camera parameters to the defaults, including the „ network settings. NDF821/NDF821E User Manual...
-
Page 42: User Management
To modify the password of an existing user, enter the user name and modify the password. „ Two types of account can be specified: „ • Admin (Administrator): Can access all camera functions, pages and change configurations. • Viewer (Guest): Can only access the live view page and take snapshots. NDF821/NDF821E User Manual... -
Page 43: Language
When finished, click Save to have the configuration take effect. 4.4.6 Log This page displays detailed information about the camera’s operations and activities, including all the login and alarm records. NDF821/NDF821E User Manual... -
Page 44: Audio
2. Speak into the microphone and the person(s) around the camera should hear your voice. 3. When people around the camera are talking to you, you should hear them from the speaker that is connected to the computer. NDF821/NDF821E User Manual... -
Page 45: Event
You can alternatively select User Define and enter a value from 1 to 100 in the Customized Threshold field. When the motion within a specified area exceeds the threshold, an alarm will be triggered. Select the OFF radio button to disable motion detection NDF821/NDF821E User Manual... -
Page 46: External Alarms
SMTP: Notification email with the recorded JPEG files attached will be sent to the SMTP server. „ SD Card: Recorded video clips will be saved to the SD card when the alarm is triggered. „ Caution Note NDF821/NDF821E User Manual... -
Page 47: Blur Detection
SD Card: Recorded video clips will be saved to the SD card when the alarm is triggered. „ 4.5.4 Audio Detection With the Audio Detection enabled, when the camera detects any sound, the camera will generate an alarm and then take a specified action. NDF821/NDF821E User Manual... -
Page 48: Ethernet Detection
To perform a video recording, you must select MJPEG codec for one of the streams. 4.5.5 Ethernet Detection With Ethernet detection enabled, when the camera detects an Ethernet disconnection, the camera will generate an alarm and then take a specified action. NDF821/NDF821E User Manual... -
Page 49: Event Management
Alarm Duration: Specify the duration of the alarm when an event is triggered. „ Alarm Reset: Click this button to stop the current alarm and to restart event detection again. „ When finished, click Save to have the configuration take effect. „ NDF821/NDF821E User Manual... -
Page 50: Recording
AVI Format: Select a desired video format. Available formats depend on the primary and the „ secondary streaming codec/resolution settings. 4.6.2 Settings – FTP FTP Networking Displays the current FTP settings, which are specified via Network > FTP. NDF821/NDF821E User Manual... -
Page 51: Settings - Smtp
Attached File Numbers: Enter the number of JPEG images that will be attached to the „ notification email. Set a lower number if SMTP server has an email size limit. Attached File Format: In JPEG format always. „ NDF821/NDF821E User Manual... -
Page 52: Sd Card Storage Format Selection
Then an FTP login window shows up asking for login ID and password. After filling in the login ID and password fields (defaults are admin and 1234 respectively), you can see the the FTP directory with successful login. NDF821/NDF821E User Manual... -
Page 53: Period Setting
Up to 7 scheduled recordings can be set. Check Save to SD Card should you wish to save the recorded video clips to the SD card. NDF821/NDF821E User Manual... - Page 54 4. Web-based Interface Caution Note The scheduled recording always demands higher priority than the alarm-based recording. When a scheduled recording is proceeding, the alarm-based recording will be disabled but the alarms will be logged. NDF821/NDF821E User Manual...
-
Page 55: Vlc Player For Rtsp Streaming Access
2. Launch VLC Player. 3. Click Media _Open Network Stream. 4. On the Network tab, choose RTSP from the Protocol menu. 5. In the Address field enter the IP address of the stream that you want to view. NDF821/NDF821E User Manual... - Page 56 Corporate Headquarters No.8, Wuquan Road, New Taipei Industrial Park, Wugu District, New Taipei City 24886, Taiwan, R.O.C. Tel: +886-2-2298-3908 Fax: +886-2-2298-3909 E-mail: info@messoa.com USA Office 13611 12th St, Unit B Chino, CA 91710, USA Tel: +1-909-590-5955 Fax: +1-909-590-2374 E-mail: info@messoa.com Greater China Office Room 301, Yuanzhong Office Building, No.2007...
Need help?
Do you have a question about the NDF821 and is the answer not in the manual?
Questions and answers