
Related Manuals for Messoa NIC990


Summary of Contents for Messoa NIC990
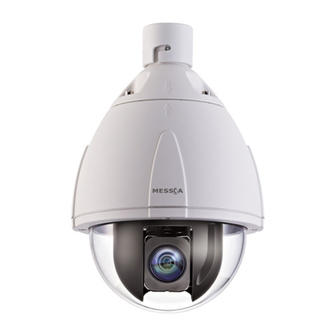
- Page 1 2MP High Speed PTZ Dome Network Camera NIC990 User Manual 2012-06 A1...
- Page 2 Specifications and information contained in this document are presented as accurately as possible as of the time of release, but are not guaranteed to be entirely free of error. MESSOA assumes no responsibility for errors or omissions that may appear in this document and reserves the right to change this publication at any time without obligation to notify anyone of such revisions or changes.
-
Page 3: Ce Compliance Statement
(1) this device may not cause harmful interference, and (2) this device must accept any interference received, including interference that may cause undesired operation. Any changes or modifications to the equipment not expressly approved by MESSOA could void the user’s authority to operate the equipment. -
Page 4: Table Of Contents
3.3.5 External Alarms ............................. 29 3.3.6 SD Card Recording ..........................31 3.3.7 FTP Recording ............................35 3.3.8 E-mail ..............................39 3.3.9 Audio ..............................42 3.4 Network ............................42 3.4.1 Basic ............................... 42 3.4.2 DDNS ..............................43 3.4.3 FTP Server ............................. 44 NIC990lUserManual3 ... - Page 5 TableofContents 3.5 System .............................45 3.5.1 Password ............................... 45 3.5.2 Date/Time ............................. 46 3.5.3 Firmware ............................... 47 3.5.4 Configuraion ............................48 3.6 Event Log ............................49 4NIC990lUserManual...
-
Page 6: Overview
1. Overview 1.1 Introduction The NIC990 is designed to provide crystal-clear 16:9 full HD video for outdoor applications in both day and night. With the support of H.264 compression, NIC990 offers you high quality images yet without the need of high bandwidth and storage capacity. -
Page 7: Dimensions
1.Overview 1.3 Dimensions Ø Unit (Ø x H): 216.14mm X 360.19mm (8.51" X 14.18") 6NIC990lUserManual... -
Page 8: Identifying The Parts Of The Camera
Wired to receive alarm signals triggered by external devices. Alarm-in 4 (Orange) Wire the terminal block with an on/off switch or just have the Default (Pink/Gray) two conducts shorted for at least five seconds to load factory default. NIC990lUserManual7 ... - Page 9 1.Overview 8NIC990lUserManual...
-
Page 10: Specifications
Exposure Mode: Auto/shutter priority EN 50130-4, EN 61000-4-2, EN 61000- White Balance: Auto/ATW/Indoor/ 4-3, EN 61000-4-4, EN 61000-4-5, EN Outdoor/One-Push 61000-4-6, EN61000-4-11 Backlight Compensation: On/Off Sharpness: 15 level sensitivity Privacy Zone Yes; customized threshold privacy zone Image Orientation Mirror, Flip NIC990lUserManual9 ... -
Page 11: Getting Started
IP Finder utility installation and how to use IP Finder. 2.1 Installing the Camera 2.1.1 Mounting the IP Camera The camera supports several mounting methods. Select an appropriate method according to your location and purchase required mounting brackets or accessories. 10NIC990lUserManual... -
Page 12: Connecting To A Power Supply
Type 1: Direct Connection to a PC Directly connect the RJ-45 cable of the camera to a PC. To extend the connection length, you should use an RJ-45 female/female coupler to connect two category 5/5e UTP/STP cables together. RJ-45 Coupler NIC990lUserManual11 ... - Page 13 Internet. Typically a broadband router has a built-in DHCP function to assign a local IP address to your camera. You can alternatively assign a fixed IP address to the camera to prevent it from frequently changing. 12NIC990lUserManual...
-
Page 14: Acessing The Camera For The First Time
For initial setup purposes, connect the RJ-45 Ethernet cable of the camera to the LAN port on your PC. If you plan to use another Ethernet cable for cabling extension, a UTP/STP category 5/5e cable is necessary. NIC990lUserManual13 ... - Page 15 If the message of Reply from… responds, it means the connection is established. Step 4: Accessing the Camera via IE Browser Open the IE browser and enter the IP address of the camera in the URL field. The default is 192.168.1.30. 14NIC990lUserManual...
- Page 16 When prompted for login, enter the user name and the password respectively (The defaults: admin, 1234). Note that the user name and password are case-sensitive. Upon successful login, you will see the live view screen shown as the example below: NIC990lUserManual15 ...
-
Page 17: Using "Ip Finder" To Manage Cameras
MAC address. Each camera comes with a unique MAC address, which is indicated on the product label. It helps identify which camera is currently accessed, particularly when multiple cameras are connected on your network. The Tool menu of the IP Finder allows you to perform these tasks: 16NIC990lUserManual... - Page 18 The management tool does’t support Update Firmware and Hard Factory Default functions for NIC990. If users tick the check box to NIC990 followed by clicking either the Update Firmware or Hard Factory Default button, the message ‘The function requested is not supported.’ displays in the status column field.
- Page 19 2.GettingStarted 18NIC990lUserManual...
-
Page 20: Web-Based Interface
In case a proxy server is being used, setting of the browser to bypass the proxy server during communication with the network camera is recommended. 1. Launch the browser. 2. Choose Internet Options on the Tools menu. 3. Click the Connections tab. 4. Click LAN Settings. NIC990lUserManual19 ... - Page 21 ID and password in place of the default values to make certain camera security. Keep the new administrator login ID and password handy for future use. To change the administrator login ID and password, see the Password section. 20NIC990lUserManual...
-
Page 22: Using The Live Player - Web
Click the icon to take a picture the lens is currently Snapshot monitoring. Snapshot Path Locate the folder storing pictures or create a new folder. Users can set image size or fix the screen. Size 1:1/Fix Screen H.264/JPEG Choose video compression methods. NIC990lUserManual21 ... -
Page 23: Information
Click Basic Settings on the left-hand menu. Then the screen of Camera - Basic Settings will appear. Image Color Auto Exposure: Auto Exposure controls the light intensity of picture. Two types of specific application conditions can be selected. You can select Full Automatic or Shutter Priority by the 22NIC990lUserManual... - Page 24 WDR: When there are both very bright and very dark areas simultaneously in the field of view, you can enable Wide Dynamic Range function. It optimizes an image to ensure that dark areas are more NIC990lUserManual23 ...
-
Page 25: Tilt Angle
Auto Patrol 1~4: Camera will perform Auto Patrol either 1, 2, 3 or 4. • Tilt Angle Scan Tilt Angle: Set the elevation of the camera in the range of zero to 92 degrees. Tilt Angle Mode: Choose the limit value of camera’s tilt angle: Indoor 85° or Outdoor 92° 24NIC990lUserManual... - Page 26 The live images will be displayed on the monitor only when the camera is not moving. When finishing configurations, remember to click the Save button to have the configurations take effect. NIC990lUserManual25 ...
-
Page 27: Auto Patrol
Stop time: Determine stop time among 3, 5, 7, 15, 30 and 60s for auto/ frame /random scan. After configuring a specified patrol group and its stop time, uers can tick the check boxes labeled with numbers from 1 to 128 to determine how many stop points for a particular patrol group. 26NIC990lUserManual... -
Page 28: Privacy Zone
4. Or click the bottom left-hand PTZ button to show the PTZ control panel • Use buttons on the control panel to define an appropriate position • Drag the mouse on the monitored view to create a rectangular mask and then click Set. NIC990lUserManual27 ... -
Page 29: Codec
Privacy zone will zoom in/out in accordance with the lens zoom level to ensure the effect. 3.3.4 Codec 1. Click Codec on the left-hand menu to display the Codec Settings interface. 2. Configure the options described in the table below. 28NIC990lUserManual... -
Page 30: External Alarms
The camera is equipped with six alarm input terminals and one output terminal and each alarm contains 32 preset actions. When any one of the six alarm is triggered, the camera will immediately move to the preset position. NIC990lUserManual29 ... -
Page 31: Alarm Input
Low: An alarm is triggered for a significant change in brightness or motion. Motion Area Setting: Click the Motion Area button and then a Motion Area Settings window shows up. Drag the mouse to define the detection area. Finally click Save to have the configurations take effect. 30NIC990lUserManual... -
Page 32: Sd Card Recording
The camera supports SDHC (Secure Digital High Capacity) card up to 32GB storage capacity. Before removing or inserting the SD card, remember to shut down the camera. • If users can’t access the SD card, please visit the web site at „https://www.sdcard.org/ to download the SD Formatter tool. downloads/formatter_3/ NIC990lUserManual31 ... -
Page 33: Recording Settings
Motion Detection: This check box is available only when the Motion Detection function • is set at ON (see the External Alarms section). Tick the check box to enable the event recording if a motion detection event occurs. „ OFF: Default setting. 32NIC990lUserManual... -
Page 34: Period Settings
Images at the moment when an event occurs are not included. Options including 0, 3, 5, 10, 20, 60, 120 frames are selectable by click the drp-down menu. „ Recording Cycle: Set the time interval for recording at least one second and up to 180 seconds. NIC990lUserManual33 ... - Page 35 Besides, users can also just launch the Windows Explorer to access SD card. The same, users are supposed to enter the FTP address (ftp://192.168.1.30 by default) in the address field and finish login process. Then you can directly get into the directory. 34NIC990lUserManual...
-
Page 36: Ftp Recording
When you click FTP Recording on the left-hand menu, a message dialog box will pop up if the stream mode is set on H264 (1080p). To start configuring FTP recording users are supposed to set stream mode on options other than H264 (1080p). Please refer to the Codec section for further details. NIC990lUserManual35 ... - Page 37 3.Web-basedInterface Recording Settings Trigger Mode You can store your image files based on your scheduled recording, recording by alarm or recording by motion detection. 36NIC990lUserManual...
-
Page 38: Schedule Settings
„ Recording Cycle: Set a time interval for recording images. „ Recording File Name: Specify the file name for files to be stored on the server. „ Server Path: Type in the fields with data path where the data is to be stored on the server. NIC990lUserManual37 ... - Page 39 „ FTP Port Number: Set ‘21’ by default. „ FTP Mode: • PORT mode: This mode is for most FTP applications. • PASV mode: This mode is for the camera’s network environment that is behind a firewall. FTP Connecting Method: 38NIC990lUserManual...
-
Page 40: E-Mail
Incoming messages are stored at a POP server until the user logs in and downloads the messages to their computer. „ SMTP Auth: Simple Mail Transfer Protocol (SMTP) is an Internet standard for electronic mail (e-mail) transmission across Internet Protocol (IP) networks. NIC990lUserManual39 ... - Page 41 Click the Save & Test E-mail button to save your settings and to test your e-mail settings. Alarm In & Motion Detection E-mail Notification Set the ‘Function’ radio button at ON to enable the following fields. Fill in the fields with related information to send E-mail when an event (alarm-in or motion detection) occurs. 40NIC990lUserManual...
- Page 42 E-mail Address List Click the ‘ON’ radio button to enable sending E-mail to the administrator when events occur. Besides, you can also assign a list of recipients to receive E-mail triggered by alarm-in or motion detection event. NIC990lUserManual41 ...
-
Page 43: Audio
„ Default Gateway: The field is left blank by default. It is not necessary to enter Default Gateway if it is not used. Ask your metwork administrator for Default Gateway information. „ Primary DNS: Same as above. „ Secondary DNS: Same as above. 42NIC990lUserManual... -
Page 44: Ddns
IP Camera Finder program. Note: Please click the Save button to save your image settings. 3.4.2 DDNS DDNS is a service provided by DDNS provider. In this page, you can configure DDNS settings. NIC990lUserManual43 ... -
Page 45: Ftp Server
„ User Name: Enter a login ID if you activate the FTP function. „ Password: Enter a password associated with a login ID. „ Password Confirm: Re-enter the password to confirm it. „ Max Simultaneous Connections: Determine the number of maximum connections by selecting a number from the drop-down list. 44NIC990lUserManual... -
Page 46: System
Admin ID and password are: • Admin. ID: admin • Password: 1234 Here you can change your own Admin ID and password. Aftert setting is done, click Save to have the configurations take effect. NIC990lUserManual45 ... -
Page 47: Date/Time
Click the drop-down menus to set up system date and time. Click Reset to reset each item. When finished, click Save to have configurations take effect. Time Zone Click the drop-down menu to select the time zone where your IP camera is located. 46NIC990lUserManual... -
Page 48: Firmware
1. Specify the Firmware to update: Click the Browse button to locate the firmware file. 2. Make sure the file located is the correct one for firmware update. 3. Click the Upload button to start the update process. NIC990lUserManual47 ... -
Page 49: Configuraion
2. Make sure the file located is the correct one for upload. 3. Click the Import button to start the upload process. Export Settings This function is designed to download configuration from this network camera to the client computer. Just click the Export button to start the download process. 48NIC990lUserManual... -
Page 50: Set To Factory Default
Set the filter condition for displaying logs by Most Recent or Earlist logs (1 to 8190 records). • Fill in the field with keyword to display logs. • Set the fiter condition for displaying logs by Date and Time. NIC990lUserManual49 ... - Page 51 MESSOA TAIWAN, R.O.C. 6F, No.26, Wuquan 6th Rd., Wugu District, New Taipei City 248, Taiwan (R.O.C.) Tel: +886-2-2298-3908 Fax: +886-2-2298-3909 E-mail: info@messoa.com MESSOA USA 13611 12th St, Unit B Chino, CA 91710, USA Tel: +1-909-590-5955 Fax: +1-909-590-2374 E-mail: info@messoa.com MESSOA SHANGHAI INC.
Need help?
Do you have a question about the NIC990 and is the answer not in the manual?
Questions and answers