Broseley York Midi Installation And Operation Manual
Hide thumbs
Also See for York Midi:
- Installation & operating instructions manual (20 pages) ,
- Operation manual (19 pages) ,
- Installation manual (12 pages)

Related Manuals for Broseley York Midi


Summary of Contents for Broseley York Midi
- Page 1 Installation and Operation Manual York Midi Gas Stove Revision: GB07a Revision: GB07a Revision: GB07a Revision: GB07a...
-
Page 2: Technical Information
..................………………..Broseley Fires Ltd. - Page 3 2. DIMENSIONS & DETAILS A - Height with optional canopy ..... . 762mm (23") B - Height Flat Top ......584mm (30") C - Height To Top Of Rear Flue Spigot .
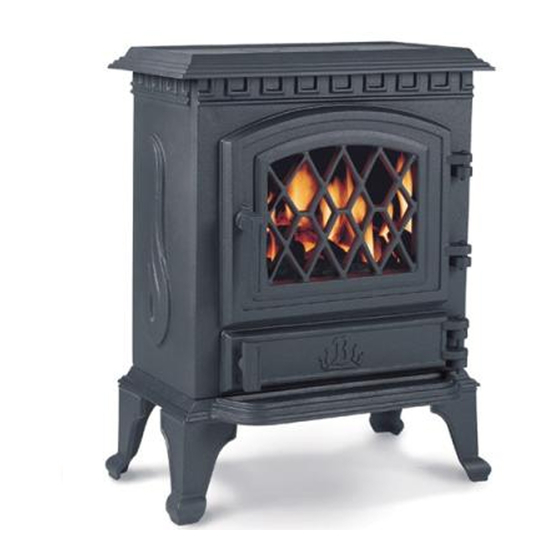
- Page 4 APPLIANCE TO BE INSTALLED IN ACCORDANCE WITH NATIONAL REGULATIONS 1. The York Midi is a gas stove designed to run on either natural gas or LPG. The burner units are not interchangeable between the two types of gas. This stove is a radiant convector fuel-effect appliance.
- Page 5 4. SITING THE APPLIANCE The gas supply connection to the appliance is at the rear right hand side. The connection requires 8mm diameter semi-rigid pipe, not more than 1 metre in length. The appliance can be installed in any adequate area suitable for solid fuel fires and stoves.
- Page 6 5. STOVE ASSEMBLY Please check that the following components are included before you start on the assembly: Stove Box 1 x Cast Iron Stove Body 4 x Stove Legs 4 x Sets of Nuts, Bolts and Washers, 1 x Flue Spigot 1 x Flue Closure Plate Burner Box 1 x Burner Unit...
- Page 7 CORGI registered installer and passed as suitable/sound. The York Midi Gas Stove is suitable for both Class I & II flues (The Building Regulations 1984).The appliance is also suitable for pre-cast flues, pre-cast chimney block, pre-cast...
- Page 8 Whilst arranging the coals, ensure that the pilot is not obstructed Broseley Fires Ltd accept no responsibility for any injury sustained whilst handling hot Ceramics Before any ceramics are placed in position ensure that the burner is operating correctly.
- Page 9 COAL LAYOUT Added Coals shown in white for identification only. Stage 1 Place largest coal matrix firmly against the back of the stove with the three arches to the bottom and central above the burner mesh. Stage 2 Place the smaller of the two remaining coal matrixes in front of the previous section with the pilot cut-out to the bottom.
- Page 10 EXTINGUISHING PROCEDURES AND THAT IT IS NORMAL FOR THE STOVE TO GIVE OFF ODOURS WHILST THE PAINT MATURES. The York Midi Gas Stove operates with a traditional permanent pilot light. The knob for ignition and power control is located on the lower right hand side of the stove.
- Page 11 (D) EXTINGUISHING THE STOVE BACK TO PERMANENT PILOT SETTING From any heat setting, depress control knob fully and turn clockwise to “Pilot” position Release (E) EXTINGUISHING THE STOVE FULLY From any heat setting or the permanent pilot, depress control knob and turn clockwise to “OFF”...
- Page 12 THE REMOTE CONTROL THE REMOTE CONTROL THE REMOTE CONTROL THE REMOTE CONTROL POSITIONING THE RECEIVER After fitting the batteries in the receiver and the hand set, place the receiver anywhere on the hearth. There is a long lead on the receiver to allow you to position the receiver towards the front of the hearth, if you wish to see the light come on when the handset is in use.
- Page 13 Transmitter Function Set the Display • After connecting the battery or by simultaneously pressing AUTO and TIMER, the display flashes. You are in set mode. • From set mode, press AUTO to switch from ° F (and 12 hour clock) to °...
- Page 14 • The LED of the receiver flashes when knob B of the valve reaches its end stops. Automatic Mode (AUTO in display) for Temperature Control • Briefly press AUTO. The set temperature will appear briefly before the display reverts to the room temperature.
- Page 15 10. NOTE TO THE INSTALLATION ENGINEER Please make sure the customer is familiar with the initial lighting and operating procedures before leaving the site and that this instruction booklet is left with them when the final commissioning is complete. TEST FOR SPILLAGE A spillage test MUST be made before the installed fire is left with the customer.
- Page 16 12. TROUBLESHOOTING THE GAS PILOT WILL NOT IGNITE OR STAY LIT Ensure the gas is turned on at the appliance and the meter/cylinder. • Hold in the pilot gas button for at least twenty seconds once the pilot is alight to •...
- Page 17 We hope these instructions are clear and helpful and you are able to enjoy the full benefits of your stove. Please keep this booklet handy for future reference. The manufacture and materials used in building your York Midi gas stove are guaranteed for one year provided the assembly and operation complies with these instructions.Accidental damage and all consumables including the glass door seals are...
- Page 18 SPECIFICATION & INFORMATION THIS SECTION TO BE COMPLETED AND SIGNED BY THE INSTALLATION ENGINEER Type gas supply (please tick) Natural (mains) Gas LPG supply in bulk LPG supply in cylinder Size of Governor setting: (i.e.) Natural Gas 20MBAR. LPG 37MBAR) Length and size of gas supply: Meter pressure.
- Page 19 The rights given in this guarantee are limited to the UK mainland and are in addition to any to which you may have a statutory entitlement. Please retain your purchase receipt. We will need to see this in the event of a claim under warranty. Broseley Fires Ltd Knights Way Battlefield Enterprise Park Shrewsbury...
Need help?
Do you have a question about the York Midi and is the answer not in the manual?
Questions and answers