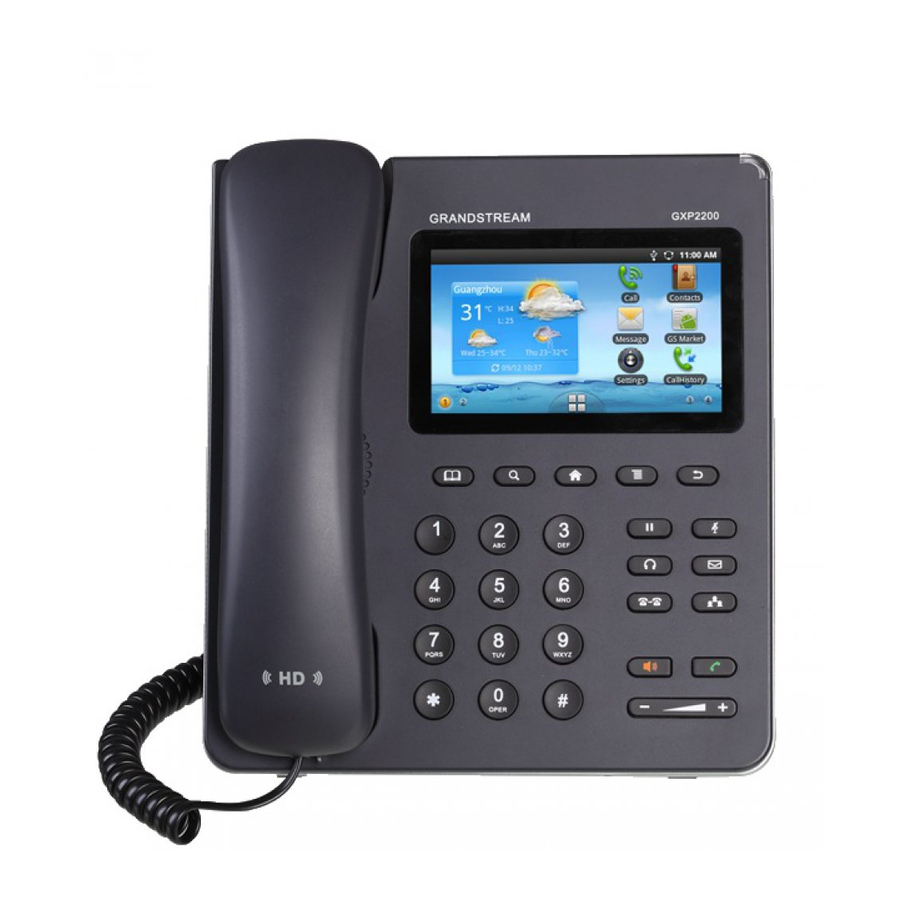
Grandstream Networks GXP2200 User Manual
Enterprise multimedia phone for android
Hide thumbs
Also See for GXP2200:
- Customization manual (15 pages) ,
- Quick start manual (6 pages) ,
- User manual (157 pages)

Related Manuals for Grandstream Networks GXP2200


Summary of Contents for Grandstream Networks GXP2200
- Page 1 Grandstream Networks, Inc. GXP2200 Enterprise Multimedia Phone for Android User Manual Grandstream Networks, Inc. www.grandstream.com...
-
Page 2: Table Of Contents
GXP2200 TECHNICAL SPECIFICATIONS ..................15 INSTALLATION ..................17 EQUIPMENT PACKAGING ......................... 17 CONNECTING YOUR PHONE ......................17 GXP2200 EXTENSION MODULE (GXP2200EXT) ................18 SAFETY COMPLIANCES ........................20 WARRANTY ............................20 GETTING TO KNOW GXP2200 ............... 22 USING THE TOUCHSCREEN ......................22 IDLE SCREEN ............................. - Page 3 CALL FORWARD ..........................54 MULTI-PURPOSE KEYS ........................56 SHARED CALL APPEARANCE (SCA) ....................57 CALL FEATURES ..........................58 GXP2200 APPLICATIONS ............... 60 CUSTOMIZING IDLE SCREENS ......................60 ADDING AN ITEM TO IDLE SCREEN ..................60 MOVING AN ITEM ON IDLE SCREEN ..................61 REMOVING AN ITEM FROM IDLE SCREEN ................
- Page 4 BLUETOOTH ............................111 TURNING BLUETOOTH ON OR OFF ..................112 CHANGING BLUETOOTH DEVICE NAME ................112 PAIRING GXP2200 WITH A BLUETOOTH DEVICE ..............112 CONNECTING TO A BLUETOOTH DEVICE ................113 SENDING AND RECEIVING FILES VIA BLUETOOTH ............. 113 DISCONNECTING A BLUETOOTH DEVICE ................113 UNPAIRING A BLUETOOTH DEVICE ..................
- Page 5 MAINTENANCE/DEBUG ......................137 MAINTENANCE/LANGUAGE ....................137 MAINTENANCE/TR-069 ......................137 MAINTENANCE/CONTACTS ..................... 138 MAINTENANCE/LDAP BOOK ....................139 MAINTENANCE/DEVICE MANAGER ..................141 GXP2200 LCD SETTINGS ..............143 OPENING SETTINGS ........................143 PERSONALIZED ACCOUNT ......................143 NETWORK ............................144 SOUND .............................. 145 DISPLAY ............................145 SECURITY SETTINGS ........................
- Page 6 Table 4 : GXP2200EXT Packaging ......................19 Table 5 : GXP2200 Onscreen Icons ......................25 Table 6 : GXP2200 Keypad Buttons ......................31 Table 7 : GXP2200 MWI LED Status ......................32 Table 8 : GXP2200 Feature Code ....................... 58 Firmware Version 1.0.3.26...
- Page 7 Figure 21 : GXP2200 Account Registration Status ..................36 Figure 22 : GXP2200 Call Screen ....................... 38 Figure 23 : GXP2200 Call History Screen - One Entry Selected ..............39 Figure 24 : GXP2200 Contacts Screen ....................... 39 Figure 25 : GXP2200 Messages Screen ....................40 Figure 26 : Making Call Via Bluetooth Headset ..................
- Page 8 Figure 49 : Call Forward - Busy/No Answer ....................56 Figure 50 : GXP2200 MPK APP ......................... 56 Figure 51 : GXP2200 Shared Call Appearance Web GUI Settings ............57 Figure 52 : Add Item to Home Screen ......................60 Figure 53 : Set Wallpaper From Live Wallpapers ..................
- Page 9 Figure 88 : GXP2200 Email Setup Wizard - Set Up Email ................. 84 Figure 89 : GXP2200 Email Setup Wizard - Press Next or Manual For Quick Setup ........ 84 Figure 90 : GXP2200 Email Setup Wizard - Select IMAP ................84 Figure 91 : GXP2200 Gallery ........................
- Page 10 Figure 138 : GXP2200 Account & Sync - Add An Account ............... 147 Figure 139 : GXP2200 Account & Sync - Sign In With Google Account ........... 148 Figure 140 : GXP2200 Account & Sync - Linked With Google Account ........... 148 Figure 141 : Google Play Store Sign In With Linked Account ..............
-
Page 11: Gnu Gpl Information
GXP2200 firmware contains third-party software licensed under the GNU General Public License (GPL). Grandstream uses software under the specific terms of the GPL. Please see the GNU General Public License (GPL) for the exact terms and conditions of the license. -
Page 12: Change Log
CHANGE LOG This section documents significant changes from previous versions of GXP2200 user manuals. Only major new features or major document updates are listed here. Minor updates for corrections or editing are not documented here. FIRMWARE VERSION 1.0.3.26 Software Matrix: System 1.0.3.16, Boot 1.0.3.4, Kernel 1.0.3.8, Recovery 1.0.3.4 ... -
Page 13: Firmware Version 1.0.1.9
Added Account & Sync. [ACCOUNT & SYNC] Added Storage. [STORAGE] Added generic XML file provisioning support. [CONFIGURATION FILE DOWNLOAD] Added ADB support. FIRMWARE VERSION 1.0.1.9 This is the initial version. Firmware Version 1.0.3.26 GXP2200 USER MANUAL Page 12 of 159... -
Page 14: Welcome
User Manual, could void your manufacturer warranty. Warning: Please do not use a different power adapter with the GXP2200 as it may cause damage to the products and void the manufacturer warranty. -
Page 15: Product Overview
Dual switched auto-sensing 10/100/1000Mbps network ports, PoE, Bluetooth, USB, SD, EHS (Electronic Hook-Switch) with Plantronics headsets, capability to connect/power up to 4 cascaded extension modules with LCD display (GXP2200 EXT) Automated provisioning using TR-069 or AES encrypted XML configuration file, TLS/SRTP/HTTPS for... -
Page 16: Gxp2200 Technical Specifications
GXP2200 TECHNICAL SPECIFICATIONS Table 1: GXP2200 Technical Specifications SIP RFC3261, TCP/IP/UDP, RTP/RTCP, HTTP/HTTPS, ARP, ICMP, DNS (A Protocols record, SRV, NAPTR), DHCP, PPPoE, SSH, TFTP, NTP, STUN, SIMPLE, LLDP, Standards LDAP, TR-069, 802.1x, TLS, SRTP Network Interfaces Dual switched 10/100/1000Mbps ports with integrated PoE... - Page 17 C, 10-90% (non-condensing); Humidity Storage: 14 - 140 F / -10 - 60 GXP2200 phone, handset with cord, universal power supply, network cable, quick Package Content installation guide FCC Part 15 (CFR 47) Class B; EN55022 Class B, EN55024, EN61000-3-2, Compliance EN61000-3-3, EN60950-1;...
-
Page 18: Installation
INSTALLATION EQUIPMENT PACKAGING Table 2: GXP2200 Equipment Packaging Main Case Yes (1) Handset Yes (1) Phone Cord Yes (1) Power Adaptor Yes (1) Ethernet Cable Yes (1) Yes (1) Phone Stand Yes (1) Quick Installation Guide CONNECTING YOUR PHONE SD Card Slot... -
Page 19: Gxp2200 Extension Module (Gxp2200Ext)
Each extension module has 20 programmable buttons, Left and Right buttons, supporting 40 Multiple Purpose Keys to be configured. GXP2200 supports up to 4 extension modules, adding 160 fully programmable phone extensions to the phone. -
Page 20: Table 4 : Gxp2200Ext Packaging
To set up the GXP2200EXT with the GXP2200, please follow the steps below: 1. On the back of the GXP2200 and the GXP2200EXT, there are slots for connector plate. Attach the connector plate between the slots for GXP2200 and the GXP2200EXT;... -
Page 21: Safety Compliances
WARRANTY If the GXP2200 phone was purchased from a reseller, please contact the company where the phone was purchased for replacement, repair or refund. If the phone was purchased directly from Grandstream, please contact Grandstream Support for a RMA (Return Materials Authorization) number before the product is returned. - Page 22 This type of damage is not covered under warranty. Firmware Version 1.0.3.26 GXP2200 USER MANUAL Page 21 of 159...
-
Page 23: Getting To Know Gxp2200
Onscreen MENU icon. Tap to access settings and applications. Figure 4: GXP2200 Default Main Screen Tap the onscreen MENU icon, the settings and applications menu will be brought up as shown below. Figure 5: GXP2200 Onscreen Menu Firmware Version 1.0.3.26... -
Page 24: Idle Screen
To fully manipulate the GXP2200 capacitive touch screen, use your fingers operate the following on the GXP2200 icons, buttons, menu items, onscreen keyboard and etc. To select items on the screen (e.g., setting options, apps); To press onscreen buttons (e.g., "End" or "Options" softkey during the call) ;... -
Page 25: Adding Idle Screens
By default, there are four idle screens. To add more screens, firstly pinch on the idle screen, or press the MENU button and then touch "Edit" option to bring up the display in Figure 6: Set GXP2200 HOME Screen. Then tap on the icon so one more idle screen will be added. -
Page 26: Idle Screen Icons
Removing the widgets/shortcuts from the screen to be deleted is necessary. Otherwise, users won't see show up for the screen. IDLE SCREEN ICONS The following table describes the icons used on the GXP2200 idle screen and MENU screen. Table 5: GXP2200 Onscreen Icons Onscreen MENU icon. Displayed on the bottom of each idle screen. - Page 27 Call forward (Account 4). Displayed in status bar when call forward is set up for account 4. Call forward (Account 5). Displayed in status bar when call forward is set up for account 5. Firmware Version 1.0.3.26 GXP2200 USER MANUAL Page 26 of 159...
-
Page 28: Onscreen Keyboard
Playing. Media Player is currently playing files. Wi-Fi signal strength. Displayed in status bar when Wi-Fi is used. ONSCREEN KEYBOARD The GXP2200 onscreen keyboard can be activated by tapping on an input field. Firmware Version 1.0.3.26 GXP2200 USER MANUAL Page 27 of 159... -
Page 29: Figure 8: Gxp2200 Onscreen Keyboard - English Keyboard
English Keyboard This is the default keyboard on GXP2200. Tap on to change keyboard/input options. Figure 8: GXP2200 Onscreen Keyboard - English Keyboard Chinese Keyboard When using Chinese Keyboard, users could input English and Chinese by switching input method. To... -
Page 30: Figure 11: Gxp2200 Onscreen Keyboard - Lowercase
Figure 11: GXP2200 Onscreen Keyboard - Lowercase Figure 12: GXP2200 Onscreen Keyboard - Capital Uppercase Figure 13: GXP2200 Onscreen Keyboard - All Uppercase Number and symbols To input number and symbols, tap on to switch the mode and tap on to go to another page for more symbols. -
Page 31: Figure 14: English Keyboard - Number And Symbols
To configure keyboard and input options, users could go to Settings -> Language & Keyboard -> Keyboard Settings. Users could press and hold on the input field for 2-4 seconds to activate the window for Input method configuration. Firmware Version 1.0.3.26 GXP2200 USER MANUAL Page 30 of 159... -
Page 32: Using The Keypad
USING THE KEYPAD Figure 16: GXP2200 Keyboard Table 6: GXP2200 Keypad Buttons Contacts. Press to view and edit contact information. Search. Press to search. Home. Press to go back to Home screen; or press and hold it for about 2 seconds, the current running applications and a Manage Applications button will show. -
Page 33: Using The Message Waiting Indicator
Phone is on but the screen is off Normal MANAGING STATUS BAR The GXP2200 status bar is located on the top of the screen. Touch the bar and slowly drag it down to display the full status list. Firmware Version 1.0.3.26... -
Page 34: Figure 17: Gxp2200 Status Bar
Figure 18: GXP2200 Status Bar - Notification Process Tap on Process tab then users could view all the running processes on the GXP2200. Press on the process to open it, or tap on to close the process. Firmware Version 1.0.3.26... -
Page 35: Figure 19: Gxp2200 Status Bar - Process
3rd Scroll left/right party app. to adjust LCD brightness. Turn on/off LCD display. Select Media Channel when playing audio or video. Figure 20: GXP2200 Status Bar - System Settings Firmware Version 1.0.3.26 GXP2200 USER MANUAL Page 34 of 159... - Page 36 Speaker button to activate GXP2200 dialer under this mode.) Auto: In this mode, the GXP2200 will automatically detect if the audio path is used by 3rd party app first. If so, it will use the handset mode "Disabled". Otherwise, keep it in "Enabled" mode. Please note that running the 3rd party app doesn't necessarily mean the audio path is used by the 3rd party app.
-
Page 37: Making Phone Calls
NAT configurations. For example, the user has configured 4 SIP accounts on GXP2200: Account 1, Account 2, Account 3 and Account 4. The registration status for each account is displayed on the main screen. The icon next to the account name will indicate the registration status ( Green: registered;... -
Page 38: Handset, Speaker And Headset Mode
HANDSET, SPEAKER AND HEADSET MODE The GXP2200 allows users to switch among handset, speaker or headset when making calls. Press the Hook Switch to switch to handset; press the Headset button to switch to headset; or press the Speaker button to switch to speaker. -
Page 39: Figure 22: Gxp2200 Call Screen
Figure 22: GXP2200 Call Screen 2. Off hook and dial Take the handset off hook, or press the speaker button , or press the headset button to bring up the call screen; Select the account by tapping on the account name in the right panel;... -
Page 40: Figure 23: Gxp2200 Call History Screen - One Entry Selected
Figure 23: GXP2200 Call History Screen - One Entry Selected 5. Via Contacts Access the contacts information by tapping on the onscreen Menu icon->Contacts icon The LCD screen will display the records in the contacts; Navigate to the contacts by sliding up/down on the screen;... -
Page 41: Direct Ip Call
Figure 25: GXP2200 Messages Screen 7. Making Call Via Bluetooth Headset Connect Bluetooth headset with the GXP2200; Make an outgoing call; If the call is dialed out using Speaker, the Bluetooth headset will be activated and connected automatically;... -
Page 42: Answering A Call
The phone needs to configure option "User Random Port" to "No" to accept direct IP calls; In GXP2200 Contacts, if the number is using IP address, direct IP call can be made by dialing this contact. ANSWERING A CALL 1. -
Page 43: Figure 27: Single Incoming Call
"Video Answer") and Reject button for the new call. If the call is answered, the current call will be placed on hold. New incoming call from "Alex Smith" to "5100". current call with John Doe. Figure 28: Multiple Incoming Calls 3. Missed Call Firmware Version 1.0.3.26 GXP2200 USER MANUAL Page 42 of 159... -
Page 44: Figure 29: Auto Answer Option In Web Gui
When there is missed call, a missed call window will pop out. Tap on it to check the missed call details. 4. Auto-Answer/Paging/Intercom To enable auto-answer/paging/intercom feature, user could login GXP2200 Web GUI->Account page->Call Settings to select the options for "Auto Answer". -
Page 45: Call Hold
5. Incoming Call Using Bluetooth Headset If the Bluetooth headset is connected to the GXP2200, users will hear the ring tone from Bluetooth headset when there is incoming call. Tap on the call button on the Bluetooth headset to pick up the call. -
Page 46: Call Waiting
This will automatically put the current call on hold. Touch the bars indicating different lines on the right panel to toggle among multiple calls. Figure 33: GXP2200 Multiple Calls Screen CALL TRANSFER The GXP2200 supports blind transfer and attended transfer. The default transfer mode is blind transfer. Firmware Version 1.0.3.26 GXP2200 USER MANUAL Page 45 of 159... -
Page 47: Figure 34: Blind Transfer
Users could configure the "Default Transfer Mode" to be used on the GXP2200 under web GUI->Advanced Settings->Call Features. 1. Blind Transfer During the active call, press TRANSFER button to bring up the transfer screen; The default transfer mode is "Blind". Users could also select transfer mode by tapping on the mode selection bar (see figure below);... -
Page 48: Figure 35: Auto Attended Transfer
The GXP2200 support auto attended transfer which provides users a fast and easy way to complete attended transfer. During the active call, press TRANSFER button to bring up the transfer screen; Select transfer mode by tapping on the mode selection bar (see figure below);... -
Page 49: Figure 37: Auto Attended Transfer - Split
Tap on the line on hold to transfer the call; The call will be transferred and GXP2200 will hang up the call. Firmware Version 1.0.3.26 GXP2200 USER MANUAL Page 48 of 159... -
Page 50: 5-Way Conference
If users would like to cancel the transfer, press button to go back to the previous talking screen. 5-WAY CONFERENCE The GXP2200 supports up to 5-way conferencing. 1. Initiate conference When the phone is in idle, call screen, or during an active call, press CONFERENCE button to bring up conference screen;... -
Page 51: Figure 39: Gxp2200 Conference Screen
Figure 39: GXP2200 Conference Screen Users could manually select account, enter digits and then tap on the icon, or select the call (on hold or active ) to add to the conference; Figure 40: Invite Party to Conference ... -
Page 52: Figure 41: 3-Way Conference Call Established
GUI->Advanced Settings->Call Features and set "Auto Conference" to "Yes". To establish call with auto conference when there are 1 or more calls on the GXP2200, simply press the conference button and all the calls on GXP2200 will be brought into the conference. -
Page 53: Voicemail(Message Waiting Indication
VOICEMAIL(MESSAGE WAITING INDICATION) When there is new voicemail, the Message Waiting Indication (MWI) LED icon will blink in red on the upper right corner of the GXP2200. Also in the status bar, Voice Mail icon will shows up as a notification. To... -
Page 54: Call Recording
SD card storage or USB flash drive. Tap on "Options"->"Stop Recording" or simply hang up the call to stop recording. If both SD card and USB flash drive are inserted to the GXP2200, the recording file will be save in the SD card first. -
Page 55: Mute
To turn on DND, tap on the status bar->System Settings on the GXP2200 LCD. Then touch the DND icon to turn it on/off. When DND is on, the incoming calls to the GXP2200 will be blocked for all registered accounts with a reminder ring produced. To disable the reminder ring, configure the option under GXP2200 web GUI->Advanced Settings->Call Features: "Disable DND Reminder Ring". -
Page 56: Figure 46: Call Forwarding On Gxp2200 Lcd
From Web GUI Log in GXP2200 web GUI and go to Account page->Call Settings. By default, Call Forward feature is set to "None". The Call Forward feature options are: Unconditional Forward: All the incoming calls will be forwarded to the number set up in "All To"... -
Page 57: Multi-Purpose Keys
Call Forward on Busy / Call Forward No Answer: The incoming call will be forwarded when the GXP2200 is busy or no answer after certain interval "Delayed Call Forward Wait Time (s)". Figure 49: Call Forward - Busy/No Answer... -
Page 58: Shared Call Appearance (Sca)
SHARED CALL APPEARANCE (SCA) The GXP2200 supports shared call appearance by Broadsoft standard. This feature allows members of the SCA group to shared SIP lines and provides status monitoring (idle, active, progressing, hold) of the shared line. When there is an incoming call designated for the SCA group, all of the members of the group will be notified of an incoming call and will be able to answer the call from the phone with the SCA extension registered. -
Page 59: Call Features
CALL FEATURES The GXP2200 supports traditional and advanced telephony features including caller ID, caller ID with caller Name, call waiting, call forward and etc. Before using the following feature code, please make sure "Enable Call Features" option is set to "Yes" under web GUI->Account page->Call Settings. -
Page 60: Firmware Version 1.0.3.26
Delayed Call Forward. To set up delayed call forward: s) Enter *92 and the number to forward the call; Dial out. Cancel Delayed Call Forward. To cancel the delayed call forward: u) Dial *93. Firmware Version 1.0.3.26 GXP2200 USER MANUAL Page 59 of 159... -
Page 61: Gxp2200 Applications
GXP2200 APPLICATIONS CUSTOMIZING IDLE SCREENS On the GXP2200 idle screens, users could add app icons, shortcuts, widgets, and other items when there is free space on the desktop. ADDING AN ITEM TO IDLE SCREEN 1. Select and open up the screen where you would like to add the item;... -
Page 62: Moving An Item On Idle Screen
3. When the item gets close to the Recycle Bin, it will turn red. Now lift your finger to release. Note: When the item is removed from the idle screen, it still exists on GXP2200. Users could always add it back to display on the idle screen. -
Page 63: Changing Idle Screen Wallpaper
Live wallpapers: to open a list of animated wallpapers embedded in the GXP2200; Wallpapers: to open a list of sample wallpapers embedded in the GXP2200. Slide to left/right to view the samples; 3. Tap on Set wallpaper. -
Page 64: Figure 54: Move Clock App To Desktop
The widgets are miniature apps that can be placed on the idle screens. It could be an application itself or it provide quick access and control for the related applications. Firmware Version 1.0.3.26 GXP2200 USER MANUAL Page 63 of 159... -
Page 65: Opening Apps
OPENING APPS When the GXP2200 is in idle screen, tap on the onscreen MENU icon to access the list for all the apps. Touch an app's icon to open it. Or touch an app's widget icon on the idle screen (if already added) to quickly launch it. -
Page 66: Firmware Version 1.0.3.26
Delete an app’s settings and other data by touching the Clear data; If the app stores data in a temporary space of the GXP2200's memory, Cache lists how much information is stored. Tap on Clear cache to clear the cache;... -
Page 67: Managing Downloads
Manage applications screen, select the Downloaded tab and tap on the Uninstall button. Touch OK in the screen when asked to confirm if you would like to uninstall the app. MANAGING DOWNLOADS The files (such as PDF documents, pictures) downloaded from GXP2200 browser will be stored on GXP2200's internal storage. -
Page 68: Playing With Apps
In this section, the apps that come with GXP2200 are described in details. BLACKLIST GXP2200 Blacklist app helps users to manage the blacklist and block settings. There are three options on the left panel when you open the Blacklist app. -
Page 69: Figure 59: Gxp2200 Blacklist - Block History
Figure 60: GXP2200 Blacklist To add number in Blacklist, Tap the Add button. Once Add is touched, there are three ways to add number to GXP2200 Blacklist: Add Manually, Add from contacts and Add from call history. Firmware Version 1.0.3.26... -
Page 70: Figure 61: Add Number To Blacklist
Then tap on Select to add it/them into the blacklist. You can also Check All entries, Uncheck All entries and Invert All the selection by tapping on the corresponding buttons on the bottom. Firmware Version 1.0.3.26 GXP2200 USER MANUAL Page 69 of 159... -
Page 71: Figure 63: Add Number From Contacts
Figure 64: Add Number From Call History To delete blacklist entry, tap on Delete button in Figure 60: GXP2200 Blacklist. The following screen with all the blacklist entries will show. Select the number you would like to remove from by tapping on the checkbox on the right hand side. -
Page 72: Figure 65: Delete Entry From Blacklist
Block Notification: Turn on/off Block Notification; Time Settings: Set up the block schedule. Select Block 24 Hours or Modify Time by specifying the Starting Time and Ending Time. Firmware Version 1.0.3.26 GXP2200 USER MANUAL Page 71 of 159... -
Page 73: Broswer
Figure 66: Delete Entry From Blacklist BROSWER GXP2200 browser could be used in a similar way as a PC-based web browser, i.e., open web pages, bookmarks, view history, select the most visited pages, search and etc. In the Browser app, press on the... -
Page 74: Calculator
MENU button then users could switch the operation between "Basic panel" and "Advanced panel". Or users could simply slide to the left and right to switch between Basic panel and Advanced panel. Figure 69: GXP2200 Calculator - Basic Panel Firmware Version 1.0.3.26... -
Page 75: Calendar
Figure 70: GXP2200 Calculator - Advanced Panel CALENDAR In Calendar app, users could create, modify and view the events as well as configure the Calendar to provide notification for the upcoming events. In Calendar app, press the MENU button . -
Page 76: Call History
When viewing the Calendar, tap on the date (view by Month) or time (view by Day) could bring up option to create event. Tap on New event and event details window will show. Figure 73: GXP2200 Calendar Screen - Edit Event CALL HISTORY Call History App provides users access to phone's call records with different categories on the left panel. -
Page 77: Figure 74: Gxp2200 Call History - All Calls
Missed calls, indicated by per call. Figure 74: GXP2200 Call History - All Calls In Call History app, the following operations could be done: To delete call log. Tap on Delete all to delete all call logs displayed on the current screen. Or Tap on one entry and touch icon to delete a single log;... -
Page 78: Clock
Figure 75: GXP2200 Call History - Entry Details To add contact. Tap on one entry and touch Add a contact; To dial out the number from Call History. Tap on one entry and touch to dial out; ... -
Page 79: Contacts
Set up alarm by tapping on the icon Figure 78: GXP2200 Alarm Screen CONTACTS GXP2200 supports up to 1000 entries in contacts. Users can manage their contacts by adding, deleting, modifying, downloading from the TFTP/HTTP server, importing and exporting the contact to external storage. -
Page 80: Figure 79: Gxp2200 Contacts Screen
First name, Last name, Phone number, Email address and etc). When there are more than one Phone number added for the contact, the first one will be used and displayed by default. Figure 80: GXP2200 Contacts - New Contact ... -
Page 81: Figure 81: Gxp2200 Contacts - Edit Contact
Figure 81: GXP2200 Contacts - Edit Contact Delete Contact. Tap the contact you would like to delete and tap on Delete; Make calls via Contacts. Tap on the contact you would like to call; or select "Call Mode" and ... -
Page 82: Figure 82: Gxp2200 Contacts - Storage Status
Figure 82: GXP2200 Contacts - Storage Status Import contacts. XML/Vcard/CSV format phonebook could be imported to GXP2200. Tap on Options->Import. And you would see the screen in the following figure for you to import your file; Figure 83: GXP2200 Contacts - Import File ... -
Page 83: Figure 84: Gxp2200 Contacts - Export File
Figure 85: GXP2200 Contacts - Download File Change display options. The GXP2200 contacts can be configured to display entries with different settings. Tap Options->Display options, and the following figure will show. Configure the display options based on users' preference. -
Page 84: Email
EMAIL The GXP2200 Email app provides users easy access to business or personal email account. When opening it for the first time, a wizard will be provided for users to configure the email account on GXP2200. Firmware Version 1.0.3.26 GXP2200 USER MANUAL... -
Page 85: Figure 88: Gxp2200 Email Setup Wizard - Set Up Email
Figure 88: GXP2200 Email Setup Wizard - Set Up Email Press "Next" for quick setup. Or press "Manual setup" to configure more options manually. Figure 89: GXP2200 Email Setup Wizard - Press Next or Manual For Quick Setup Figure 90: GXP2200 Email Setup Wizard - Select IMAP Firmware Version 1.0.3.26... -
Page 86: File Manager
File Manager is a tool that helps manage folders and files such as pictures, music, video and other files on GXP2200. The root directory for File Manager app shows screensaver, user_data folders by default. If USB flash drive or SD card is inserted into the GXP2200, the folder for USB or for SD card will also be displayed here. -
Page 87: Gallery
GALLERY Gallery app could be used to view pictures and play videos from GXP2200 internal storage or USB/SD card storage. Users could also perform basic editing tasks on pictures and set them as wallpaper or picture for contacts. The pictures can be easily shared with friends in Gallery app by sending via Bluetooth, and Email too. -
Page 88: Gs Market
Figure 91: GXP2200 Gallery GS MARKET GXP2200 provides direct access to apps via built-in GS Market app. Users could browse, search, download and install the apps from there for tools and games. Browse apps. Select the tabs on the top menu to view apps in different categories: Hot, Apps, Games, Tools. -
Page 89: Figure 93: Gxp2200 Gs Market - Search App
Figure 93: GXP2200 GS Market - Search App Download an app. To download an app, tap the icon right next to the app. The downloading process will be automatically started. In GS Market, tap on Downlaod option to view the downloaded apps and downloading process. -
Page 90: Ip Location
Figure 95: GXP2200 GS Market - Installed Figure 96: GXP2200 GS Market - Confirm Uninstall IP LOCATION The IP Location app provides users with a tool to resolve the IP address to the location. Users could simply enter the IP address and then tap on Search to view the result. Based on the IP address provided, the following information will be given: Country, Region, City, Latitude, Longitude, Time Zone and Weather Code. -
Page 91: Ldap Book
For example, in the above figure, the IP address 67.110.250.152 is mapped to Yorba Linda in California, USA. The time zone is UTC-07:00 and the weather code is USA1267. LDAP BOOK GXP2200 supports LDAP (Lightweight Directory Access Protocol). LDAP Setting Users could configure the LDAP settings via LCD Menu->LDAP Book->Setting, or from web... -
Page 92: Figure 99: Gxp2200 Ldap Search Result
LDAP server as configured. The result will be returned and displayed in a real-time manner. Figure 99: GXP2200 LDAP Search Result Add LDAP Contact to Local Phonebook After the LDAP contact result is displayed, users could tap on "Add"... -
Page 93: Media Player
MEDIA PLAYER GXP2200 Media Player supports video format in MP4 and 3GP, audio format in AAC, MP3, AMR, WAVE, MIDI and Vorbis to be displayed. Users could scan the media files by tapping on Scan and files detected from internal storage and USB/SD card storage will be displayed. -
Page 94: Figure 103: Gxp2200 Media Player - Sort Music Files
Figure 103: GXP2200 Media Player - Sort Music Files To edit music files, tap on Edit option. Then users could click on the checkbox for each file and perform operations to Send the file, Add to Playlist, and Delete. The Members (number) indicates the selected music files. -
Page 95: Figure 105: Gxp2200 Media Player - Music File Options
Figure 105: GXP2200 Media Player - Music File Options To play the music, simply touch the music file you would like to play. Touch to switch to lyrics display if there is local lyrics file. Progress bar. Drag to adjust the time axis. -
Page 96: Figure 107: Gxp2200 Media Player - Lyrics
Figure 107: GXP2200 Media Player - Lyrics Video. On Local Files tab, select Video to bring up the screen for the detected video files. User could Sort or Edit the video files, similar to the operations for Music files as described above. -
Page 97: Figure 109: Gxp2200 Media Player - Folder
Figure 109: GXP2200 Media Player - Folder Playlist. Tap on the Playlist tab on the left panel to bring up Playlist screen. Figure 110: GXP2200 Media Player - Playlist To create New Playlist, tap on the New Playlist button. Type the name of new Playlist and Save it. -
Page 98: Message
Figure 112: GXP2200 Media Player - Playlist Options MESSAGE GXP2200 has built-in Message app, which could be used with SIP server's support. If two parties (1 of them is GXP2200, or both are GXP2200) are registered on the same SIP server, text messages can be sent/received between them. -
Page 99: Figure 113: Gxp2200 Message
Figure 113: GXP2200 Message View Dialog Tap on the contact you have pervious chatted with to view the message dialog. Sent Message Received Message Figure 114: View Dialog Touch and hold at the "Sent Message" dialog to bring up the operation options including Lock/Unlock, Forward, Copy, Delete and Resend. -
Page 100: Figure 115: Message Options
View Draft Tapping on Draft in Figure 113: GXP2200 Message will show you the SMS Draft List, which saves the messages edited but not sent yet. Tap to select the draft, then you could edit and send it. Firmware Version 1.0.3.26... -
Page 101: Figure 117: Gxp2200 Message - Sms Draft List
Figure 117: GXP2200 Message – SMS Draft List Delete SMS Tap on Delete in Figure 113: GXP2200 Message and select the message you would like to delete. Then Tap on Delete again. Check Storage Status In Figure 113: GXP2200 Message, tap on Storage Status to display storage information. The maximum storage capacity for GXP2200 message is 1000 messages. -
Page 102: Music
MUSIC Use Music app on GXP2200 to listen to music and other audio files. When Music app is launched, it will scan and detect the files in internal storage and USB/SD storage. The files could be displayed by Artist, Albums, or per song. Tap on Playlists, users could check the recently added files. To play the file, touch the file in the list. -
Page 103: Search
The music will still be played in the MUSIC app running in background. Figure 120: GXP2200 Music - Now Playing: MENU Options SEARCH GXP2200 Search app could be used to search information in web or in GXP2200. Launch Search app. Return to HOME first and press the search button . -
Page 104: Figure 121: Gxp2200 Search - Search On Web
Figure 121: GXP2200 Search - Search on Web Search in GXP2200. Type in the content you would like to search. If it's an app in GXP2200, suggestions will display, tap on the suggestion to launch the app. If it's number, "Dial number"... -
Page 105: Voice Assist
Search app will be cleared. VOICE ASSIST GXP2200 Voice Assist allows users to dial number, send text message or access Google search in seconds. To use it, open the app and simply speak to the microphone icon with the following format: Figure 124: GXP2200 Voice Assist ... -
Page 106: Figure 125: Gxp2200 Voice Assist - Call Number/Contact
Figure 125: GXP2200 Voice Assist - Call Number/Contact Figure 126: GXP2200 Voice Assist - Call Number/Contact Result Search text. For example, speak "search Boston". The detected result will show. Users could select "Exit" or tap on the result in the following picture. If no selection is made, after 3 seconds timeout, the command will be sent out with the first matching result and "Boston"... -
Page 107: Figure 127: Gxp2200 Voice Assist - Search
Figure 127: GXP2200 Voice Assist - Search Here is the result after speaking "search Boston". Figure 128: GXP2200 Voice Assist - Search Result Send name/number Text content. For example, speak "send John text hello". The detected result will show. Users could select "Exit" or tap on the result in the following picture. -
Page 108: Voice Dialer
Figure 130: GXP2200 Voice Assist - Send Text Result VOICE DIALER GXP2200 Voice Dialer allows users to make calls by directly speaking the number or contact name. To use it, open the app and simply speak to the microphone icon with number or contact name. Multiple languages are supported in GXP2200 Voice Dialer. -
Page 109: Voice Recorder
If no selection is made, after 3 seconds timeout, the call will be made with the first matching number/contact. Figure 132: GXP2200 Voice Dialer Result For example, speak "1234" and the detected result will show. Users could select "Quit" or tap on the desired result. -
Page 110: Figure 133: Gxp2200 Voice Recorder
GXP2200 Voice Recorder is a simple and easy app for users to record audio and voice. It can be used to record meeting, lectures, personal notes. There is no time limits on the voice recorder as long as there is enough space to save the recording file. -
Page 111: Connecting To Network And Devices
DNS Server and Alternative DNS server for the GXP2200 to correctly connect to network. WI-FI WI-FI is supported on GXP2200 with WI-FI adaptor plugged in. Insert the USB WI-FI adaptor to the USB port on the back of GXP2200 first and then go to GXP2200's Settings application->Network. -
Page 112: Adding Wi-Fi Networks
6. The phone will start connecting to the Wi-Fi. The status bar will show Wi-Fi signal strength; 7. Once it's added and the password is remembered, the GXP2200 will connect to it again when the SSID is within the range. -
Page 113: Turning Bluetooth On Or Off
To connect to a Bluetooth device, turn on GXP2200’s Bluetooth radio first. The first time when using a new Bluetooth device with the GXP2200, "pair" the device with GXP2200 so that both devices know how to connect securely to each other. After that, users could simply connect to a paired device. Turn off Bluetooth if it's not used. -
Page 114: Connecting To A Bluetooth Device
"Pair with this device" under the device ID. Make sure the Bluetooth device is active in pairing mode. Then tap on the device ID on GXP2200 to pair them. Confirm the passkey in the prompted message (if any). Or If passcode is required, please refer to the device's documentation or other procedures to obtain the passcode. -
Page 115: Unpairing A Bluetooth Device
The GXP2200 supports USB connection for mouse, keyboard, USB storage devices and USB camera. To use USB mouse or keyboard, simply plug it into the USB port on the back of the GXP2200 and it will be ready to use. -
Page 116: Sd Card
SD CARD 1. Insert your SD card into SD Card slot at the back of GXP2200. Please make sure the SD Card is inserted with right direction on GXP2200; 2. It will take a few seconds for the GXP2200 to prepare the connection. Then the SD Card icon will show on the status bar;... -
Page 117: Gxp2200 Web Gui Settings
Mozilla Firefox, Google Chrome and etc. Figure 135: GXP2200 Web GUI - Login ACCESSING GXP2200 WEB GUI The GXP2200 Web GUI URL is http://Phone-IP-Address,where the Phone-IP Address is the IP address displayed on the GXP2200 desktop account widget. To access the GXP2200 Web GUI: 1. -
Page 118: Figure 136: Gxp2200 Main Screen - Ip Address
3. Open a Web browser on your computer; 4. Enter the phone’s IP address in the address bar of the browser; 5. Enter the administrator’s login and password to access the Web Configuration Menu. Figure 136: GXP2200 Main Screen - IP Address Note: ... -
Page 119: Definitions
DEFINITIONS This section describes the options in the GXP2200 Web GUI. As mentioned, you can log in as an administrator or an end user. Status: Displays the Account Status, Network Status, and System Info of the phone; Account (1-6): To configure each of the SIP accounts;... -
Page 120: Status/System Info
System Up Time System up time since the last reboot. ACCOUNT PAGE DEFINITIONS The GXP2200 has six lines that can be configured to accommodate independent SIP accounts. Every SIP account has an individual configuration page. ACCOUNT/GENERAL SETTINGS This field indicates whether the account is active. The default value for Account Active the primary account (Account 1) is "Yes"... -
Page 121: Account/Network Settings
A SIP Extension to notify the SIP server that the phone is behind a Proxy-Require NAT/Firewall. Do not configure this parameter unless this feature is supported on the SIP server. Firmware Version 1.0.3.26 GXP2200 USER MANUAL Page 120 of 159... -
Page 122: Account/Sip Settings
UPDATE method. Select "Yes" to use the INVITE method to refresh the session timer. The default setting is "No". Caller Request Timer If set to "Yes" and the remote party supports session timers, the phone Firmware Version 1.0.3.26 GXP2200 USER MANUAL Page 121 of 159... -
Page 123: Firmware Version 1.0.3.26
Defines whether the incoming messages will be validated or not. The Messages default setting is "No". If set to "Yes", the phone will challenge the incoming INVITE for Authenticate Incoming INVITE authentication with SIP 401 Unauthorized response. The default setting Firmware Version 1.0.3.26 GXP2200 USER MANUAL Page 122 of 159... -
Page 124: Account/Codec Settings
Enables the SRTP mode based on your selection from the drop-down SRTP Mode menu. The default setting is "Disable". Silence Suppression Controls the silence suppression/VAD feature of the audio codec G.723 Firmware Version 1.0.3.26 GXP2200 USER MANUAL Page 123 of 159... -
Page 125: Account/Call Settings
<2=011> - replace digit 2 with 011 when dialing g) | - the OR operand h) \+ - the + at the beginning of the number to be dialed, e.g., +861234567890 Example 1: {[369]11 | 1617xxxxxxx} Firmware Version 1.0.3.26 GXP2200 USER MANUAL Page 124 of 159... -
Page 126: Firmware Version 1.0.3.26
[3469]11 - allow dialing special and emergency numbers 311, 411, 611 and 911. The default dial plan on the GXP2200 is { x+ | \+x+ | *x+ | *xx*x+ }. x+ - at least 1 digit; ... -
Page 127: Firmware Version 1.0.3.26
"Send" key. If set to "No", the "#" key is included as part of the dialing string. Conference URI Configures Conference URI for N-way conference (Broadsoft standard). Firmware Version 1.0.3.26 GXP2200 USER MANUAL Page 126 of 159... -
Page 128: Firmware Version 1.0.3.26
If there is custom ring Account Ring Tone tone imported from GXP2200 LCD menu, the ring tone file name will be displayed in this dropdown menu as well for users to select. Specifies the Call Forward Type: 1. -
Page 129: Advanced Settings Page Definations
The IP address or Domain name of the STUN server. STUN resolution STUN Server results are displayed in the STATUS page of the Web GUI. Only non-symmetric NAT routers work with STUN. Firmware Version 1.0.3.26 GXP2200 USER MANUAL Page 128 of 159... -
Page 130: Advanced Settings/Call Features
The default setting is "No". Disable Call-Waiting Disables the call waiting feature. The default setting is "No". Disables dial plan check on the GXP2200 when dialing out. This can be Disable DialPlan used when dialing out phone number which contains alphabet characters from imported contacts. -
Page 131: Advanced Settings/Video Settings
The server side has to support this feature. Users need configure an eventlist BLF URI on the service side first (i.e., BLF1006@myserver.com) with a list of extension included. On Firmware Version 1.0.3.26 GXP2200 USER MANUAL Page 130 of 159... -
Page 132: Advanced Setting/Mpk Lcd Settings (For Mpk App)
(i.e., BLF1006). ADVANCED SETTING/MPK LCD SETTINGS (FOR MPK APP) Assigns a function to the Multi-Purpose Key from the MPK App installed on the GXP2200. The MPK App can be downloaded from GS Market. The key mode options are: ... -
Page 133: Advanced Setting/Mpk Ext Settings (For Gxp2200Ext Board 1/2/3/4)
For example, if MPK 1 's MPK ID is changed from 1 to 5, users will see the configuration saved on MPK 5. Display Format Configures the display format for the multi-purpose keys. Users could Firmware Version 1.0.3.26 GXP2200 USER MANUAL Page 132 of 159... -
Page 134: Maintenance Page Defination
"Phonebook Name", "UserID", or "UserID(Phonebook Name)". The "Phonebook Name" is the name saved in GXP2200 Contacts. The default setting is "Phonebook Name". Note: For more details on GXP2200EXT and GXP2200EXT Multi-Purpose Key configurations, please refer to the GXP2200EXT user manual in the website: http://www.grandstream.com/support... -
Page 135: Maintenance/Time Settings
If set to “Yes”, the phone will not allow any SSH access to the phone. Disable SSH The default setting is "No". Access Method Allows users to select HTTP or HTTPS for Web Access. The default Firmware Version 1.0.3.26 GXP2200 USER MANUAL Page 134 of 159... -
Page 136: Maintenance/Upgrade
Enables your ITSP to lock firmware updates. If configured, only the Firmware File Postfix firmware with the matching encrypted postfix will be downloaded and flashed into the phone. Firmware Version 1.0.3.26 GXP2200 USER MANUAL Page 135 of 159... -
Page 137: Maintenance/Syslog
Selects the level of logging for syslog. The default setting is "None". Syslog Level There are 4 levels: DEBUG, INFO, WARNING AND ERROR. Syslog messages are sent based on the following events: Firmware Version 1.0.3.26 GXP2200 USER MANUAL Page 136 of 159... -
Page 138: Maintenance/Logcat
URL for TR-069 Auto Configuration Servers (ACS). ACS Username ACS username for TR-069. ACS Password ACS password for TR-069. Periodic Inform Enable Enables periodic inform. If set to "Yes", device will send inform packets Firmware Version 1.0.3.26 GXP2200 USER MANUAL Page 137 of 159... -
Page 139: Maintenance/Contacts
The default setting is "OFF". Selects the file encoding format for XML phonebook download. The File Encoding default setting is UTF-8. Download Server Specifies server address to download the XML phonebook file. Firmware Version 1.0.3.26 GXP2200 USER MANUAL Page 138 of 159... -
Page 140: Maintenance/Ldap Book
Download Interval send download request to the download server based on the download interval. Note: For more information on XML Based Downloadable Phonebook on GXP2200, please refer to the GXP2200 XML Phonebook Guide in the following link: http://www.grandstream.com/products/gxp_series/gxp2200/documents/gxp2200_xml_phonebook_guide.p MAINTENANCE/LDAP BOOK Server Address Configures the IP address or domain name of the LDAP server. -
Page 141: Firmware Version 1.0.3.26
Specifies the maximum number of results to be returned by the LDAP Max Hits server. If set to 0, server will return all search results. The default setting is 50. Firmware Version 1.0.3.26 GXP2200 USER MANUAL Page 140 of 159... -
Page 142: Maintenance/Device Manager
If set to "Yes", the LED indicator on the upper right corner of the Disable Missed Call Indicator GXP2200 will not light up when there is missed call on the phone. The default setting is "No". If set to "Yes", the LED indicator on the upper right corner of the Disable MWI Indicator GXP2200 will not light up when there is new voicemail on the phone. -
Page 143: Firmware Version 1.0.3.26
Click on OK and the phone will reboot. Wait for approximately 1 minute to log in again. Firmware Version 1.0.3.26 GXP2200 USER MANUAL Page 142 of 159... -
Page 144: Gxp2200 Lcd Settings
GXP2200 LCD SETTINGS The GXP2200 LCD MENU provides easy access to the settings on the phone. Most of the settings from Web GUI could be configured on the LCD settings as well. OPENING SETTINGS Go to LCD onscreen MENU and then tap on Settings;... -
Page 145: Network
802.1x mode. This option allows the user to enable/disable 802.1x mode on the phone. The default setting is disabled. To enable 802.1x mode, this field should be set to EAP-MD5. Once Firmware Version 1.0.3.26 GXP2200 USER MANUAL Page 144 of 159... -
Page 146: Sound
Identity and MD5 Password to be authenticated on the network. SOUND Use the Sound settings to configure how the GXP2200 rings, plays music or other media with audio, notification ringtones and alarms. ... -
Page 147: Applications
Running services. Tap to open a list of applications, processes, and services that are currently running or cached; Storage use. Tap to open a list of all applications on the GXP2200 with information about the storage they use. ACCOUNT & SYNC Account &... -
Page 148: Figure 137: Gxp2200 Account & Sync
Figure 137: GXP2200 Account & Sync Tap "Add account" on the above figure and follow the setup wizard to add account. The following example shows adding a Google account. Figure 138: GXP2200 Account & Sync - Add An Account Firmware Version 1.0.3.26 GXP2200 USER MANUAL... -
Page 149: Figure 139: Gxp2200 Account & Sync - Sign In With Google Account
Figure 139: GXP2200 Account & Sync - Sign In With Google Account Figure 140: GXP2200 Account & Sync - Linked With Google Account Once the account is set up, users will be able to sync up with the following: ... -
Page 150: Storage
"Choose contacts to display" and change the display settings for contacts under Menu->Contacts->Options->Display options. Figure 142: Contacts Display Options - Choose Contacts To Display STORAGE Storage shows the internal storage status on the GXP2200. Total Space. Total internal storage space on GXP2200. Firmware Version 1.0.3.26... -
Page 151: Language & Keyboard
Available. Available storage space on the GXP2200. LANGUAGE & KEYBOARD Select language. Tap to open a list of language options for GXP2200 to display with. Select Input Method. Tap and users could select English keyboard or Chinese Keyboard. -
Page 152: About Phone
Select date format. Select the format of year, month and day for the date to be displayed. ABOUT PHONE About Phone lists the GXP2200's account information, network status and system information. Account Status. Displays the account name and registration status on the GXP2200. -
Page 153: Reboot
Syslog Server Address. The URL/IP address for the syslog server. Factory Reset. Open and tap on Factory Reset to restore the GXP2200 to factory default settings. REBOOT Tap on "Reboot" to reboot the device. Firmware Version 1.0.3.26 GXP2200 USER MANUAL... -
Page 154: Upgrading And Provisioning
Examples of valid URLs: firmware.grandstream.com fw.ipvideotalk.com/gs UPGRADE AND PROVISIOING CONFIGURATION There are two ways to setup upgrade and provisioning on GXP2200. They are Keypad Menu and Web GUI. Configure via keypad Menu In GXP2200 Settings, select Advanced Settings->Upgrade. Users may then select the upgrade mode and enter the IP address or FQDN for the Firmware server and the Config server. -
Page 155: Confirm Upgrage To Start
Open a web browser on PC and enter the IP address for the GXP2200. Then login with the administrator username and password. Go to Maintenance section, select Upgrade tab. In the Upgrade web page, enter the IP address or the FQDN for the upgrade server and choose to upgrade via TFTP, HTTP or HTTPS. -
Page 156: Upgrade Via Sd Card
GUI. Please follow the steps below to upload firmware to GXP2200 locally. Download the latest GXP2200 firmware file from the following link and save it in your PC; http://www.grandstream.com/support/firmware Log in the Web GUI as administrator in the PC;... -
Page 157: No Local Firmware Servers
SD card is an alternative. Follow the steps below to upgrade GXP2200 via SD card. Download the firmware file to PC and save it in SD card; Insert the SD card to GXP2200; Power cycle the GXP2200;... -
Page 158: Configuration File Download
Note: When the GXP2200 boots up, it will issue TFTP or HTTP request to download a configuration XML file named "cfgxxxxxxxxxxxx" followed by "cfgxxxxxxxxxxxx.xml", where "xxxxxxxxxxxx" is the MAC address phone, i.e., "cfg000b820102ab" "cfg000b820102ab.xml". download "cfgxxxxxxxxxxxx.xml" file is not successful, the provision program will download a generic cfg.xml file. The configuration file name should be in lower case letters. -
Page 159: Factory Functions And Factory Reset
Restoring the Factory Default Settings will delete all configuration information on the phone. Please backup or print all the settings before you restore to the factory default settings. Grandstream is not responsible for restoring lost parameters and cannot connect your device to your VoIP service provider. -
Page 160: Restore To Factory Default Via The Web Gui
Figure 149: GXP2200 LCD - Confirm Factory Reset RESTORE TO FACTORY DEFAULT VIA THE WEB GUI 1. Login GXP2200 Web GUI and go to Maintenance->Upgrade page; 2. At the bottom of the page, click on the Reset button for Factory reset. A dialog box will pop up;... -
Page 161: Restore To Factory Default Via Hard Keys
If users could not access web GUI for factory reset, or when the GXP2200 cannot bootup, pressing and holding 1 and 9 at the same time for about 5 seconds could reset the GXP2200 before it boots up. Follow the steps below to reset the GXP2200 via hard keys. -
Page 162: Experiencing The Gxp2200 Application Phone
FAQs User and Developer Forum for answers to your general questions. If you have purchased our products through a Grandstream Certified Partner or Reseller, please contact them directly for immediate support. Our technical support staff is trained and ready to answer all of your questions. Contact a technical support...
Need help?
Do you have a question about the GXP2200 and is the answer not in the manual?
Questions and answers