Table of Contents
Advertisement
Available languages
Available languages
Quick Links
See also:
User Manual
Advertisement
Table of Contents

Related Manuals for Philips HD6123


Summary of Contents for Philips HD6123
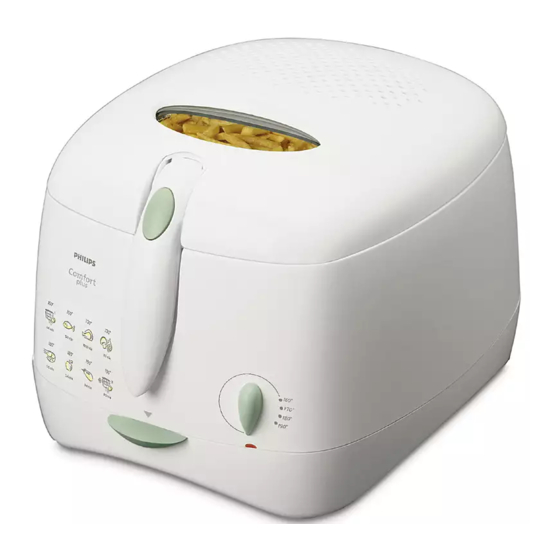
- Page 1 Fryer HD6123, HD6121 Read manual before use...
-
Page 5: Table Of Contents
ENGLISH 6 DEUTSCH 15 FRANCAIS 24 NEDERLANDS 33 ESPAÑOL 42 ITALIANO 51 PORTUGUÊS 60 SVENSKA 69 TÜRKÇE 88 G D Y QH»I 129... -
Page 6: English
If any part of this appliance is damaged, it should be replaced by Philips or a service centre authorised by Philips in order to avoid hazardous situations (see chapter 'Guarantee &... - Page 7 ENGLISH Preparing for use Oil and fat Never mix different types of oil or fat. If you want to use new blocks of fat, first melt them slowly over a low heat in a normal pan. Pour the melted fat carefully into the fryer. Store the fryer with resolidified fat still in it at room temperature.
- Page 8 Carefully insert the basket into the fryer without lowering it into the oil or fat (fig. 9). Close the lid. HD6123 only - Set the required frying time (see section 'Timer' in this chapter). You can also use the fryer without setting the timer.
- Page 9 If necessary, shake the basket over the fryer to remove excess oil or fat. Put the fried food in a bowl or colander containing grease-absorbing paper, e.g. kitchen paper. HD6123 only: Switch the fryer off by means of the on/off switch (fig. 14). The pilot light in the on/off switch goes out.
- Page 10 ENGLISH Disassembling the fryer Do not use any abrasive (liquid) cleaning agents or materials (e.g. scouring pads) to clean the appliance. Remove the lid by pressing the lid release lever to open the lid. Then lift the lid off the appliance. Remove the water tray.
- Page 11 Guarantee & service If you need information or if you have a problem, please visit the Philips Web site at www.philips.com or contact the Philips Customer Care Centre in your country (you will find its phone number in the worldwide guarantee leaflet).
-
Page 12: Troubleshooting
The fuse of temperature control enough. may have blown, causing the safety cut-out to switch the appliance off. Turn to your Philips dealer or a service centre authorised by Philips to have the fuse replaced. The fryer gives off a strong... - Page 13 ENGLISH Problem Possible cause Solution The oil or fat foams strongly during The food contains too much Dry the food thoroughly before frying. moisture. frying it. The type of oil or fat used is Use frying oil or liquid frying fat of unsuitable for deep-frying food.
- Page 14 ENGLISH Preparation times and temperature settings The table below indicates how much of a particular type of food you can prepare at one time and which frying temperature and preparation time you should select. If the instructions on the package of the food to be prepared differ from those in the table, always follow the instructions on the package.
-
Page 15: Deutsch
DEUTSCH Einführung Herzlichen Glückwunsch zu Ihrer neuen Philips Comfort Plus Fritteuse. Mit dieser Fritteuse können Sie die verschiedensten Lebensmittel sicher und einfach frittieren. Komponenten A Deckel B Kondenswasserbehälter C Frittierkorb D Temperaturregler E Kontrolllampe F Deckelentriegelung G Netzkabel H Netzkabelfach... - Page 16 Achten Sie darauf, dass das Netzkabel nicht mit heißen Teilen des Geräts in Berührung kommen kann. Nur HD6123: Schalten Sie die Fritteuse mit dem Ein/Aus-Schalter ein (Abbildung 4). Die Kontrolllampe im Ein/Aus-Schalter leuchtet. Stellen Sie mit dem Temperaturregler die gewünschte Temperatur ein (160, 170, 180 oder 190c C) (Abbildung 5).
- Page 17 Setzen Sie den Frittierkorb vorsichtig in die Frittierwanne, jedoch noch nicht in das Öl oder Fett (Abbildung 9). Schließen Sie den Deckel. Nur HD6123: Stellen Sie die gewünschte Frittierdauer ein (siehe unter "Timer" in diesem Kapitel). Sie können die Fritteuse auch ohne den Timer benutzen.
- Page 18 Geben Sie das Frittiergut in eine Schale, die mit fettsaugendem Papier ausgelegt ist. Nur HD6123: Schalten Sie die Fritteuse mit dem Ein/Aus-Schalter aus (Abbildung 14). Die Kontrolllampe im Ein/Aus-Schalter erlischt. Ziehen Sie nach Gebrauch den Netzstecker aus der Steckdose.
- Page 19 DEUTSCH nach jedem Gebrauch durch ein Sieb, können Sie es ca. 10 bis 12 Mal verwenden, bevor es ausgetauscht werden muss. Wird das Gerät zum Frittieren proteinhaltiger Nahrungsmittel (z. B. Fleisch oder Fisch) verwendet, sollte das Öl/Fett häufiger erneuert werden. Benutzen Sie dasselbe Öl nie länger als 6 Monate und beachten Sie immer die Anweisungen auf der Verpackung.
- Page 20 DEUTSCH Selbst zubereitete Pommes frites Die schmackhaftesten und knusprigsten Pommes frites erhalten Sie auf die folgende Weise: Verwenden Sie fest kochende Kartoffeln und schneiden Sie sie in Stäbchen. Spülen Sie die Stäbchen mit kaltem Wasser ab, damit sie beim Frittieren nicht aneinander kleben. Trocknen Sie die Kartoffelstäbchen gründlich.
- Page 21 Benötigen Sie weitere Informationen oder treten Probleme auf, besuchen Sie die Philips Website www.philips.com oder setzen Sie sich mit einem Philips Service-Center in Ihrem Land in Verbindung (die Telefonnummer finden Sie im beiliegenden Merkblatt zur weltweiten Garantie). Gibt es in Ihrem Land kein Philips Service-Center, wenden Sie sich an Ihren Philips-Händler oder an die...
- Page 22 Sie den Deckel in heißem beschädigt oder abgenutzt. Wasser mit etwas Spülmittel oder im Geschirrspüler. Ist die Dichtung abgenutzt, lassen Sie sie von Ihrem Philips-Händler oder einem von Philips autorisierten Service-Center austauschen. Das Öl/Fett fließt beim Frittieren Es befindet sich zu viel Öl/Fett in Achten Sie darauf, dass die über den Rand.
- Page 23 DEUTSCH Temperatur Art der Speise Empfohlene Frittierzeit in Frittierzeit in Menge pro Minuten (frische Minuten Zubereitungsport oder angetaute (gefrorene bzw. aufgetaute Nahrungsmittel) Nahrungsmittel) 160c C Hausgemachte 600 g 4 bis 6 (unter 190c Pommes frites*), 1. C in dieser Tabelle Frittiergang finden Sie Informationen zum...
-
Page 24: Francais
FRANCAIS Introduction Cher consommateur, nous vous remercions d'avoir acheté la nouvelle friteuse Comfort Plus de Philips. Cette friteuse vous permet de frire tous types d'aliments d'une manière sûre et facile. Description générale A Couvercle B Ramasse-gouttes C Panier D Thermostat E Témoin lumineux... - Page 25 FRANCAIS Préparation à l'emploi Huile et graisse Ne mélangez jamais des types différents d'huile ou de graisse. Si vous voulez utiliser de nouveaux blocs de graisse, faites-les fondre doucement à basse température dans une casserole. Versez avec précaution la graisse fondue dans la friteuse. Rangez la friteuse avec la graisse de nouveau solidifiée à...
- Page 26 Placez avec précaution le panier dans la friteuse sans insérer le panier dans l'huile ou la graisse (fig. 9). Fermez le couvercle. HD6123 uniquement - Réglez la température nécessaire (reportez-vous à la section "Minuteur" dans ce chapitre). Vous pouvez utiliser la friteuse sans régler le minuteur.
- Page 27 Déposez les aliments frits dans un bol ou dans une passoire recouvert de papier absorbant, par exemple du papier essuie-tout. HD6123 uniquement:Arrêtez l'appareil à l'aide du bouton marche/arrêt (fig. 14). Le témoin lumineux du bouton marche/arrêt s'éteint. Débranchez l'appareil après utilisation.
- Page 28 FRANCAIS N'utilisez jamais la même huile pendant plus de 6 mois, et reportez-vous toujours aux indications figurant sur l'emballage. N'ajoutez jamais de l'huile ou de la graisse fraîches à une friture déjà usagée. Remplacez toujours l'huile quand elle commence à bouillonner, ou lorsqu'elle a un goût ou une odeur de rance, quand elle fonce et/ou devient sirupeuse.
- Page 29 Enroulez le cordon, rangez-le dans son compartiment et fixez la fiche dans la fente spéciale. Soulevez la friteuse par les poignées. Environnement Elimination des piles (modèle HD6123 uniquement) Retirez la pile du minuteur avant de mettre l'appareil au rebut. Utilisez une petite tournevis à lame plate pour enlever la partie antérieure.
- Page 30 FRANCAIS Garantie et service Pour plus d'informations, visitez notre Philips Web site : www.philips.com ou veuillez contacter le Service Consommateurs Philips de votre pays (vous trouverez le numéro de téléphone dans le dépliant sur la garantie internationale). S'il n'y a aucun Service Consommateurs Philips dans votre pays, contactez votre distributeur ou le Service Department of Philips Domestic Appliances and Personal Care BV.
- Page 31 FRANCAIS Problème Cause possible Solution Pendant la cuisson, l'huile ou la Il y a trop d'huile ou de graisse dans Assurez-vous que la quantité d'huile graisse déborde de la friteuse. la friteuse. ou de graisse dans la friteuse, ne dépasse pas le niveau maximum indiqué.
- Page 32 FRANCAIS Température Type d'aliment Quantité Temps de cuisson Temps de cuisson recommandée (minutes) (minutes) pour une portion aliment frais ou aliment congelé (partiellement) décongelé 180cC Rouleaux de 2-3 pièces 10-12 printemps chinois Rouleaux de 5-6 pièces 8-10 printemps vietnamiens Morceaux de poulet 8-10 pièces Mini-snacks 8-10 pièces...
-
Page 33: Nederlands
NEDERLANDS Introductie Beste klant, gefeliciteerd met de aankoop van uw nieuwe Philips Comfort Plus friteuse. Met deze friteuse kunt u allerlei soorten etenswaren veilig en gemakkelijk frituren. Algemene beschrijving A Deksel B Condenswaterlade C Frituurmand D Temperatuurregelaar E Indicatielampje F Dekselontgrendelknop... - Page 34 (fig. 3). Zorg ervoor dat het snoer niet in aanraking komt met de hete delen van het apparaat. Alleen HD6123: schakel het apparaat in door de aan/uitknop op 'aan' te zetten (fig. 4). Het indicatielampje in de aan/uitknop gaat aan.
- Page 35 (fig. 9). Sluit het deksel. Alleen HD6123: stel de vereiste frituurtijd in (zie 'Timer' in dit hoofdstuk). U kunt de friteuse ook gebruiken zonder de timer in te stellen. Druk op de ontgrendelknop van de handgreep en laat de frituurmand voorzichtig naar de laagste stand zakken (fig.
- Page 36 Leg de gefrituurde etenswaren in een schaal of vergiet met vetabsorberend papier, bijvoorbeeld keukenpapier. Alleen HD6123: schakel de friteuse uit door de aan/uitknop op 'uit' te zetten (fig. 14). Het indicatielampje in de aan/uitknop gaat uit. Haal na gebruik de stekker uit het stopcontact.
- Page 37 NEDERLANDS Voeg nooit nieuwe olie of nieuw vet toe aan reeds gebruikte olie of gebruikt vet. Vervang in elk geval alle olie of al het vet wanneer het gaat bruisen bij verhitting, sterk ruikt of smaakt of donker van kleur en/of stroperig wordt. Olie of vet weggooien Giet gebruikte olie of gebruikt vloeibaar vet terug in de originele (hersluitbare) plastic flessen.
- Page 38 Til de friteuse op aan de handgrepen om hem weg te zetten. Milieu De batterij weggooien (alleen type HD6123) Verwijder de batterij van de timer wanneer u het apparaat afdankt. Gebruik een kleine, platte schroevendraaier om de achterzijde van de timer te verwijderen.
- Page 39 (www.philips.com), of neem contact op met het Philips Customer Care Centre in uw land (u vindt het telefoonnummer in het 'worldwide guarantee' vouwblad). Als er geen Customer Care Centre in uw land is, ga dan naar uw Philips dealer of neem contact op met de afdeling Service van Philips Domestic Appliances and Personal Care BV.
- Page 40 NEDERLANDS Probleem Mogelijke oorzaak Oplossing Tijdens het frituren loopt er olie of Er zit te veel olie of vet in de Zorg ervoor dat de olie of het vet vet over de rand van de frituurpan. frituurpan. in de frituurpan de maximum aangegeven hoeveelheid niet overschrijdt.
- Page 41 NEDERLANDS Temperatuur Soort Aangeraden Frituurtijd (in Frituurtijd (in etenswaren hoeveelheid per minuten) voor minuten) voor frituurbeurt verse of bevroren (gedeeltelijk) etenswaren ontdooide etenswaren 180cC Loempia's 2-3 stuks 10-12 Vietnamese 5-6 stuks 8-10 loempia's Kipnuggets 8-10 stuks Minisnacks 8-10 stuks Gehaktballetjes 8-10 stuks (klein) Mosselen...
-
Page 42: Español
Acuda a su distribuidor de Philips o a un centro de servicio autorizado por Philips si su aparato se desconecta por acción del disyuntor térmico de seguridad. - Page 43 (fig. 3). Asegúrese de que el cable no entra en contacto con las piezas calientes del aparato. Sólo para el modelo HD6123 - Conecte la freidora mediante el botón de marcha/parada (fig. 4). El piloto del botón de marcha/parada se iluminará.
- Page 44 Introduzca con cuidado la cesta en la freidora, sin sumergirla en el aceite o la grasa (fig. 9). Cierre la tapa. Sólo modelo HD6123: Establezca el tiempo de fritura necesario (véase la sección 'Temporizador' de este capítulo). También puede usar la freidora sin programar el temporizador.
- Page 45 Ponga los alimentos fritos en un recipiente o colador con papel que absorba la grasa, como papel de cocina. Sólo para el modelo HD6123: Desconecte la freidora con el botón de marcha/parada (fig. 14). El piloto del botón marcha/parada se apagará.
- Page 46 ESPAÑOL No utilice el mismo aceite durante más de 6 meses y siga siempre las instrucciones del paquete. No añada nunca aceite nuevo al aceite ya usado. Lo mismo se aplica a la grasa. Cambie siempre el aceite o la grasa si hace espuma cuando se calienta, si tiene un olor o un sabor muy fuerte o si se pone oscuro y/o espeso.
- Page 47 Enrolle el cable, colóquelo en su compartimento y ponga el enchufe en su soporte. Levante la freidora por las asas. Medio ambiente Cómo deshacerse de la pila (sólo modelo HD6123). Quite la pila del temporizador antes de tirar el aparato. Utilice un destornillador de punta plana para quitar la parte trasera.
- Page 48 Servicio Philips de Atención al Cliente de su país (hallará el número de teléfono en el folleto de la Garantía Mundial). Si en su país no hay Servicio Philips de Atención al Cliente, diríjase a su distribuidor local Philips o póngase en contacto con el Service Department of Philips Domestic Appliances and Personal Care BV.
- Page 49 Si la tapa estuviera gastada, diríjase a su distribuidor de Philips o a un centro de servicio autorizado por Philips para que sustituyan el precinto. Mientras se está friendo, el aceite o Hay demasiado aceite o grasa en la Asegúrese de que el aceite o la...
- Page 50 ESPAÑOL Temperatura Tipo de alimento Cantidad Tiempo Tiempo recomendada (minutos) para (minutos) para por lote alimentos frescos alimentos o (parcialmente) congelados descongelados Verdura rebozada 8-10 piezas (p.ej. champiñones, coliflor) 180cC Rollitos de 2-3 piezas 10-12 primavera chinos Rollitos de 5-6 piezas 8-10 primavera vietnamitas...
-
Page 51: Italiano
ITALIANO Introduzione Caro Cliente, ci congratuliamo con lei per aver acquistato la nuova friggitrice Philips Comfort Plus. Con questa nuova friggitrice potrà friggere qualsiasi tipo di cibo in modo facile e sicuro. Descrizione generale A. Coperchio B.Vassoio condensa C. Cestello per friggere D. - Page 52 Controllate che il cavo di alimentazione non venga a contatto con le parti bollenti dell'apparecchio. Solo mod. HD6123 - Accendete la friggitrice usando l'interruttore on/off (fig. 4). Si accenderà la spia dell'interruttore on/off. Impostate il controllo temperatura sulla temperatura richiesta (160, 170, 180 o 190cC) (fig.
- Page 53 Inserite con la massima attenzione il cestello nella friggitrice senza immergerlo nell'olio o nel grasso (fig. 9). Chiudete il coperchio. Solo mod. HD6123 - Impostate la temperatura prescelta (vedere il paragrafo "Timer" di questo capitolo). Potete anche usare la friggitrice senza impostare il timer.
- Page 54 Mettete il cibo a scolare in una ciotola o in uno scolapasta rivestito con carta assorbente (ad es. carta da cucina). Solo mod. HD6123: per spegnere la friggitrice usate l'interruttore on/off (fig. 14). Si spegnerà la spia dell'interruttore on/off.
- Page 55 ITALIANO In ogni caso, non usate mai lo stesso olio per più di sei mesi e attenetevi sempre alle istruzioni riportate sulla confezione. Non aggiungete mai olio o grasso nuovo ad olio o grasso già usato. Sostituite l'olio se durante il riscaldamento produce schiuma, se ha un cattivo odore o sapore o se diventa scuro e/o sciropposo.
- Page 56 Arrotolate il cavo, infilatelo nell'apposito scomparto e inserite la spina nell'apposita presa. Sollevate la friggitrice usando i manici. Ambiente Come eliminare le batterie (solo mod. HD6123) Prima di gettare l'apparecchio, togliete la batteria dal timer. Per togliere la parte posteriore, utilizzate un piccolo cacciavite piatto.
- Page 57 Se avete bisogno di assistenza o di ulteriori informazioni, vi preghiamo di visitare il nostro sito web www. philips.com oppure di contattare il Centro Assistenza Clienti Philips del vostro paese (per conoscere il numero di telefono, vedere l'opuscolo della garanzia). Qualora nel vostro paese non ci fosse un Centro Assistenza Clienti, rivolgetevi al rivenditore autorizzato Philips oppure contattate il Service Department of Philips Domestic Appliances and Personal Care BV.
- Page 58 Se invece è usurata, rivolgetevi al vostro rivenditore Philips o a un centro assistenza autorizzato per farla sostituire. L'olio o il grasso fuoriescono dalla Nella friggitrice c'è troppo olio o Assicuratevi che l'olio o il grasso friggitrice durante la cottura.
- Page 59 ITALIANO Temperatura Tipo di cibo Quantità Tempo di cottura Tempo di cottura consigliata in una (minuti) per cibo (minuti) per cibo sola volta fresco o congelato (parzialmente) scongelato. 180cC Involtini primavera 2-3 pezzi 10-12 cinesi Involtini alla 5-6 pezzi 8-10 vietnamita Crocchette di pollo 8-10 pezzi...
-
Page 60: Português
PORTUGUÊS Introdução Caro cliente, parabéns pela compra da sua nova fritadeira Philips Comfort Plus. A sua nova fritadeira permite-lhe fritar todo o tipo de aliemntos de forma segura e simples. Descrição geral A Tampa B Tabuleiro de recolha da água condensada... - Page 61 PORTUGUÊS Preparação Óleo e gordura Nunca misture diferentes tipos de óleo ou gordura. Se quiser usar novos pedaços de gordura, derreta-os primeiro lentamente em lume brando numa panela normal. Deite cuidadosamente a gordura já derretida para a fritadeira. Guarde a fritadeira com a gordura solidificada à temperatura ambiente. Se a gordura ficar muito fria, poderá...
- Page 62 Retire o tabuleiro e despeje a água para o lava-loiça. Temporizador - mod. HD 6123 O mod. HD6123 está equipado com um temporizador digital destacável. O temporizador indica o fim do tempo de fritura, mas NÃO desliga a fritadeira. Programação do temporizador Prima o botão do temporizador para programar o tempo de fritura em minutos.
- Page 63 Se for necessário, agite o cesto sobre a fritaderia para remover o excesso de óleo ou gordura. Coloque os alimentos numa tigela ou num escorredor com papel absorvente (rolo de cozinha). Mod. HD6123: Desligue a fritadeira no interruptor (fig. 14). A lâmpada piloto do interruptor apaga-se. Desligue da corrente após cada utilização.
- Page 64 PORTUGUÊS Como desfazer-se do óleo ou gordura usados Deite o óleo ou a gordura líquida usados para a sua embalagem original (fechada). A gordura sólida usada deve ser deixada na fritadeira a solidificar (sem o cesto colocado) e, depois, retirada para fora com uma espátula e embrulhada em papel de jornal.
- Page 65 PORTUGUÊS Antes de começar o segundo ciclo, coloque as batatas fritas numa tigela e sacuda-as. Alimentos congelados As batatas congeladas já têm uma fritura prévia, por isso basta fritá-las uma vez, seguindo as instruções da embalagem. Os alimentos congelados saídos do congelador (-16 a -18cC) irão arrefecer consideravelmente o óleo ou a gordura quando forem mergulhados na cuba.
- Page 66 PORTUGUÊS Garantia e assistência Se necessitar de informações ou se tiver algum problema, por favor consulte a página da Philips em www.philips.pt ou contacte o Centro de Informação ao Consumidor Philips do seu País (os números de telefone encontram-se no folheto da garantia mundial). Se não existir um Centro de Informação ao Consumidor no seu país, dirija-se a um agente Philips ou contacte o Departamento...
- Page 67 PORTUGUÊS Problema Causa provável Solução O óleo ou gordura sai para fora da A fritadeira tem demasiado óleo ou O óleo ou gordura não devem fritadeira durante a fritura. gordura. exceder o nível máximo. A comida tem demasiada Seque bem os alimentos antes de humidade.
- Page 68 PORTUGUÊS Temperatura Tipo de alimento Quantidade Tempo de fritura Tempo de fritura recomendada (minutos) para (minutos) para por cada vez alimentos frescos alimentos congelados (parcialmente) descongelados 180cC Crepes chineses 2-3 peças 10-12 Crepes vietnamitas 5-6 peças 8-10 Douradinhos de 8-10 peças frango Mini-snacks 8-10 peças...
-
Page 69: Svenska
SVENSKA Introduktion Tack för att du valde fritösen Philips Comfort Plus. Du kan fritera alla möjliga typer av mat både enkelt och säkert med din nya fritös. Allmän beskrivning A Lock B Behållare för vattenkondens C Friteringskorg D Temperaturinställning E Signallampa F Frigöringsspak för lock... - Page 70 (fig. 3). Se till att sladden inte kommer i kontakt med varma ytor. Endast modell HD6123 - Slå på fritösen med hjälp av start-/stoppknappen (fig. 4). Signallampan i start-/stoppknappen tänds. Ställ in önskad temperatur (160, 170, 180 eller 190cC) (fig. 5).
- Page 71 Sätt försiktigt i korgen i fritösen utan att sänka ned den i oljan/matfettet (fig. 9). Stäng locket. Endast modell HD6123 - Ställ in önskad friteringstid (se avsnittet 'Timer' i det här kapitlet). Du kan också använda fritösen utan att ställa in timern.
- Page 72 Skaka korgen försiktigt för att bli av med överflödigt fett om så behövs. Lägg den friterade maten i en skål eller ett durkslag på något fettabsorberande material, till exempel hushållspapper. Endast modell HD6123: Stäng av fritösen med hjälp av start-/stoppknappen (fig. 14). Signallampan i start-/stoppknappen släcks. Koppla ur apparaten när du är klar.
- Page 73 SVENSKA Ta hand om använd frityr Häll tillbaka använd frityr i den ursprungliga (återförslutbara) behållaren. Fast använt matfett låter du stelna i fritösen (utan friteringskorgen) och med hjälp av en stekspade lägger du därefter över det i tidningspapper, som du sedan virar in det i. Om möjligt kan du sedan slänga behållaren eller tidningspappret i sopförvaring för biologiskt avfall (inte i sopförvaring för restprodukter) eller så...
- Page 74 återvinning. Garanti och service Om du behöver information eller har något problem kan du söka upp Philips webbsida på adressen www.philips.com eller kontakta Philips kundtjänst i ditt land (rätt telefonnummer finner du i världsgarantibroschyren). Om det inte finns någon kundtjänst i ditt land ska du vända dig till din lokala återförsäljare, eller kontakta serviceavdelningen på...
- Page 75 Om packningen är sliten vänder du dig till din Philips- återförsäljare eller en Philips- serviceombud för att få den utbytt. Olja/matfett rinner över kanten på Det är för mycket olja/matfett i Se till att oljan/matfettet inte fritösen under fritering.
- Page 76 SVENSKA Friteringstider och temperaturinställningar Tabellen nedan visar hur stor mängd av en viss typ mat du kan fritera samtidigt samt hur länge och vid vilken temperatur den ska friteras. Följ alltid instruktionerna på förpackningen till den mat som ska friteras om de skiljer sig från instruktionerna i tabellen.
- Page 77 Philips Comfort Plus. HD6123) on/off( HD6123) Philips Philips Philips &...
- Page 78 Philips Philips . 1). 1700 2000 . 3). HD 6123 - on/off ( . 4). on/off. (160, 170, 180 190cC) ( . 5).
- Page 79 . 6). . 7). 1000 . 9). HD6123 - . 10). HD6123 HD6123...
- Page 80 '00' . 11). 12). . 13). , . . HD6123: on/off ( . 14). on/off...
- Page 81 ( . .
- Page 82 160cC, 190cC. (-16 18cC) 190cC. 160cC.
- Page 83 HD6123). Philips www.philips.com Philips Philips Philips.
- Page 84 Philips Philips...
- Page 85 Philips Philips...
- Page 86 160cC 4-6 ( *) 1 190cC 170cC 12-15 15-20 8-10 180cC 10-12 8-10 8-10 8-10 8-10 12-15 8-10 190cC *) 2...
-
Page 88: Türkçe
TÜRKÇE Giriş Değerli müşterimiz, Philips Comfort Plus fritözü tercih ettiğiniz için tebrikler.Yeni fritözünüz sayesinde her çeşit yiyeceği güvenli ve kolay bir şekilde kızartabilirsiniz. Genel tanım A Kapak B Yoğunlaşmış su kasesi C Kızartma sepeti D Sıcaklık kontrolü E Pilot ışık F Kapak kaldırma kolu... - Page 89 Kordon muhafaza bölmesindeki tüm kordonu çıkartın ve fişi duvar prizine takın (şek. 3). Kordonun cihazın sıcak kısımlarıyla temas etmemesine özen gösterin. Sadece HD6123 modelinde - Fritözü açma/kapama düğmesi yardımıyla açın (şek. 4). Açma/kapama düğmesi içerisindeki pilot ışık yanar. Sıcaklık kontrolünü istenilen sıcaklığa ayarlayın (160, 170, 180 veya 190cC) (şek. 5).
- Page 90 Kapağı kaldırın. Su kasesini çıkartın ve lavaboya boşaltın. Zamanlayıcı - sadece HD6123 modelinde HD6123 modeli yerinden çıkartılabilir bir dijital zamanlayıcı ile donatılmıştır. Zamanlayıcı kızartma süresinin bittiğini belirtir, fakat fritözü KAPATMAZ. Zamanlayıcının ayarlanması Kızartma süresini dakika olarak ayarlamak için zamanlama düğmesine basın.Ayarladığınız süre, ekranda görünecektir.
- Page 91 Gerekirse, fazla yağı süzmek için sepeti fritözün üzerinde sallayın. Kızarmış yiyeceği içinde yağ emici kağıt, örn. mutfak kağıdı bulunan bir kaba veya süzgece yerleştirin. Sadece HD6123 modelinde:Açma/kapama düğmesiyle fritözü kapatın (şek. 14). Açma/kapama düğmesindeki pilot ışık sönecektir. Kullanım sonrasında cihazı prizden çıkartın.
- Page 92 TÜRKÇE Fritözü parçalarına ayırmak Cihazı temizlemek için aşındırıcı (sıvı) temizlik maddeleri veya materyalleri (örn. ovalayıcı maddeler) kullanmayın. Kapağı açmak için, kapak açma koluna basarak kapağı kaldırın. Daha sonra cihazın kapağını kaldırın. Su kasesini kaldırın. Kızartma sepetini fritözden çıkartın ve yağı boşaltın. Ana gövdeyi nemli bir bezle (biraz bulaşık deterjanı...
- Page 93 (dünya genelindeki telefon numaralarını verilen garanti belgeleri içerisinde bulabilirsiniz). Eğer ülkenizde Müşteri Danışma Merkezi yoksa, yerel Philips yetkilinize başvurun veya Philips Ev Aletleri ve Kişisel Bakım BV Servis Departmanı ile iletişime geçin. 0 800 261 33 02...
- Page 94 Yağ yeterince ısınmıyor. Sıcaklık kontrol sigortası atmış olabilir. Bu ısı güvenlik sisteminin cihazı kapatmasına sebep olmuş olabilir. Sigortayı değiştirmek için, Philips bayiinize veya Philips tarafından yetki verilmiş bir servis merkezine başvurun. Fritöz istenmeyen ağır bir koku Yağ tutmayan filtre dolmuş olabilir.
- Page 95 TÜRKÇE Problem Olası neden Çözüm İç kap düzgün şekilde Bu kullanım talimatlarında tarif temizlenmemiş. edildiği şekilde iç kabı temizleyin. Hazırlama süreleri ve ısı ayarları Aşağıdaki tabloda, bir seferde ne kadar miktarda belirli bir tür yiyeceği hazırlayabileceğiniz ve seçmeniz gereken kızartma ısıları ve hazırlama süreleri belirtilmektedir. Eğer yiyecek ambalajı...
-
Page 121: Gdyqh"I
GdYQH»I GdGC ƒ bGJ GdºJWdHI ddJìV»Q Gø GdêOƒd GC O øG√ »T»Q Gdi ∂º»I øƒY ºY»ø ºø GdºGC ∂ ƒdGJ GdJ» »º∂ø∂ JìV»Q√G a» GB ø ƒGìO ƒ»T»Q G»VG Gdi OQêI ìQGQI Gdbd» ƒGdƒbJ GdºJWdH ddJìV»Q GdP» »êH Yd»∂ GñJ»GQ√. GPG GñJdaJ GdGQTGOGJ GdºJƒaQI Ydi ZdGa YdHI GdºGC ∂... - Page 122 » I G d Y Od»d ìd GdºTG∂d G d ì º d ì J d º H H G G d S Id∂TºdG O G J Q T G ƒ d G ê O » ƒ a G J G C ∂...
- Page 123 » I G d Y IÅ»HdG HD6123 RGQW Wba) I»QGWHdG øº UdñJdG .RG√êdG øº UdñJdG dHb JbD h ºdG I»QGWH »YRøG .»adñdG ºSbdG IdGRGd Q»ZU »ZGQH ∂aº »ºOñJSG .»ºSQ º»dSJ R∂Qº idG G√º»dSJH »ºƒb dH dRøºdG JG»Gaø »a G√»ºQJ Gd .I»QGWHdG »YRøG IºOñdGƒ...
- Page 124 » I G d Y .YHGUG idG G√»YWbƒ I»SGb GWGWH »ºOñJSG .»dbdG AGøKC G º√VYHH bGUJdGdG øº º√Høê» ∂dP .OQGHdG AGºdGH GWGWHdG YHGUC G »aWTG .GO»ê GWGWHdG YHGUC G »aaê IêQO idY bÅGbO 4-3 IOºd IQº »øGKƒ ,I»ƒÅº IêQO 061 IQGQì IêQO idY bÅGbO 6-4 IOºd IQº dƒC G :ø»JQº GWGWHdG »dbG .I»ƒÅº...
- Page 125 » I G d Y æ .QK∂C G JGQº ø√OdG ƒC G J»RdG Q»»ZJ Hê» ,(ºìddGƒ ∂ºSdG dKº) ø»JƒQHdGH I»øZ JGdƒ∂C G º »dbd IGdbºdG ø»ºOñJSJ Jø∂ GPG æ .IHdYdG aGdZ idY JGOGTQGdG GºƒO »YHJGƒ Q√TC G 6 øY O»RJ IOºd √JGP J»RdG »ºOñJSJ Gd æ...
- Page 126 »ƒJìJ IGaUº ƒC G AGYƒ »a »dbºdG ºGYWdG »YV .ø√OdG ƒC G J»RdG øº VÅGadG IdGRGd IGdbºdG bƒa IdSdG »∂ q Q ì ,QºC G dG ºRd GPG .ñHWºdG bQƒ dKº ,øƒ√OdG UJº» HD6123 .a»bƒJdG/d»ZTJdG ìGJaº idY WZVdG dGdñ øº RG√êdG a»bƒJH »ºƒb :Wba RGQW .IAGVGdG øY a»bƒJdG/d»ZTJdG QTD h º...
- Page 127 ∂ º .ø√OdG ƒC G J»RdG idG G√dGRøG øƒO QPìH IGdbºdG idG IdSdG »dñOC G .AGWZdG »dabC G HD6123 .("dUadG GP√ »a "J»bƒJdG RG√ê" IQba »YêGQ) HƒZQºdG »dbdG Jbƒ »QGJñG - Wba RGQW .J»bƒJdG RG√ê ºGOñJSG øƒO GV»C G IGdbºdG ºGOñJSG ∂øG∂ºGH .GVGañøG QK∂C G dG I»YVƒdG idG QPìH IdSdG »dRøC G ƒ...
- Page 128 .WÅGìdG SHGbH RG√êdG »dUƒC G ƒ »ÅGHQ√∂dG ∂dSdG øGRñ øº √dºG∂H »ÅGHQ√∂dG ∂dSdG »Pñ .RG√êdG »a IøñGSdG AGRêC G dG »ÅGHQ√∂dG ∂dSdG SºGd» Gd øC G »O∂C G J HD6123 .a»bƒJdG/d»ZTJdG ìGJaº dGdñ øº RG√êdG d»ZTJH »ºƒb - Wba RGQW .a»bƒJdG/d»ZTJdG QTD h º...
- Page 129 IQGQìdGH º∂ìJdG ìGJaº QTD h º AƒV AGWZdG Q»QìJ ìGJaº IYaGQ »ÅGHQ√∂ ∂dS »ÅGHQ√∂dG ∂dSdG øRñº HD6123 RGQW Wba) dGUaøGdd dHGb JbD h º HD6123 RGQW Wba) aGb»G/d»ZTJ ìGJaº GOê º√º .dHbJSºdG »a ∂d YêQº∂ G√H »XaJìGƒ RG√êdG ºGOñJSG dHb GO»ê dGºYJSGdd JGOGTQGdG √P√ »C G QbG æ...
- Page 132 4222 001 96081 www.philips.com...
Need help?
Do you have a question about the HD6123 and is the answer not in the manual?
Questions and answers